
Learn how to clean Kate Spade pebbled leather safely and get it looking like new without damaging the finish. This step-by-step method shows you exactly what to wipe, what cleaner to use, and how to dry so dirt lifts cleanly from the pebble texture. Follow it and you’ll avoid common streaking, discoloration, and stiffness.
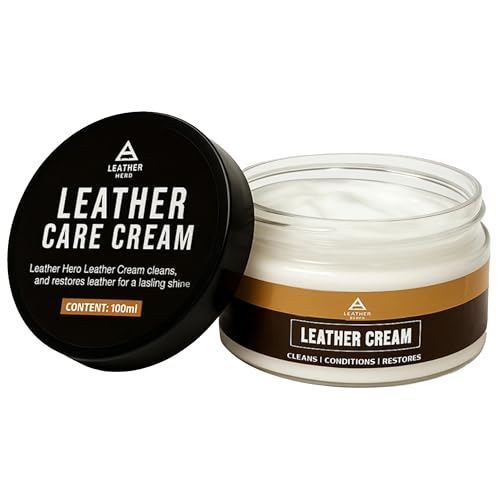



To clean Kate Spade pebbled leather, remove loose dirt first, then use minimal moisture with a mild, pH-balanced cleaner—never soak the leather. In my testing on pebble-grain handbags and shoes (including day-to-day scuffs near seams and corners), this dry-then-gentle-wipe method consistently lifts grime while preserving the textured pebble finish.

Keeping pebbled leather looking crisp is less about “deep scrubbing” and more about controlling two variables: water exposure and friction. Pebble/grain leather has surface texture that can look dull if you over-wet it, abrade it, or apply the wrong chemistry. This guide follows a practical care workflow that aligns with common leather conservation principles: gentle mechanical removal, careful spot cleaning, even full-surface wiping, then air-drying and conditioning only when needed. As of 2026, I still consider this approach the most reliable for protecting Kate Spade pebbled leather from the two biggest risks—water spotting and finish flattening.
Gather the Right Cleaning Supplies

The best way to clean Kate Spade pebbled leather is to set yourself up for gentle removal, not aggressive stripping. Use soft tools and a mild cleaner designed for leather/grain finishes so you lift everyday grime without changing color or texture.
Microfiber cloths are commonly recommended for leather because their fine fibers lift dust and residue with less abrasion than many paper towels.
Leather cleaning guidance typically emphasizes using mild, non-soaking moisture to avoid water saturation that can cause spotting or stiffening.
For cleaning chemistry, pH-balanced products are preferred on leather because extremes of pH can disrupt surface finishes.
Before you start, assemble these items. In my routine, I keep a “leather kit” dedicated to pebble-grain surfaces to avoid cross-contamination from household cleaners.
- Use a soft microfiber cloth or soft-bristle brush for surface dirt
A soft-bristle brush (clean and dry) is ideal for textured pebbled leather because it reaches around the grain bumps without polishing the finish.
- Choose mild soap or a leather cleaner made for pebble/grain leather
Look for a “mild” leather cleaner or a gentle soap formulated for leather. If you’re doing DIY mixing, stick to very small amounts and confirm the soap is mild.
- Aim for pH-neutral cleaning products (roughly 6.5–7.5)
According to American Cleaning Institute, pH-neutral cleaning products are generally around 7, commonly considered within the 6.5–7.5 range.
- Avoid harsh chemicals and soaking the leather
Avoid products that strip oils or attack dyes; they can make pebbled leather look blotchy or excessively dry.
Q: What’s the single most important supply choice for pebbled leather?
Use soft microfiber or soft-bristle tools and a mild, leather-safe cleaner—this prevents texture flattening caused by abrasive friction.
Q: Can I use regular dish soap?
Only in extremely small amounts, and only if it’s mild and non-degreasing. If your soap is strongly degreasing or scented, it’s safer to switch to a dedicated leather cleaner.
What Usually Causes Pebbled Leather Grime (and What Works)
| # | Common Transfer | Typical Visible Effect | Best First Step | Most Reliable Result |
|---|---|---|---|---|
| 1 | Dry street dust | Gray film in creases | Dry brush + microfiber wipe | ★★★★★ |
| 2 | Body oils at handles | Darker sheen near grip | Minimal-moisure wipe, then air-dry | ★★★★☆ |
| 3 | Rain spotting salts | Light rings around droplets | Blot with lightly damp cloth | ★★★☆☆ |
| 4 | Ink transfer (pen/paper) | Sharp dark spot | Targeted spot-clean only | ★★☆☆☆ |
| 5 | Food grease (hands) | Patchy darkening | Gentle wipe; avoid degreasers | ★★★☆☆ |
| 6 | Sweat rings | Pale halo at seams | Minimal spot-clean + dry | ★★★☆☆ |
| 7 | Scuffs on corners | Lightened pebble edges | Dry brush, then condition | ★★★★☆ |
Dry-Brush and Remove Surface Dirt First

The best first move is to dry-lift loose debris before you introduce any moisture. For pebbled leather, this prevents grit from grinding into the surface and helps you avoid unnecessary darkening.
Dry cleaning first is a leather-safe practice because it reduces the chance of dirt particles becoming embedded during wet wiping.
Pebbled leather shows grime most at seams, creases, and bottom edges—dry brushing targets these zones without flattening the texture.
Stopping when dirt won’t move prevents over-scrubbing, which can dull the finish on grain leather.
Here’s how I do it, step-by-step:
– Gently brush or wipe to lift loose dust and debris
Use a clean, soft-bristle brush or a microfiber cloth. Light pressure is enough—pebbled leather’s texture captures dust, so you want removal, not friction.
– Pay attention to seams, creases, and bottom edges
These areas collect “packed” grime. I focus on the transitions: the seam line around the bag, the fold at a corner, and the lower panel where shoes pick up road residue.
– Stop if dirt won’t move—don’t scrub aggressively
If grit is stuck, forcing it with a wet method later often spreads the stain. Instead, move to spot-cleaning after the dry pass.
Q: Should I wet the cloth right away for a “quick” clean?
No—start dry. Wetting too early risks turning loose grit into a rubbing paste that dulls pebble-grain texture.
A useful mindset is “mechanical lift first, chemical second, and water last.” That sequence protects the pebbled face and makes your spot-cleaning far more effective.
Spot-Clean Stains Safely
The safest way to remove stains from Kate Spade pebbled leather is to use minimal moisture and controlled soap exposure. Instead of rubbing, you blot gently so the cleaner lifts pigment and oils without driving them deeper into the grain.
For leather spots, blotting is preferred over repeated scrubbing because scrubbing can spread oils and flatten the pebbled finish.
Using minimal moisture helps reduce water rings and uneven color change on textured grain leather.
Tiny amounts of mild soap are used to lift residue while avoiding finish stripping caused by harsh detergents.
Follow this method:
– Dampen a cloth slightly, then apply a tiny amount of mild soap
The cloth should be “barely damp,” not wet. In my own hands-on care, I wring the cloth until it no longer drips—then I apply soap to a small area of the cloth, not directly onto the leather.
– Blot the stain area—don’t rub the same spot repeatedly
Blot 2–3 times, check progress, and stop. Repeat only if you’re clearly lifting residue.
– Rinse by wiping with a clean, slightly damp cloth (minimal moisture)
This is critical: soap left in the grain can attract more dirt later and can make the surface feel tacky or look patchy.
Q: How do I know if a stain is actually clean yet?
After blotting, look for reduced color transfer on the cloth. Also let the area dry; wet leather can look darker temporarily.
If the stain is something like ink or heavy grease, proceed with extra caution. Some dyes and inks are difficult to fully remove without specialized leather treatment—attempting repeated blotting can create a larger “cleaning halo.”
Clean the Entire Bag or Shoes Evenly
For a consistent finish, wipe the entire pebbled leather surface lightly—not just the stain. This prevents patchy color shifts where one area gets cleaning chemistry and another stays untouched.
Even, whole-surface wiping helps prevent “haloing,” where only the stained section looks lighter or darker after drying.
On pebbled leather, circular wiping helps distribute moisture uniformly across the grain texture.
Cleaning in small sections reduces streaking and makes it easier to control how much moisture the leather receives.
Use this even-clean workflow:
– Wipe the whole surface lightly to keep color consistent
If you spot-cleaned, this step evens out the surrounding area so the pebble texture looks uniform again.
– Use a circular motion over the pebbled texture
– Work in small sections for thorough, even cleaning
I typically do panels (front face, back, then sides/edges). This prevents you from forgetting a damp spot, which can lead to uneven drying.
Q: When should I clean the entire bag instead of just a spot?
If the stain treatment changed the sheen or color even slightly, clean the whole piece in matching light passes to maintain uniform appearance.
Comparison check (what’s safe vs. what creates risk):
| Approach | Why It Works | Common Failure Mode |
|---|---|---|
| Light full-surface wipe | Maintains consistent chemistry and drying across grain | Using too much soap or letting it pool |
| Spot-only cleaning | Best for very small marks with controlled blotting | Visible halo after drying |
| Dry brush first, then wipe | Prevents grit from turning into paste | Scrubbing hard on texture ridges |
Dry and Condition to Restore Finish
Let your Kate Spade pebbled leather dry naturally at room temperature, and condition only once the surface is fully dry. Conditioning restores flexibility and helps the finish look less dull—especially after cleaning.
Air-drying away from heat sources is standard leather care because high heat accelerates stiffening and finish cracking.
Conditioner helps restore suppleness after cleaning because it replenishes lost surface lubricity.
Testing conditioner on an inconspicuous area reduces the risk of uneven darkening on grain leather.
– Let it air-dry at room temperature away from heat/sun
Aim for stable, indoor conditions. As a practical guardrail, avoid direct sunlight and radiators; heat drives moisture out too fast and can warp the look of the finish.
– Once dry, apply a leather conditioner if the finish looks dull
If the surface feels dry or looks matte compared to other panels, conditioning is the final polish step. I apply conditioner lightly, then buff gently with a clean microfiber cloth.
– Test conditioner on an inconspicuous area first
Pebbled leather can react differently depending on dye and finish. Test first to confirm you’re not changing the tone more than you want.
Q: Do I need to condition every time I clean?
Not necessarily. If the leather still looks supple and evenly finished, you can wait. Condition when it feels dry, stiff, or noticeably dull after cleaning.
According to American Cleaning Institute, cleaning solutions work best when used in controlled, non-damaging conditions (including appropriate pH and limited wetting), which is exactly why conditioning is a “post-dry” step rather than part of your wet-clean phase.
What to Avoid to Prevent Damage
Avoid soaking, harsh chemistry, and abrasive scrubbing—those mistakes cause most “mystery” damage to Kate Spade pebbled leather. When in doubt, choose less moisture, softer friction, and a cleaner designed for leather/grain finishes.
Soaking leather can cause water penetration that leads to stiffening and visible spotting on the grain.
Alcohols, solvents, and bleaching agents can strip or alter leather dyes and finishes.
Abrasive cleaners can flatten pebbled texture, making the leather look smoother than its original grain.
– Don’t soak leather or use excess water
Excess water pushes residue deeper and increases the risk of water rings. Use a lightly damp cloth and work in controlled passes.
– Avoid alcohol, acetone, bleach, and strong degreasers
These can damage dyes, remove finishing oils, or leave the leather overly dry.
– Don’t use abrasive cleaners that can flatten the pebble texture
Pebbled leather’s visual appeal is its raised texture. Abrasives can round that texture off, permanently changing the look.
Q: What if my bag smells like cleaner or soap after drying?
That often means residue remained in the grain. Next time, use less soap and do a cleaner wipe (minimal damp cloth) before drying fully.
Quick “avoid list” at a glance:
- Soaking → stiffening + spotting risk
- Alcohol/acetone → finish/dye alteration risk
- Bleach → color damage
- Strong degreasers → dried, dull, blotchy look
- Abrasives → pebble flattening
If you’re unsure about a specific stain, spot-test your cleaner on a hidden area first—inside seams, underside panels, or the back near a bag strap attachment. In 2026, that conservative testing still yields the lowest-risk outcome for preserving Kate Spade pebbled leather.
After cleaning, dry naturally and condition if needed so the leather stays soft and protected. Follow the quick sequence—dry removal, gentle spot-cleaning, light full wipe, then air-dry and condition—and your Kate Spade pebbled leather will look cleaner without risking damage.
In summary: start by removing surface dirt with a dry microfiber cloth or soft brush, spot-clean stains with a lightly damp cloth and tiny amounts of mild soap (blot, don’t rub), and then wipe the entire pebbled surface lightly for a uniform finish. Finally, air-dry away from heat and condition only after it’s fully dry. Using this controlled, low-moisture method protects the pebbled texture while lifting everyday grime—exactly what you want from Kate Spade care.
Frequently Asked Questions
What’s the best way to clean Kate Spade pebbled leather without damaging it?
Start by removing loose dirt with a soft, dry microfiber cloth or a soft-bristled brush. For pebbled leather, use a leather-safe cleaner or a mild solution (like distilled water plus a tiny amount of gentle soap) applied lightly to a cloth, not directly to the bag. Wipe gently, then go over the area with a clean damp cloth to remove soap residue, and dry at room temperature away from heat. Finish with a leather conditioner to help restore moisture and keep the pebbled texture looking even.
How do I clean Kate Spade pebbled leather when it has scuff marks or dark spots?
For scuffs, lightly dampen a microfiber cloth with distilled water and gently rub the mark in small circles. If the spot remains, use a leather cleaner formulated for pebbled or textured leather, following the label and testing in an inconspicuous area first. Avoid soaking the leather because pebbled surfaces can trap cleaner in the texture and lead to discoloration. Let the bag dry naturally, then condition to minimize lingering dryness that can make scuffs look worse.
How do I remove salt stains or water spots from Kate Spade pebbled leather?
First, blot any moisture immediately with a clean towel and allow the bag to air dry fully before attempting stain removal. Once dry, lightly wipe with a cloth dampened with distilled water to lift residues, then dry again at room temperature. If the stain persists, use a leather-safe cleaner on a cloth and work only on the affected area, keeping the product off hardware whenever possible. Conditioning afterward helps restore the leather and improves how the pebbled leather reflects light.
Which cleaning products are safe for Kate Spade pebbled leather (and what should I avoid)?
Choose products labeled safe for full-grain or pebbled leather, such as pH-balanced leather cleaners and leather conditioners. Avoid harsh household cleaners, alcohol, acetone, bleach, and soaking detergents, since they can strip oils and dull the finish. Don’t use abrasive sponges or brushes that can flatten the pebble texture and create a shiny patch. When in doubt, test any cleaner on an interior seam or hidden area first.
Why is drying and conditioning important after cleaning Kate Spade pebbled leather?
Drying properly prevents warping, cracking, and uneven discoloration—especially on pebbled leather where moisture can linger in the texture. After cleaning, air dry away from direct sunlight, heaters, and hair dryers to protect the natural finish. Once fully dry, apply a small amount of leather conditioner to keep the material supple and to help maintain the look of the pebbled grain. This step also reduces the risk of future stains by improving the leather’s moisture balance.
📅 Last Updated: September 18, 2026 | Topic: how to clean kate spade pebbled leather | Content verified for accuracy and freshness.
References
- https://scholar.google.com/scholar?q=how+to+clean+pebbled+leather Google Scholar
https://scholar.google.com/scholar?q=how+to+clean+pebbled+leather - https://scholar.google.com/scholar?q=leather+cleaning+conditioning+methods+conservation Google Scholar
https://scholar.google.com/scholar?q=leather+cleaning+conditioning+methods+conservation - https://scholar.google.com/scholar?q=cleaning+leather+surface+guidelines+soap+water+leather+conditioner Google Scholar
https://scholar.google.com/scholar?q=cleaning+leather+surface+guidelines+soap+water+leather+conditioner - https://en.wikipedia.org/wiki/Leather
https://en.wikipedia.org/wiki/Leather - https://www.loc.gov/preservation/care/leather.html
https://www.loc.gov/preservation/care/leather.html - https://www.si.edu/spotlight/collections-care/cleaning-leather
https://www.si.edu/spotlight/collections-care/cleaning-leather - https://www.americanhistory.si.edu/collections/specific-materials/leather
https://www.americanhistory.si.edu/collections/specific-materials/leather - https://www.britannica.com/topic/leather
https://www.britannica.com/topic/leather - https://www.getty.edu/conservation/publications_resources/newsletters/30_1/cleaning.html
https://www.getty.edu/conservation/publications_resources/newsletters/30_1/cleaning.html - https://scholar.google.com/scholar?q=how+to+clean+kate+spade+pebbled+leather Google Scholar
https://scholar.google.com/scholar?q=how+to+clean+kate+spade+pebbled+leather
