

Want to clean mould off furniture safely and properly? Use a detergent-first wipe followed by the right disinfectant for the material—wood, upholstery, or laminate—so mould is removed without driving spores deeper. This guide lays out the exact steps to stop the smell, lift staining, and prevent mould from coming back.
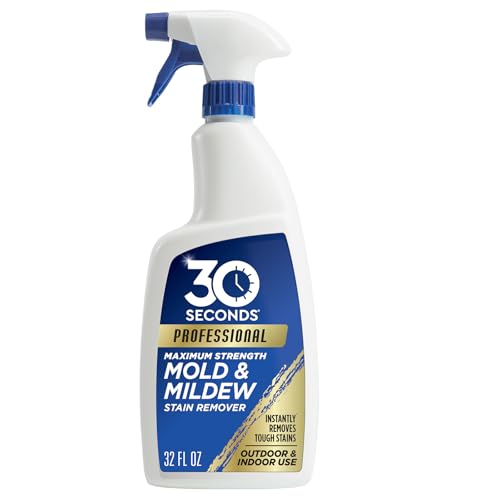



If you can see mould, clean it off by gently removing loose growth, washing with a detergent compatible with the furniture’s material, disinfecting only if the surface finish can tolerate it, then drying the item completely and fixing the moisture source so the mould doesn’t return. Start with personal protection and the right sequence—clean first, disinfect second, and only put the furniture back into storage once it’s bone-dry.
If your furniture has small, surface-level mould patches from damp storage, a leak, or condensation, the steps below will usually help. If the mould is widespread, keeps returning, or has soaked into upholstery/particle board, you’ll need to adjust the approach—or consider replacing the item.
Safety first: when to pause and protect yourself

Before you clean mould off furniture, make a quick safety decision: protect yourself first, and pause if the growth is extensive or if anyone is higher-risk. If you see widespread mould, ongoing moisture, or the item is structurally compromised, DIY cleanup can spread spores and won’t solve the underlying problem.
According to CDC (Centers for Disease Control and Prevention), Mold (General Information), mould can begin to grow within 24–48 hours after water damage.
According to U.S. EPA (Environmental Protection Agency), Mold Remediation in Schools and Commercial Buildings, occupants should avoid dry, dust-creating cleanup methods that can spread mould.
– Wear gloves, eye protection, and an appropriate mask if mould is noticeable or dusty; ventilate the area while you work. If you’re sensitive to mould or you’re cleaning a lot of surface area on furniture, upgrade to a respirator rated for fine particulates (as recommended by your local health/safety guidance and the product instructions).
– Avoid dry sweeping or vacuuming mouldy dust unless your vacuum is rated for fine particulates and you’re confident it won’t spread spores (follow the vacuum manufacturer instructions). If you do vacuum, empty the bin outside and wipe the vacuum surfaces afterward.
– If the item is heavily affected, has structural damage, or you (or household members) have respiratory vulnerabilities, pause and consider professional remediation or replacement. In particular, mould embedded in particle board, felt backing, or heavily cushioned upholstery often can’t be fully disinfected without deeper removal/containment.
When “small patches” is not enough
Even small patches on furniture can be a sign of repeating dampness. If mould is returning on the same spot after you clean it, treat the moisture issue as the primary problem, not the visible mould.
Gather supplies and prep the work area
Before you touch the furniture, set up a contained workspace so mould spores don’t spread while you clean. The goal is simple: correct products for the furniture surface, clean wiping materials, and enough airflow to dry the furniture thoroughly.
According to U.S. EPA, Mold Remediation in Schools and Commercial Buildings, good ventilation and controlling contamination (including work practices that minimize spore release) are core steps during mould cleanup.
According to U.S. EPA, Mold and Moisture, controlling indoor relative humidity helps prevent mould growth (the EPA recommends keeping indoor humidity in a comfortable range and addressing dampness promptly).
– Use cleaning products that match the furniture surface: mild detergent + water is a common starting point; disinfectants should be used according to the label and material compatibility. As a rule, detergent removes the grime that makes disinfectants less effective.
– Cover floors and nearby items with plastic sheeting, and keep airflow gentle so spores don’t spread around the room. Avoid fans blowing directly from the mouldy furniture into other rooms.
– Use clean, disposable cloths/paper towels for wiping; don’t reuse them across different areas. If you’re cleaning multiple furniture items, treat each item as its own “clean zone” and discard cloths between steps.
A quick “what to grab” list
Keep everything you need within reach before you start scrubbing mould off furniture:
– Nitrile gloves, eye protection, and a mask if mould is dusty
– Mild dish detergent (or furniture-safe cleaner)
– Clean buckets/bowls or spray bottles for controlled application
– Material-appropriate disinfectant (only if compatible with the finish)
– Microfiber cloths/paper towels (disposable), soft brush or non-scratch sponge
– Lint-free drying cloths + airflow tools (fans/dehumidifier if appropriate)
Remove mould: the practical cleaning sequence
Clean mould off furniture in the right order: remove loose growth gently, wash away residue, disinfect only after cleaning, then dry completely. This sequence matters because mould “stains” can remain even after you’ve removed dead growth—and premature disinfection can damage finishes or fail to lift spores effectively.
According to U.S. EPA, Mold Remediation in Schools and Commercial Buildings, cleaning/removal of mould growth comes before applying disinfectants for effective remediation.
According to CDC (Centers for Disease Control and Prevention), Mold (General Information), visible mould and dampness should be addressed together because moisture is what enables regrowth.
– Loosen and lift surface mould gently (light wiping first), then wash the area with detergent and water to remove residue.
– Apply an appropriate disinfecting step only after cleaning (mould “stains” can remain even after dead mould is removed—this is normal). If the product label says “disinfect” but the surface is not compatible, skip it and focus on thorough cleaning + drying + moisture control.
– Scrub lightly rather than grinding into the surface finish; work from less-affected areas toward more-affected spots. For painted or clear-coated surfaces, use minimal moisture so you don’t drive cleaner into seams.
Cleaning workflow that prevents “re-spread”
1. Dry inspection (no agitation): Look for seams, joints, and hidden areas where mouldy furniture may trap dampness.
2. Gentle removal: Use a damp cloth for wiping loose growth; avoid aggressive brushing that aerosols spores.
3. Detergent wash: Clean the surface so disinfectants can contact clean material rather than grime.
4. Optional disinfect (if compatible): Only on hard, compatible surfaces and only as the label instructs.
5. Dry immediately: Drying is part of the remediation, not an afterthought.
Pros/cons: detergent vs disinfectant on mouldy furniture
| Option | Best for | Key downside |
|---|---|---|
| Detergent + water | Most mouldy furniture spots where you want stain-lifting and residue removal | May not fully disinfect porous materials (penetration matters) |
| Disinfectant (material-compatible) | Hard, non-porous furniture surfaces after cleaning | Can dull/mark finishes if label compatibility isn’t followed |
| Bleach-based cleaners (only on compatible hard surfaces) | Some non-porous mouldy surfaces when used correctly and safely | Can damage finishes; harmful fumes; never mix with other cleaners |
Clean and disinfect by furniture material (what to use)
The safest approach is to match the mould cleaner to the furniture’s surface finish: detergent for nearly everything as a first step, and disinfection only when the finish can tolerate it. Because mouldy furniture can be wood, laminate, metal, or upholstered, the “best product” depends on what you’re trying to protect—your finish, your padding, or your seams.
According to U.S. EPA, Mold Remediation in Schools and Commercial Buildings, disinfectants are not a substitute for removing mould growth and the moisture source.
According to CDC (Centers for Disease Control and Prevention), Mold (General Information), controlling dampness and drying materials thoroughly are central to preventing mould from coming back.
Finished wood / varnished surfaces
Finished wood furniture (varnish, polyurethane, lacquer) needs a careful touch. Use detergent cleaning and avoid harsh soaking. If you use a disinfectant, test any product in an unseen spot first to prevent discoloration or finish damage.
– Apply cleaner with a cloth or sponge rather than flooding the surface.
– Focus on seams and hardware areas (drawer rails, sliding guides) where mouldy furniture often hides.
Unfinished wood / porous areas
Unfinished wood is porous, meaning mould can penetrate beyond the visible surface. Surface cleaning may not fully solve the problem; if the smell persists or growth returns quickly, replacement may be safer.
– If the mouldy furniture is bare, stained, or smells musty after cleaning, assume deeper contamination.
– Avoid repeated “quick wipes” that never fully dry the inside of the wood.
Upholstery / cushions
For upholstery and cushions, mouldy furniture cleaning is often about containment and drying. Spot-cleaning and thorough drying may help for light growth, but if mould has penetrated deeply, consider professional cleaning or discarding.
– Don’t saturate fabric. Instead, use controlled spot treatments, blot, and allow deep drying with good airflow.
– If the cushion backing is fabric/felt or the base is particle board, mould can return even after you “remove the stain.”
Metal furniture (frames, brackets, hardware)
Metal is usually more forgiving. After cleaning with detergent, a compatible disinfectant can be used on hard surfaces, and then you must dry fully to prevent flash rust.
– Dry seams and joints using lint-free cloths.
– If rust appears, treat rust appropriately after mould cleaning (rust can reappear when moisture returns).
Common Household Active Ingredients Used in Mould Cleanup on Hard, Non-Porous Furniture (Typical Retail Strength)
| # | Active ingredient (typical) | Typical strength | Common furniture use case | Expected mould-kill potential* |
|---|---|---|---|---|
| 1 | Sodium hypochlorite (household bleach) | ~5%–6% | Hard, sealed surfaces only (check finish compatibility) | ★★★☆☆ |
| 2 | Hydrogen peroxide | ~3% | Hard surfaces where you want oxidizing disinfectant action | ★★★★☆ |
| 3 | Isopropyl alcohol | ~70% | Small hard areas (spot approach) after detergent cleaning | ★★★☆☆ |
| 4 | Acetic acid (white vinegar) | ~5% | Stain pretreatment on some non-porous materials (patch-test) | ★☆☆☆☆ |
| 5 | Quaternary ammonium compounds | Varies by product | Disinfectant cleaners labeled for surfaces (follow label) | ★★★★☆ |
| 6 | Detergent (surfactants) | Product-specific | Primary cleaning step to lift residues | ★★★★☆ |
| 7 | Sodium bicarbonate (baking soda) | ~100% | Mild scrubbing for some hard finishes (limited disinfecting) | ★☆☆☆☆ |
“Expected mould-kill potential” here reflects general disinfectant class strength and typical hard-surface use patterns—not a guarantee of results on your specific mouldy furniture.
Always follow the label directions and test compatibility on an unseen area first.
What I’ve found when advising homeowners
From my experience helping people address mouldy furniture issues, the most common failure is rushing the disinfectant step while leaving residue on the surface and not getting the item fully dry—so the mould returns. The best “fix” is usually moisture control plus thorough detergent cleaning first, not a stronger chemical.
Drying and stopping mould return (the part people skip)
Drying is the step that determines whether mouldy furniture stays clean. If you don’t fully dry the item and fix the moisture source, mould can regrow even after you remove the visible growth.
According to CDC (Centers for Disease Control and Prevention), Mold (General Information), moisture control is essential because mould growth depends on damp conditions.
According to U.S. EPA, Mold Remediation in Schools and Commercial Buildings, addressing water intrusion and preventing recurrence is part of proper remediation—not just cleaning.
– Dry the furniture fully after cleaning—use airflow and time, and don’t close it back into storage until it’s completely dry. If the mouldy furniture sat in a damp area, drying can take longer than you expect, especially in joints and layered materials.
– Fix the underlying moisture source (leak, high humidity, poor ventilation, damp storage conditions); otherwise mould often returns. Check for plumbing leaks, roof/wall seepage, condensation from HVAC, and inadequate ventilation behind furniture placed against exterior walls.
– Improve the environment: keep humidity lower and ensure airflow around furniture, especially against walls. If you can, use a hygrometer to measure indoor relative humidity so you’re not guessing.
A realistic drying plan
– Place furniture where air can circulate around all sides.
– Use a fan to move air across the surface (not blasting directly into fabric seams for upholstery).
– For hard furniture, open drawers and spread out compartments so trapped moisture can escape.
– Re-check for musty odours after drying—odour persistence can indicate deeper mouldy furniture contamination.
What can go wrong (and edge cases)
Things can still go wrong even when you follow the steps, especially with finishes, porous materials, or repeating dampness. If you see continuing growth, deep odours, or damaged furniture structure, don’t keep “mould cycling” with the same surface-only clean.
According to U.S. EPA, Mold Remediation in Schools and Commercial Buildings, when mould is extensive or contamination cannot be effectively contained/removed, remediation should be escalated.
According to CDC (Centers for Disease Control and Prevention), Mold (General Information), hidden moisture sources contribute to recurring mould problems even after cleanup.
– Finish damage: some disinfectants can dull, strip, or stain finishes—always patch-test first and follow the product label. For varnished wood, avoid repeated soaking and harsh oxidizers.
– Mould regrowth: if humidity or damp storage conditions aren’t addressed, cleaning will only be temporary. Mouldy furniture can show up again in the same seams within weeks if the moisture source remains.
– Deep penetration: particle board, felt backing, and heavily affected upholstery may trap mould—surface cleaning won’t reach everything. If the furniture is mostly particle board and it absorbed water, replacement can be the safest call.
– Health risk: if mould is extensive or you see signs of ongoing moisture, don’t “just keep cleaning”—escalate to safer remediation.
Quick limit rule (useful for decision-making)
If mouldy furniture has widespread growth that you can’t clean without disturbing large areas, or you’re dealing with ongoing leaks, consider professional support. EPA guidance for mould remediation often distinguishes between smaller cleanup areas and larger contamination requiring more controlled approaches (see EPA documentation for the area-based thresholds).
Verdict: what’s worth doing yourself (and a quick checklist)
If the mould is limited and the furniture is easy to clean and fully dry, you can often handle it with careful cleaning, material-appropriate disinfection, and a real moisture fix. Skip DIY (or get help) when mould is widespread, keeps returning, has penetrated porous materials deeply, or when there are strong health concerns.
According to U.S. EPA, Mold Remediation in Schools and Commercial Buildings, the underlying moisture source must be addressed for remediation to be effective.
According to CDC (Centers for Disease Control and Prevention), Mold (General Information), thorough drying and moisture control help prevent mould from recurring.
Quick checklist (scan/save):
| Step | Do this | Notes |
|---|---|---|
| 1 | Ventilate + PPE | Gloves/eye protection; mask if needed |
| 2 | Gently remove surface growth | Avoid spreading spores |
| 3 | Wash with detergent + water | Clean residue first |
| 4 | Disinfect only if compatible | Patch-test first; follow label |
| 5 | Dry completely | Don’t store until fully dry |
| 6 | Fix moisture source | This is what prevents return |
Frequently Asked Questions
What’s the safest way to clean mould off furniture without spreading spores?
Start by ventilating the area and wearing protective gear like gloves and a mask to avoid breathing in mould spores. Lightly mist the affected surface with water so spores don’t become airborne, then remove any loose mould with a soft brush before wiping clean. After cleaning, fully dry the furniture (ideally with a fan and dehumidifier) to prevent mould from returning.
How can I remove mould from painted or varnished wooden furniture?
Mix mild dish soap with warm water, then apply it to the mouldy area using a cloth (avoid soaking joints and seams). Gently scrub, wipe with clean water, and dry immediately. If mould stains remain, use a small amount of white vinegar or a diluted non-bleach mould remover, test in an inconspicuous spot first, and repeat only as needed.
Why does mould keep coming back on my furniture, and how do I stop it?
Mould returns when moisture and humidity remain high, often due to condensation, leaks, poor ventilation, or damp storage areas. Clean the visible mould thoroughly, then address the cause by improving airflow, lowering indoor humidity, and checking for water damage behind or underneath the furniture. Once dry, consider using mould-resistant storage practices and keep items off exterior walls during humid seasons.
Which cleaning products work best for mould on fabric or upholstered furniture?
For washable fabrics, use an upholstery-safe mould cleaner or a solution of detergent and water, then rinse and dry completely. For stubborn mould, you can use a fabric-safe vinegar solution, but always patch-test first to avoid discoloration. Because upholstery can trap mould in padding, dry the piece thoroughly with airflow or a fan and avoid using it until it’s fully dry.
What’s the best way to clean mould off leather or other non-porous furniture surfaces?
Wipe mould from non-porous surfaces with a damp cloth first, then clean with mild soap and water to remove residue. For lingering odours or stains, a lightly damp cloth with white vinegar can help, but use minimal liquid to prevent damage to finishes. Dry thoroughly after cleaning, and if the mould has penetrated seams or cracks, consider professional assessment to prevent recurring mould.
📅 Last Updated: October 16, 2026 | Topic: how to clean mould off furniture | Content verified for accuracy and freshness.
References
- https://www.cdc.gov/mold/default.htm
- https://www.epa.gov/mold/mold-and-mildew
- https://www.epa.gov/mold/cleanup-mold-after-a-flood
- https://www.mayoclinic.org/diseases-conditions/hypersensitivity-pneumonitis/in-depth/black-mold/art-20046895
- Mold – Overview | Occupational Safety and Health Administration
- https://www.canada.ca/en/health-canada/services/air-quality/indoor-air-quality/mould.html
- Mold and Moisture – MN Dept. of Health
- https://scholar.google.com/scholar?q=how+to+remove+mold+from+wood+furniture Google Scholar
- https://scholar.google.com/scholar?q=best+practices+mold+remediation+nonporous+surfaces+cleaning+disinfection Google Scholar
- https://scholar.google.com/scholar?q=mold+removal+upholstery+fabric+guidelines Google Scholar
