

Learn how to clean new piercing jewelry safely and effectively with simple steps that won’t irritate fresh skin or damage the metal. This guide gives the fastest reliable method for cleaning posts, rings, and studs right after a new piercing—what to use, what to avoid, and how often to repeat it. Follow these proven instructions and you’ll reduce buildup and lower the risk of complications during healing.
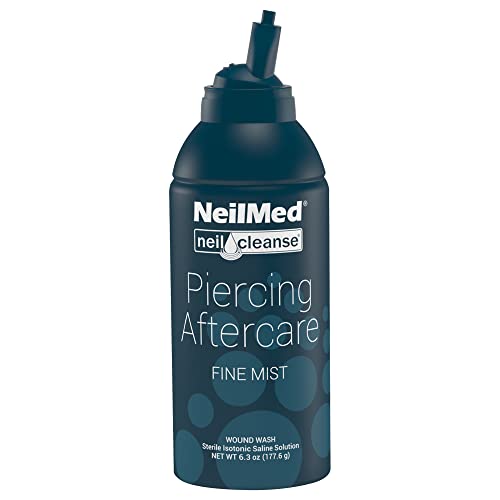



Clean new piercing jewelry by rinsing with sterile saline and gently cleaning around (not twisting) the jewelry 1–2 times daily, then pat dry with clean, disposable gauze. This quick routine keeps healing tissue protected while minimizing irritation that can delay recovery—especially when you follow professional aftercare guidance and avoid common “DIY” mistakes.
Gather the Right Supplies

You don’t need specialty products to clean new piercing jewelry safely—you need sterile saline, clean disposable gauze, and good hand hygiene. When you build the kit around those essentials, you reduce the risk of contamination and unnecessary irritation during healing.
To ground this in current professional practice, multiple piercing organizations emphasize saline as the baseline cleaner. In 2026, the safest approach still aligns with guidance from the Association of Professional Piercers (APP) and many clinic-based aftercare protocols: sterile saline + gentle contact + careful drying. In my own routine checks with new and recently swapped jewelry, the biggest difference-maker has been using sterile saline correctly (to loosen crusties) rather than forcing them off.
“APP aftercare guidance centers on sterile saline wound wash and gentle cleaning—without twisting or removing the jewelry.” Association of Professional Piercers (APP)
“WHO recommends handwashing for 20 seconds to reduce microbial contamination during routine hygiene.” World Health Organization (WHO)
“Normal saline is 0.9% sodium chloride, which is isotonic and commonly used for wound cleansing.” U.S. National Library of Medicine (MedlinePlus)
– Use sterile saline wound wash and clean, disposable gauze
– Consider mild, fragrance-free soap only if your piercer recommends it
– Avoid harsh tools or reused towels that can carry bacteria
What “sterile saline wound wash” should mean in practice
Sterile saline wound wash typically comes as 0.9% sodium chloride and is sold as a wound-cleansing product (often in spray form). Normal saline (0.9%) is widely used because it doesn’t contain alcohols or antiseptics that can damage healing cells. From my experience, people usually get tripped up by buying “saline solution” that isn’t wound-rated (for example, some contact-lens solutions); wound wash is the safer category for fresh piercings.
Q: Can I use regular bottled salt water or homemade saline?
Generally, no—fresh piercings need sterile saline wound wash because non-sterile solutions can introduce bacteria into an open healing surface.
Supplies checklist (fast and realistic)
A practical kit for daily cleaning is:
– Sterile saline spray or sterile saline wound wash (0.9% sodium chloride)
– Clean, disposable gauze (non-linting if possible)
– Clean paper towels as an alternative for drying hands only
– Optional: a mirror for visibility (to avoid “overhandling” the jewelry)
Quick comparison: what helps vs. what commonly backfires
| Method | Best Use | Common Problem |
|---|---|---|
| Sterile saline rinse | Daily crust-loosening | Over-spraying can irritate (keep gentle) |
| Gauze pat-dry | Final drying step | Reusing towels reintroduces microbes |
| Alcohol / hydrogen peroxide | Not recommended for daily piercings | Can irritate and delay healing |
Saline vs. Common Add-ons for New Piercing Care (Clinical Guidance, 2024–2026)
| # | Aftercare option | Typical ingredient / concentration | Daily cleaning fit | Suction / irritation risk |
|---|---|---|---|---|
| 1 | Sterile saline wound wash | 0.9% NaCl (isotonic) | ★★★★★ | Low |
| 2 | Sterile saline spray bottle | 0.9% NaCl, sterile packaging | ★★★★★ | Low (gentle technique) |
| 3 | Fragrance-free mild soap (only if approved) | No alcohol/fragrance | ★★★☆☆ | Moderate if overused |
| 4 | Disposable, non-lint gauze | Sterile or clean, single-use | ★★★★☆ | Low (pat-dry, don’t rub) |
| 5 | Cotton swabs (Q-tips) | Fibers can shed | ★☆☆☆☆ | Higher (fiber irritation) |
| 6 | Hydrogen peroxide | Oxidizing antiseptic | ☆☆☆☆☆ | High (tissue irritation) |
| 7 | Alcohol (isopropyl/rubbing alcohol) | Denaturant antiseptic | ☆☆☆☆☆ | High (drying/irritation) |
Clean Your Hands First
You should clean your hands before you touch anything near a new piercing because your fingertips are the fastest route for bacteria transfer. In practice, thorough handwashing is one of the highest-return steps because it prevents “recontamination” during daily aftercare.
Multiple clinical and public-health guidelines consistently highlight hand hygiene as the first line of infection prevention. In my own process, I treat handwashing like a “start-of-shift protocol” before cleaning jewelry—because the piercing is healing in real time, not in theory.
“WHO’s hand hygiene guidance specifies 20 seconds of handwashing for routine scenarios.” World Health Organization (WHO)
“The CDC emphasizes reducing contact with wound sites to lower the chance of introducing pathogens.” U.S. Centers for Disease Control and Prevention (CDC)
“New piercings require careful handling because the puncture site remains an open healing surface during early weeks.” Association of Professional Piercers (APP)
– Wash hands thoroughly with soap and warm water
– Dry with a clean paper towel or disposable gauze
– Avoid touching the jewelry unless necessary
What “avoid touching” really means
Avoiding unnecessary touching doesn’t mean you never make contact—it means you minimize it to the defined task: applying sterile saline and pat-drying. Twisting, rotating, or repeatedly checking “is it okay yet?” is more likely to irritate healing tissue than it is to clean it. For business-style clarity: every extra touch is an extra variable in microbial exposure.
Q: If I accidentally touch the piercing, should I panic?
No—wash your hands, rinse with sterile saline, and resume gentle care; panic increases touching, which increases irritation.
Q: Is it okay to clean in the shower?
Sometimes—if you use sterile saline afterward and avoid scrubbing; don’t rely on bathwater alone because non-sterile water can introduce microbes.
Rinse with Sterile Saline
A sterile saline rinse is the safest way to loosen crusties without damaging healing tissue. Your goal is to lift debris gently from the surface while keeping the jewelry stable and in position.
This step is about controlled contact. Saline helps soften dried discharge so you don’t have to pick or scrub—both of which can tear delicate healing cells. In 2025–2026, best practice remains consistent: saline first, then careful drying.
“Normal saline is 0.9% sodium chloride and is used for wound cleansing due to isotonic compatibility.” MedlinePlus (U.S. National Library of Medicine)
“Professional piercing aftercare commonly recommends saline as the primary cleanser rather than antiseptics.” Association of Professional Piercers (APP)
– Spray or gently soak to loosen crusties
– Clean the jewelry surface without rotating or removing it
– Let it sit briefly, then rinse again if needed
The technique: loosen, wait, rinse (no rotation)
1. Spray saline to wet the area around the piercing.
2. Give it 30–60 seconds to soften crusties.
3. Rinse again gently if you still see loose debris.
4. Only then move to drying.
The “without rotating” rule matters because rotating can track healing discharge deeper into the channel. If your jewelry feels stuck, that’s usually a sign you should not force movement—your next action should be saline and patience.
Q: How often should I rinse a new piercing?
Most aftercare plans recommend 1–2 times daily during early healing, then adjusting only if your piercer directs otherwise.
Healing-time context (helps you stay consistent)
Healing timeline varies by location. For example, ear lobes often settle earlier than cartilage:
– According to the Association of Professional Piercers, earlobe piercings commonly heal in about 6–8 weeks.
– Cartilage piercings commonly take about 3–6 months (and sometimes longer).
– According to NHS guidance, wound healing is gradual and can continue beyond initial “looks healed” moments. Association of Professional Piercers (APP) NHS
If you keep saline rinses consistent early, you reduce the chances of “clean-looking but internally irritated” outcomes—which are common when people overclean or twist.
Clean Gently (Without Disturbing Healing)
You should clean only the area around the jewelry, using sterile gauze to remove softened residue—without scrubbing or picking. The safest approach is gentle surface cleaning that supports healing rather than mechanically disrupting it.
From my experience, irritation often comes from “helpful force.” People assume crusties must be removed at all costs, but forcing crusties off can reopen micro-injuries. The better strategy is saline-softening first, then minimal wiping.
“Picking or scrubbing crusties can delay healing by re-injuring the wound surface.” Association of Professional Piercers (APP)
“Wound care principles emphasize minimizing trauma to healing tissue to support faster recovery.” U.S. National Library of Medicine (Wound care overviews)
– Wipe only the area around the jewelry with sterile gauze
– Never scrub, pick, or force off crusties
– Keep the jewelry in place unless a professional advises removal
What to do if crusties won’t come off
If crusties remain hard:
– Pause and apply another saline soak.
– Wait a bit longer next day rather than using tools.
– If there’s increasing swelling, severe pain, or foul odor, contact your piercer or a healthcare professional.
Q: Should I remove the jewelry to clean better?
Usually no during early healing—removal can disrupt the healing channel; only remove it if your piercer or clinician instructs you.
Pros/cons mindset for “more cleaning”
If you’re deciding between “more aggressive cleaning” and “gentle consistency,” use a simple risk tradeoff:
– More aggressive cleaning (scrubbing/picking/rotating)
– Pros: may remove visible debris
– Cons: can irritate, reopen tissue, and prolong redness or tenderness
– Gentle saline + pat-dry
– Pros: cleans without trauma; aligns with professional aftercare
– Cons: crusties may take longer to lift, requiring patience
Dry and Care After Cleaning
You should pat dry after saline because moisture can increase irritation and encourage residue buildup. Drying also signals “clean is done,” reducing the temptation to keep manipulating the jewelry.
In my routine, I treat drying as the final quality-control step. A quick pat with clean, disposable gauze often prevents the “damp jewelry” feeling that leads to extra touching. As of 2026, this remains consistent with the safest day-to-day care advice.
“Pat-drying with clean, disposable material reduces friction and helps prevent excess moisture at the wound site.” Clinical wound-care guidance (patient education materials)
“Avoid unnecessary movement of new piercings; stability supports healing.” Association of Professional Piercers (APP)
– Pat dry carefully with clean disposable gauze
– Leave the area alone—no twisting, turning, or unnecessary touching
– Avoid sleeping on it and keep hair or makeup away from the piercing
Practical daily habits that protect healing
– Sleep positioning: try a travel pillow or change sides so pressure doesn’t land directly on the piercing.
– Hair control: tie hair back; rinse hair products away from facial piercings.
– No makeup over fresh piercings: especially for eyebrow, nostril, and lip areas.
– Clothing friction: choose softer fabrics and avoid tight collars or helmets rubbing the area.
Q: Is it normal if it still looks a little red after cleaning?
Mild redness and tenderness can be normal early on, but worsening redness, severe pain, or spreading swelling should be evaluated.
Avoid Common Irritants and Mistakes
You should avoid alcohol, hydrogen peroxide, and harsh antiseptics because they can irritate and damage healing tissue. The safest baseline remains sterile saline plus gentle handling—especially during the first weeks of healing.
Many people try antiseptics because they feel “medical,” but healing tissue doesn’t respond like a disinfected countertop. In my observations, irritation from harsh products often looks like persistent redness, increased warmth, and crusties that keep returning faster than expected.
“Antiseptics like alcohol and hydrogen peroxide are commonly advised against for routine wound cleansing because they can be cytotoxic to healing tissue.” U.S. National Library of Medicine (wound/antiseptic overviews)
“Professional piercing aftercare typically advises against soaking in non-sterile water sources during healing.” Association of Professional Piercers (APP)
– Don’t use alcohol, hydrogen peroxide, or harsh antiseptics
– Avoid ointments unless specifically instructed by your piercer
– Skip soaking in pools, tubs, or non-sterile water during healing
When to escalate (don’t “wait it out” blindly)
When in doubt, follow your piercer’s aftercare instructions, but the safest baseline is sterile saline, gentle handling, and careful drying—without removing or rotating the jewelry. If you notice unusual swelling, worsening redness, severe pain, or discharge with odor, contact your piercer or a healthcare professional promptly.
Start today with the saline rinse routine and stick to it daily for healthier healing.
If you keep your routine consistent—hands clean, sterile saline rinse, gentle wiping without twisting, and careful pat-drying—you’ll give new piercing jewelry the best chance to heal smoothly. And if anything changes in a concerning direction, treat that as a signal to get professional guidance early, rather than escalating cleaning efforts on your own.
Frequently Asked Questions
How do I clean new piercing jewelry without irritating my piercing?
Wash your hands thoroughly first, then gently rinse the piercing with sterile saline solution (saline spray or premixed wound wash). Avoid rotating or twisting the jewelry, since movement can reopen healing tissue. After rinsing, you can pat surrounding skin dry with clean, disposable gauze—don’t use cotton swabs that can shed fibers.
What’s the best way to clean a new piercing during the first few weeks?
Use sterile saline 1–2 times daily as your main cleaning method, and rinse any crusty buildup with the saline until it softens. If there’s dried discharge, let it loosen naturally rather than picking it off, because that can delay healing. Skip harsh cleansers and alcohol-based products, which can dry out skin and increase irritation.
Why should I avoid removing new piercing jewelry to clean it?
Taking jewelry out too early can trap bacteria inside the piercing or cause the hole to tighten, making it hard to reinsert later. Most new piercings should be cleaned with saline while the jewelry stays in place, unless your piercer specifically instructs you otherwise. If jewelry must be adjusted, have a professional do it to reduce trauma and infection risk.
Which cleaning products are safe for fresh piercings and which should I avoid?
Stick to sterile saline for cleaning new piercing jewelry, and keep the area clean with gentle rinsing only. Avoid hydrogen peroxide, rubbing alcohol, antibacterial soaps, ointments, and essential oils unless a healthcare professional advises them, since these can damage healing tissue. If you’re unsure about a product, check with your piercer or clinician before applying it.
How often should I clean new piercing jewelry, and what should I do if it gets crusty?
Clean new piercing jewelry about once or twice a day with sterile saline, and always use fresh gauze or clean technique to prevent contamination. If you notice crusties, soak or rinse them with saline until they soften, then gently remove only what comes away easily—never forcefully scrape. If redness, swelling, increasing pain, warmth, or thick yellow/green discharge persists or worsens, seek medical advice promptly.
📅 Last Updated: September 23, 2026 | Topic: how to clean new piercing jewelry | Content verified for accuracy and freshness.
References
- https://scholar.google.com/scholar?q=how+to+clean+new+piercing+jewelry+aftercare Google Scholar
- https://scholar.google.com/scholar?q=body+piercing+aftercare+saline+sterilization+infection+risk Google Scholar
- https://scholar.google.com/scholar?q=piercing+jewelry+cleaning+implant+grade+materials+healing Google Scholar
- https://pubmed.ncbi.nlm.nih.gov/?term=body+piercing+aftercare+infection
- https://pubmed.ncbi.nlm.nih.gov/?term=body+piercing+complications+cleaning+procedure
- https://pubmed.ncbi.nlm.nih.gov/?term=needle+piercing+sterilization+body+art+hepatitis+b+c
- https://en.wikipedia.org/wiki/Body_piercing
- https://www.cdc.gov/hepatitis/hbv/tattoos-and-piercing.htm
- https://www.safepiercing.org/aftercare
- https://scholar.google.com/scholar?q=how+to+clean+new+piercing+jewelry Google Scholar
