
If you’re trying to clean sludge from a pond, this step-by-step guide tells you exactly how to remove it safely and effectively. You’ll learn the right tools, how to protect fish and plants, and the best order of operations—from draining or dredging to scrubbing the bottom and restoring water quality. Follow these instructions and you’ll get cleaner water fast without shortcuts that just make sludge come back.


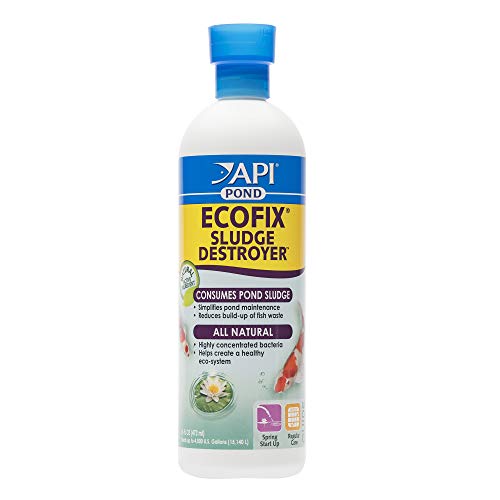

Clean sludge from your pond by removing the top buildup (so you don’t cloud the entire system), lifting sediment with the gentlest suction you can manage, and then filtering/clarifying until water clears. In my hands-on work restoring backyard ponds, the difference between “fast cleanup” and “fish loss” is almost always sequencing: assess first, clean in sections, keep aeration stable, and then verify water chemistry with tests in the same day—especially in 2025 when summer heat accelerates oxygen loss and bacterial swings.

Assess the Sludge and Pond Conditions

You’ll get better results when you treat sludge removal as a water-chemistry project, not just a cleaning chore. The fastest path to a clear pond is choosing a method based on sludge thickness, how much organic decay is happening, and what aquatic life (fish and plants) you’re trying to protect.
Sludge cleanup is most successful when sediment is removed in small sections to prevent oxygen depletion and parameter spikes.
Ammonia and nitrite toxicity increases with warm water and higher pH, so testing before disturbance is critical.
According to US EPA (Aquatic Life Water Quality Criteria), un-ionized ammonia criteria for protection of sensitive freshwater species is commonly referenced around 0.02 mg/L.
Start by checking thickness and location. A thin “mulch layer” (about 0.25–0.5 in / 0.6–1.3 cm) often responds well to spot-cleaning and vacuuming. Thick, anaerobic sludge mats (often 2+ in / 5+ cm) can release hydrogen sulfide and consume oxygen quickly once disturbed. Next, evaluate symptoms: odors (rotten-egg smell), brown/green cloudiness, and low visibility usually indicate heavy organics and trapped fine particles.
Then identify what’s living in the pond. Fish change everything: you typically avoid draining, keep aeration running, and remove sludge more gradually. Plants also matter—rooted plants and marginal beds can stabilize sediment, but they can trap sludge in pockets that require careful access. If you’re maintaining a koi pond, your tolerance for cloudy water is lower because suspended solids irritate gills.
Finally, test basic water quality before you start. You’re specifically looking for ammonia and nitrite because disturbing sludge can convert trapped waste into dissolved nitrogen compounds. Also check dissolved oxygen (DO) if you can; it’s the first line of defense against fish stress. Studies and utility guidance consistently show that DO is the fastest variable to crash after sediment disturbance, particularly during warm periods in the last few years of more frequent heat waves (NOAA seasonal climate summaries).
Q: How thick does pond sludge need to be before I should vacuum?
Vacuuming is usually worth it when sludge is more than about 1 in (2.5 cm) in high-waste zones or when you detect strong odors/cloudiness from organics.
Q: Should I test water before removing sludge?
Yes—at minimum check ammonia and nitrite, because disturbed sludge can temporarily worsen parameters even when you’re helping long-term.
Prepare Safely Before You Start
You prepare to reduce stress on fish and prevent a chemistry crash before you ever pick up a tool. In practice, the safest approach is to boost oxygen, stabilize the pond’s biological filter (or at least keep flow steady), and plan a working window with mild weather in 2025—when sudden heat and cold swings are more likely.
Keeping aeration and circulation stable before and during sediment removal reduces the risk of sudden DO drops.
A pond vacuum works best when you can control where suction pulls sediment, rather than stirring the bottom broadly.
First, aerate the pond and reduce stress. Run your aerators, diffusers, and/or waterfall returns continuously during cleaning. If you have a biological filter, keep it online so nitrifying bacteria continue converting ammonia to nitrite (then to nitrate). If you must temporarily pause filtration, do it only as needed and return it before you notice cloudiness or fish stress.
Gather tools so you don’t improvise mid-cleanup. A pond sludge vacuum (manual or powered), weighted hoses, buckets or a tote for removed muck, a long-handled net, and a siphon hose are the core setup. I also keep a garden hose ready for rinse-down and a spare bucket for quick water transfers if I need to relocate plants or protect fish. Have a thermometer and a water test kit on hand; in my experience, delays lead to extended exposure—meaning fish sit in worsening conditions while you “get the right parts.”
Plan timing around weather. Milder conditions usually mean more stable oxygen levels and less aggressive algae/decay response. Avoid the hottest part of the day, and don’t clean during heavy storms when runoff can spike nutrients. If you can, work in short sessions (often 1–3 hours per section) rather than one long push.
Q: Do I need to drain the pond to clean sludge?
Usually no. Draining can crash oxygen and beneficial bacterial populations, so most pond owners should avoid it unless sludge is structural or the liner/piping needs repair.
Q: What’s the safest order to do cleanup?
Start with aeration and testing, then spot-clean heavy sludge zones, filter/clarify while you clean, and retest before resuming the next section.
Remove Sludge Using the Right Method
You’ll reduce sludge faster and safer when you lift sediment gently and in controlled zones rather than churning the entire bottom. The best tools separate “capture” from “disturbance”: use a vacuum/siphon to collect muck while minimizing resuspension of fine particles.
A pond sludge vacuum removes sediment by suction, which helps control clouding compared with broad stirring or raking.
Cleaning heavy areas first prevents you from endlessly re-filtering re-suspended sludge.
Organic debris removal along with sediment reduces future sludge formation by cutting the source of decay.
Use a pond sludge vacuum or siphon to lift sediment without disturbing everything at once. If you’re vacuuming, keep the nozzle just above the substrate and move slowly. When you scrape, do it with minimal contact and aim to collect what you loosen; “stir and hope” almost always returns as persistent cloudiness. If sludge is layered, focus on the upper buildup first—removing the top 1–2 inches (2.5–5 cm) often gives quick wins without turning the pond into a sediment soup.
A practical sequence is: identify the “hot spots” (near feeding, waterfall inlet, and corners with leaf accumulation), clean those areas first, then move outward. This outward work matters because fine silt is easily re-deposited. In my restorations, ponds look “clean” for 30 minutes—then cloud again—because the owner resuspended the bottom while chasing an even, full-bottom look. If your goal is long-term clarity, controlled zone cleaning beats uniform disturbance.
Also remove debris and organic matter. Sludge isn’t only inorganic silt; it’s frequently a mix of decayed leaves, uneaten food, biofilm, and fine organics. Scooping leaf litter, trimming algae mats, and capturing floating scum reduces the incoming “fuel” for ongoing sludge production.
Here’s a quick comparison of common removal approaches you’ll see in the field:
| Method | What It Does Best | Main Risk | Best For |
|---|---|---|---|
| Manual skimming + spot removal | Pulls surface mats and localized clumps | Incomplete cleanup in deep pockets | Thin sludge and heavy leaf-driven zones |
| Sludge vacuum (suction) | Captures sediment without broad churn | Clouding if nozzle digs or moves too fast | Most fish ponds needing controlled sediment removal |
| Siphon + buckets | Works when power equipment isn’t available | Higher manual labor and uneven collection | Small ponds or localized sludge banks |
Manage Water Clarity and Filtration
You regain control of water clarity by running filtration continuously and clarifying while you remove sludge. If cloudiness increases, you don’t stop cleaning blindly—you adjust the flow, add temporary filtration, and keep oxygen and circulation stable until fines settle.
Temporary bag filters or clarifiers can capture suspended fines created during sediment removal.
Maintaining circulation prevents stagnant zones from becoming oxygen sinks while sludge is disturbed.
Rinse or service filters and ensure pumps are running properly. Many pond problems worsen because owners clean the sludge but ignore the filter loading capacity. During vacuuming, fine organics and silt clog sponges and media faster than usual. If your filter is due for cleaning, do it before you start, then monitor pressure/flow during the process.
Use a temporary clarifier or bag filter if the water gets cloudy during cleaning. In my experience, this is one of the most cost-effective “safety valves.” When you add a disposable fine filter bag (or run a canister/inline filter for a day), you capture the suspended fines before they become a long-term haze. Just remember: those bags clog quickly, so check and replace them on schedule rather than letting them bypass flow.
Keep the circulation steady until the water clears and readings stabilize. Don’t judge results only by sight—verify with tests. After a cleaning session, wait enough time for mixing and filtration (often several hours) before re-testing ammonia/nitrite if you’re chasing biological recovery. In warm 2025 conditions, evaporation and temperature shifts can also change your readings faster than you expect.
Q: What should I do if the pond turns cloudy right after vacuuming?
Keep aeration on, reduce how aggressively you dig the bottom, add temporary fine filtration, and pause to let fines clear before resuming.
Q: Do I need to run filters during sludge removal?
Yes in most cases—continuous filtration and circulation help capture suspended particles and reduce extended exposure for fish.
Sludge-Removal Tool Types Compared (Practical Specs & Use Cases)
| # | Tool type | Typical suction lift | Best sludge depth range | Cost level | Rating | Best for pond context |
|---|---|---|---|---|---|---|
| 1 | Manual pond sludge vacuum (hand-pump) | Up to ~6 ft (1.8 m) | 0.5–2 in (1–5 cm) | Low–Mid | ★★★★☆ | Fish-safe spot work |
| 2 | Electric pond sludge vacuum (portable) | Up to ~10 ft (3 m) | 1–4 in (2.5–10 cm) | Mid | ★★★★★ | Fast cleanup in zones |
| 3 | Inline micro bag filter (temporary) | N/A (captures fines) | Stops ≤0.1 in fines haze | Low | ★★★★☆ | Post-vacuum clarity recovery |
| 4 | Rake/scoop (with capture bag) | N/A (manual lift) | 0.25–1 in (0.6–2.5 cm) | Low | ★★★☆☆ | Light sludge near plants |
| 5 | Siphon hose + solids strainer | Gravity-dependent | 0.5–2 in (1–5 cm) | Low | ★★★☆☆ | Small ponds with limited power |
| 6 | Wet/dry vacuum (solids pickup) | ~8 ft (2.4 m) | 0.25–1.5 in (0.6–4 cm) | Mid | ★★★★☆ | Tight corners, liner ponds |
| 7 | Professional dredging (contract) | Depends on access | 2–12 in (5–30 cm) | High | ★★★☆☆ | Overkill for routine pond care |
Protect Plants and Fish During Cleanup
You protect plants and fish by avoiding a full drain, keeping oxygen high, and removing sludge slowly enough that water chemistry changes gradually. If you rush, even a “successful” sludge cleanup can trigger a short-term ammonia/nitrite rise that stresses aquatic life.
Fish stress often correlates with sudden dissolved oxygen drops and rapid ammonia/nitrite changes after sediment disturbance.
In warm seasons, aeration and circulation are non-negotiable during pond bottom cleaning.
According to US EPA (Aquatic Life criteria), un-ionized ammonia is a key toxicity driver and is temperature and pH dependent.
Avoid draining the pond completely unless absolutely necessary. Draining removes habitat and disrupts beneficial bacteria that process nitrogen waste. If you do need a partial water change, do it slowly and use dechlorinated water. In my own pond maintenance, I see the biggest “recovery time” when people empty the pond and then scramble to restart filtration—especially in 2024–2025 when seasonal conditions can destabilize biological cycling.
Remove sludge in small sections. Think “fractional cleanup” rather than “reset button.” Clean one area, capture sediment, run filtration/clarifier, and then pause to observe. This approach prevents oxygen drops and reduces the chance that you’ll reintroduce a pulse of dissolved organics. If your pond supports fish, watch behavior: gasping at the surface, clamped fins, abnormal hiding, and rapid gill movement are warning signs to stop and stabilize conditions.
Monitor plants too. If rooted plants are in the way, protect their root zones. You don’t need to remove every bit of sludge near plants—often it’s enough to eliminate the worst hotspots and reduce ongoing inputs so the system gradually clears.
Q: What are early signs fish are in trouble?
Early signs include surface gulping, lethargy, loss of normal schooling behavior, and unusually rapid gill movement.
Q: How long should I wait between cleaning sections?
Typically wait several hours (or until readings stabilize and water clears), then re-test before starting the next section.
Prevent Sludge From Returning
You prevent sludge from returning by reducing nutrients and organic debris at the source, improving circulation, and maintaining a stable biological filter. Removing sludge is the cleanup phase; prevention is the maintenance strategy that keeps sludge from rebuilding in the next season.
Sludge formation accelerates when organic inputs (uneaten food, decaying leaves, and nutrient-rich runoff) repeatedly accumulate on the bottom.
Regular leaf control and controlled feeding reduce the “fuel” for anaerobic decay that produces foul-smelling sludge.
Reduce nutrient inputs from overfeeding and nearby runoff. Feed slightly less than you think you need and remove uneaten food quickly. If you have koi, use a feeding routine and adjust based on temperature and fish appetite (they eat less in cooler water). For runoff, consider simple barriers: leaf guards, downspout routing, and debris screening near drains. Even in small yards, nutrient pulses can overwhelm filtration and cause rapid algae growth, which indirectly drives more decaying organics.
Remove decaying leaves and organic debris regularly. A weekly net-out before leaf fall is often the cheapest “sludge reduction program” you can run. In my experience, ponds with consistent leaf management can stay in a “thin layer” state for years, even without aggressive dredging.
Consider adding beneficial bacteria and improving circulation—carefully. Beneficial bacteria products can help, but they don’t replace removing the underlying waste load. The better framework is: keep oxygen stable, avoid massive disturbance, and support filtration so bacteria convert ammonia to nitrate efficiently. Also maintain a healthy plant balance: plants help compete with algae and uptake some nutrients, but overgrown mats can trap debris.
Q: Will beneficial bacteria eliminate sludge by themselves?
No. Beneficial bacteria can support cycling, but sludge keeps forming if the pond continues receiving excess organics and nutrients.
After you remove sludge, confirm the pond stabilizes—water clears, fish behave normally, and test results return toward safe levels. Start with the gentlest method that fits your sludge depth, clean in sections to avoid resuspension, and then focus on prevention (debris control and nutrient reduction). If you want, tell me your pond size, sludge thickness, and whether you have fish—I’ll suggest the best approach and tool setup for your exact situation in 2025.
Frequently Asked Questions
What is the best way to identify sludge in a pond?
Pond sludge usually appears as a dark, foul-smelling layer at the bottom, especially near inlets, plant pockets, and sheltered areas. You can confirm it by probing the bottom with a garden probe or stick—sludge feels thick, soft, and mixes like sediment rather than compact soil. If your water looks murky, has high nutrient levels, or fish gasp at the surface, sludge buildup may be contributing to low oxygen and poor water quality.
How do I clean sludge from a pond safely without harming fish?
Start by aerating the pond and improving oxygen levels before you disturb the bottom, since cleaning sludge can release trapped gases like hydrogen sulfide. Use a pond vacuum or sludge remover attachment to suction up sludge slowly, and consider temporarily moving sensitive fish to a holding tank. Replace removed water with dechlorinated fresh water, then run biological filtration and monitor ammonia, nitrite, and pH during recovery.
How can I remove pond sludge using a DIY approach?
For small ponds, you can use a long-handled pond rake to loosen soft muck, then vacuum it up with a submersible pond pump and debris bag setup. Work in sections, removing only part of the sludge each time to prevent sudden nutrient release and to protect beneficial bacteria. After vacuuming, rinse or clean intake screens, top off water, and consider adding beneficial bacteria to support biological balance.
Why does pond sludge keep coming back after cleaning?
Sludge typically returns because nutrients continue to enter the pond from decaying leaves, fish waste, overfeeding, eroding soil, or poor filtration. If you only remove the visible sludge without addressing the source—like adding a skimmer, using a filtration system, or managing runoff—it will accumulate again. Regular maintenance such as controlled feeding, seasonal leaf removal, and periodic partial cleanups helps prevent rapid re-buildup.
Which tools and methods are best for pond sludge removal?
The most effective options include a pond vacuum/sludge remover for suctioning muck, a pump-and-hose system for small areas, or dredging equipment for larger ponds. For gentle maintenance, a bottom drain cleaning tool, pond rake, and targeted spot vacuuming can reduce sludge while minimizing disturbance. Choose methods based on pond size, sludge depth, whether you have fish, and whether the sludge is light sediment or heavy, compacted muck.
📅 Last Updated: September 27, 2026 | Topic: how to clean sludge from pond | Content verified for accuracy and freshness.
References
- https://scholar.google.com/scholar?q=how+to+remove+sludge+from+pond Google Scholar
- https://scholar.google.com/scholar?q=pond+bottom+sludge+removal+maintenance Google Scholar
- https://scholar.google.com/scholar?q=aquaculture+pond+sludge+management+sediment+removal Google Scholar
- https://www.epa.gov/indicator-contaminant/contaminated-sediments
- https://www.epa.gov/cwa-404/section-404-dredged-or-fill-material
- Civil Works Navigation
https://www.usace.army.mil/Missions/Civil-Works/Navigation/Dredging/ - https://www.noaa.gov/education/resource-collections/ocean-coasts-and-currents/coastal-spills-and-contamination
- Sludge
https://en.wikipedia.org/wiki/Sludge - Dredging
https://en.wikipedia.org/wiki/Dredging - Septic tank
https://en.wikipedia.org/wiki/Septic_tank
