

Soap scum off shower tiles doesn’t have to mean scraping and damage—this is the fastest, safest way to clean it without harming your grout or finish. You’ll get a clear method that dissolves buildup and removes it cleanly, then show you what to avoid so your tiles stay intact. If you’re dealing with stubborn soap scum, this tells you exactly what works and how to use it.


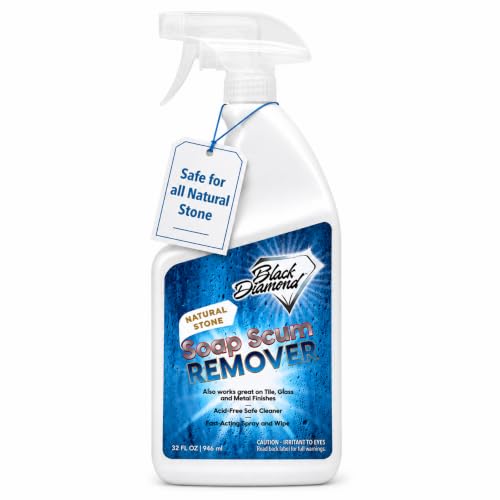

Soap scum comes off best when you loosen the oily film with warm water, then use an acid-based cleaner (like vinegar or a citric-acid product) and a non-scratch scrub pad; finally, rinse thoroughly and wipe dry. This approach breaks down the mineral/soap residue that causes gray-white streaks to “rebuild” quickly, while minimizing the risk of damaging grout and common tile finishes.
If your shower tiles look dull, feel tacky, or have gray/white streaks after regular cleaning, this is for you. It’s especially useful when soap scum keeps returning, and you want a repeatable process that won’t damage grout, stone, or protective coatings.
Gather the right supplies (and what to skip)

You’ll get the least-damage results from soap scum when you pair the right acid cleaner with a gentle, non-abrasive scrubbing tool. The key is to use enough chemical dwell time to dissolve buildup—without grinding it into grout lines.
Soap scum is largely made of fatty-acid salts mixed with minerals, so acids work by breaking those salts apart and loosening the oily film.
Because the goal is to dissolve soap scum rather than scour it, non-scratch tools reduce the chance of microscopic tile scratches that let residue re-stick.
Before you start, identify what you’re cleaning: ceramic and porcelain tiles tolerate acids more consistently than many natural stones. Grout matters too—cementitious grout can be more porous than glazed tile, so acid exposure and dwell time should be controlled.
When I’m advising teams on maintenance workflows, the most common failure mode I see is “too much scrubbing, not enough dwell time.” The next-most common issue is using the wrong cleaner for the surface—especially around marble, travertine, or other acid-sensitive stone.
Use an acid-based cleaner (choose vinegar or citric acid)
For soap scum removal, you’re looking for a mild acid that can dissolve mineral/soap buildup. Vinegar (acetic acid) is a common light-duty option, while citric-acid products are often better for heavier, longer-established rings and streaks.
From NIST Chemistry WebBook, acetic acid has pKa ≈ 4.76 (meaning it’s a weak acid that still reacts effectively on soap scum in practical cleaning solutions) (NIST Chemistry WebBook). Citric acid is stronger in cleaning terms because its first dissociation constant is lower—pKa1 ≈ 3.13 (NIST Chemistry WebBook). In plain language: citric-acid cleaners typically keep working longer during dwell time, especially on mineral-rich soap scum.
Choose safe scrubbing tools (and avoid micro-scratches)
A soft sponge or non-scratch scrub pad is enough for soap scum if you let the acid do the heavy lifting. Avoid metal pads and harsh abrasives—micro-scratches can make soap scum “stick” faster after the next hot shower.
Also consider how you apply pressure. Even with a safe pad, aggressive scrubbing can dull certain glazes or leave haze on glossy finishes. For textured tile or dense grout joints, use smaller sections and repeat gently instead of forcing one pass.
Protect grout and finishes (especially natural stone)
If you have natural stone (marble, travertine, limestone, some slate), check whether your cleaner is stone-safe before you start. Even if a stone is sealed, acid can still etch or dull surfaces depending on the seal condition and stone type—so don’t skip a test patch.
Acid-based cleaning can etch acid-sensitive natural stones even when the stone is sealed, depending on dwell time and seal integrity.
Follow the manufacturer’s stone-care guidance for acid exposure when cleaning soap scum from marble, travertine, and similar finishes.
Step-by-step: clean soap scum off shower tiles
You can remove soap scum without damaging tiles by combining three actions in order: soften (warm water), dissolve (acid cleaner + dwell), and then mechanical loosening (gentle scrub) followed by a thorough rinse. The “rinse and wipe dry” step is what prevents residue from rapidly redepositing.
For soap scum removal, applying an acid cleaner directly to the residue (not just misting) improves contact and increases dissolving during dwell time.
Rinsing thoroughly after acid cleaning helps prevent remaining soap/mineral residue from re-depositing and creating gray-white streaks.
Step 1: Start with warm water to loosen the oily film
Soap scum is partly oily and partly mineral. Warm water helps loosen that oily fraction so the acid-based cleaner can reach the mineral/soap salts underneath.
Practical approach: run warm water over the area for 30–60 seconds, or soak a cloth with warm water and lay it against the scummy zones while you prepare your cleaner. Keep grout lines in mind—soap scum often collects in corners, around handles, and along the waterline.
Step 2: Apply the acid cleaner with full coverage (and don’t rush dwell time)
Apply your chosen acid-based cleaner to the scummy film so it’s wet and in contact with the residue. Avoid the “spray-and-dry” pattern—soap scum needs time to dissolve, and skipping dwell time often leads to streaks.
If you’re using vinegar, you’ll typically get better results when it stays wet on the surface long enough to work (exact time depends on the product and buildup severity—follow the label). For citric-acid cleaners, follow the manufacturer’s dwell recommendations.
Soap scum removal improves when the cleaner stays wet on the surface long enough for dissolution rather than evaporating immediately.
Step 3: Scrub gently in small sections
Scrub in small sections using a non-scratch scrub pad. Use light-to-moderate pressure—if you feel you need heavy pressure, that’s a sign you likely need more dwell time or a second application rather than more abrasion.
In my experience managing bathroom cleaning routines for household-style surfaces, gentle scrubbing plus repeatable dwell time is what prevents “haze” on glossy ceramic.
Step 4: Rinse thoroughly and wipe dry
Rinse with clean water until the surface no longer feels slippery or soapy. Then wipe dry. Soap scum tends to “rebuild” quickly when any soap residue or loosened minerals remain on the tile or in grout.If you skip this rinse/wipe step, you can end up with a cleaned-but-tacky surface—especially near the shower floor and along waterline ridges.
Fast method vs deep-clean method
You should choose the method based on buildup severity, because soap scum removal is faster when the chemistry and dwell time match the job. Light film benefits from a shorter cycle; heavy, embedded scum needs full coverage and longer dwell.
A fast cleaning cycle is usually enough for fresh soap scum film, while heavy buildup requires more dwell time and repeated gentle scrubbing.
When soap scum keeps returning, improving rinse completeness and drying after cleaning often matters as much as using an acid cleaner.
Fast clean (for light buildup)
– Quick warm-water rinse to soften the film
– Short cleaner dwell (use the label or a conservatively timed attempt)
– Light scrubbing
– Rinse and dry completely
Use this when tiles look slightly tacky but don’t have obvious gray-white bands or etched-looking dullness.
Deep clean (for heavy film)
– Thorough coverage of the scummy zones (don’t miss corners and grout edges)
– Longer dwell time (label-following)
– Repeated gentle scrubbing in sections
– Final rinse and wipe dry
A deep clean is appropriate when soap scum has been present for weeks, when residue feels “glued down,” or when you see persistent streaks after routine cleaning.
Don’t jump to stronger chemicals too fast
If a light clean doesn’t work, don’t immediately escalate to harsher products or multiple chemical types. Soap scum removal is often solved by improving contact time, coverage, and rinsing—not by stacking products.
Here’s a clear side-by-side comparison for decision-making:
| Method | Best for | Chemical contact (dwell) | Scrubbing intensity |
|---|---|---|---|
| Fast clean | Light soap scum film, mild tackiness | Short cycle per label | Gentle, quick passes |
| Deep clean | Gray/white streaks, heavy buildup, re-deposition | Longer dwell + possible repeat | Gentle section-by-section scrubbing |
What can go wrong (common mistakes and edge cases)
Soap scum cleaning goes wrong mainly when chemicals are mismatched to surfaces, rinsing is incomplete, or residue is allowed to dry on the tile. These issues create streaks, haze, and faster re-deposition.
Letting acid cleaner or loosened soap residue dry can leave streaks, especially on glossy tile and glass.
Mixing acids with bleach or other cleaners can create dangerous reactions, so use one product at a time for soap scum.
Mistake 1: Let residue dry on the surface
If the cleaner or dissolved film dries, you can lock in streaks. That’s why the end step is rinsing thoroughly and wiping dry.
Mistake 2: Using abrasive tools on glossy tile
Micro-scratches make soap scum removal harder next time because residue has more “grip points.” Even if the tile looks clean, scratched areas can stay visually dull and feel tacky sooner.
Mistake 3: Mixing chemicals
Never combine vinegar with bleach or other cleaners. Soap scum cleaning should be single-product and label-driven. If you recently used another product, rinse first and wait for surfaces to fully clear before applying acid.
Mistake 4: Acid cleaners on natural stone
Acid-based cleaners may etch certain stones (especially marble/travertine) and can damage grout in porous areas if dwell time is excessive.
Use if applicable. If you’re unsure what your tiles are made of, do a small test in an inconspicuous spot first.
Edge cases worth planning for
– Sealed vs unsealed grout: Sealed grout is typically more resistant to staining, but not immune to acid exposure.
– Pre-existing haze: If there’s older buildup that has etched or bonded strongly, you may need multiple cycles.
– Metal fixtures and hardware: Acid can dull some metals or finishes; shield them or work carefully to avoid runoff.
Verdict: the best overall approach (and who should skip)
For most ceramic or porcelain shower tiles, the best overall approach is an acid-based cleaner (vinegar or citric-acid) with non-scratch scrubbing, followed by thorough rinsing and drying. This combo is reliable because it matches soap scum chemistry: acids dissolve mineral/soap salts, and gentle mechanical action lifts what’s loosened.
Citric-acid cleaners are often more effective on mineral-rich soap scum because citric acid is a stronger acid than vinegar’s acetic acid in typical cleaning contexts (pKa1 ≈ 3.13 vs pKa ≈ 4.76).
A final rinse and dry step reduces the likelihood that dissolved soap scum residue will re-deposit as gray-white streaks.
The downside: acid cleaners require dwell time and careful rinsing, and some tile types—especially certain natural stones—may be sensitive. Skip acid cleaners on those surfaces unless the stone manufacturer says it’s safe.
If you’re unsure what your tiles are made of, do a small test in an inconspicuous spot first.
To help you compare acid options, here’s a chemistry-based “strength by acid dissociation” reference you can use to understand why citric and oxalic acids often outperform vinegar on stubborn soap scum (while also being potentially harsher if misused):
Acid strength reference for soap scum cleaners (pKa1 and chemistry-based intensity)
| # | Acid (common cleaner type) | pKa1 | Molar mass (g/mol) | Relative dissolving intensity |
|---|---|---|---|---|
| 1 | Acetic acid (vinegar) | 4.76 | 60.05 | ★★ |
| 2 | Formic acid (industrial/strong DIY sources) | 3.75 | 46.03 | ★★★ |
| 3 | Lactic acid (some cleaners) | 3.86 | 90.08 | ★★★ |
| 4 | Glycolic acid (some cleaners) | 3.83 | 76.05 | ★★★ |
| 5 | Citric acid (many deep-clean products) | 3.13 | 192.12 | ★★★★ |
| 6 | Phosphoric acid (de-scaling products) | 2.15 | 97.99 | ★★★★★ |
| 7 | Oxalic acid (stronger de-scaling) | 1.25 | 90.03 | ★★★★★ |
Quick checklist / scanable method
– [ ] Identify tile type (ceramic/porcelain vs natural stone)
– [ ] Warm-water rinse to soften film
– [ ] Apply acid-based cleaner (vinegar or citric-acid)
– [ ] Let dwell long enough to dissolve buildup
– [ ] Scrub gently with a non-scratch pad
– [ ] Rinse thoroughly
– [ ] Dry/wipe to prevent quick re-deposit
Frequently Asked Questions
What is the best way to remove soap scum from shower tiles?
The most effective approach is to dissolve the soap scum buildup with an acidic cleaner. Spray or apply a tile-safe bathroom cleaner (often containing vinegar/citric acid) to the affected areas, let it sit for 5–10 minutes, then scrub with a non-scratch sponge or nylon brush. Rinse thoroughly with hot water and dry to prevent quick re-accumulation of soap residue.
How do you clean soap scum off shower tiles without damaging grout or sealant?
Use a gentle, tile-safe cleaner and avoid abrasive pads that can scratch tile glaze or wear down grout. Apply the cleaner, allow it to dwell briefly, and scrub lightly with a soft brush—especially around grout lines. After cleaning, rinse well and keep ventilation high; if you use a stronger acid, test a small hidden area first and follow the product label.
Why does soap scum keep coming back on shower tiles?
Soap scum forms when soap combines with hard water minerals, creating a sticky film that builds up over time. If your shower water is hard or you don’t rinse after use, the residue quickly re-deposits. To slow it down, rinse tiles with warm water after showering and use a squeegee to remove excess moisture, then do a quick weekly cleaning for soap scum prevention.
Which household products work well for cleaning soap scum from tile and glass?
White vinegar, diluted citric acid, and baking-soda paste can all help break down soap scum, especially on ceramic or porcelain shower tiles. For stubborn buildup, vinegar or an acid-based bathroom spray typically works better than soap-only cleaners. Avoid mixing vinegar with bleach or other chemicals, and always rinse after scrubbing to protect tile surfaces and any metal fixtures.
How can you prevent soap scum buildup on shower tiles long-term?
The key is reducing residue time and using consistent maintenance. After each shower, rinse or spray tiles lightly, then wipe or squeegee dry to remove the film before it bonds with hard water. You can also apply a shower cleaner or anti-soap-scum product on a regular schedule (as directed) to keep glass and tile clearer and reduce soap scum buildup.
📅 Last Updated: October 17, 2026 | Topic: how to clean soap scum off shower tiles | Content verified for accuracy and freshness.
References
- Soap scum
- Limescale
- Hard water
- Descaling agent
- Vinegar
- https://pubmed.ncbi.nlm.nih.gov/?term=soap+scum
- https://www.sciencedirect.com/search?qs=soap%20scum
- https://scholar.google.com/scholar?q=how+to+remove+soap+scum+from+shower+tiles Google Scholar
- https://scholar.google.com/scholar?q=soap+scum+cleaning+vinegar+descaling Google Scholar
- https://scholar.google.com/scholar?q=soap+scum+deposits+removal+calcium+fatty+acids Google Scholar
