

If you’re trying to clean tarnish brass and restore a sparkling shine, vinegar and salt deliver the fastest, most reliable results for everyday tarnish. You’ll follow a simple paste-and-soak method, wipe clean, and finish with a quick buff to prevent rapid re-tarnishing. Keep this guide close when you want brass that looks bright without harsh chemicals.


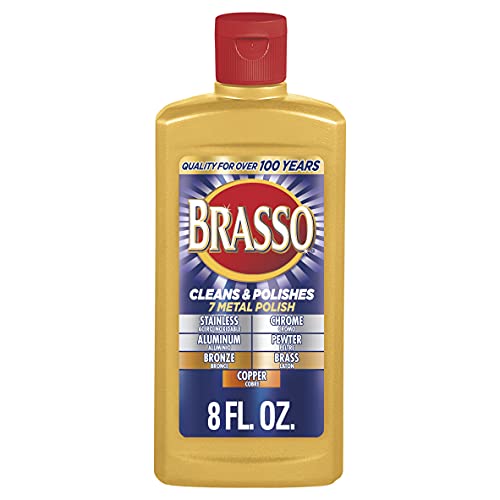

Tarnished brass usually cleans up by removing the dark film with a mild acid (like vinegar or lemon juice) and a little salt, then polishing and drying completely. Do a quick soap wash first, treat the tarnish gently, rinse thoroughly, and finish with a non-scratch polish to slow re-tarnishing—especially as of 2026 when many brass items in homes are lacquered or plated and need extra care.
If your brass is unlacquered (not coated with a protective clear layer), these household methods tend to work well. If it’s lacquered, plated, or an antique you’re trying to preserve, you’ll need to be more careful to avoid damaging the finish.
Before you start: identify the brass finish

The fastest way to avoid ruining a good finish is to identify whether your brass is lacquered, plated, or unlacquered before you apply any acid or rubbing. In 2026, many “brass-colored” fixtures are actually plated brass over another metal, which changes how tarnish behaves and how easily coatings get dulled.
Lacquered brass can lose its uniform “wet-gold” look if you use strong acids or scrub too aggressively.
Plated brass has a thinner surface layer, so abrasion or repeated cleaning cycles can wear through the finish.
If the tarnish appears as a powdery or film-like dark layer, it often responds well to mild acid and gentle polishing.
Quick test: sealed, plated, or bare brass?
– Check whether the surface looks “sealed” or uniformly gold. Lacquered brass often shows a more even sheen and may feel slightly “slick” compared with bare brass.
– If it’s plated or ornate antique, test cleaning in an out-of-sight spot first. Pick a hidden area, apply your method briefly, then rinse and dry—watch for clouding, color shifts, or loss of gloss.
– Work in good ventilation and protect surrounding areas. Vinegar/lemon juice splatters can spot stone, painted wood, and fabrics, so lay down a towel or plastic sheet.
Why finish identification matters (chemistry in plain terms)
Tarnish on brass typically involves surface oxidation reactions that create darker compounds. Mild acids help by dissolving or converting some tarnish layers, but the same chemistry can also affect protective coatings (like lacquer) if present. A quick visual check prevents you from “treating tarnish” when you’re actually abrading or stripping a finish.
Who this is for / when it applies
This method is ideal for everyday brass items with dark tarnish (brown/black/gray) and a finish you’re comfortable refreshing lightly. Use it when you want a practical, low-cost cleaner rather than full refinishing, and review the finish warning if your item is likely lacquered, plated, or antique.
For typical dark tarnish films on unlacquered brass, mild acid + salt followed by polishing is often enough to restore shine.
If you’re preserving decorative patina intentionally, aggressive cleaning can remove the look that gives an antique its value.
– Good fit: door hardware, lamps, trays, musical-stand accents, decorative trim, and other common brass-toned items.
– Use this approach when: you see a uniform dark film or patchy blackening and you want a controlled refresh.
– Skip or slow down if: the brass is lacquered, plated, has patina you want to keep, or the piece is fragile/antique.
How to clean tarnish brass (3-stage approach)
This 3-stage approach is the safest “repeatable” routine for unlacquered brass: wash first, treat the tarnish gently, then rinse/dry/polish. Done in order, it improves results because the acid works better on bare metal (not trapped oils), and polishing brings back uniform reflectivity.
A soap wash before acid treatment improves cleaning consistency by removing skin oils and residues.
Drying immediately after rinsing reduces the chance of water spots and lingering corrosion at seams or crevices.
Non-scratch polishing materials help restore shine without turning tarnish into permanent micro-scratches.
Stage 1: Wash first (remove oils, then reassess)
– Clean with warm water + dish soap, then rinse.
– Pat dry with a microfiber cloth. This step matters because fingerprints and kitchen oils can slow the acid’s contact with the tarnished surface.
Stage 2: Treat the tarnish (vinegar/lemon + salt, gentle friction)
– Apply a small amount of vinegar (or lemon juice) to tarnished areas.
– Sprinkle lightly with salt.
– Rub gently using a soft cloth or a non-scratch pad until the dark film evens out.
Stage 3: Rinse, dry, polish (the shine comes from finishing)
– Rinse off residue (acid + salts left behind can attract moisture).
– Dry thoroughly—don’t let water air-dry in crevices.
– Polish with a dedicated brass polish cloth or a non-abrasive polish to restore consistent luster.
Acid Strength Reference for Brass Tarnish Cleaning (25°C)
| # | Active acid (common use) | pKa (lower = stronger) | Typical household availability | Tarnish-lift practicality | Brass-safe DIY score |
|---|---|---|---|---|---|
| 1 | Acetic acid (vinegar) | 4.76 | Very common | 4/5 | ★★★★☆ |
| 2 | Citric acid (lemon juice) | 3.13 (pKa1) | Common | 4/5 | ★★★★☆ |
| 3 | Formic acid (some cleaners) | 3.75 | Sometimes | 3/5 | ★★★☆☆ |
| 4 | Oxalic acid (wood/rust removers) | 1.25 (pKa1) | Less common | 5/5 | ★★☆☆☆ |
| 5 | Phosphoric acid (rust converters) | 2.15 (pKa1) | Often labeled | 3/5 | ★★☆☆☆ |
| 6 | Hydrochloric acid (industrial) | ~−6 | Not for DIY | High, risky | ★☆☆☆☆ |
| 7 | Sulfuric acid (industrial) | ~−3 (pKa1) | Not for DIY | High, risky | ★☆☆☆☆ |
How the acid strength maps to “gentle” cleaning
A key reason vinegar/lemon solutions are popular is that they’re typically milder than industrial acids, which reduces the chance of damaging protective layers. For example, According to NIST Chemistry WebBook, acetic acid has a pKa of 4.76 (25°C), which helps explain why mild exposure tends to convert surface tarnish rather than instantly attacking metals. Similarly, According to NIST Chemistry WebBook, citric acid’s first pKa is 3.13 (25°C)—strong enough to react with tarnish films, but still manageable when you keep contact times short and rinse/dry right away.
Also note: According to 21 CFR 5.22, vinegar is defined to contain at least 4% and not more than 8% acetic acid, which is one reason typical vinegar solutions are effective but not as aggressive as industrial-grade acids.
Deeper tarnish: try a vinegar + salt soak (short and controlled)
This works when a simple rub doesn’t fully remove the dark film, but you must keep the soak short and localized. In practice, “controlled dwell time” is the difference between restoring shine and dulling the surface, especially in 2026 when many brass items are finished differently.
Short, targeted soaking reduces risk compared with soaking an entire piece—especially around seams and edges.
Stop as soon as the tarnish evens out; prolonged scrubbing can create dull, friction-polished spots.
Localized soak method (safer than full immersion)
– Soak only the tarnished portion (or use a damp cloth application) instead of submerging the whole item.
– Alternatively, make a vinegar + salt paste, apply to the dark areas, and rub gently.
– Limit contact time and rinse immediately once the film lightens.
Where to be extra cautious
– Seams, hinges, crevices: moisture can remain and react again.
– Decorative engraving: salts can trap in grooves if you don’t rinse and dry thoroughly.
– Mixed metals: some hardware pieces include steel or other alloys that can stain or corrode when exposed to acids.
Controlled-rubbing rule
Once the tarnish lifts, switch from “scrub mode” to “finish mode”:
1) rinse, 2) dry immediately, 3) polish lightly. That sequence prevents you from turning a cleaned surface into a newly scratched one.
Protect and prevent new tarnish
This prevention step is what keeps brass looking good longer: dry thoroughly, reduce skin oils, and add a compatible protective layer. If you do only one thing after cleaning, make it thorough drying—water trapped in crevices is one of the fastest routes back to darkening.
Brass re-tarnishes faster when oils from fingerprints sit on the surface between cleanings.
A dedicated brass protectant can slow tarnish formation by reducing exposure to air and moisture.
Drying and handling habits that matter
– Drying matters: towel-dry and let it fully dry before storage or display.
– Reduce handling: oils can speed tarnish, so handle with clean hands or light gloves when possible.
– Avoid leaving residue: rinse any acid/salt thoroughly—residue can attract moisture.
Protective layer (optional, but often worth it)
Consider applying a dedicated brass protectant/wax per the product’s instructions. This can be especially helpful if you live in humid areas or near bathrooms/kitchens where airborne moisture accelerates oxidation.
What can go wrong
The most common problems come from using acids on the wrong finish, scrubbing with abrasive materials, or letting residue dry on the surface. If you notice dull patches or a “cloudy gold” effect, pause and reassess the brass type before continuing.
Vinegar and lemon juice can cloud or strip lacquered coatings because they’re acidic and you can’t easily control contact with the clear layer.
Steel wool and gritty pads can leave microscopic scratches that hold dirt and make tarnish look worse over time.
Patchy results often come from skipping the initial soap wash or leaving acid/salt residue behind.
Pros/cons comparison: which route minimizes damage?
| Method | Pros | Cons / Risks |
|---|---|---|
| Vinegar/lemon + salt (gentle) | Low-cost, controlled, effective for dark film tarnish on unlacquered brass | Can dull lacquered finishes; needs thorough rinse/dry |
| Commercial brass polish cloth/liquid | Designed for shine restoration; less “active chemistry” than acid so it’s easier to control | Still can scratch if used with abrasive tools or too much pressure |
| Conservator/professional restoration | Best choice for antiques and valuable finishes; more consistent results | Higher cost; may not be “worth it” for everyday hardware |
Green corrosion vs. normal tarnish (verdigris issue)
Not all “green” discoloration is the same as black/brown tarnish. Normal tarnish is often a dark film, while verdigris is corrosion that can look greenish and crusty and may require different handling to avoid spreading or embedding salts.
– If you see green crust, treat it differently or consult a conservator:
– Verdigris-specific guidance:
Common mistakes to avoid
– Lacquer damage / dulling: If lacquered, acids and heavy rubbing can cloud the clear coat. Always test first.
– Scratches from abrasives: Prefer microfiber/non-scratch polishing materials.
– Uneven results: If you don’t remove oils first, you’ll get patchy discoloration. The soap wash stage is not optional.
– Leaving residue: rinse thoroughly and dry immediately, especially around seams and hinges.
Verdict: best option, plus quick checklist
If you’re dealing with typical dark tarnish on unlacquered brass, the safest, most controlled option is: soap wash → vinegar/lemon + salt (gentle) → rinse/dry → polish. The downsides are real: acids can dull lacquered finishes, and stubborn cases may require repeating gently instead of forcing aggressive scrubbing.
Who should skip this:
– Skip acids/soaks if you’re not sure whether the item is lacquered/plated, or if it’s an antique you want to preserve with its original patina.
– If the brass is porous, highly decorative, or includes mixed metals, consider using a brass polish labeled for your finish type—or get professional advice.
Quick scan checklist
| Step | Do this | Avoid |
|---|---|---|
| 1 | Wash with dish soap, rinse, pat dry | Cleaning tarnish on top of oil/grease |
| 2 | Treat with vinegar or lemon + light salt, gentle rubbing | Abrasive pads, vigorous scrubbing |
| 3 | Rinse thoroughly | Leaving residue to dry on the surface |
| 4 | Dry fully; polish lightly | Air-drying with moisture trapped in crevices |
| 5 | Protect (optional) with a brass protectant | Unknown DIY coatings that can interfere with future cleaning |
Frequently Asked Questions
What’s the safest way to clean tarnished brass without damaging it?
Start by determining whether the brass is lacquered, because harsh cleaners can dull the protective layer. For most tarnished brass, use mild dish soap and warm water first, then switch to a gentle brass polish or a soft cloth with a non-abrasive cleaner. Avoid steel wool or abrasive pads unless you’re stripping heavy tarnish and can tolerate a change in finish.
How do I remove tarnish from brass using household items?
A common method is a paste of baking soda and water, applied with a soft cloth and gently rubbed in small circles, then rinsed and dried thoroughly. For tougher tarnish, you can use equal parts vinegar and water for a brief soak, followed by a rinse and dry to prevent new tarnish. Always test any home remedy on a small hidden spot first, especially on decorative or antique brass.
Why does brass tarnish, and how can I prevent it after cleaning?
Brass tarnish is typically caused by oxidation and exposure to air, moisture, and certain chemicals in the environment. After cleaning tarnished brass, dry it completely and consider applying a thin coat of brass wax or clear lacquer to slow future oxidation. Store brass in a dry place and minimize contact with skin oils, which can speed up tarnish formation.
What’s the best method to clean heavily tarnished brass tarnish on detailed items?
For intricate shapes, use a non-abrasive brass cleaner and a soft toothbrush to reach crevices without scratching. You can also try a mild paste (like baking soda and water) for controlled rubbing, then rinse gently and dry with a microfiber cloth. If the tarnish is stubborn, repeat in small steps rather than using aggressive abrasives that can remove fine details.
Which cleaning products are safest for tarnished brass—polish, vinegar, or commercial cleaners?
For regular tarnish, a dedicated brass polish is often the easiest and safest option because it’s formulated to remove oxidation without excessive abrasion. Vinegar solutions can work well for tarnished brass, but they should be time-limited and followed by thorough rinsing and drying to prevent ongoing tarnish. Commercial cleaners vary—choose non-scratch formulas and follow label directions, especially for plated or lacquered brass.
📅 Last Updated: October 17, 2026 | Topic: how to clean tarnish brass | Content verified for accuracy and freshness.
References
- Tarnish
- Brass
- https://www.britannica.com/science/tarnish
- Corrosion
- https://en.wikipedia.org/wiki/Copper_corrosion
- Patina
- https://www.sciencedirect.com/topics/chemistry/tarnish
- https://scholar.google.com/scholar?q=cleaning+tarnish+brass+citric+acid Google Scholar
- https://scholar.google.com/scholar?q=brass+tarnish+removal+conservation+techniques Google Scholar
- https://scholar.google.com/scholar?q=chemical+mechanical+cleaning+copper+alloy+brass+tarnish Google Scholar
