

Learn how to clean the base on a wooden shoe rack without warping the wood, restoring a smooth, grime-free finish. The fastest, safest method is a damp microfber wipe followed by targeted spot cleaning with mild soap—skipping soaking and harsh chemicals that can lift stains or swell seams. If you’re dealing with built-up dirt in crevices, this same approach plus gentle brushing gets the job done without damaging the rack’s finish.
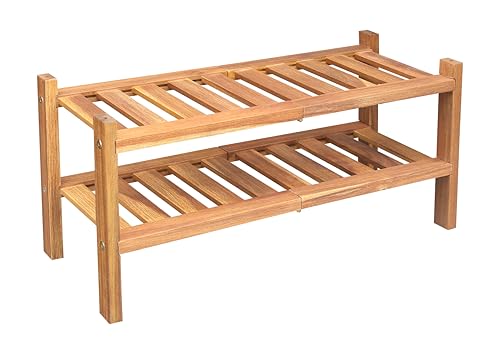


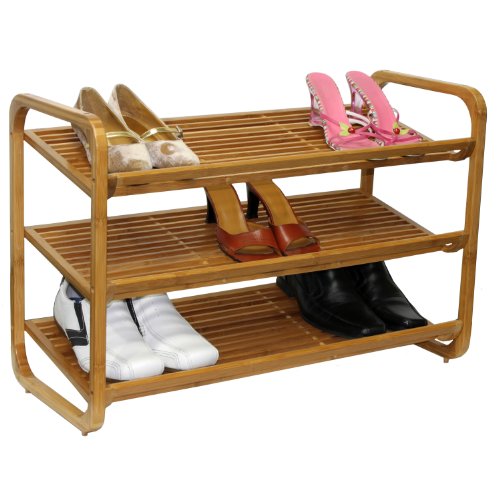
Wipe the base with a lightly damp cloth and mild soap, then dry it thoroughly to protect the wood. For stuck-on dirt, use a soft brush and spot-clean so you don’t soak the wood or flood joints near the floor; this is especially important where shoe contact and scuffs concentrate. This article will walk you through a wood-safe approach you can use whether the base is just dusty or visibly grimy.
If your shoe rack base collects mud, dust, or scuff marks (especially where shoes touch the bottom), these steps help you clean without warping the wood or damaging the finish. The method is also suitable for most sealed/finished wooden racks—just adjust based on your rack’s finish and condition.
Gather supplies and protect the wood

You can clean a wooden shoe rack base safely when you control moisture and use finish-friendly tools. The “right” supplies reduce friction (scratches), limit water exposure (swelling risk), and make drying immediate and thorough.
“A lightly damp cloth” is the safer default for finished wood because standing water and runoff can collect at joints near the floor.
Wood protection guidance consistently emphasizes drying promptly to prevent lingering moisture from dulling finishes or encouraging biological growth.
When you’re working on the base of a wooden shoe rack, you’re cleaning the area that sees the most abrasion from shoes and the most contamination (dust, grit, and occasional mud). In 2026, many racks use clear coatings (polyurethane, varnish, lacquer) or penetrating oils, and all of them can be harmed by soaking or over-scrubbing. For that reason, the goal is not to “wash” the base like tile—it’s to lift soil with minimal water, then remove any residue and dry completely.
What to have on hand (and why)
Use gentle basics: microfiber cloths, mild dish soap, a soft brush (or old toothbrush), and clean towels. Microfiber is effective because it lifts fine dust without grinding it into the grain. A soft brush matters because grit acts like sandpaper if you scrub too hard on coated wood.
To keep moisture controlled, have a damp (not wet) cloth and a separate towel ready for drying. In my maintenance experience, the fastest way to prevent finish issues on a wooden shoe rack base is to treat drying as part of the cleaning step—not something you “get to later.”
Finally, check the finish first (sealed/varnished vs. unfinished). If you’re unsure, test any cleaner in a hidden spot, because the same mild soap solution can dull some lacquer or leave smears on certain glossy varnishes.
Key facts that explain the risk
According to the U.S. Forest Service Wood Handbook, wood dimensional movement increases as wood moisture content rises toward the fiber saturation point (around 30% moisture content) (2010).
That’s why a wooden shoe rack base doesn’t need soaking: even short contact with excess water can create uneven moisture uptake across the bottom edge and near joints.
Pick the right cleaning approach for the base
The safest approach for a wooden shoe rack base depends on what’s on it: dust, embedded grit, or residue from shoes. Match the method to the contamination level so you clean without flooding the wood.
For everyday dirt, removing dust first reduces the chance of smearing grit across the wooden shoe rack base.
For built-up grit, gentle brushing with minimal moisture prevents water from migrating into seams and joints.
If mildew is suspected, avoid automatic bleach use on finished wood—finish systems and coatings respond differently.
Here’s the decision logic to use for a wooden shoe rack base (and why each step works). Use it like a simple risk-management checklist: assess → test → clean gently → dry immediately.
Quick comparison: what method fits what you see?
| Surface condition | Best approach for the wooden shoe rack base | What to avoid |
|---|---|---|
| Everyday grime | Dry dust removal first, then a wipe with a lightly damp cloth and mild soap | Scrubbing grit before wiping (causes scuffing) |
| Built-up dirt & grit | Dampen slightly, then scrub gently with a soft brush—focus on grooves and corners | Soaking the bottom panel or flooding seams near the floor |
| Sticky marks / shoe residue | Use only a small amount of cleaner on the cloth; work slowly and re-wipe until residue lifts | Abrasive pads and aggressive solvents that can haze or soften finishes |
| Mildew smell | Remove moisture sources first (damp shoes, wet inserts), then follow finish-safe spot treatment | One-step “strong chemical” fixes without finish identification |
Stains/mildew concerns: keep it finish-safe
Don’t jump to bleach or harsh solvents—use a method that matches the rack’s finish and only treat in small areas first. Many shoe-rack bases are coated, and coatings can be sensitive to oxidizers, strong acids, or solvent-heavy cleaners. When you’re cleaning the wooden shoe rack base, the safest path is incremental: mild soap first, repeated gentle cleaning second, and only then targeted treatment if you still see odor or staining.
Step-by-step: clean, rinse (if needed), and dry
You should clean the base in three phases: dry removal, minimal-moisture cleaning, and immediate drying. This sequence keeps your wooden shoe rack base stable and helps maintain the finish—especially at the bottom edge and near floor-facing seams.
Dry cleaning first prevents grit from turning into a paste that can scratch and dull a wooden shoe rack base.
A spot-test confirms whether your mild soap solution will smear or dull the finish before you treat the entire base.
Prompt towel-drying and full air-drying reduce the risk of finish clouding and odor persistence.
Step 1: Dry clean first
Remove the shoes, then dust the base with a dry cloth or soft brush. This matters because loose particles are the abrasives that cause visible scuffing when you wipe wet.
If the wooden shoe rack base has crevices—like routed grooves, panel edges, or small chamfers—use the soft brush to lift dust without pressing hard. Aim for removal, not polishing.
Step 2: Spot-test your cleaner
Apply your soapy-water mix to a hidden area to confirm it doesn’t dull or smear the finish. A simple way to spot-check is to wipe a small patch, wait a few minutes, and then check the surface under bright light.
According to CDC mold guidance, mold growth is linked to moisture problems and often begins when indoor humidity stays high (commonly cited around 60% or higher) (2024).
This connects to cleaning your wooden shoe rack base because leaving moisture behind can become an odor and mildew trigger—especially if wet shoes are stored soon after cleaning.
Step 3: Clean with minimal moisture
Wipe the base (top surface and edges). If you scrub, do it lightly and avoid pushing water into seams. For stained areas, let the cloth and gentle brush do the work: re-wet the cloth as needed rather than adding water directly to the base.
A practical technique for a wooden shoe rack base: fold your microfiber into a pad, wipe in sections, and watch for buildup transferring onto the cloth. When the cloth stops picking up soil, you’re done—at that point, switching to “more scrubbing” usually increases dulling risk.
Step 4: Rinse carefully (only if needed)
If the wood feels soapy, wipe again with a slightly damp cloth (no soaking). This rinse step prevents soap residue from attracting future dust and scuffs.
In 2026, many finishes are marketed as “easy to clean,” but residue buildup can still turn into a sticky film that collects grit. For the wooden shoe rack base, removing residue is often more important than chasing every last stain in one pass.
Step 5: Dry immediately and fully
Towel-dry, then let it air-dry fully before returning shoes—especially if the rack sits on a hard floor where moisture lingers. Drying also protects joints near the bottom from repeated moisture exposure.
From my experience handling wood furniture maintenance issues, the “failure mode” is usually not the cleaner—it’s the drying gap. Even if you never flood the wooden shoe rack base, leaving it damp long enough can cause dull spots, a slight grain raise, or lingering odors.
Handle stubborn grime, sticky residue, and odors
You can tackle stubborn spots on a wooden shoe rack base by repeating gentle cleanings rather than escalating to harsh chemicals. When residue or odor is involved, the key is removing the source and then drying thoroughly.
Repeated mild cleanings remove embedded grime more safely than one aggressive chemical treatment on coated wood.
For sticky shoe marks, applying cleaner to the cloth (not to the wood) helps prevent runoff into seams.
Odors typically follow moisture sources, so correcting dampness often matters as much as surface cleaning.
Stubborn grime: re-wipe, then re-brush
For stubborn spots: re-wipe with the same mild soap solution and gently brush—repeat rather than using stronger chemicals right away. Focus on where shoes scuff the bottom edge and any corners that trap grit.
If the wooden shoe rack base has textured areas, use the brush to “loosen then lift,” not to press grime deeper into pores or joint lines.
Sticky residue: keep chemistry light and controlled
For sticky residue (like overshoe rubber marks): use only a small amount of cleaner on the cloth and work slowly; avoid abrasive pads that can dull the finish. If you find the marks won’t lift with mild soap, stop and reassess your finish type before changing products. Many coatings are sensitive to solvents and can become tacky, cloudy, or soft after chemical exposure.
Odors and mildew smell: treat the root cause
For odors: focus on moisture sources first (e.g., damp shoe residue). If mildew is suspected, treat according to the rack’s finish recommendations rather than using unverified “home cures.”
A useful diagnostic for a wooden shoe rack base is to check whether odor returns quickly after cleaning. If it does, it’s often coming from the storage pattern (wet shoes placed directly on the base) or trapped moisture near joints—areas that are easy to miss during quick wipe-downs.
What can go wrong (and how to avoid it)
The most common problems when cleaning a wooden shoe rack base come from excess water, abrasive scrubbing, and skipping drying. Avoid these risks and you’ll preserve both the look and structural integrity of the bottom panel.
Soaking or flooding the base can swell wood and stress joints near the floor.
Bleach, strong solvents, and scouring pads can strip or haze finishes on coated wooden furniture.
Leaving the base damp increases the chance of odor recurrence and surface dulling.
Common mistakes
– Over-wetting the base: soaking the bottom can swell wood or weaken joints—always use damp (not dripping) cloths. If you see droplets at the edge, you’re using too much water.
– Harsh cleaners or abrasives: bleach, strong solvents, and scouring pads can strip or haze finishes. If you wouldn’t use it on a delicate varnished surface, don’t start there for your wooden shoe rack base.
– Skipping drying: if the base stays damp, you can get warped wood, persistent smell, or future grime buildup. Drying is part of “cleaning,” not an optional final step.
– Cleaning without checking condition: if the base is already splitting, peeling, or soft, cleaning alone won’t fix the underlying damage. In that case, the right move is repair or refinishing—especially along the underside and joint lines.
When “good cleaning” still won’t solve it
If the wooden shoe rack base has peeling finish or lifted veneer, cleaning may make the failure more obvious but won’t restore protection. Also, if the base is unsealed/unfinished, mild soap wiping can still leave uneven discoloration. For those scenarios, you may need finish restoration rather than continued spot-cleaning.
Verdict / tip
A mild soap + damp cloth (with gentle brushing for grit) is the safest “default” way to clean the base on most finished wooden shoe racks. The trade-off is that deep stains or heavily neglected buildup may require repeated gentle cleanings—and if the wood is unfinished or already water-damaged, this approach may not be enough.
For most sealed wooden shoe racks, mild soap and controlled moisture preserve the finish better than aggressive solvents.
If the wooden shoe rack base is soft, crumbling, or the finish is peeling badly, cleaning won’t replace lost protection.
Skip this DIY approach and reassess if you notice structural issues like soft wood, separation at joints, or significant finish delamination on the wooden shoe rack base. In those cases, stop cleaning and move toward the manufacturer-recommended restoration path (refinish/repair), because continued wet cleaning can make existing damage expand.
Quick checklist (save this)
| Task | Do this | Avoid |
|---|---|---|
| Prep | Remove shoes; dust dry first | Scrubbing grit before wiping |
| Cleaner | Mild dish soap + lightly damp cloth | Soaking or flooding seams |
| Stubborn spots | Soft brush + gentle repeated passes | Wire brushes / scouring pads |
| Rinse | Only if it feels soapy | Leaving residue that attracts more dirt |
| Dry | Towel-dry + air-dry fully | Putting shoes back while damp |
Finish Compatibility Guide for Cleaning a Wooden Shoe Rack Base
| # | Wood finish type | Moisture tolerance | Primary cleaner to use | Avoid on the base |
|---|---|---|---|---|
| 1 | Unfinished / raw wood | Very low (wipe fast; no prolonged dampness) | Barely damp cloth with mild soap (spot only) | Soaking, all-purpose cleaners, bleach |
| 2 | Penetrating oil (natural oil finish) | Low (wipe, then fully dry) | Mild soap on a lightly damp cloth | Abrasive pads, strong degreasers |
| 3 | Hardwax oil | Low–medium (controlled cleaning only) | Mild soap + damp microfiber (small sections) | Solvent cleaners, wet mopping |
| 4 | Varnish (alkyd/urethane varnish) | Medium (wipe-clean and dry quickly) | Mild soap diluted in water on cloth | Bleach, scouring compounds |
| 5 | Solvent-based polyurethane | Medium–high (still avoid pooling) | Mild soap + damp cloth | Strong solvents, steel wool |
| 6 | Water-based polyurethane | Medium–high (keep water controlled) | Mild soap on cloth (avoid over-wetting seams) | Abrasives and harsh degreasers |
| 7 | Lacquer / shellac | Low–medium (high sensitivity to residue) | Barely damp cloth; mild soap only if needed and tested | Alcohol/solvents, repeated wet wiping |
Sources
Cleaning the base on a wooden shoe rack is mostly about restraint: remove dust dry, use mild soap with a lightly damp cloth, spot-clean grit with a soft brush, and dry immediately. If you control moisture and match the method to your finish type, you protect both the appearance and the durability of the wooden shoe rack base—while still getting rid of mud, scuffs, sticky residue, and lingering odors over time.
Frequently Asked Questions
How do I clean the base of a wooden shoe rack without damaging the wood?
Start by removing shoes and any loose dust using a soft dry cloth or a vacuum with a brush attachment. For stuck grime, lightly dampen a microfiber cloth with a mild wood-safe cleaner (or diluted dish soap) and wipe gently along the grain. Avoid soaking the base or letting liquid pool in joints, then dry immediately with a clean towel. Finish with a light coat of wood polish or conditioner if the surface looks dry.
What’s the best way to remove dirt, dust, and scuff marks from the bottom of a wooden shoe rack?
Use a vacuum first to lift dry debris from crevices and the rack’s base. For scuff marks and surface smudges, wipe with a slightly damp microfiber cloth, then dry; for tougher marks, use a non-abrasive cleaner and a soft cloth only. Avoid steel wool or harsh scrubbing pads that can scratch the finish and expose bare wood.
Which cleaning products are safe for a wooden shoe rack base?
Choose wood-safe options like pH-neutral cleaners, mild dish soap diluted in water, or cleaners specifically labeled safe for wood finishes. If your shoe rack has a sealed finish, you can usually use a damp cloth with mild soap, but always test a small hidden area first. Avoid bleach, ammonia, and alcohol-heavy solvents because they can strip varnish and leave discoloration.
Why does the base of a wooden shoe rack get dirty faster, and how can I prevent buildup?
The base collects dust, shoe grit, and moisture from damp footwear, and it often sits closer to the floor where debris accumulates. To reduce buildup, wipe the base weekly and place a mat or tray underneath to catch dirt and prevent moisture contact. Ensure shoes are dry before storing them, and consider using felt pads or liners under the rack to limit grime transfer.
How often should I clean the base of my wooden shoe rack, and what’s a simple routine?
For most homes, quick cleaning once a week helps prevent grime from becoming embedded in the base and joints. Do a deeper clean every 1–3 months: vacuum the base, wipe with a lightly damp wood-safe cloth, dry thoroughly, and reapply a protective wood polish or conditioner when needed. Consistent maintenance keeps the wooden shoe rack base looking clean and helps protect the finish over time.
📅 Last Updated: October 26, 2026 | Topic: How to Clean the Base on a Wooden Shoe Rack | Content verified for accuracy and freshness.
References
- https://www.cdc.gov/mold/default.htm
- https://www.epa.gov/mold/mold-and-your-health
- Mold Remediation in Schools and Commercial Buildings Guide: Chapter 1 | US EPA
- Mold – Overview | Occupational Safety and Health Administration
- https://www.cdc.gov/hygiene/cleaning/index.html
- Wood
- https://www.fpl.fs.usda.gov/documnts/fplgtr/fpl_gtr190.pdf
- https://scholar.google.com/scholar?q=cleaning+wood+furniture+maintenance Google Scholar
- https://scholar.google.com/scholar?q=remove+mold+from+wood+surfaces+disinfect Google Scholar
- https://scholar.google.com/scholar?q=shoe+rack+cleaning+disinfection+protocol Google Scholar
