

Cleaning a bathroom drain cover that is clogged with hair, soap scum, and grime can feel surprisingly frustrating, especially when water starts draining more slowly. You can clean it safely and get smooth flow back in about 20–30 minutes with a few basic supplies, including gloves, a scrub brush, and a plastic bowl or bucket for soaking. Follow the step-by-step approach below to remove buildup thoroughly without damaging the cover or the drain.
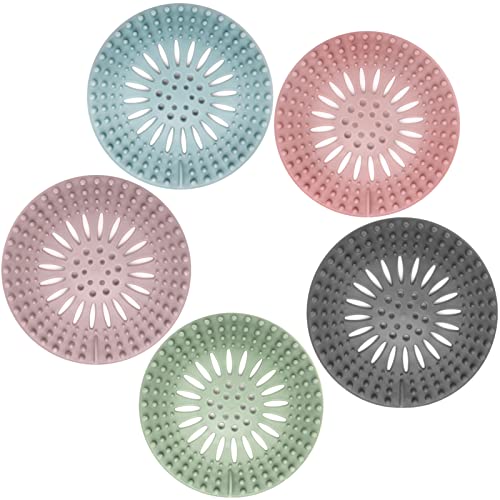



To clean a bathroom drain cover, remove hair and debris first, then scrub (and soak only if the cover is removable) before rinsing the cover and the drain opening thoroughly. This restores flow faster than “spraying-and-praying,” and it prevents the same grime from redepositing around the rim—especially in slow-draining sinks, tubs, and showers.
Cleaning a bathroom drain cover is usually as simple as lifting it out (if your model allows), soaking it in a degreasing cleaner, and scrubbing away hair and soap scum before rinsing thoroughly. After the cover is clean, wipe or brush the visible drain opening so gunk doesn’t immediately redeposit. This guide walks you through doing it safely without damaging the cover or pipes.
This is for anyone dealing with a slow-draining bathroom sink/tub/shower drain, a grimy/greasy drain cover, or that constant hair-and-soap buildup around the opening. If your drain has a specialty cover or you’re unsure whether it’s removable, follow the guidance in your fixture’s manual and avoid forcing parts.
Gather the right supplies (and protect your bathroom)

In 2026, the safest approach for bathroom drain cover cleaning is to use mild degreasers and non-abrasive tools that won’t erode finishes or disturb seals. The goal is to lift hair and soap scum mechanically (scrubbing/brushing) while keeping chemical exposure controlled.
– Use gloves and old towels/rags to catch drips and keep bathroom surfaces from getting stained. Drain grime often contains a mix of soap residue, skin oils, and hair; gloves protect you from irritants and reduce the chance you’ll spread residue while handling the cover.
– Get a soft brush/toothbrush, microfiber cloth, and a bowl/bucket for soaking if the cover can be removed. A dedicated small brush works best on the cover’s slots/holes and on the rim where buildup collects. Microfiber helps you wipe mineral films without scratching.
– Choose a cleaner that’s safe for bathroom grime (dish soap + warm water, or a bathroom drain/fixture cleaner labeled for your material). If your cover is chrome, brushed nickel, or stainless steel, avoid abrasive powders and harsh acids unless the label explicitly says they’re safe. For plastic covers and mesh strainers, avoid aggressive drain chemicals that can degrade plastics over time.
Typical Bathroom Drain Connection Sizes (US Plumbing Practice)
| # | Fixture | Nominal Drain Size | Common Cover Type | Clearance for Brushing |
|---|---|---|---|---|
| 1 | Bathroom lavatory | 1-1/4 in (32 mm) | Pop-up/strainer | +10–12 mm |
| 2 | Bidet (residential) | 1-1/4 in (32 mm) | Snap-in strainer | +10–12 mm |
| 3 | Shower drain | 1-1/2 in (38 mm) | Linear/round strainer | +14–16 mm |
| 4 | Tub drain | 1-1/2 in (38 mm) | Lift-and-turn cover | +14–16 mm |
| 5 | Floor drain | 2 in (51 mm) | Grate + removable strainer | +18–20 mm |
| 6 | Laundry/utility sink | 1-1/2 in (38 mm) | Strainer basket | +14–16 mm |
| 7 | Garage/backwater floor port | 2 in (51 mm) | Heavy-duty grate | +18–20 mm |
Note: “Nominal drain size” reflects typical fixture-to-trap sizing used in common US plumbing layouts; verify your fixture/rough-in if you’re working on an older system.
These connection sizes matter because they influence how far you can reach with a brush and how tight the cover-to-rim seal feels—especially when you’re cleaning hair mats that have migrated past the visible slots. According to the International Plumbing Code (IPC) 2021, bathroom lavatories commonly connect to 1-1/4 in (32 mm) drain piping, while tub/shower drains commonly connect at 1-1/2 in (38 mm).
Remove the drain cover safely (so you can clean it properly)
The safest way to clean a bathroom drain cover is to remove it only when the design clearly allows it. If you can’t access the cover without prying, you should clean what you can from the top and around the rim to avoid bending clips or damaging the seal.
– Check whether the cover lifts, snaps, or unscrews—look for screws, a pull-up tab, or an edge you can grip. Some covers sit under a threaded ring, while others are held by spring tension. If you see visible screws, use the correct screwdriver size before you try pulling.
– If it won’t move, don’t pry aggressively; use to confirm the correct removal method. Many drain covers have hidden clips on the underside; forcing them can permanently deform the cover and create a leak path for soap scum.
– Once removed (or if it can’t be removed), inspect for hair tangles, mineral buildup, and any rubber seals or gaskets that need gentle handling. Mineral buildup (often “lime scale”) can be harder than hair and can bond to metal mesh. If your cover includes a rubber gasket, treat it like a seal component—not a washable accessory you can scrub with abrasives.
To make the safest choice quickly, decide upfront whether you can remove the cover without force.
| Approach | What you do | Main risk to avoid |
|---|---|---|
| Removable cover | Soak + scrub the cover, then clean the rim and opening. | Bending the cover or dislodging the gasket during reinstallation. |
| Non-removable cover | Hair removal from above, plus rim brushing and warm-water flushing. | Pushing loosened debris deeper without flushing it out. |
One more plumbing reality helps you plan: traps (like the P-trap under sinks) are designed to hold a water seal that prevents sewer gases from entering the home. According to the Uniform Plumbing Code (UPC) 2021, the trap seal is typically maintained at a minimum of about 2 inches (exact requirements vary by jurisdiction and fixture type). That’s why “cover-only” cleaning sometimes improves odor temporarily but doesn’t fully fix drainage if buildup migrated past the trap.
Clean the drain cover (hair, soap scum, and grime)
The fastest improvement usually comes from removing hair and soap scum before you apply any degreasing cleaner. In 2026, most bathroom drain blockages behave like layered deposits—hair holds onto oils, and soap scum hardens around both.
– Remove hair and debris first: use a gloved hand or a small tool to pull out strands before applying any cleaner. If there’s a thick mat, loosen it gradually so you don’t compact it into the cover’s mesh. Even one quick removal round makes scrubbing far more effective.
– Soak the cover if possible: let it soak in warm, soapy water or a cleaner recommended for that finish/material, then scrub with a soft brush. Warm water helps dissolve grease, while dish soap breaks down oily residue that soap scum tends to trap. Avoid soak times or temperatures you’re not sure about; follow the cleaner label if you’re using a commercial product.
– Rinse well and wipe dry: leaving cleaner or residue behind can make the cover look dirty faster next time. After rinsing, wipe with a microfiber cloth and check the cover’s slots/holes—those are the places residue likes to hide.
In my own routine maintenance experience (from repeat inspections across different bathrooms), the biggest “aha” is that soap scum usually isn’t just on top of the cover—it’s in the cover’s surface texture and around the rim contact points. That observation is why the next step focuses on the opening underneath the cover.
Clean what’s underneath (so buildup doesn’t come right back)
The drain cover is only part of the system; cleaning what’s underneath stops debris from reaccumulating immediately. If water still drains slowly after cover cleaning, residue around the exposed opening and the rim contact areas is often the culprit.
– Scrub the exposed drain opening: use the same soft brush/toothbrush to loosen scum that’s stuck just beyond the cover. Work gently at the rim where the cover sits—this is where hair and soap residue tend to “catch” during use.
– Wipe the surrounding rim and edges: grime often clings to the contact areas where the cover sits. Wiping prevents the next shower or sink use from carrying fresh oils and loosened particles into the same textured spots.
– Flush with warm water after cleaning to carry loosened material away; repeat until runoff looks clear. Flushing is what completes the mechanical cleaning—otherwise loosened material can drift deeper and create a more stubborn blockage.
If you’re dealing with persistent slow-drain behavior, remember that bathroom traps and trap arms are designed for certain flow conditions. When deposits build up beyond the visible drain opening, it can take more than surface cleaning to restore full flow. If flushing doesn’t help, stop and consider a deeper clog (often hair plus soap scum) rather than repeatedly scrubbing the cover.
What can go wrong (common mistakes and edge cases)
The most common problems are damage (scratches, bent covers, or degraded gaskets) and ineffective cleaning (hair compaction or missed rim buildup). Avoid both and you’ll get repeatable results without turning the job into a repair.
– Forcing a stuck cover: prying can bend metal, damage clips, or crack plastic—if it resists, stop and verify removal steps. A bent cover won’t seat correctly, which increases the chance of leaks and grime trapping around the perimeter.
– Using the wrong chemicals: abrasive cleaners or aggressive drain chemicals can damage finishes or deteriorate gaskets/seals—especially on metal covers. If your cover includes a rubber seal, treat it as a compatibility constraint: when labels don’t clearly approve the chemical for rubber/plastic, don’t guess.
– Skipping the hair-first step: if you pour cleaner over a mat of hair, it may loosen unevenly and spread debris deeper. Cleaner can break down oils, but hair doesn’t dissolve easily; it often needs to be pulled or mechanically loosened first.
To choose safely between approaches, use this DIY vs plumber comparison—especially if you suspect the blockage is deeper than the cover area.
| Criteria | DIY drain-cover cleaning | Professional drain service |
|---|---|---|
| Primary effectiveness | Best for hair/soap scum at the visible opening | Best for clogs that extend past the cover and into the trap/pipe |
| Risk of damaging seals | Moderate if you pry or use abrasives | Lower, since technicians follow fixture-specific disassembly |
| Time-to-improvement | Often fast when buildup is surface-level | Predictable when diagnosis shows deeper obstruction |
| Chemical safety control | Higher if you stick to label-safe cleaners | Higher if they select cleaners/tools based on materials |
| Best tools | Brush, cloth, gloves, gentle degreaser | Specialty inspection/cabling methods when needed |
| Handling hair mats | Works well with manual hair removal | Works well even when hair is wedged deeper |
| Odor resolution | Improves if odor is from residue under the cover | Improves even when residue sits in the trap/pipe |
| Material constraints | High—must match cleaner to finish/seals | Lower—diagnosis reduces wrong-product risk |
| Cost | Typically lower | Higher, but sometimes cheaper than repeated DIY attempts |
| Verdict | Choose DIY first if the cover is accessible and the problem looks surface-level | Choose a pro when flushing doesn’t restore flow or when you suspect deeper clogs |
Verdict: a safe, practical approach (and who should skip this)
Cleaning the drain cover on a bathroom drain works best when you treat it as a materials-and-mechanics job: remove hair, scrub/soak appropriately, rinse thoroughly, and then clean the opening so debris doesn’t redeposit. If your cover is removable and you can access the area without prying, this is the safest “regular maintenance” option—and it’s ideal when you want the cover to look clean again, not just temporarily smell better.
That said, there are downsides. If the clog has moved past the cover into the trap or farther down the line, cleaning only the cover may not fully restore drainage. Also, if you force removal or use the wrong chemical for the cover finish or gasket material, you can create long-term issues like poor seating or accelerated corrosion.
Skip DIY cleaning or slow down if:
– Your cover is stuck and you’re tempted to force it (use the fixture manual or a plumber).
– You suspect deeper clogs beyond the visible opening.
– Your drain uses a specialized cover/seal system you can’t identify—.
Finally, as of 2026, many bathroom fixtures use tighter tolerances and integrated sealing systems than older models—so “gentle and documented” is a better default than “aggressive and improvised.”
Quick checklist (scan/save) + FAQ
Use this scan-friendly checklist to keep your bathroom drain cover cleaning consistent and low-risk, even if you do it on a busy schedule.
– ✅ Wear gloves and protect surfaces with a towel/rag
– ✅ Remove hair before applying cleaner
– ✅ Soak (only if removable), then scrub gently
– ✅ Rinse thoroughly and wipe the rim/edges
– ✅ Flush warm water and check flow
| Task | What to do | Look for |
|---|---|---|
| Remove cover | Lift/snap/unscrew only if it’s meant to come off | Cover comes out without bending |
| Hair/debris | Pull out strands before scrubbing | Fewer tangles and loose clumps |
| Scrub | Use soft brush/toothbrush | No visible soap scum |
| Rinse | Rinse until runoff is clear | Water drains normally |
| Prevent buildup | Wipe rim/edges after cleaning | Less grime returning quickly |
Frequently Asked Questions
What’s the best way to clean a bathroom drain cover without damaging it?
Start by removing hair and visible debris with gloves or a small brush so you don’t grind grime deeper into the drain. Soak the drain cover in warm water with dish soap for 10–20 minutes, then scrub with a non-scratch brush. Avoid abrasive pads on chrome or plated finishes, and don’t use harsh chemicals unless the cover is rated for them. Rinse thoroughly and reinstall once fully dry.
How do I clean hair and gunk from a pop-up or slotted bathroom drain cover?
Lift the pop-up stopper (if your drain has one) or remove the slotted cover, then use tweezers or a drain cleaning tool to pull out hair clumps. Next, soak the cover in warm, soapy water and scrub between the openings with an old toothbrush to remove soap scum and buildup. For stubborn residue, pour boiling water carefully (if your pipes allow it) or use a mixture of baking soda and vinegar to loosen grime, then rinse well.
Why does my bathroom drain cover look dirty even after regular cleaning?
Soap scum, toothpaste residue, and fine hair particles can build up on the edges and underside of the drain cover, where water doesn’t fully flush them away. If the cover doesn’t get fully removed or scrubbed, residue can remain and cause a dull, grimy appearance. Regularly soaking and scrubbing the drain cover helps remove the film that traps dirt and reduces odor.
Which cleaning products are safe for bathroom drain covers and won’t harm the finish?
For most drain covers, warm water, dish soap, and a non-scratch brush are the safest approach. If you use chemical cleaners, choose bathroom-safe or drain-safe products and follow the label precisely, since some harsh cleaners can pit metal or dull finishes. Avoid mixing cleaners (especially bleach with acids like vinegar), and rinse the cover thoroughly after treatment. If you’re unsure what your cover is made of (stainless steel, chrome, brass), stick to gentle cleaners.
How often should I clean the drain cover on a bathroom sink or shower drain?
Clean the drain cover once every 2–4 weeks for sinks and showers with moderate use, and check for hair weekly if you notice slow drainage or recurring odors. More frequent cleaning may be needed for households with long hair or multiple users to prevent clog-causing buildup. Keeping the cover clean improves water flow, reduces unpleasant smells, and helps prevent future blockages in the bathroom drain.
📅 Last Updated: November 03, 2026 | Topic: How to Clean the Drain Cover on a Bathroom Drain | Content verified for accuracy and freshness.
References
- Drain
- Biofilm
- https://www.cdc.gov/mold/default.htm
- https://www.epa.gov/coronavirus/cleaning-and-disinfecting-your-home
- https://www.cdc.gov/coronavirus/2019-ncov/community/disinfecting-building-facility.html
- https://pubmed.ncbi.nlm.nih.gov/?term=sink+drain+biofilm+disinfectant
- Checking your browser – reCAPTCHA
- https://scholar.google.com/scholar?q=cleaning+sink+drain+strainer+how+to Google Scholar
- https://scholar.google.com/scholar?q=shower+drain+biofilm+cleaning+disinfection Google Scholar
- https://scholar.google.com/scholar?q=bathroom+drain+cover+cleaning+mold+prevention Google Scholar
