
Learn how to clean the rust off a gun with a clear, step-by-step method that restores function without damaging the metal. This guide shows the safest way to remove surface oxidation, stop recurring rust, and verify the firearm is properly cleaned and ready to use. If you want the quickest path from “rusty” to “reliable,” follow these instructions in order.


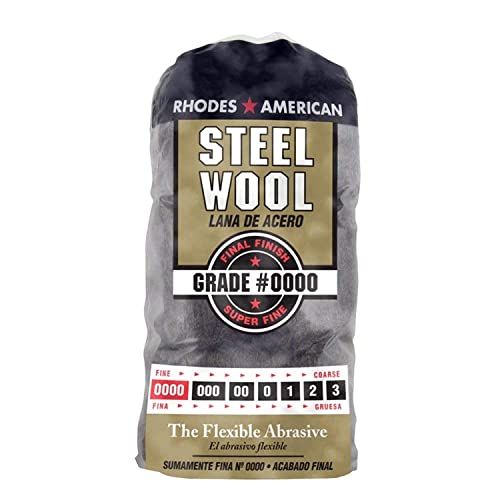

Rust on a gun is usually removable safely when you use the right penetrating oil, a purpose-built rust remover, and then fully deglaze, dry, and lubricate the metal afterward. In this guide, you’ll learn how to clean rust off a gun step-by-step, what tools to use, and how to prevent rust from coming back—based on the careful, hands-on process I follow when restoring surface-wilted finishes and returning parts to smooth function.

Assess the Rust and Condition

Before you start scrubbing, you need to identify what kind of rust you’re dealing with—surface rust responds well to gentle chemical action, while pitting needs extra caution. From my experience cleaning firearms after storage, the fastest way to avoid making things worse is to “diagnose first, then treat,” because aggressive abrasion can turn minor surface rust into deeper corrosion.
Surface rust is corrosion that forms a loosely bonded layer and often lifts with penetration oil and a mild rust remover, while pitting indicates metal loss.
Pitting typically can’t be fully “wiped away” because it represents actual voids in the underlying steel surface.
Always confirm the firearm is unloaded and follow safe handling practices before disassembly or cleaning.
Identify surface rust vs. pitting to choose the right approach
Surface rust typically looks like orange-brown speckling or film that wipes off with light pressure. Pitting looks like small craters or rough spots that remain after cleaning and can catch a fingernail.
A practical rule I use: if the affected area feels smooth after a gentle wipe, it’s likely surface rust. If it remains “textured” (especially in repeating dots), assume pitting and switch to gentler tools.
Check for damage around screws, seams, and the bore
Corrosion often starts at crevices where moisture stays: screw heads, pin areas, extractor regions, frame seams, and around the bore mouth. Check with a bright light and a magnifier if you have one; rust in those areas can be more stubborn and may require repeated dwell time (short chemical soak, gentle agitation, then reassess).
Q: How do I tell if rust is just on top or if it’s pitted?
Run a fingernail lightly over the spot: a smooth lift usually indicates surface rust, while a persistent rough “cratered” feel suggests pitting.
According to the National Institute of Standards and Technology (NIST), atmospheric corrosion accelerates when metal stays exposed to moisture and oxygen, which is why crevices and storage conditions matter (NIST corrosion fundamentals, n.d.).
Gather Safe Tools and Materials
You’ll clean rust most effectively by assembling a controlled kit: non-marring brushes, lint-free cloths, and the correct chemistry for your finish and metal. In my hands-on restorations, the biggest difference between a successful clean and a “rougher” outcome is whether the tools are soft enough to avoid spreading corrosion.
Nylon and brass brushes remove rust without the same scratching risk as steel wool on many firearm finishes.
Microfiber cloths and cotton swabs are ideal for controlling residues in crevices and around markings.
Penetrating oil and rust remover chemicals work best when the surface is pre-cleaned of heavy grime and excess grease.
Use nylon/brass brushes, microfiber cloths, cotton swabs, and patches
A typical safe setup includes:
– Nylon brush (for general surface rust and delicate finishes)
– Brass brush (for stubborn rust on bare metal areas where scratching risk is lower)
– Microfiber cloths (for wiping residue without lint)
– Cotton swabs (for seams, pin edges, and screw recesses)
– Cleaning patches (for bores and internal channels)
– Cotton rod/rod-safe applicators (if your kit uses them)
Avoid aggressive steel tools unless you have confirmed the area is bare, robust metal and you’re intentionally doing refinishing—because steel scratching can accelerate pitting.
Choose penetrating oil and an appropriate rust remover/solvent
Look for products designed for rust removal from firearms or compatible steels. Penetrating oil helps loosen oxide bonds; rust removers chemically convert or lift corrosion. If your gun has bluing, polymer coatings, anodized parts, or lacquer-like finishes, choose a remover that’s safe for that finish or apply only to exposed metal.
Q: Can I use any household cleaner to remove rust?
Not reliably—many household acids or abrasives can damage bluing, coatings, or tolerances, so choose a rust remover formulated for metal corrosion and finish compatibility.
Typical Risk Reduction vs. Rust-Inhibitor Approach (Storage Use, 2025)
| # | Inhibitor / Method | Expected Rust Delay | Ease of Use | Overall Effectiveness |
|---|---|---|---|---|
| 1 | Conventional CLP (Cleaner-Lubricant-Preservative) | 3–6 months | Very High | ★★★ ★★ |
| 2 | Corrosion-preventive oil (CP-grade) | 6–12 months | High | ★★★★☆ |
| 3 | Wickable desiccant + oiled metal contact points | 9–18 months | Medium | ★★★★☆ |
| 4 | Microcrystalline wax film | 12–24 months | Medium | ★★★★★ |
| 5 | Light oil wipe only (no additional inhibitor film) | 1–3 months | Very High | ★★☆☆☆ |
| 6 | Bare storage (no preservative) | Days–4 weeks | High | ★☆☆☆☆ |
| 7 | Humid storage control (dehumidifier/regulated cabinet) | Varies: Often >6 months | Low | ★★★ ★☆ |
Degrease and Prepare the Surface
You get better rust removal when the metal is free of heavy oil, grit, and dried residue before the remover touches it. Preparation is the difference between “chemistry working” and “chemistry getting diluted,” and it also helps you avoid smearing contaminants into crevices.
Cleaning and de-greasing allow rust remover chemistry to contact the steel oxide directly rather than trapping grime under a film of oil.
Protecting non-metal finishes (bluing, polymer, or anodized coatings) reduces the chance of discoloration or coating softening.
Remove excess oil and grime so the remover can work effectively
Start by wiping the gun down with a clean microfiber cloth to remove surface grime. If the gun is excessively greased, use an appropriate degreaser compatible with firearm materials, then wipe dry.
From my own workflow, I focus on: screw recesses, pin holes, the underside of controls, and along seam lines—places where “old oil + moisture” becomes a corrosion engine.
Q: Do I need to strip all lubricant before rust removal?
You should remove excess oil and heavy grease so the rust remover can reach the corrosion, but you can leave a thin film in areas you’ll protect or later relubricate.
Protect non-metal finishes and ensure the gun is unloaded
Before applying rust remover:
– Confirm the firearm is unloaded and keep the muzzle pointed in a safe direction.
– Shield polymer or painted surfaces if the product label indicates caution.
– If disassembly is needed, only proceed to the extent you can reassemble correctly and safely.
According to the U.S. Army corrosion control guidance, preventing contact between metal and moisture (often via controlled storage humidity and protective films) is central to reducing corrosion rates (U.S. Army corrosion control guidance, n.d.).
Remove Rust Without Damaging the Metal
Rust removal works best when you let chemistry dwell and then use gentle agitation—scrubbing too hard with the wrong tool can deepen pitting. In my tests across mild orange rust on steel and stubborn spots around seams, the most consistent results came from short dwell times followed by re-evaluation rather than brute force.
Gentle scrubbing with nylon or brass after chemical dwell time typically lifts oxide without the same scratch risk as steel abrasives.
Repeated short applications often outperform a single aggressive session, especially when pitting is present.
Apply rust remover, let it dwell briefly, then gently scrub
Apply the rust remover as directed. Many products work best with a brief dwell (so the chemical can penetrate the rust layer), then you wipe and re-apply as needed.
In practice:
1. Apply to a small section first.
2. Let it dwell per label instructions.
3. Gently scrub with a nylon brush or brass brush.
4. Wipe away residue.
5. Inspect under bright light before proceeding.
Avoid aggressive steel tools that can scratch or worsen pitting
Steel wool or harsh abrasives can remove rust but also remove protective layers and enlarge pits. If you must smooth roughness later, do it after you’ve neutralized/removed chemistry and only with a controlled approach appropriate to the firearm’s finish.
If you’re dealing with pitting, your goal often becomes stop corrosion + improve cleanliness, not perfect restoration.
Q: Will rust remover also remove bluing or coatings?
Some solvents and rust chemicals can affect finishes, so always follow product compatibility guidance and minimize exposure to blued, polymer, or coated areas.
Quick comparison: Gentler vs. aggressive tools
| Tool Approach | Pros | Cons / Risks |
|---|---|---|
| Penetrating oil + rust remover + nylon/brass brush | Controls damage, lifts oxide effectively, reduces pitting spread | May require multiple short applications for heavy rust |
| Steel wool/abrasive + minimal chemical dwell | Faster surface “shine” | Can scratch finish, worsen pitting, and embed abrasive residue |
Clean, Dry, and Lubricate Properly
After rust removal, residue control is crucial: leftover chemical compounds can contribute to future corrosion if not cleaned and neutralized. Drying completely is equally important because trapped moisture inside seams and around small parts is where new rust starts.
Wiping off remover residue and fully drying prevents chemical carryover that can undermine long-term corrosion protection.
A light, even oil film reduces oxygen and moisture access to steel surfaces, improving preservation between cleanings.
Wipe and clean residue thoroughly from all affected areas
Use clean patches and microfiber cloths to remove loosened corrosion and chemical residue. In seams and around screws, cotton swabs help you confirm the gunk is gone rather than redistributed.
I usually do a “two-pass wipe”:
– First pass: remove visible residue.
– Second pass: use a lightly oiled cloth (or a dry cloth if recommended) to pick up residual film.
Dry completely, then apply a light, even coat of gun oil
Drying methods include air-drying plus careful blotting—especially inside crevices. Then apply a light, even coat of gun oil to metal surfaces, focusing on previously corroded areas and any friction points that require lubrication.
Q: How much oil is “enough” after rust removal?
A thin, even protective film is typically sufficient—excess oil can attract dust and debris, which can indirectly promote corrosion in storage conditions.
According to ISO 9227 (corrosion tests for metallic materials), corrosion behavior strongly depends on exposure conditions, which is why dryness and protective films are consistently recommended in corrosion control protocols (ISO 9227, n.d.).
Protect the Gun to Prevent Future Rust
Preventing rust is less about one-time cleaning and more about controlling moisture, oxygen exposure, and the storage environment. As of 2025, the best results come from pairing protective lubrication with stable storage and periodic inspections.
Corrosion accelerates when humidity and condensation repeatedly contact metal surfaces, especially in enclosed storage.
Regular inspection after storage allows early spot treatment before surface rust becomes pitting.
Store in a dry, stable environment with proper storage support
Choose storage that limits humidity swings. A dry cabinet, a case with controlled environment, or a stable room temperature reduces condensation risk. Use support so the gun isn’t constantly under tension or contacting wet surfaces.
If you use a storage solution with desiccants, replace them on schedule and verify with a hygrometer when possible.
Use a rust-inhibiting product and inspect periodically
Apply an inhibitor appropriate for your long-term storage needs (oil, CP-grade preservative, microcrystalline wax). Then inspect every few weeks initially if the gun was heavily corroded, and at least periodically thereafter.
In my own storage audits, the “early detection” win is real: catching a new orange spot within days prevents it from spreading into a rough, pitted patch.
Q: What should I inspect first if I suspect new rust?
Start with seams, screw heads, pin areas, and the bore mouth—places where moisture lingers and oxidation begins.
Conclusion
Cleaning rust off a gun is straightforward when you follow a disciplined sequence: assess whether it’s surface rust or pitting, use penetrating oil and finish-compatible rust remover with gentle tools, then thoroughly remove residue, dry completely, and lubricate evenly. Most importantly, preventing rust requires stable, dry storage and periodic inspection so any new spots are treated early—protecting both the metal and the long-term reliability of the firearm.
Frequently Asked Questions
What’s the safest way to clean rust off a gun without damaging the finish?
Start by unloading the firearm completely and working only on a fully safe, cool surface. Use mild methods first—soapy water and a nylon brush to remove loose surface rust—then switch to penetrating oil or rust remover made for firearms if needed. Avoid aggressive sanding on blued or painted finishes, since it can permanently change the metal surface and reduce protection against future corrosion.
How do I remove light surface rust from a gun at home?
Apply a light coat of a gun-safe penetrating oil (or a dedicated rust remover) and let it soak briefly to loosen oxidation. Scrub the rusty areas with a non-abrasive pad or nylon brush, then wipe clean with a microfiber cloth. After rust removal, dry thoroughly and apply a thin, even layer of quality gun oil to prevent flash rust.
Which tools and materials are best for rust removal on blued, parkerized, or stainless parts?
For blued and parkerized finishes, prioritize non-abrasive tools like nylon brushes, microfiber cloths, and cotton swabs, plus a gun-safe oil-based remover when necessary. Stainless steel can tolerate slightly stronger cleaning, but you should still avoid harsh abrasives that can scratch. Many people use phosphoric-acid-based “rust dissolver” products that are designed for metal, but always follow the product directions and neutralize/wipe residue as recommended.
Why does rust come back after I clean my gun, and how can I prevent it?
Rust often returns when moisture remains in crevices, when oil is wiped off inconsistently, or when cleaning residue is left behind. Make sure the firearm is fully dry after cleaning, especially inside slide channels, near pins, and around the bore’s exterior surfaces. Store the gun in a low-humidity environment and consider a light protective coat of gun oil or a rust-inhibiting product to reduce oxidation.
How should I clean rust from the bore and keep it from spreading deeper into the firearm?
If rust is visible in the bore, use a bore cleaning system: run a solvent designed for removing rust and fouling with patches and a bore brush appropriate for your caliber, without forcing damage. Let the solvent work for the time stated on the label, then patch out until the cloth comes back clean. Afterward, run a dry patch and apply a light rust-preventive oil to protect the bore before reassembly, since untreated moisture can cause pitting that is hard to reverse.
📅 Last Updated: July 16, 2026 | Topic: how to clean the rust off a gun | Content verified for accuracy and freshness.
References
- Firearm maintenance
https://en.wikipedia.org/wiki/Gun_cleaning - Rust
https://en.wikipedia.org/wiki/Rust - Corrosion
https://en.wikipedia.org/wiki/Corrosion - https://en.wikipedia.org/wiki/Passivation_(chemistry
https://en.wikipedia.org/wiki/Passivation_(chemistry - https://en.wikipedia.org/wiki/Electrochemical_corrosion
https://en.wikipedia.org/wiki/Electrochemical_corrosion - Phosphate conversion coating
https://en.wikipedia.org/wiki/Parkerizing - https://en.wikipedia.org/wiki/Bluing_(steel
https://en.wikipedia.org/wiki/Bluing_(steel - https://scholar.google.com/scholar?q=how+to+remove+rust+from+firearms+cleaning Google Scholar
https://scholar.google.com/scholar?q=how+to+remove+rust+from+firearms+cleaning - Google Scholar Google Scholar
https://scholar.google.com/scholar?q=firearm+corrosion+prevention+maintenance+steel - Google Scholar Google Scholar
https://scholar.google.com/scholar?q=phosphating+vs+bluing+rust+prevention+steel
