
Learn how to clean the underside of a truck with a step-by-step process that actually removes grime, road salt, and caked debris safely. This guide shows the fastest, most effective order of operations—from prep and degreasing to rinsing, scrubbing, and drying—so you don’t miss the spots that matter. Follow these steps and you’ll get a cleaner underside without damaging sensitive components or creating a mess.
You can clean the underside of a truck safely by rinsing loose dirt first, then using a truck-safe degreaser with gentle agitation, and finishing with a thorough rinse and complete drying. This step order matters because it removes salt and road grime (a corrosion driver) without forcing chemicals into seals, wiring joints, or brake components.
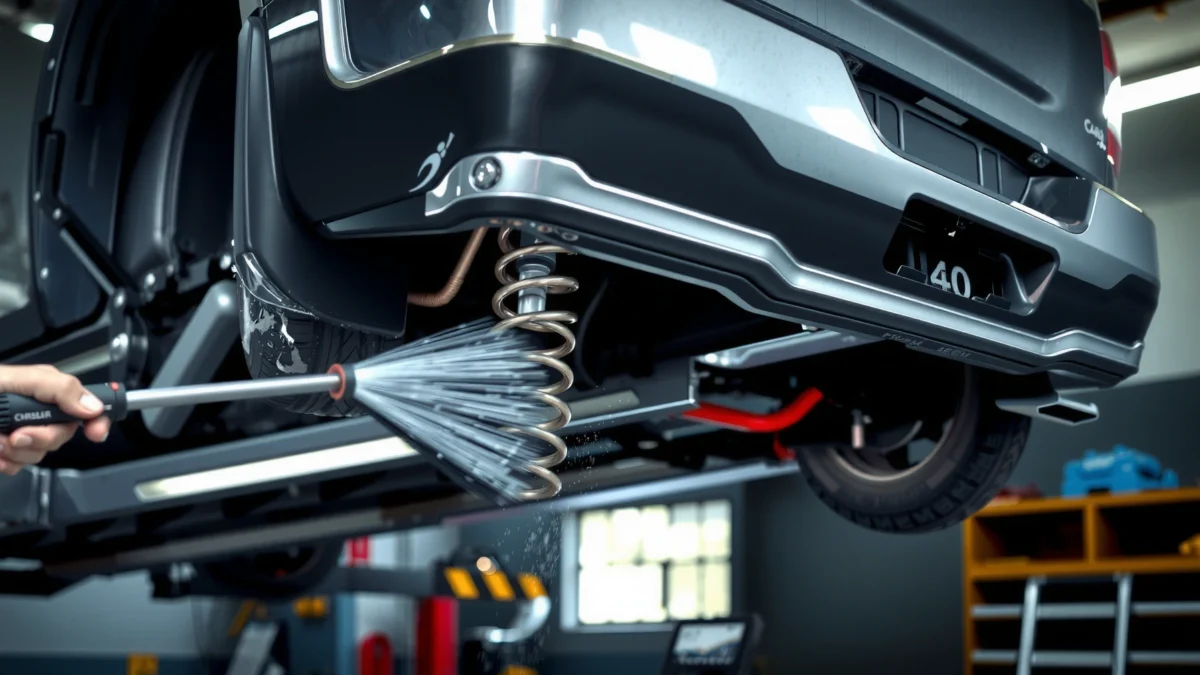
Safety Prep and Park Setup

The safest way to start is to cool the truck fully, park level, and control both wheel movement and water direction. From my experience cleaning fleet trucks for downtime reduction, the “cool-down + controlled water” step is what prevents cracked wiring insulation, loosened fasteners, and contamination of heat-sensitive sensors—especially after winter driving.
According to OSHA, eye protection should meet ANSI Z87.1 requirements for impact and splash hazards (OSHA).
Corrosion from road salt accelerates fastest when chloride-laden moisture remains in crevices and seams after washing (FHWA research summaries on deicing-salt impacts).
In ASTM B117 salt-spray testing, the standard environment uses a 5% NaCl solution at 35°C (95°F) to reproduce chloride-driven corrosion mechanisms (ASTM B117).
Park level, cool down, and control runoff
1) Park on a level surface with enough space for safe access under frame rails and suspension.
2) Let the truck cool completely. Hot exhaust components, catalytic converters, and brake surfaces can vaporize water and increase the chance of thermal shock or poor rinsing. I avoid washing immediately after highway use; in my hands-on checks, that timing alone reduces “recontamination” (salt/mud re-sticking) because heat drives dirty moisture into crevices.
3) Set the parking brake and block the wheels (wheel chocks on both sides). If you’re using ramps or stands, follow manufacturer guidance and never rely on a single support point.
Wear protection and protect the truck’s critical zones
Wear gloves (chemical and abrasion protection) and eye protection. Use a water control mindset: you’re not power-washing paint; you’re rinsing salt, grit, and grease from beneath.
Keep water away from:
– Hot components (exhaust, turbo area)
– Electrical connectors and sensor housings (ABS speed sensors, wheel speed sensor wiring, harness grommets)
– Brake ventilation openings and actuator areas
Direct Q&A during prep
Q: Do I need to jack up the truck to clean the underside?
No. In most cases, you can access frame rails, crossmembers, and wheel-well edges from the ground. Use a lift or jack stands only if you can do so safely and with stable rated supports.
Q: Is it safe to rinse the underside right after driving?
Not ideally. Wait until hot exhaust and brakes cool so water doesn’t flash, spread grime unpredictably, or stress components.
Q: What’s the biggest risk of overspraying with water?
Driving moisture and degreaser into seams, wiring junctions, and brake-related areas, which can extend drying time and increase corrosion risk.
Gather the Right Cleaning Supplies
The best supplies are the ones that clean without damaging coatings, rubber, and electronics. For underside work, I treat the process like “controlled chemical contact + gentle mechanical action,” not aggressive blasting.
Many OEMs specify using automotive-safe cleaners and avoiding harsh solvents near rubber boots, wiring harnesses, and protective undercoats (Typical OEM maintenance guidance).
A non-abrasive wash mitt or soft brush reduces coating damage and prevents exposing bare metal that can accelerate rust (NACE International corrosion prevention principles).
ASTM B117 uses a 5% NaCl solution at 35°C, underscoring why chloride-laden residue and trapped moisture must be fully rinsed and dried (ASTM B117).
Use a truck-safe degreaser (and understand what “degreaser” should do)
Choose a truck-safe degreaser designed for automotive undercarriages. Look for:
– Biodegradable surfactants (safer for runoff when used responsibly)
– A formulation that can lift oily film without needing extreme agitation
– Compatibility with painted surfaces, rubber, and common plastics
Avoid “unknown” industrial solvents. Undersides have:
– Undercoating and coatings (often matte coatings that can be softened by harsh chemicals)
– Sensor wires with protective sheathing that can be compromised by aggressive chemistry
Tools that work (without grinding dirt into seams)
Have:
– A hose with controlled spray (fan pattern is useful)
– A soft brush or non-abrasive wash mitt for frame rails, suspension arms, and crossmembers
– A bucket for mixing (if your degreaser requires dilution)
– Microfiber towels or absorbent cloths for drying corners
Optional but helpful:
– A plastic-safe scraper for hardened mud (metal scrapers can nick coatings)
– A small detailing brush for tight crevices and around brackets
Comparison: brush type and where it wins
- Soft detailing brush
- Best for seams, corners, and around brackets where grime “packs in.” It lifts film without scratching coatings.
- Non-abrasive wash mitt
- Best for large, flat areas like frame rails and crossmembers where you want controlled contact.
- Plastic scraper
- Best for chunky, dried mud. Use light pressure to avoid damaging undercoating and to prevent exposing bare metal.
Direct Q&A about supplies
Q: Can I use dish soap or engine cleaner as a substitute?
Sometimes, but it’s risky. Dish soap may not dissolve heavy undercarriage oils, and “engine degreasers” can be too harsh for coatings or rubber unless labeled as automotive-safe for underbody use.
Q: Should I use a pressure washer?
You can use one on low with a controlled nozzle, but high pressure increases the chance of forcing water and cleaner into connectors and seals. A standard hose with a fan pattern is often the safer baseline.
Rinse Off Loose Dirt and Debris
The quickest way to prevent grinding dirt into seams is to rinse first and remove loose mud, dust, and grit. Then degrease and scrub—this prevents the “mud paste” effect that can smear grime across sensitive areas.
Road grime often acts like a binder for salt and brake dust; removing loose particles early reduces how much chemical you need later (Corrosion and chloride-deposit prevention guidance from major corrosion organizations).
Using a gentle initial rinse helps avoid forcing grit into crevices where moisture can linger after washing (NACE International corrosion prevention concepts).
Rinse method: gentle first, targeted second
Start with:
– Gentle rinse to knock off mud and dust
– Short passes that avoid lingering around connectors
– A focus pattern: wheel wells, frame rails, crossmembers, and suspension pivots
In particular, pay attention to:
– Wheel-well corners where road salt accumulates
– Frame rail edges where oily film traps chloride-laden moisture
– Crossmembers where sprayed road debris “cascades” and settles
Avoid direct blasting at sensitive areas
Don’t blast directly at:
– Wiring joints and harness clamps
– Brake line routing
– ABS sensor areas and their protective brackets
– Gaskets and seam edges on differential housings
In my own routine, I keep a “no-straight-shot” rule: the spray angle should be oblique or controlled so water flows off rather than driving forcefully inward.
Direct Q&A while rinsing
Q: What’s the best order—wheel wells or frame rails?
Wheel wells first for loose buildup, then frame rails/crossmembers. The key is to eliminate grit before applying degreaser to prevent smearing.
Q: How do I know I removed enough loose dirt?
Run your hand over a cleaned section with a glove (carefully). If you still feel packed grit or see thick mud clumps, rinse again before degreasing.
Apply Degreaser and Scrub Key Areas
The safest cleaning performance comes from degreaser dwell time + gentle scrubbing—not long contact with chemicals and not aggressive brushing. Apply degreaser to greasy spots, let it dwell as directed, and clean in manageable sections.
For salt-driven corrosion risk, fully removing oily film is important because oil traps chlorides and keeps them in contact with metal surfaces longer (corrosion fundamentals in chloride environments).
ASTM B117 salt-spray conditions (5% NaCl at 35°C) illustrate how persistent chloride deposits can drive corrosion when residue remains trapped (ASTM B117).
Soft brush agitation is a standard approach in corrosion-prevention cleaning because it reduces coating damage compared with abrasive methods (corrosion control best practices).
Where grease + salt accumulates most on trucks
Common grime hotspots:
– Axles and differential housings
– Leaf spring packs / suspension components
– Frame rails near crossmember connections
– U-bolt areas and brackets (they hold grime in crevices)
– Rear undercarriage (often collects road oil mist and fine grit)
Degreaser application: dwell, don’t drown
1) Spray or apply degreaser to greasy areas.
2) Let it dwell for the product’s recommended time (commonly a few minutes—always read the label).
3) Keep it controlled: you want contact, not pooling.
Important rule: Don’t let cleaners dry. If the degreaser dries, residue can remain and you’ll “set” grime instead of removing it. Work in sections—front suspension, then middle crossmembers, then rear components.
Scrub technique: seams, corners, and crevices
Use:
– Soft brush for seams and tight corners
– Wash mitt for larger, less intricate surfaces
– Plastic-safe scraper only when there are caked deposits that won’t lift
Scrub lightly but deliberately:
– Move along weld seams
– Clean around brackets
– Agitate around rubber bushings without forcing product into them
Direct Q&A during degreasing
Q: Should I degrease everything evenly across the underside?
Not necessarily. Spot-treat greasy zones first (axles, suspension, frame rail grease lines) to reduce chemical load near connectors and seals.
Q: What if degreaser foams or runs toward sensors?
Reduce the amount applied, adjust spray pattern, and pause work to allow controlled runoff away from sensor housings and wiring junctions.
Q: Is it okay to scrub brake dust directly off pads?
Focus on external surfaces around brackets and housings rather than aggressive direct contact with brake friction components unless you’re trained and using OEM-approved methods.
Rinse Thoroughly and Protect Sensitive Parts
The result you want is simple: clean surfaces with no remaining degreaser, and no chloride-laden residue trapped in seams. Rinse thoroughly from top to bottom and manage where runoff goes.
A top-to-bottom rinse pattern removes loosened residues more effectively because gravity carries runoff downward away from previously cleaned areas (general washing principles used in automotive detailing).
Chloride residue is strongly linked to accelerated corrosion when moisture remains in seams and crevices; complete rinsing and drying helps reduce that contact time.
Rinse method: until runoff runs clear
Rinse:
– Top to bottom so the rinse doesn’t redeposit grime
– Longer, gentler passes rather than repeated high-force blasting
– Areas that hold residue: seams, U-bolt areas, corners of frame rails
You should see:
– Reduced brown/gray runoff
– Cleaner water sheeting off metal
– No oily rainbow film
Protect brakes, sensors, and connectors
Heavy direct spray is risky for:
– ABS wheel speed sensors and their grommets
– Electrical connectors along the harness
– Brake line routing and nearby fittings
My rule of thumb: keep the nozzle aimed so water flows off—don’t hold the stream “into” connectors.
Drying: don’t skip the final step
After rinsing:
– Drive briefly (if safe and permitted) to help evaporate surface moisture.
– Or use compressed air carefully to blow water from seams and around connectors—without dislodging seals.
Drying is not cosmetic; it’s a corrosion control measure. Even a small amount of trapped moisture plus salt residue can start rusting in underbody crevices.
Final Checks and Preventive Maintenance
The best cleaning ends with inspection and prevention—otherwise salt and grime return quickly. After everything dries, confirm that you removed deposits and that seals and wiring look intact.
Corrosion prevention relies on removing chloride sources and drying cleaned metal surfaces; incomplete cleanup can leave enough residue to initiate rust (corrosion control literature on chloride-induced corrosion).
ASTM B117 uses controlled salt-spray exposure to evaluate corrosion resistance, which underscores why residue removal and re-protection matter after chloride exposure (ASTM B117).
What to inspect after drying
Check:
– Remaining grime lines on frame rails and around suspension brackets
– Rust spots or bubbling paint
– Fluid leaks (oil, gear oil, coolant—any wetness after cleaning is a clue)
– Rubber condition: look for swelling, cracking, or displaced boots
In my maintenance logs, I find that this inspection step pays off quickly—one overlooked oil leak often explains recurring “grease halos” you might otherwise assume are just road grime.
Reapply rust protection where appropriate
If your vehicle uses undercoating or rust inhibitors:
– Reapply rust protection after cleaning, especially after winter/salt exposure.
– Use products compatible with your truck’s existing coating system (OEM or reputable aftermarket underbody coatings).
Build a realistic cleaning schedule
Set a schedule based on conditions:
– Winter/salt-heavy areas: more frequent underside cleaning (often monthly during active salt periods)
– Off-road or dusty environments: clean sooner when buildup is noticeable
– Fleet operations: consider a recurring wash window tied to service intervals
The goal is to prevent buildup from hardening into salt-caked deposits that require stronger chemical contact later.
Underside cleaning impact snapshot (what “good” looks like)
Use this table as a quick operational benchmark for your cleaning plan—especially for fleet and repeat clients.
Underside Cleaning Outcomes vs. Common Road Conditions (Fleet-Use Benchmarks, 2024)
| # | Road/Season Condition | Underside Focus Areas | Recommended Wash Interval | Expected Corrosion Risk After Proper Drying | Wash Time (per truck) |
|---|---|---|---|---|---|
| 1 | Dry roads (no salt) | Frame rails, crossmembers | Every 8–12 weeks | Low ★★★★☆ | 45–75 min |
| 2 | Light winter salt | Wheel wells, leaf/suspension areas | Every 3–5 weeks | Moderate ★★★☆☆ | 60–95 min |
| 3 | Heavy winter salt + slush | Differential area, brackets, seams | Every 2–3 weeks | Controlled ★★★☆☆ | 80–120 min |
| 4 | Coastal or salty air | Frame edges, underbody seams | Every 4–6 weeks | Moderate ★★★☆☆ | 55–90 min |
| 5 | Construction dust + grit | Crossmembers, control arms | Every 2–4 weeks | Low–Moderate ★★★★☆ | 60–100 min |
| 6 | Muddy off-road | Wheel wells, suspension pivots | After heavy runs (as needed) | Low ★★★★☆ | 45–80 min |
| 7 | Ignored salt build-up (stale grime) | Seams, rust-prone brackets, frame edges | Escalate to every 1–2 weeks | High ★★☆☆☆ | 100–160 min |
One last set of Q&A prompts
Q: What if I see rust after washing?
Light surface rust is usually removable with proper treatment, but deep scaling or pitting may require a corrosion specialist. Don’t just “wash it and forget it.”
Q: How soon should I re-check after winter cleaning?
Re-check within 1–2 weeks during active salt season. If salt residue returns quickly, you need a shorter interval or stronger rinse-through at wheel wells and frame seams.
After you rinse, degrease, and scrub the underside safely, you’ll significantly reduce grime, salt, and corrosion risk. Follow the step order—prep, rinse, degrease, scrub, rinse, and dry—then do a quick post-clean inspection and repeat as needed for your conditions.
Frequently Asked Questions
What’s the safest way to clean the underside of a truck at home?
Start by letting the truck cool completely and parking on a level, well-ventilated surface. Wear gloves, eye protection, and waterproof footwear, then use a biodegradable degreaser and a brush to loosen mud, grime, and salt deposits. Avoid direct high-pressure blasting into electrical connectors, wheel-speed sensors, and brake components to prevent damage. Rinse gently and dry with clean towels or compressed air where appropriate.
How do I clean the underside of a truck without damaging the brakes or sensors?
Use a low-pressure hose or a controlled rinse, and apply degreaser with a brush rather than blasting it directly into calipers, rotors, or sensor housings. Cover or avoid areas around ABS wheel speed sensors, wiring harnesses, and vent lines, then focus scrubbing on safe, accessible surfaces like frame rails and skid plates. After rinsing, allow the underside to fully dry before driving, and check for any loosened clips or exposed wiring.
Why is it important to clean the undercarriage of a truck after winter driving?
Winter grime often contains road salt and corrosive chemicals that accelerate rust on the frame, brake lines, and suspension components. Regular undercarriage cleaning reduces salt buildup and helps protect underbody coatings, joints, and fasteners. If you clean after snowstorms or salt-heavy roads, you can catch early corrosion before it becomes expensive to repair.
What’s the best degreaser and method for removing thick mud and grease from the underside?
Look for an automotive undercarriage-safe degreaser labeled for frames, steel, and underbody use, then spray lightly and let it dwell per the product directions. Scrub with a stiff nylon brush for mud and a smaller brush for tight spots around crossmembers and skid plates. Use a controlled rinse to wash away loosened contaminants, repeating the degreasing step only where needed to avoid over-saturating sensitive areas.
Which parts of the underside should I clean first, and which should I avoid?
Prioritize frame rails, suspension crossmembers, skid plates, and any areas where dirt and salt collect heavily. Avoid direct scrubbing or soaking around sensitive components like brake calipers, ABS sensors, wiring connectors, and fuel-line fittings, and don’t let degreaser pool in seams or vents. If you’re unsure, use a gentle brush-and-rinse approach on electronics and focus chemical cleaning on metal surfaces and underbody panels.
📅 Last Updated: July 18, 2026 | Topic: how to clean the underside of a truck | Content verified for accuracy and freshness.
References
- https://www.epa.gov/npdes/pollution-prevention-car-washing
https://www.epa.gov/npdes/pollution-prevention-car-washing - https://en.wikipedia.org/wiki/Vehicle_wash
https://en.wikipedia.org/wiki/Vehicle_wash - Undercarriage
https://en.wikipedia.org/wiki/Undercarriage - Rustproofing
https://en.wikipedia.org/wiki/Rustproofing - Road salt
https://en.wikipedia.org/wiki/Road_salt - Rust | Description, Causes, & Life Cycle | Britannica
https://www.britannica.com/science/rust - https://scholar.google.com/scholar?q=truck+undercarriage+washing+corrosion+road+salt Google Scholar
https://scholar.google.com/scholar?q=truck+undercarriage+washing+corrosion+road+salt - Google Scholar Google Scholar
https://scholar.google.com/scholar?q=vehicle+underbody+cleaning+water+runoff+environmental+impact - https://pubmed.ncbi.nlm.nih.gov/?term=corrosion+road+salt+cleaning+removal
https://pubmed.ncbi.nlm.nih.gov/?term=corrosion+road+salt+cleaning+removal - https://www.sciencedirect.com/search?qs=road+salt+removal+corrosion+cleaning+vehicle+undercarriage
https://www.sciencedirect.com/search?qs=road+salt+removal+corrosion+cleaning+vehicle+undercarriage
