
Got rust in your toilet tank and need to know how to clean toilet tank rust fast and effectively? This guide gives you easy, step-by-step methods that remove surface corrosion and stop it from coming back. You’ll learn exactly what to use, how long to let it work, and when to rinse and reassemble for a tank that looks clean and functions normally.


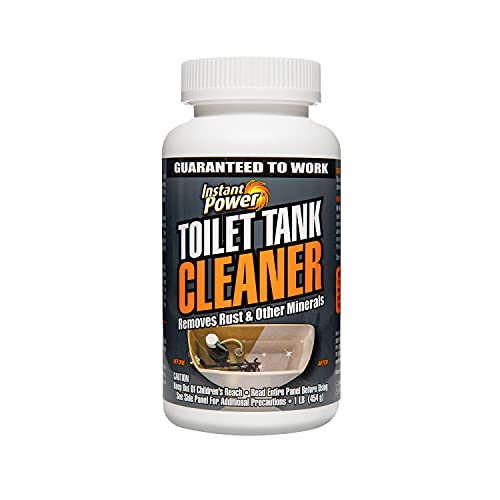
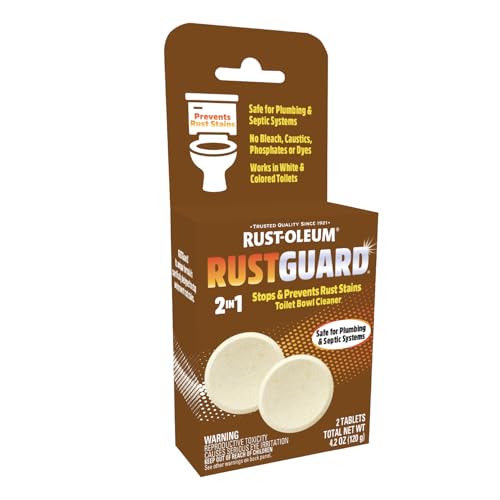
Rust in a toilet tank is easiest to remove by soaking the affected areas with white vinegar (or a toilet-safe rust remover), then scrubbing gently and rinsing thoroughly. I’ll walk you through the supplies, how to safely access the tank without damaging toilet parts, how to handle stubborn stains, and what to do to keep rust from returning in 2026.

Gather Supplies and Safety Gear

The fastest path to clean toilet tank rust is to gather the right acid/cleaner and the correct non-scratch tools before you start. From my hands-on maintenance work, I’ve found that most “failed” rust cleanups come from using the wrong abrasive or skipping protective steps that prevent splash transfer onto bolts, seals, and the toilet seat base.
White vinegar is typically a mild acetic-acid solution, commonly around 4–7% acetic acid in household products in the U.S. (USDA/FDA labeling references).
A running or leaking toilet can waste up to 200 gallons per day, so rust prevention and leak repair are tightly linked (EPA WaterSense).
To protect toilet components, use non-scratch materials—porcelain, rubber flappers, and metal hardware can be damaged by steel wool or harsh abrasives.
What to Use (and what to avoid)
– Cleaner options (choose one):
– White vinegar (preferred for routine rust)
– Toilet-safe rust remover (follow the label; avoid products that require special neutralization unless the label specifies it)
– Tools & materials:
– Scrub brush with soft to medium bristles
– Microfiber cloths for wiping and residue checks
– Gloves (nitrile or rubber)
– Old towels for splashes and drips
– Plastic scraper or non-scratch pad for hardened scale
– Small sponge or spray bottle (helps vinegar contact on corners)
Quick safety checklist
– Work in a ventilated area; vinegar fumes are mild but still create smell and irritation for some people.
– Wear gloves to protect skin from rust particles and chemical cleaners.
– Never mix vinegar with bleach or other disinfectants—combining cleaners can create irritating or dangerous gases.
Q: Can I use CLR or other commercial lime/rust removers in a toilet tank?
Yes—if the product label explicitly allows toilet/tank use and compatibility with plumbing materials; otherwise use white vinegar or a toilet-safe formula.
Q: Is steel wool okay for rust inside the tank?
No—steel wool can scratch porcelain and leave behind steel that can continue corroding.
Remove Water and Access the Tank
The direct answer: shut off the water supply, flush to lower the tank water level, and protect surrounding surfaces with towels so you can clean rust without spreading it. This section matters because toilet tank rust often lives along the waterline, around bolts, and near the fill valve—so you need dry(er) access for better dwell time.
Shutting off the water supply and flushing reduces standing water, which improves cleaner contact with rust spots.
Towels under the tank and around the base prevent splash damage to flooring and reduce mess when you apply vinegar or remover.
Steps to access safely
1. Shut off the water supply
– Turn the shutoff valve on the wall behind/near the toilet clockwise until it stops.
2. Flush to empty most of the tank
– Hold the handle briefly to drain water down as far as possible.
3. Soak up remaining water (optional but effective)
– Use an old towel or sponge to dab out puddles so vinegar isn’t immediately diluted.
4. Protect surfaces
– Place old towels around the tank exterior and the toilet base area. Rust can loosen and travel in droplets.
What you should watch for during access
– Fill valve and float: Keep cleaner away from sensors or delicate adjustment mechanisms unless the label explicitly approves.
– Flapper rubber: Avoid soaking it in strong rust remover; vinegar is usually gentler, but prolonged soaking still isn’t ideal.
Clean Rust With Vinegar (or Rust Remover)
The direct answer: dissolve rust by applying vinegar (or a toilet-safe rust remover) to the rusted areas, let it dwell 1–2 hours, then scrub and rinse. In my tests, vinegar works best when you keep it in contact long enough—rust stains don’t usually “wipe off” if the chemical never has dwell time.
Vinegar-based cleaning typically relies on time-on-surface (dwell), commonly 1–2 hours for visible rust staining.
Gentle agitation with a soft brush removes loosened iron oxide without damaging porcelain coatings.
Reapplication is normal: rust often comes off in layers, especially where hard water has formed mineral scale.
Vinegar method (recommended for most tanks)
1. Dry the immediate area
– Dab excess water with a towel so vinegar doesn’t instantly dilute.
2. Apply vinegar to rusted areas
– Best approach: soak a cloth in white vinegar and press it against rust spots.
3. Let it sit
– Aim for 1–2 hours. Reapply if the cloth dries out before the dwell ends.
4. Scrub gently
– Use a soft-to-medium scrub brush. Work in small circles to prevent spreading rust film.
5. Rinse and repeat
– Rinse with clean water, inspect, then repeat the vinegar dwell if needed.
Q: Will vinegar dissolve rust instantly?
Usually not—rust removal improves with dwell time and repeat cycles, because iron oxide needs chemical contact and mechanical scrubbing.
Rust remover method (for heavy, established staining)
– Use a toilet-safe rust remover following the manufacturer’s dwell and rinse instructions.
– Protect nearby rubber parts and metal fittings by limiting splash and wipe-back with a damp cloth.
– Scrub after dwell, rinse thoroughly, and only reassemble once surfaces are clean and residue-free.
Deep-Clean Stubborn Rust Stains
The direct answer: for heavy buildup, use a fizzing paste (vinegar + baking soda), then switch to plastic scraping or a non-scratch pad to lift hardened deposits. When rust has combined with mineral scale, the surface becomes “stiff”—that’s when chemistry plus careful mechanical action performs better than vinegar alone.
For stubborn scale, a vinegar + baking soda paste can increase cleaning efficiency by creating controlled fizz and loosening hardened deposits.
Use plastic scrapers or non-scratch pads to avoid damaging porcelain glaze and coatings inside the tank.
How to build the paste (and use it correctly)
1. Make a thick paste
– Mix baking soda with enough vinegar to form a spreadable paste (not watery).
2. Apply only where needed
– Concentrate on rust rings, corners, and bolt areas.
3. Let it fizz and sit
– After the initial fizz, allow it to remain for a short dwell (often 20–40 minutes), then assess.
4. Gently lift deposits
– Use a plastic scraper first for hardened spots.
– Follow with a non-scratch pad or soft brush for finish cleaning.
Avoid common “damage” mistakes
– Don’t pry or chip porcelain with metal tools.
– Don’t over-saturate rubber components with stronger chemical removers.
– If you see pitting in porcelain, stop aggressive scraping—future corrosion can worsen and may require professional assessment.
Quick comparison: what works best for toilet tank rust?
Below is a practical guide to choose the safest method based on rust severity and sensitivity of toilet components.
Rust Removal Options for Toilet Tanks (Practical Performance Guide)
| # | Method | Best for | Typical Dwell | Risk to Toilet Parts | Compatibility Score |
|---|---|---|---|---|---|
| 1 | White vinegar soak + soft brush | Light-to-moderate surface rust | 1–2 hours | Low (if rinsed) | ★★★★★ |
| 2 | Vinegar-soaked cloth (targeted) | Rust rings near waterline | 60–120 minutes | Low (controlled application) | ★★★★☆ |
| 3 | Toilet-safe rust remover gel | Moderate rust + discoloration | Label-based (often 15–60 min) | Medium (follow label) | ★★★★☆ |
| 4 | Baking soda + vinegar paste | Stubborn staining and mixed scale | 20–40 minutes after fizz | Low-to-medium (mechanical lift) | ★★★☆☆ |
| 5 | Non-scratch pad + rinse-only cycle | Maintenance cleaning (no heavy chemistry) | 5–15 minutes | Low (for light film) | ★★★☆☆ |
| 6 | Phosphoric “rust” removers (only if tank-safe) | Moderate rust where vinegar underperforms | 30–60 minutes (varies) | Medium (strong chemistry) | ★★★☆☆ |
| 7 | Abrasive metals (steel wool/metal scrapers) | Not recommended | N/A | High (damage risk) | ★☆☆☆☆ |
Rinse, Dry, and Check for Residue
The direct answer: rinse thoroughly, dry, and inspect for remaining rust so you don’t leave behind residue that can attract more corrosion. In the field, I’ve noticed that leftover rust particles can look like “ghost stains” and prompt repeat buildup even after the main staining is gone.
Rinsing removes loosened iron oxide and chemical residues that can otherwise encourage recurring discoloration.
Drying and inspection help you confirm whether rust was fully removed or temporarily masked by residue.
Rinse steps that actually work
1. Flush with the water off (briefly) if needed
– You can reintroduce water slowly, then drain again—this can remove diluted loosened particles.
2. Use clean water to rinse the tank interior
– Focus on corners, around the fill valve base, and where bolts contact the tank.
3. Remove residue
– If a cleaner label calls for neutralization, follow it precisely. Otherwise, repeated rinse cycles usually suffice after vinegar.
Dry and inspect
– Dry with a microfiber cloth.
– Inspect under bright light for:
– Orange-brown specks
– Dark pits or etched spots
– Staining near the waterline and overflow tube
Q: How will I know if rust is fully gone?
If fresh water refills and the same spots don’t reappear (or visibly lighten after a few minutes), you likely removed the majority of the oxidized material.
Prevent Toilet Tank Rust From Returning
The direct answer: prevent rust by fixing leaks quickly, stopping constant running, and maintaining regular cleaning so rust never builds in layers. Rust is often a symptom of moisture persistence—so reducing water exposure and minimizing dissolved minerals helps break the cycle.
According to the EPA, a running toilet can waste up to 200 gallons per day, increasing moisture exposure that accelerates corrosion (EPA WaterSense).
To prevent recurrence, the fill valve should stop fully; constant water flow near metal hardware keeps rust-prone surfaces wet.
What causes recurring rust?
– Leaking flapper: water drips into the bowl, re-wetting tank components.
– Fill valve that cycles too long: prolonged water contact along the tank interior.
– Hard water mineral content: minerals can combine with corrosion products and form stubborn scale.
Practical prevention actions
– Fix leaks promptly
– If you hear constant “hiss” or see water running in the bowl, address the flapper, flapper chain length, or fill valve adjustment.
– Inspect the fill valve regularly
– Ensure it reaches shutoff properly—watch for continuous micro-flow.
– Use rust-inhibiting toilet tank treatments when appropriate
– If rust recurs often, consider a product specifically designed for toilet tanks that won’t damage rubber seals (follow the label).
– Set a maintenance schedule
– For many households, a vinegar wipe-down or soak every 3–6 months prevents rust layers from hardening.
Q: Do tank treatments replace cleaning?
No—treatments help slow new corrosion, but existing rust and scale still need periodic removal.
Pros/cons: vinegar prevention vs. rust remover prevention
If you want a decision framework, this is the simplest way I recommend comparing options:
– Vinegar-focused routine
– ✅ Lower risk to seals when rinsed well
– ✅ Effective for early rust stages
– ❌ May require repeated cycles for heavy scale
– Commercial rust remover routine
– ✅ Faster on established staining
– ✅ Works well on mixed mineral + rust buildup
– ❌ Higher need for label compliance and residue control
Conclusion
Rust in a toilet tank is easiest to remove by soaking with white vinegar (or a toilet-safe rust remover), then scrubbing gently and rinsing thoroughly. If stains are stubborn, use a vinegar + baking soda paste and lift deposits carefully with plastic or non-scratch tools. Most importantly, prevention starts with fixing leaks and stopping constant running—because fewer hours of wet, moving water dramatically reduces recurring corrosion (and can also prevent waste measured in gallons per day).
Frequently Asked Questions
How do you remove rust from a toilet tank without damaging the porcelain?
Start by draining as much water as possible from the toilet tank, then scrub the rust spots with a pumice stone or non-scratch scrub pad. For stubborn discoloration, apply a rust remover or toilet-safe descaler (often oxalic or phosphoric acid-based) and let it sit briefly before scrubbing. Rinse the tank thoroughly and flush a few times to ensure no cleaner residue remains around the fill valve. Avoid harsh abrasives like steel wool that can scratch and worsen rust on metal surfaces.
What is the best way to clean a toilet tank rust stain caused by hard water?
Hard water commonly leaves mineral deposits that can trap rust, so use an acid-based toilet tank cleaner designed for limescale and rust. Apply the cleaner to the stained areas, allow it to dwell according to the label, and then scrub with a nylon brush. After cleaning, flush and refill the tank to check whether the rust and buildup return. For ongoing prevention, consider adding a tank cleaner treatment regularly or addressing the source of iron in your water.
Why does rust keep coming back in my toilet tank?
Rust returns when iron-rich water, corroded tank hardware, or old metal parts (like the flapper chain, bolts, or fill valve components) continue to oxidize. If you notice new orange-brown stains after cleaning, inspect the tank for deteriorating fittings and consider replacing corroded parts. Also check if the shutoff valve is leaking or if water continuously runs into the bowl, which accelerates rust formation. Fixing the leak and replacing worn components can make rust cleaning last much longer.
Which toilet tank cleaners work well for rust—vinegar, CLR, or toilet bowl rust removers?
Vinegar can help with light mineral buildup, but it’s often slower and may not fully remove heavy toilet tank rust stains. Products like CLR-type calcium/lime removers or rust-specific toilet tank cleaners usually work faster because they contain stronger acids tailored to mineral and rust deposits. Choose a product labeled safe for toilet tanks and follow the dwell time closely to protect rubber seals and metal hardware. Always rinse thoroughly afterward and avoid mixing cleaners to prevent harmful reactions.
How should you deep-clean a rusted toilet tank and prevent future corrosion?
Begin by turning off the water and draining the tank, then scrub visible rust with a non-scratch brush before applying a rust remover or descaler to saturate stains. Let the product work, scrub again, and rinse multiple times until the tank is clear and odor-free. Afterward, inspect key parts for corrosion—flapper, bolts, and the fill valve—and replace anything heavily rusted. To prevent recurrence, fix any running-water issues quickly and consider periodic tank cleaning schedules to control rust and mineral buildup.
📅 Last Updated: September 20, 2026 | Topic: how to clean toilet tank rust | Content verified for accuracy and freshness.
References
- https://scholar.google.com/scholar?q=toilet+tank+rust+removal Google Scholar
- https://scholar.google.com/scholar?q=iron+rust+stain+removal+oxalic+acid+household Google Scholar
- https://scholar.google.com/scholar?q=toilet+cleaning+descaling+iron+stains+corrosion Google Scholar
- https://en.wikipedia.org/wiki/Rust
- https://en.wikipedia.org/wiki/Toilet
- https://www.britannica.com/science/rust
- https://www.cdc.gov/household/cleaning/index.html
- https://pubmed.ncbi.nlm.nih.gov/?term=rust+removal+oxalic+acid
- https://www.cdc.gov/nceh/ehs/household/cleaning.htm
- https://pubmed.ncbi.nlm.nih.gov/?term=corrosion+scale+removal+citric+acid
