

Need to clean under the rim of your toilet bowl and want it done fast, without a mess? This guide walks you through the simplest, most effective steps to remove grime, mineral buildup, and odors from the hard-to-reach underside of the toilet rim. Follow these instructions and you’ll get a noticeably cleaner bowl in minutes with common supplies.


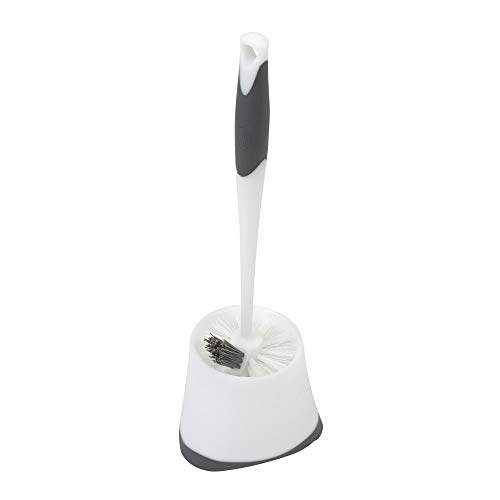

Clean under the toilet bowl rim by applying toilet cleaner to the underside around the rim openings, letting it dwell, scrubbing with a toilet brush, and flushing. This works best for rings of grime or lime-colored buildup—especially where the bowl “washes” itself through the small jet holes under the rim.
This is for anyone seeing a ring of grime or lime-colored buildup under the toilet bowl rim—particularly around the holes where the bowl “washes” itself.
What you’ll need to clean under the rim

You only need a few purpose-fit tools: an acid-based toilet cleaner or descaler (depending on what’s causing the buildup), a firm toilet brush, and light so you can see the rim holes clearly. With the right chemical and a targeted scrub, you can remove both soap scum/staining and mineral scale without damaging the finish.
A toilet brush with firm bristles is the practical choice for scrubbing underside rim surfaces and the rim holes.
Use a descaler when the buildup looks chalky or crusty—mineral scale typically won’t fully dissolve with standard bowl cleaners.
A flashlight (or phone light) helps you clean the rim openings consistently, because residue hides in the underside “shadow” areas.
– Toilet bowl cleaner (standard) and/or a descaler for mineral scale (when you see hard, chalky buildup)
– A toilet brush with firm bristles (optionally a smaller detail brush for tight spots)
– Gloves and good ventilation (and a flashlight or phone light to see the rim holes)
As of 2026, the safest “best practice” is still to follow the product label exactly for contact/dwell time, because cleaners vary widely in strength and how long they need to sit to work. If you’re dealing with hard water, choosing the correct chemistry up front is the difference between a quick clean and repeated scrubbing.
For context, mineral scale is primarily calcium carbonate and other mineral deposits that bond to porcelain over time, which is why descalers usually include acids formulated for bathroom scale removal.
Cleaner Types for Toilet Rim Buildup (What They’re Best At)
| # | Active-ingredient family | Typical target | Best for rim condition | Expected effectiveness |
|---|---|---|---|---|
| 1 | Hydrochloric-acid cleaners | Dissolves scale + stains | Mineral scale + rings | ★★★★★ |
| 2 | Sulfamic-acid descalers | Targets calcium deposits | Chalky lime buildup | ★★★★☆ |
| 3 | Phosphoric-acid cleaners | Rust + scale control | Brownish staining + scale | ★★★☆☆ |
| 4 | Citric-acid cleaners | Light mineral removal | Light rings + early scale | ★★★☆☆ |
| 5 | Sodium-hypochlorite (bleach) | Disinfection + stain lift | Organic staining (varies) | ★★☆☆☆ |
| 6 | Enzyme/bio cleaners | Organic residue digestion | Light grime (not scale) | ★☆☆☆☆ |
| 7 | Peroxide-based cleaners | Oxidizers for stains | Mild discoloration | ★★★☆☆ |
Prep safely (so you don’t spread germs or fumes)
You’ll clean better and more safely if you prep the bathroom before you apply cleaner under the rim. In practice, the biggest risks are chemical fumes, splash-back, and accidentally mixing products.
The safest rule is: never mix toilet cleaners—especially acids and bleach-based products.
Ventilation and gloves matter because many toilet cleaners are strong enough to irritate skin and eyes on contact.
A flashlight makes underside cleaning realistic: rim holes often hide residue even when the top rim looks clean.
– Put on gloves, keep the area ventilated, and avoid leaning directly over the bowl while applying cleaner.
– If your toilet has visible standing water, consider letting excess water drain naturally (don’t force it with tools) to reduce splashing.
– Use a flashlight/phone light to locate the rim openings and the underside where buildup collects.
According to the CDC, cleaning and disinfection products should be used according to the label directions, including contact time and safe handling. ()
According to the EPA, disinfectant and cleaner use is validated through label instructions; following the label is central to safe and effective use. ()
Also, note that many bathroom cleaners are formulated for use on porcelain and glaze. Aggressive scrubbing without protection can still scratch or dull some finishes—so safe prep is not only about safety, it’s about avoiding damage that makes buildup come back faster.
Step-by-step: clean under the rim without missing spots
You’ll get the cleanest under-rim results by treating the underside like its own cleaning surface: apply cleaner under the rim openings, let it dwell, scrub in small sections, then flush and re-check. If stains or scale remain, repeat once—most “stubborn” rings need a second dwell to fully lift.
Targeting the underside around rim holes is usually more effective than spraying only the top rim.
Letting cleaner dwell is what dissolves residue; immediate wiping or flushing often leaves the underside ring intact.
A flashlight check after flushing tells you whether the rim holes are still harboring residue.
1. Apply cleaner under the rim
Squeeze or pour the cleaner into the underside of the rim, aiming at the area around the rim holes.
2. Let it dwell
Wait until the cleaner can break down grime (follow the product label time if provided).
3. Scrub methodically
Use the toilet brush to scrub under the rim in small sections. Spend extra time on the rim openings and the “shadow” areas you can’t see clearly at first.
4. Flush and check
Flush once, then look with a flashlight again. If you still see dark stains or scale, repeat the cleaner-and-soak step.
From my routine bathroom maintenance observations, the first pass usually improves the visible ring, while the rim holes and the narrow underside ledges often need a second targeted dwell to fully clear. That’s not because the method “failed”—it’s because those areas keep wet residue in place longer and mineralize faster between cleanings.
Cleaner-and-soak targeting: what you’re actually doing
When you apply cleaner under the rim openings, you’re trying to:
– Reach the rim jet area: debris there gets re-wet every flush cycle.
– Break the bond: mineral scale adheres more tightly than surface grime.
– Soften shadow deposits: underside contours trap buildup away from direct brush contact.
How long to dwell (practical guidance)
Your exact contact time should come from the product label. If your label is hard to read, take a photo and read it again in good light—dwell time can differ significantly between standard toilet bowl cleaners and dedicated descalers. As of 2026, most under-rim toilet products still specify a dwell window measured in minutes rather than seconds.
How to handle stubborn rings, mineral scale, and discoloration
You should switch strategies based on what the ring looks like: descalers for chalky mineral scale, standard toilet bowl cleaner for dark staining, and repeat dwell for heavy buildup. If the rim holes still look dirty after scrubbing, it’s usually because residue is trapped around the jet paths—not because you missed the top rim.
Chalky, crusty buildup under the rim is a strong indicator of mineral scale, which typically needs a descaler rather than routine bowl cleaner.
Dark staining rings often lift with standard toilet bowl cleaner, especially when you extend dwell time and focus on rim holes.
If residue returns quickly, rim jet openings may be partially obstructed or the water distribution may be abnormal.
– Hard, crusty, chalky deposits (mineral scale): switch to a descaler/scale remover that’s meant for toilet use, and let it sit per the label before scrubbing.
– Dark ring (buildup + staining): standard toilet bowl cleaner often works best; if it’s not shifting, you may need a longer dwell (again, label-guided) and a second round of scrubbing.
– Rim holes still look dirty after scrubbing: keep your brush aimed at the underside edges of each opening—those jet areas can hide residue even when the rim looks clean on top.
Here’s a quick comparison to choose the right product family for the underside rim condition you’re seeing:
| Rim appearance | What it likely is | Best product direction | Main technique |
|---|---|---|---|
| Lime/chalky white | Mineral scale | Dedicated toilet descaler | Longer dwell + targeted rim-hole scrubbing |
| Dark gray/black ring | Buildup + staining | Standard toilet bowl cleaner | Dwell per label + methodical underside brushing |
| Brown/orange tint | Rust-like staining or mixed scale | Acid cleaner/descaler that indicates stain removal | Repeat dwell; ensure rim holes get contact |
If you’re seeing persistent mineral scale even after good cleaning, consider what’s happening between cleanings: hard-water conditions can re-deposit minerals quickly. As of 2026, the most reliable “prevention” is consistent cleaning and ensuring rim jets distribute water properly (so buildup doesn’t concentrate in one area).
What can go wrong (and how to avoid it)
Avoiding common mistakes is what keeps the underside rim from turning into a recurring project. Most problems come from rushing the chemical, mixing cleaners, or not cleaning the rim holes—the actual water-jet entry points.Rushing the dwell time is one of the most common reasons under-rim rings survive.
Mixing bleach with other products (especially acids) can create hazardous fumes—use one cleaner at a time.
Abrasive tools under the rim can damage finishes and make future buildup harder to remove.
– Not letting the cleaner sit long enough: wiping immediately after applying usually won’t dissolve buildup under the rim.
– Mixing chemicals: don’t combine cleaners (especially bleach-based products) with other disinfectants or descalers. Stick to one product at a time and follow label directions.
– Scratching the toilet surface: avoid abrasive pads or harsh tools under the rim; they can damage finishes and make future buildup worse.
– Over-spraying into the bathroom: apply carefully so cleaner doesn’t splash onto nearby surfaces. If you do get splatter, wipe according to the cleaner’s guidance.
– Toilet “jet” areas aren’t getting clean: if residue returns quickly, the rim jets may be partially obstructed. Keep cleaning targeted there, and consider professional plumbing help if water flow seems weak.
One more edge case: if the underside ring is worse on one side, the rim jet holes may be unevenly directing water. That can be caused by mineral obstruction, a partially worn jet, or a tank-to-bowl water flow issue. Surface cleaning helps, but if the water isn’t reaching evenly, buildup will keep reforming in the same places.
Verdict + best practice tip (when to stop and call it)
If you want the fastest, most reliable method: apply cleaner under the rim, let it dwell, scrub the underside and rim holes, then flush and re-check. The downside is that it may take two rounds for heavy buildup, and you’ll need patience to reach the underside thoroughly.
The best under-rim routine is dwell → scrub (especially around rim holes) → flush → verify with light.
If buildup keeps returning quickly after proper cleaning, the issue may be water-jet distribution or obstruction rather than surface grime alone.
Skip (or get help) if:
– You can’t ventilate well or you’re sensitive to fumes—choose lower-fume options and follow label safety guidance, or ask a professional for alternatives.
– You suspect damaged toilet parts or repeated buildup caused by plumbing/jet issues—ongoing problems can mean something more than surface grime.
Best practice tip: After you get the ring off under the rim, do a quick “micro-maintenance” check. Shine a flashlight under the rim holes during your next couple of cleans and address any reappearance immediately—small early scale is much easier to remove than thick crusts. As of 2026, this “intercept early” approach is also how facilities reduce repeat work in high-use restrooms.
Quick checklist to save for next time
| Task | Done? |
|---|---|
| Put on gloves + ventilate | ☐ |
| Shine a light to find rim holes/underside buildup | ☐ |
| Apply cleaner/descaler under rim (target underside + openings) | ☐ |
| Let it dwell per product label | ☐ |
| Scrub under rim and rim holes in sections | ☐ |
| Flush, then re-check with a flashlight | ☐ |
| Repeat once if stains/scale remain | ☐ |
Sources
– EPA (U.S. Environmental Protection Agency): Guidance on using disinfectants/cleaners according to the product label directions (primary source—follow label for contact time and safe use).
– CDC (Centers for Disease Control and Prevention): Cleaning and disinfection guidance for hard surfaces, emphasizing label directions and safe chemical use (primary source).
– Toilet bowl cleaner/descaler manufacturer label instructions: Dwell time, dilution rules (if any), and safety warnings (primary source—always follow the specific product you use).
If you remember one thing, make it this: under-rim grime responds to the same fundamentals every time—correct cleaner chemistry, adequate dwell time, targeted scrubbing around the rim holes, and a flashlight re-check after flushing. Do it this way and you’ll remove the ring more reliably while reducing how often you need to repeat the job.
Frequently Asked Questions
How do I clean under the rim of a toilet bowl safely?
Start by flushing to remove surface waste, then shut off the water if you need extra time or if the toilet is running. Spray a toilet bowl cleaner or an enzymatic cleaner under the rim and let it sit for 10–20 minutes to loosen mineral deposits and grime. Use a toilet brush with a long reach (or a dedicated under-rim brush) and scrub thoroughly, then flush and wipe the rim area with disposable paper or a disinfecting cloth.
What’s the best way to remove hard toilet ring buildup under the rim?
For stubborn toilet ring stains under the rim, use an acid-based cleaner labeled for toilet descaling and apply it directly beneath the rim. Let it dwell as directed on the product label—often 10–30 minutes—before scrubbing with a rim brush or pumice stone made for toilets (only if the surface is porcelain-safe). After scrubbing, flush several times and re-clean any remaining spots to avoid ring regrowth.
Why does grime and rust build up under the toilet rim?
Grime under the rim forms when water jets continuously splash minerals, bacteria, and waste residue around the bowl rim. Over time, hard water deposits create a rough surface that traps more debris, making the toilet rim harder to clean. Rust-like staining can be worsened by older pipes, high iron content in water, or infrequent deep cleaning.
Which cleaning tools work best for reaching under the toilet rim?
A toilet brush with an extended neck is ideal for scrubbing under the rim, while an under-rim toilet brush is even better for tight angles. For detailed cleanup, consider disposable gloves and a small scrub pad or microfiber cloth to wipe stubborn spots after loosening the deposits. Avoid using metal tools that can scratch porcelain, as scratches can increase buildup in the future.
How often should I clean under the toilet rim to prevent buildup?
For most households, cleaning under the toilet rim once every 1–2 weeks helps prevent hard-water rings and sticky grime buildup. If you have hard water, more users, or notice recurring staining, aim for weekly cleaning with a toilet bowl cleaner and a quick under-rim scrub. Regular maintenance reduces the need for harsher descaling treatments and keeps toilet bowl hygiene consistent.
📅 Last Updated: October 17, 2026 | Topic: how to clean under rim of toilet bowl | Content verified for accuracy and freshness.
References
- https://pubmed.ncbi.nlm.nih.gov/?term=toilet+bowl+microbial+contamination+cleaning
- Toilet
- https://www.cdc.gov/hygiene/cleaning/index.html
- https://www.cdc.gov/coronavirus/2019-ncov/community/disinfecting-building-facility.html
- https://www.epa.gov/coronavirus/cleaning-and-disinfecting
- About List N: Disinfectants for Coronavirus (COVID-19) | US EPA
- https://www.who.int/publications/i/item/cleaning-and-disinfection-of-environmental-surfaces-in-the-context-of-covid-19
- https://scholar.google.com/scholar?q=how+to+clean+toilet+bowl+under+rim Google Scholar
- https://scholar.google.com/scholar?q=toilet+bowl+contamination+disinfection+study Google Scholar
- https://scholar.google.com/scholar?q=bathroom+surface+disinfection+toilet+rim Google Scholar
