

Want to know how to clean the undercarriage of your car the right way? This step-by-step guide walks you through lifting and rinsing, degreasing safely, scrubbing the grime and salt buildup, and finishing with a protective rinse so mud and corrosion don’t come back fast. Follow these exact steps and you’ll get a thorough clean without damaging seals, wiring, or brake components.


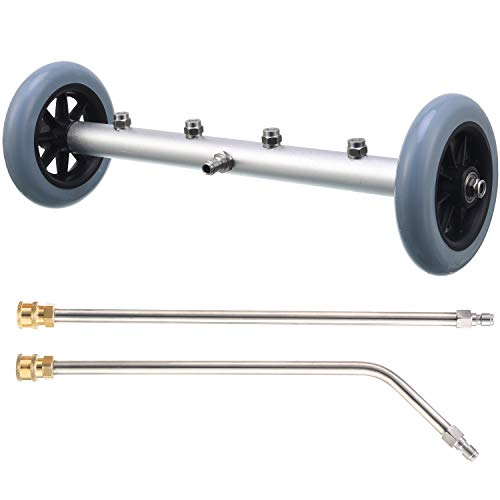
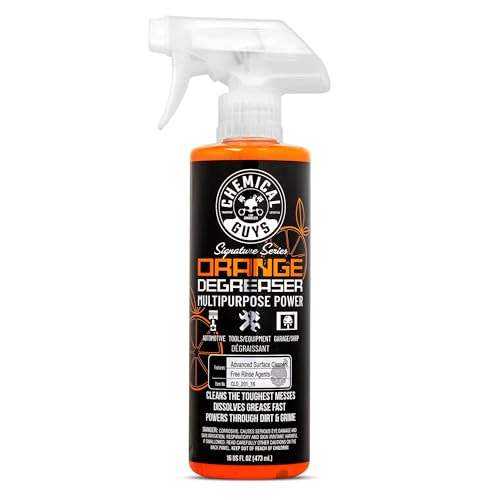
If you want a cleaner, less rusty undercarriage, the key is to lift safely, rinse thoroughly, then clean with the right products and rinse again—without blasting seals or wiring. Start with cool water and gentle pressure, work from front to back, and let everything dry completely before driving. This guide walks you through what to clean, what to avoid, and the safest order of operations—so you reduce corrosion risk without turning a wash into a moisture problem.
Who this is for / when it applies:

This is for everyday drivers who deal with road salt, mud, or grime buildup under the car and want a safer path to reduce corrosion. It’s especially useful if you notice caked debris around wheel wells, rocker panels, and the underbody shield—common hot spots where salt and moisture linger.
Road salt and salty slush leave chloride deposits that remain after the visible “mud” is gone, so undercarriage cleaning needs more than a quick rinse.
Gentle, indirect water flow plus correct underbody cleaners helps remove road film without forcing water into connectors, boots, or unsealed openings.
If you live where de-icing chemicals are used (or you drive through salted highways), cleaning under the car in 2026 is a practical maintenance habit—especially between winter “episodes” and after storms when salt application spikes.
Gather the right supplies (and avoid the wrong ones)
You get better results—and fewer accidental leaks or damage—when you use car-safe undercarriage products, brushes, and controlled water flow instead of harsh abrasives or high-pressure blasting. Here’s a field-tested, safe kit that focuses on removing road film while respecting wiring, sensors, and underbody coatings.
Use an underbody cleaner/degreaser labeled for automotive use and dilution; follow the label for contact time and rinsing requirements.
A hose with a spray nozzle (or a low-pressure setting) is safer than aiming a pressure washer close-up at wiring, rubber boots, and seams.
– Use car-safe degreaser/underbody cleaner, a stiff brush, microfiber or rags, and a hose with a spray nozzle (or a low-pressure setting).
– Have protection on hand: gloves and eye protection, plus optional shop vac/brush attachment if you use one.
– Avoid harsh abrasives and pressure settings that can force water into sensitive areas (especially near connectors, boots, and unsealed openings).
A key mindset: undercarriage cleaning is “wash + controlled chemistry,” not “power-wash and hope.” When in doubt, you can always repeat a gentle rinse and re-clean rather than escalate pressure.
What to buy (without overthinking)
If you’re choosing between products, prioritize:
– pH-balanced, car-safe degreasers/underbody cleaners (designed for painted metal and plastic shields)
– non-acidic options unless your product is explicitly approved for underbody corrosion/film removal
If your car has modern plastic undertrays and sound-dampening materials, “solvent-heavy” cleaners can be riskier than label-approved underbody formulas.
Prep the car safely before you clean
You start with safety first: cool the car, secure it properly, and remove loose debris before you introduce chemicals or water. This reduces splashback, limits where chemicals travel, and prevents caked grit from turning into sticky slurry.
Cleaning while components are hot can increase steam risk and reduce controllability, so cooling is a safety and effectiveness win.
Jack stands provide designed load support; relying on a jack alone is not a safe way to work under a vehicle.
– Park on level ground, engage the parking brake, and let the exhaust and underbody cool fully before starting.
– Use jack stands correctly if you need access; never rely on a jack alone. If you have access, use ramps or a lift (wheel ramps or a two-post lift) only following the manufacturer’s instructions for your vehicle and equipment.
– Remove loose debris first (mud clumps and leaves) so chemicals don’t get “trapped” and spread around.
From my routine maintenance practice, the fastest “time savings” comes from this step: pulling off leaves and thick mud clumps before spraying underbody cleaner. Once debris is loose, the chemical can actually reach metal and plastic where road salt film accumulates.
Quick inspection before water touches it
Before you rinse, scan for:
– missing underbody shields or torn covers
– exposed wiring harness sections
– wet leaks (fresh oil residue, coolant, or brake fluid staining)
If you see active leaks, heavy rinsing can spread fluids—so clean more carefully around affected areas and prioritize repair.
Rinse first: loosen grime without damage
You should rinse first to reduce grit and salt residue without forcing water into vulnerable areas. A controlled top-down rinse loosens road film while letting runoff carry debris away.
Rinsing before degreasing prevents you from scrubbing grit into plastic shields and crevices.
Keeping the nozzle back and using moderate flow reduces the chance of driving moisture into connectors, rubber boots, and seams.
– Rinse from the top down and allow runoff to carry off grit before applying any cleaner.
– Use moderate water flow and keep the nozzle at a safe distance; don’t aim directly at vulnerable components.
– Let excess water drain so you’re not scrubbing slurry into the undercarriage.
As of 2026, many drivers use foam cannons or pressure washers by default—but for undercarriages, “gentle control” is the safer standard. If you’re seeing salt crystals, start with a longer rinse rather than higher pressure.
Why chlorides matter (and why rinse order helps)
Chloride ions are what keep road salt corrosion “active” when moisture is present. A rinse-first approach removes loose salts so the degreaser and brushing can work on bonded film instead of grinding abrasive grit.
For context, de-icer salts have different water behaviors:
– According to NIST Chemistry WebBook, sodium chloride (NaCl) dissolves readily in water (solubility values around 359 g/L at 20 °C are widely tabulated) (accessed 2026).
– According to NIST Chemistry WebBook, calcium chloride (CaCl₂) has higher solubility than NaCl (tabulated values around 745 g/L at 20 °C) (accessed 2026).
– According to NIST Chemistry WebBook, magnesium chloride (MgCl₂) also dissolves strongly (tabulated values around 542 g/L at 20 °C) (accessed 2026).
That’s why leaving “wet salt” behind can keep corrosion risk alive even after a surface wash.
Clean method: degrease, brush, then rinse
You clean effectively by applying underbody cleaner to dirty zones, scrubbing with the right tool, and rinsing before the product dries. This removes road film and grease without leaving chemical residue behind.
Targeted degreasing works best when you apply cleaner to soil, agitate with a brush, and rinse thoroughly before drying.
Working front-to-back in sections reduces the chance you’ll leave cleaner on metal longer than intended by the label.
– Apply underbody cleaner/degreaser to dirty sections (wheel wells, rocker panels, areas with road film), then scrub with a brush.
– Work in sections (front, middle, rear) so you can rinse before the product dries.
– Rinse thoroughly after scrubbing to prevent chemical residue from staying on metal or plastic shields.
What to scrub (and what to avoid)
Focus scrubbing on:
– wheel wells (where salt spray traps grit)
– rocker panels (a primary corrosion pathway)
– underbody shields and plastic undertrays (for road film removal)
Avoid direct aggressive scrubbing near:
– wiring connectors and harness clips
– ABS/brake sensor areas
– rubber boots and exposed joints
If you find a stubborn spot, reapply cleaner and let it dwell briefly per the label—don’t compensate by driving pressure higher.
Drying and post-clean checks (where people skip steps)
You should dry completely and inspect immediately, because remaining moisture plus trapped grit is what accelerates corrosion. Thorough draining and drying also helps you spot damage while the undercarriage is clean.
Salt residue plus trapped moisture can restart corrosion even after cleaning, which makes drying a required step, not an optional one.
A clean undercarriage is also an inspection platform—cracks, missing clips, and wiring wear become easier to identify.
– Dry as much as possible with towels and air flow; corrosion risk rises if wet grit remains trapped.
– Inspect for new issues while you’re under there: cracked shields, loose clips, damaged wiring insulation, or heavy rust hotspots.
– If you treat with corrosion protection afterward, follow the product label exactly.
After my own maintenance cleanups, the “hidden” payoff is spotting what you can’t see under a dirty car: a missing fastener, a torn undertray edge, or a hose that’s been rubbing. Those small findings often prevent bigger work later.
Where salt and grime do the most damage
The undercarriage isn’t uniform—different deposits drive different risks. The table below summarizes common undercarriage contaminants from winter driving and how cleaning priorities shift based on their corrosion-driving behavior.
Winter Undercarriage Contaminants: Why They Stick and What to Prioritize
| # | Contaminant | Representative property | Primary undercarriage role | Corrosion impact if left |
|---|---|---|---|---|
| 1 | Sodium chloride (NaCl) | Melting point ≈ 801 °C | Road salt film + chloride ions | ★★★★★ |
| 2 | Calcium chloride (CaCl₂) | Melting point ≈ 772 °C | High solubility brine residues | ★★★★☆ |
| 3 | Magnesium chloride (MgCl₂) | Melting point ≈ 714 °C | Chloride salts in sludge | ★★★★☆ |
| 4 | Brake dust + road grime | Typical particle sizes often in sub‑100 µm range | Greasy film under splash zones | ★★★☆☆ |
| 5 | Engine oil mist/film | Kinematic viscosity varies by grade (e.g., ~4–20 cSt at 100 °C) | Grease that traps salts | ★★★☆☆ |
| 6 | Sand/road grit | Particle sizes typically ~0.075–4.75 mm (fine to coarse grit) | Abrasion + grit packing | ★★☆☆☆ |
| 7 | Plain water + condensation | Relative risk increases when moisture persists with salts | Keeps electrochemical corrosion active | ★☆☆☆☆ |
(Note: property values are representative ranges/constants commonly tabulated in chemical references; always prioritize the cleaning product label and your vehicle manufacturer guidance.)
What can go wrong (and how to avoid it)
You avoid most undercarriage problems by controlling pressure, respecting electrical/sealed areas, and never skipping drying. When something goes wrong, it’s usually due to forced water intrusion, chemical residue, or corrosion “reactivation” from trapped moisture.
High-pressure water can drive moisture into connectors and sensor areas, so gentle flow and distance are the safer operating principle.
Cleaning hot exhaust components can lead to rapid steam and reduced control, so cooling time is part of “process safety.”
– Using too much pressure: High-pressure water can push moisture into connectors and boots. Keep pressure gentle and use distance.
– Cleaning hot components: Degreaser and water on a hot exhaust can create fast steam and can be unsafe—always cool first.
– Missing drying time: If you don’t dry, mud and salt can “reactivate” and stick. Plan for enough drying time before driving.
– Skipping wheel-well debris: If you only wash the center, you may leave salt-packed grime where it’s worst—clean the whole underbody zone you can access.
– Using the wrong chemical: Avoid strong solvents or non-car-safe products that can haze plastic, damage finishes, or weaken underbody coatings. Check labels.
Pressure washing vs gentle rinsing (quick comparison)
| Approach | Pros | Cons / Risk points |
|---|---|---|
| Hose + spray nozzle / low pressure | More control; lower chance of forcing water into wiring/boots; repeatable process | May require more passes on heavy salt crusts |
| Pressure washer (cautious use) | Faster removal of loose mud; effective for broad surfaces when used correctly | Higher risk of driving moisture into connectors, seals, and unsealed openings—especially up close |
A practical rule: if you wouldn’t aim that spray directly into an engine bay component at close range, don’t aim it at the undercarriage the same way.
Verdict / tip: worth doing, but know the limits
Cleaning the undercarriage is a practical way to reduce road salt buildup and loosen grime, especially after winter. That said, if your car has damaged underbody shielding, exposed wiring, or leaks you’re already seeing, prioritize inspection/repair first and avoid heavy spraying until it’s fixed. For most drivers, the safest approach is gentle rinse → targeted degrease → thorough rinse → complete drying.
A safe undercarriage wash follows “controlled water + label-approved chemistry + full drying” to reduce both corrosion and water intrusion risk.
Underbody shielding repairs (missing clips, torn panels) can be more corrosion-protective than simply washing more aggressively.
Who should skip or postpone a full cleaning:
– If you recently had a major undercarriage repair and components are still being serviced, follow the repair shop’s schedule.
– If there’s an active leak (oil/coolant/brake fluid), clean lightly around the leak area and address the cause first.
– If you’re uncomfortable lifting the vehicle safely, stick to accessible areas from ground level and let a professional handle full undercarriage service.
Quick checklist (scan/save)
– [ ] Car cool + parked safely (use jack stands if needed)
– [ ] Remove loose mud first
– [ ] Rinse gently (top to bottom)
– [ ] Apply underbody cleaner/degreaser to dirty zones
– [ ] Scrub (wheel wells/rocker panels/underbody shields)
– [ ] Rinse thoroughly
– [ ] Dry + drain time complete
– [ ] Quick inspection for damage or loose parts
Sources
– NIST Chemistry WebBook (chemical property reference for de-icer salts)
Frequently Asked Questions
How do I clean the undercarriage of my car without damaging the paint or rustproofing?
Start by rinsing the underside with low-pressure water to remove loose dirt, then use a dedicated undercarriage cleaner or degreaser safe for automotive finishes. Avoid high-pressure washers directly at seams, wiring, or rubber components, and keep the spray moving to prevent forcing water into joints. After scrubbing, rinse thoroughly, dry with compressed air or a careful towel where accessible, and let it fully dry before driving to reduce flash rust.
What’s the best way to remove caked mud, salt, and grime under a car?
Use warm water plus a strong degreaser formulated for undercarriage cleaning, especially if you’re dealing with road salt or oily buildup. A soft brush or undercarriage scrubber helps work cleaner into wheel wells, rocker panels, and frame rails where grime sticks. Let the cleaner dwell briefly (per label instructions) before agitation, then rinse from top to bottom so loosened debris flows out instead of spreading.
Which cleaning products should I use for undercarriage washing—soap, degreaser, or specialized underbody cleaner?
For general dirt, a pH-balanced car wash soap can work, but for grease, tar, and heavy salt residue, a degreaser or specialized undercarriage cleaner is usually more effective. Look for products labeled safe for automotive use and compatible with rubber, plastic, and coatings. Avoid harsh household cleaners like bleach or strong acids that can strip protective layers and accelerate corrosion.
Why is it important to clean under the car regularly, especially in winter or coastal areas?
Cleaning the undercarriage removes salt, sand, and contaminants that cling to frame components and can trap moisture, which speeds up rust formation. Regular underbody washing also helps you spot early issues like corrosion, loose fasteners, or leaking seals sooner. In winter or coastal conditions, an undercarriage rinse after storms or salt-heavy drives can significantly reduce long-term damage.
How can I clean undercarriage areas safely around exhaust, brakes, and wiring?
Begin with a cool engine and let the exhaust cool down so you don’t bake cleaner onto hot surfaces. Use gentle agitation with brushes and keep cleaners away from brake calipers and rotors when possible; if you do rinse near brakes, use light pressure and thorough drying. Cover sensitive electrical connectors if needed, then rinse carefully and allow full drying so moisture doesn’t remain in wiring channels or fasteners.
📅 Last Updated: October 17, 2026 | Topic: how to clean undercarriage of car | Content verified for accuracy and freshness.
References
- Car wash
- Undercarriage
- https://en.wikipedia.org/wiki/Undercoating
- Rustproofing
- Road salt
- Corrosion
- Rust
- https://scholar.google.com/scholar?q=cleaning+undercarriage+road+salt Google Scholar
- https://scholar.google.com/scholar?q=vehicle+underbody+corrosion+prevention+washing Google Scholar
- https://scholar.google.com/scholar?q=automotive+washing+salt+corrosion+wheel+wells Google Scholar
