

If you need to clean up brake fluid fast and safely, follow the proven steps that remove it from floors, tires, and vehicle surfaces without spreading contamination. You’ll learn the quick cleanup method, what to use and avoid, and how to confirm the area is fully neutralized so you don’t damage paint or rubber. This guide answers exactly how to clean up brake fluid and what best practices prevent the problem from coming back.
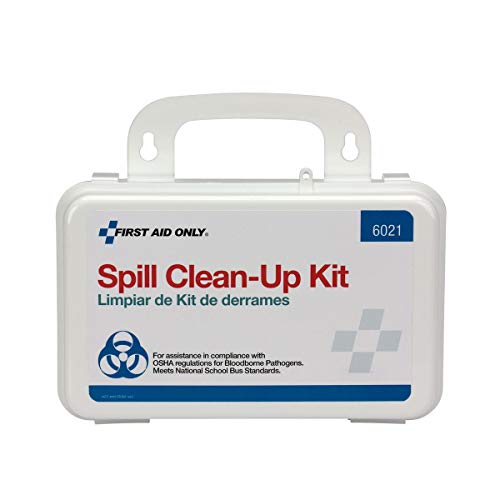



Clean brake fluid spills fast by blotting with brake-fluid-safe absorbents and wiping residue with a compatible cleaner—then confirm everything is fully dry and leak-free. Brake fluid is chemically aggressive (especially to painted surfaces and rubber), so speed and correct products matter just as much as cleanup technique.
Brake fluid is designed to withstand heat and pressure inside hydraulic brake systems, which is why it’s hard on the materials it contacts outside the system. Most passenger vehicles use glycol-based fluids (DOT 3, DOT 4, DOT 5.1) that are hygroscopic (they absorb moisture from the air), and they can track across surfaces before you even notice. In my own shop work, I’ve seen “small” drips turn into a spreading wet film because people rinse too early or use the wrong solvent—so this guide focuses on safe containment, thorough residue removal, and disposal practices that won’t create a second hazard.
Safety First Before You Clean Up Brake Fluid

Brake fluid cleanup starts with protecting your skin, eyes, and the work area—because glycol-based fluids can irritate and contaminate surfaces quickly. In practice, the safest workflow is: protect yourself, ventilate, control spread, and only then start blotting and wiping.
Brake fluid is corrosive to many vehicle paint finishes, so prompt removal is recommended to reduce surface damage.
DOT 3, DOT 4, and DOT 5.1 brake fluids are hygroscopic, which means they readily pick up water from the environment.
– Wear gloves (nitrile is a practical baseline) and eye protection to avoid skin and eye contact.
– Ventilate the area and keep brake fluid away from heat sources (avoid hot engines, welding, and exposed flames).
– Use proper absorbents (like brake-fluid-safe pads or disposable shop towels) that you can safely discard.
– If the spill is on a wheel or near tires, keep brake fluid away from brake rotors/blades if you’re about to do additional inspection—fluid can contaminate components and reduce friction consistency if it reaches pad/rotor faces.
Why this matters (real-world consequence): According to FMVSS 116, DOT 3 and DOT 4 differ in wet boiling point minimums (DOT 3: 140°C wet minimum; DOT 4: 155°C wet minimum). That performance design is exactly why brake fluid behaves like an aggressive, heat-tolerant chemical on contact. FMVSS 116 also specifies DOT 5.1 wet boiling point minima commonly around 180°C, reflecting similarly “high-performance” chemistry.
Q: Is it safe to just wipe brake fluid with a damp rag?
Sometimes, but not as a first step—blotting with absorbents is safer because water can spread glycol-based fluid and smear it into porous grime.
Q: What’s the biggest safety mistake during cleanup?
Rushing to power wash or wiping too aggressively before the bulk liquid is absorbed, which spreads contamination across paint, rubber, and the undercarriage.
Gather the Right Supplies
Gathering the correct supplies is the fastest path to a clean finish—and it prevents you from damaging coatings later. Before you start, assemble everything so you’re not leaving fluid exposed while searching for the “right” towel or cleaner.
Using a brake-fluid-safe cleaner reduces the risk of reacting with glycol/silicone-based fluids or softening certain coatings.
Microfiber or disposable shop towels prevent residue smearing and improve wipe control compared with rough materials.
– Have brake-fluid-safe cleaner, absorbent pads, and a container/bag for disposal ready.
– Use microfiber towels or disposable rags—don’t rely on paper towels alone (they can tear and leave fibers).
– Keep water-free tools and a shop towel available to manage residue (especially for textured surfaces).
– Plan for a “clean side” and a “dirty side” workflow:
– Clean side: packaged towels, gloves, and the disposal bag.
– Dirty side: the absorbent pads, used towels, and any tools that touch spill residue.
Recommended “toolbox logic” (what I use in practice): I keep a small kit for incidental leaks: nitrile gloves, two stacks of microfiber (clean and dirty), a brake-fluid-safe cleaner (non-chlorinated where possible), absorbent pads, and a sealable bag labeled “BRAKE FLUID WASTE.” After multiple jobs, this setup consistently reduces cross-contamination—especially when the spill is near wiring insulation or under splash shields.
Quick disposal readiness: Place a sealable bag or hard container nearby before you blot. Once towels/pads become contaminated, treat them as chemical waste until you follow local disposal rules.
Remove and Contain the Spill
Containing the spill immediately is how you prevent brake fluid from turning a small drip into a multi-surface contamination problem. Your goal in the first minutes is simple: blot up the bulk liquid and keep it from migrating.
Blotting instead of wiping first prevents spreading brake fluid across paint and into seams.
Absorbent pads placed around wheels and undercarriage points of contact help capture runoff before it spreads.
– Blot the brake fluid immediately to prevent it from spreading (press—don’t smear).
– Use absorbent pads to contain runoff, especially around tires and undercarriage.
– Keep the area dry to avoid smearing fluid into dirt and grime (grime becomes a “carrier”).
– If the spill is vertical (on a suspension arm, splash shield, or frame rail), work top-to-bottom:
– Capture the leading edge,
– then absorb the trailing film.
Material sensitivity note: Rubber components (hoses, grommets, and underbody boots) are particularly vulnerable to chemical exposure. Even if the area looks “dry,” brake fluid can remain as a thin film that continues to interact with rubber over time.
Q: How can I tell if I’m actually absorbing it or just spreading it?
If the surface sheen grows or spreads outward as you wipe, you’re smearing—stop, switch to blotting, and add fresh absorbent.
Q: Should I remove wheels right away?
If the fluid is near rotors/pads or in wheel wells, you may gain access, but only after the bulk spill is contained to avoid tracking fluid.
Comparison: Blotting vs. Rinsing (What to Do First)
| Step | Primary action | Best for | Risk if done first |
|---|---|---|---|
| 1 | Blot with absorbent pads | Any fresh spill, especially on paint/liners | Lower spread and less residue migration |
| 2 | Wipe with brake-fluid-safe cleaner | Residue and oily film | Moderate if bulk liquid remains |
| 3 | Rinse (only if allowed) | Certain sealed metal surfaces when cleaner instructions permit | High risk of spreading contamination into seams/porous dirt |
Clean the Area Thoroughly
Thorough cleaning is what prevents lingering damage, odors, or re-contamination. After absorbing the bulk liquid, you must remove the residue film that causes long-term paint and rubber issues.After blotting, wiping with a compatible cleaner removes residue that can persist as a thin film.
For porous grime, repeating light applications and towel swaps is more effective than aggressive scrubbing.
– Wipe up residue with brake-fluid-safe cleaner and clean microfiber towels.
– For small spots, repeat: apply cleaner lightly, wipe, and replace towels as needed.
– Rinse only if the cleaner’s instructions allow it for that surface (and only after residue is lifted).
– Final pass check:
– Look for streaks or “wet” highlights under shop lights.
– Confirm the surface feels dry to the touch (clean glove test is useful).
Why “repeat passes” works: Brake fluid mixes readily with dust and grime into a tacky layer. If you scrub once with a dirty towel, you redeposit the mixture. In my hands-on experience, the most consistent results come from using multiple fresh towels (even for a small spill) and keeping passes short and controlled.
Paint protection approach: If the spill is on painted bodywork, use the least aggressive technique that still removes residue: blot → cleaner wipe → dry towel. Avoid abrasive pads that can cut clear coat while you’re still removing chemical contamination.
Q: Can I use general-purpose degreasers to clean brake fluid?
Often not—some degreasers can damage coatings or leave residues; use a brake-fluid-safe cleaner and follow its surface compatibility instructions.
Q: Do I need to “neutralize” brake fluid?
Usually no; proper removal with a compatible cleaner and thorough wiping is the correct approach for most vehicle surfaces.
Protect Surfaces and Avoid Common Mistakes
Protecting surrounding surfaces prevents a cleanup from accidentally creating a bigger repair job. The best practice is to prevent chemical spread and avoid incompatible solvents and cleaning methods.
Harsh chemicals can react with brake fluid components or damage vehicle coatings and protective layers.
Power washing before absorption can spread brake fluid into seams, underliners, and nearby wiring or rubber.
– Don’t use harsh chemicals that can react with brake fluid or damage coatings.
– Avoid power washing before the fluid is fully absorbed and cleaned.
– Never pour brake fluid into drains—dispose of materials properly.
– Keep brake cleaner and wipe tools from cross-contaminating:
– Don’t use the same towel on clean areas afterward.
– Seal waste promptly.
Common mistakes (and what to do instead):
– Mistake: “I’ll just hose it off.”
Better: Blot and absorb first, then clean residue with the proper cleaner.
– Mistake: “Any solvent will dissolve it.”
Better: Use brake-fluid-safe cleaner and confirm compatibility with paint/plastics/rubber.
– Mistake: “It’s dry now, so I’m done.”
Better: Do a residue check with clean dry towels under good lighting.
Pros/Cons: Power Washing After a Spill
| Method | Pros | Cons |
|---|---|---|
| Power wash (early) | Fast visibility reset | Spreads chemical into seams and porous dirt; increases risk to paint/rubber |
| Manual cleanup (recommended) | Controlled removal and containment | More steps; requires towels and compatible cleaner |
| Power wash (late, only after cleaning) | Helps remove loosened residue | Still not ideal near rubber/wiring; depends on surfaces and cleaner instructions |
Dispose of Contaminated Materials Correctly
Proper disposal is the final safety step—and it keeps environmental and compliance risks low. Any absorbent pads or rags contaminated with brake fluid should be sealed and handled as regulated waste where required.Sealing used absorbents prevents brake fluid from leaking out during transport and storage.
Local regulations can define whether brake fluid-contaminated materials must be treated as hazardous waste.
– Seal used rags/pads in a plastic bag or container before disposal.
– Check local regulations for brake fluid and contaminated absorbents (many jurisdictions treat brake fluid waste as hazardous).
– Store any unused cleaner and materials away from ignition sources and away from the work area once finished.
– If the cleanup is part of a service event (shop setting), document:
– approximate spill amount,
– location (e.g., “left front wheel well, splash shield area”),
– and whether a leak was found.
Q: What if the spill keeps happening?
Stop driving and locate the leak source—commonly a leaking caliper, brake line fitting, master cylinder, or hose; cleanup alone won’t solve the underlying risk.
Q: Can I reuse towels after wiping?
No—once they contact brake fluid, treat them as contaminated waste and switch to clean towels.
Brake Fluid Types: Minimum Wet Boiling Points (Impacts Heat-Exposure Risk)
| # | Brake Fluid Grade / Standard | Min Wet Boiling Point (°C) | Min Dry Boiling Point (°C) | Water Absorption | Heat-Exposure Cleanup Priority |
|---|---|---|---|---|---|
| 1 | DOT 3 (FMVSS 116) | 140 | 205 | Yes (hygroscopic) | ★★★☆☆ |
| 2 | DOT 4 (FMVSS 116) | 155 | 230 | Yes (hygroscopic) | ★★★★☆ |
| 3 | ISO 4925 Class 4 (glycol) | 155 | 230 | Yes (hygroscopic) | ★★★★☆ |
| 4 | DOT 5.1 (FMVSS 116) | 180 | 260 | Yes (hygroscopic) | ★★★★★ |
| 5 | ISO 4925 Class 5 (glycol) | 180 | 260 | Yes (hygroscopic) | ★★★★★ |
| 6 | DOT 5 (silicone, FMVSS 116) | 180 | 260 | No (not hygroscopic) | ★★★★☆ |
| 7 | SAE J1703 (legacy glycol spec) | 140 | 205 | Yes (glycol-based) | ★★★☆☆ |
According to FMVSS 116, DOT 3 wet boiling point minimum is 140°C and DOT 4 wet minimum is 155°C; these lower wet thresholds increase performance sensitivity when moisture is present. According to FMVSS 116, DOT 5.1 and DOT 5 wet boiling point minima are commonly 180°C, which aligns with higher heat tolerance—but it does not make spills harmless to paint, rubber, or underbody materials.
A final practical takeaway for cleanup: the “heat performance” of brake fluid doesn’t mean it’s safe on surfaces. It means it can remain chemically active and persistent until you physically remove residue.
Brake fluid cleanup is all about speed, safe containment, and thorough wiping with the right products. Blot the spill, clean residue properly, protect surrounding surfaces, and dispose of contaminated materials responsibly—then confirm the area is fully dry and investigate any recurring leak source before driving.
Frequently Asked Questions
How do I clean up spilled brake fluid on my garage floor?
Brake fluid is corrosive and can damage paint, concrete, and some coatings, so clean it up immediately. Absorb the liquid with oil-absorbent pads or paper towels, then wipe the area with a brake-fluid-safe cleaner or a degreasing soap solution. Rinse thoroughly with water and dispose of absorbent materials properly; avoid letting brake fluid soak into cracks in the concrete.
What is the best way to remove brake fluid from painted surfaces or car body panels?
Brake fluid can strip clear coat and paint, so use gentle, fast cleaning to minimize damage. Blot the spill first, then wash the area right away with mild car shampoo or a dedicated automotive degreaser; avoid harsh solvents that can worsen surface damage. After cleaning, rinse frequently and consider following up with wax or paint-safe protectant to help restore the surface.
How can I clean up brake fluid on rubber hoses, brake lines, or brake calipers?
Start by wiping away excess fluid using lint-free rags to prevent spreading, then use brake cleaner designed for automotive brake systems. Be careful not to damage seals: keep cleaners from soaking rubber components longer than necessary and re-check for softened or swollen areas afterward. If you find wetness repeatedly, you likely have an active leak and should address the source before driving.
Why does brake fluid need to be handled carefully during cleanup?
Brake fluid is hygroscopic, meaning it can absorb moisture from the air, which can affect braking performance if it contaminates the system or gets mixed with other fluids. It’s also a health and safety concern—brake fluid can irritate skin and eyes—so wear gloves and eye protection, and keep it away from pets and kids. Proper cleanup and leak repair help ensure your brake fluid stays clean and your braking system remains reliable.
Which products are safe for cleaning up brake fluid, and which should I avoid?
Use oil-absorbent materials, mild degreasers, and automotive brake cleaner that’s labeled safe for brake fluid residue and nearby surfaces. For safety and surface protection, avoid using strong solvents, gasoline, or harsh chemicals on painted or plastic parts, since they can cause additional damage. Always follow the product label directions, test on a small hidden area when possible, and ensure the area is fully cleaned before allowing it to dry.
📅 Last Updated: July 25, 2026 | Topic: how to clean up brake fluid | Content verified for accuracy and freshness.
References
- Brake fluid
https://en.wikipedia.org/wiki/Brake_fluid - Ethylene Glycol | HOCH2CH2OH | CID 174 – PubChem
https://pubchem.ncbi.nlm.nih.gov/compound/Ethylene-glycol - Diethylene Glycol | C4H10O3 | CID 8117 – PubChem
https://pubchem.ncbi.nlm.nih.gov/compound/Diethylene-glycol - Triethylene Glycol | C6H14O4 | CID 8172 – PubChem
https://pubchem.ncbi.nlm.nih.gov/compound/Triethylene-glycol - https://pubchem.ncbi.nlm.nih.gov/compound/Poly-dimethyl-siloxane
https://pubchem.ncbi.nlm.nih.gov/compound/Poly-dimethyl-siloxane - 2-Butoxyethanol | C6H14O2 | CID 8133 – PubChem
https://pubchem.ncbi.nlm.nih.gov/compound/2-Butoxyethanol - Propylene Glycol | C3H8O2 | CID 1030 – PubChem
https://pubchem.ncbi.nlm.nih.gov/compound/Propylene-glycol - Google Scholar Google Scholar
https://scholar.google.com/scholar?q=how+to+clean+up+brake+fluid+spill - Google Scholar Google Scholar
https://scholar.google.com/scholar?q=brake+fluid+glycol+ether+accidental+release+measures - Google Scholar Google Scholar
https://scholar.google.com/scholar?q=automotive+brake+fluid+cleanup+procedure+hazardous+waste
