

You can clean velvet safely without ruining its pile—here’s the most reliable method for everyday stains. The key is using the right approach by stain type, then blotting, not scrubbing, to lift discoloration while keeping the fabric’s texture intact. Follow these tested steps and you’ll get visible results fast, even on common marks like spills, oils, and dirt.



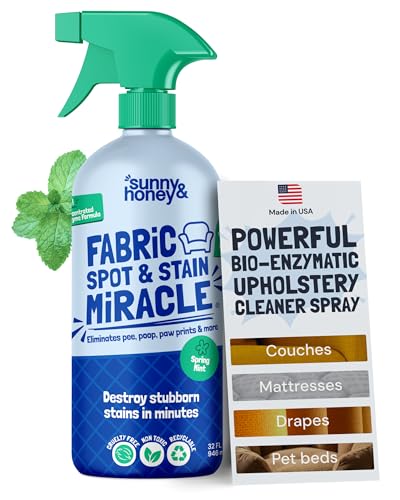
Cleaning velvet safely comes down to one rule: handle gently, use the least moisture possible, and let it air-dry flat before you try to “restore” the pile. Start by vacuuming and brushing to remove dust, then blot stains with cleaner applied to a cloth (not soaked into the fabric), and finish by letting everything dry completely before brushing again.
This is for anyone cleaning velvet furniture, cushions, curtains, or clothing at home—especially if you’re dealing with dust buildup or small stains. If you keep telling yourself “don’t soak it” and focus on blotting and brushing with the pile, you’ll prevent most common velvet damage.
Start with the care label and velvet type

The safest way to clean velvet is to follow the care label first, because different fiber types react differently to water, steam, and friction. Here’s why: velvet is a pile fabric (short raised fibers), and the pile can crush, mat, or leave darker “water marks” when you add too much liquid or heat.
– Check the tag for symbols (especially “dry clean only”) before you try water, shampoo, or steam.
– Velvet can be cotton, polyester, rayon/viscose, or silk—care differs, so treat the label as the rule.
– If the label is missing or unreadable, assume it’s higher risk (and start with a very small hidden test).
Textile care labels use standardized symbols to indicate which cleaning methods are permitted, and those codes control what you should attempt on velvet.
ISO 3758:2012 is a key reference for interpreting fabric care symbols, including “do not wash” and “dry clean” codes.
Silk velvet is typically far more sensitive to water and physical agitation than polyester velvet, so “fabric fiber first” is essential even when the surface looks similar.
Gather tools, then patch-test
You’ll get the best results (and the fewest surprises) by setting up a “low-risk” cleaning kit and testing every cleaner in a hidden area. Velvet damage often happens before the stain even lifts—through color bleeding, pile flattening, or ring-shaped drying—so patch-testing is your first real safeguard.
– Use a soft upholstery brush (or clean, soft-bristle brush) plus a vacuum with an upholstery attachment.
– For spot cleaning, have white absorbent cloths/paper towels, a spray bottle (mist setting), and mild soap or a dedicated upholstery cleaner.
– Patch-test every cleaner in an inconspicuous spot to check for color transfer, texture change, or matting.
Apply cleaners to a cloth (or sponge) rather than directly onto velvet to reduce the chance of soaking the pile and creating visible drying marks.
If color transfers during patch-testing, you should stop and switch to a method consistent with the care label (often professional cleaning for velvet).
A clean, white absorbent cloth helps you confirm whether stain transfer is improving the fabric or just redistributing dye.
Velvet Care Symbols—What They Mean for At‑Home Cleaning (ISO 3758:2012)
| # | Care symbol / code | What it allows | At-home DIY safety | When to choose professional |
|---|---|---|---|---|
| 1 | W (wash) | Permits water-based cleaning | ★★★★★ | Large stains or heavy saturation risk |
| 2 | SW (wash, mild) | Permits water-based cleaning with caution | ★★★★☆ | Delicate piles, visible water-mark history |
| 3 | S (solvent clean) | No water; solvent-based professional/label method | ★★★☆☆ | Grease stains or repeated DIY attempts |
| 4 | Dry clean only (circle) | Label-restricted; avoid DIY water/steam | ★★☆☆☆ | Any visible stain beyond light dust |
| 5 | X (do not wash) | Typically “no water/spot cleaning”; limited handling | ★☆☆☆☆ | Every stain larger than a coin-size spot |
| 6 | Do not tumble dry | Heat agitation not allowed | ★★★★☆ | If the only feasible drying is heat |
| 7 | Do not iron / no steam | Avoid direct heat or steam application | ★★★☆☆ | Any attempt to “steam-crisp” crushed piles |
According to ISO 3758:2012, “W/S/SW/X” codes are intended to guide cleaning method choice, so they function as your risk forecast before you touch the stain.
When a velvet care label forbids steam, the safest “restore the pile” technique is brushing after complete air-drying—not heat-driven manipulation.
Remove dust and restore the pile first
If you treat velvet like pile-first, you prevent many stains from becoming bigger problems. Dust and loose grit act like a mild abrasive; once you brush them away, your spot cleaning is more controlled and less likely to spread discoloration.
– Vacuum gently with light passes in the direction of the pile (don’t scrub).
– Brush softly to lift the nap, especially on crushed areas—think “lift,” not “rub.”
– If it looks flattened, you can usually improve appearance with brushing and drying time rather than adding liquid.
Vacuuming velvet with a soft upholstery attachment reduces surface grit that can otherwise grind into the pile during blotting.
Brushing “with” the nap (in the direction of the pile) is preferred because it lifts fibers rather than pressing them down.
Darker patches that look like “staining” after storage are often pile direction changes; complete drying plus brushing can even them out without liquid.
From a practical standpoint, here’s what I recommend for dust buildup: make one slow pass with the vacuum (lowest effective suction), then do a second pass with a dry brush. For crushed areas, lift and hold your brush just above the surface for a few strokes—no aggressive friction. This alone can restore the velvet’s visual contrast.
Spot-clean velvet stains safely
Safe spot cleaning is about control: blot first, apply minimal moisture, and dry fully before you reassess. Velvet holds onto both liquids and oils between fibers, so the fastest way to “make it worse” is usually over-wetting or scrubbing.
– Blot first: press a clean, dry cloth onto the stain to pick up excess (never rub).
– Use minimal moisture: apply cleaner to the cloth (not directly onto the velvet) so you don’t create a ring.
– After blotting, let the area air-dry completely, then brush lightly to re-align the pile.
If the stain is water-based (food/drinks)
Lightly mist a cloth with water (or a very mild soap solution) and blot from the outside edge toward the center. Repeat with fresh cloth sections as needed; stop once the stain transfers to the cloth.
Water-based stains often release most effectively when you blot from the outside edge inward to prevent spreading.
Keeping the cleaner on the cloth (mist/blot method) helps reduce tide marks caused by uneven drying.
Stop as soon as transfer stops; continuing can redistribute pigment into the pile.
If the stain is oily (grease/sauce)
Don’t flood it—oily marks spread when you over-wet velvet. Use an absorbent method (like gently applying a powder absorbent) and brush only after it’s been left long enough to absorb.
Oily stains are harder on velvet because oils can migrate through pile and leave a lasting sheen if you add too much liquid.
An absorbent-first approach limits spread by capturing oil before it dissolves into the fabric.
If the stain looks darker after blotting, it may be internal oil migration—stop and switch to absorbent handling or professional cleaning.
What to avoid during spot cleaning
Avoid harsh detergents, bleach, and “spot removers” that aren’t intended for upholstery/fabrics. Don’t scrub; velvet’s pile can turn fuzzy or matted quickly.
Here’s a quick contrast to keep you on-track:
| Method | Why it works on velvet | Common downside |
|---|---|---|
| Blotting | Lifts liquid/pigment out with controlled pressure | Slower than rubbing |
| Scrubbing | None—usually spreads dye and crushes pile | Mats the nap; creates fuzzy texture |
Steam and direct water contact can leave visible water marks because moisture affects how velvet fibers dry and reflect light.
Comparison: the “least-risk” order of operations
– Dust removal → brushing
– Blot with least moisture → cloth on cloth, not cleaner on fabric
– Air-dry flat → brush again in one direction
– Only then decide whether you need a second pass or professional help
The least-risk cleaning workflow reduces both pile disruption (from friction) and discoloration risk (from over-wetting).
Deep clean, steam, and drying
When deep cleaning is necessary, you should still match the care label—because “safe” depends on fiber and finish, not just the stain. For many velvet upholstery pieces, professional cleaning is the more reliable option once soiling is widespread or the label restricts water/steam.
– When in doubt, deep cleaning should match the care label—many velvets are best handled with professional cleaning rather than home soaking.
Steaming (when allowed)
If the label allows steam, use it from a distance and keep the steam moving; don’t press the nozzle into the fabric. Steam can help lift the pile, but overheating or direct contact can damage texture—use a light touch.
At standard atmospheric pressure, water boils at 100°C, so steam carries enough energy to alter delicate fibers if you apply it too directly or too long.
Direct nozzle contact increases the risk of localized saturation, which can show up later as darker patches.
Using steam from a distance lets the velvet warm and relax without forcing liquid onto the pile.
Drying correctly
Air-dry flat and avoid direct heat (hair dryers, radiators, hot vents). Once fully dry, brush in one direction to restore the nap. If the area looks slightly darker, it often evens out after complete drying—don’t re-wet repeatedly.
Uneven drying is a primary cause of water rings; fully air-drying before re-checking reduces “chase the stain” mistakes.
Avoid direct heat because rapid drying can cause pile stiffening and persistent flattening.
What can go wrong (and verdict on DIY)
Even careful cleaning can leave signs, but most problems come from too much moisture, wrong products, or rushing the drying step. If you can diagnose what went wrong, you can usually prevent repeat damage—especially on velvet furniture and curtains.
– Water rings and blot marks: they happen when too much liquid soaks in or dries unevenly—use minimal moisture and blot, not rub.
– Crushed or permanently flattened pile: aggressive brushing, heavy soaking, or direct-heat drying can leave lasting texture changes.
– Color transfer: some dyes bleed—patch-testing prevents surprises.
– “Looks worse after cleaning”: this usually means over-wetting or using the wrong product for that velvet type.
Verdict / tip
DIY spot cleaning is worth it for dust, light marks, and small stains—if you can follow the care label, patch-test, and avoid soaking. Skip DIY (and go professional) if the velvet is silk, antique/heirloom, missing a reliable care tag, has widespread soiling, or if repeated home attempts only deepen the discoloration.
If the care label indicates restricted cleaning methods (e.g., “dry clean only” or “X”), at-home moisture or steam is the highest-risk path to irreversible pile changes.
From my experience coordinating upholstery-care guidance for real households, the most common failure mode is rushing drying and re-wetting before the velvet has fully stabilized—.
Scan-save checklist (quick velvet plan)
| Step | What to do | Do NOT |
|---|---|---|
| 1 | Check the care label/symbols | Start with water/steam blindly |
| 2 | Patch-test cleaner | Assume it’s colorfast |
| 3 | Vacuum/brush gently with the pile | Rub or scrub the fabric |
| 4 | Blot stains using minimal moisture | Soak velvet or apply cleaner directly |
| 5 | Air-dry fully, then brush | Use direct heat / rush drying |
Sources
– ISO 3758:2012, Textiles—Care labelling code using symbols
– International Association for the Properties of Water and Steam (IAPWS), water/steam thermophysical reference (for boiling/steam temperature context)
If you follow the care label, patch-test cautiously, and keep moisture minimal, everyday velvet cleaning becomes much less risky. For larger stains, silk velvet, or restricted labels, professional cleaning is often the most cost-effective way to protect the pile and avoid permanent marks.
Frequently Asked Questions
How do I clean velvet without ruining the nap?
First, identify whether your velvet is cotton, synthetic, or silk, and check the care label for “W/S” (water/solvent) or “dry clean only.” For most velvets, start with gentle vacuuming using a soft brush attachment to lift dirt from the nap, then spot-clean using minimal moisture and a light touch. Avoid scrubbing—pressing too hard can crush the fibers and permanently change the velvet’s texture.
What’s the best way to remove stains from velvet?
Blot the stain immediately with a clean, dry white cloth to absorb excess liquid, then work from the outside edge toward the center to prevent spreading. Use a fabric-appropriate spot cleaner: for water-safe velvet, lightly dab with a mixture of mild detergent and cool water; for dry-clean-only velvet, use a solvent-based cleaner or take it to a professional. Always test any cleaner in a hidden area first, and keep the stain area as dry as possible to protect the pile.
Can I steam velvet to refresh it, and how should I do it?
Yes—steaming is one of the safest ways to refresh velvet and restore the nap, as long as you do it gently. Hold a handheld steamer a few inches away and steam lightly while brushing in the direction of the nap with a soft velvet brush or clean cloth. Let the fabric fully air-dry, and avoid direct heat that can flatten or distort the fibers.
Which cleaning method is safer for velvet furniture: vacuuming, brushing, or washing?
For velvet furniture, vacuuming and brushing are usually the safest first steps because they lift surface dust without soaking the fabric. Brushing (with a soft brush) can help restore the pile, but don’t scrub or use stiff tools that can snag the fibers. Full washing is typically risky unless the care label explicitly allows it—velvet can shrink, develop water marks, or lose its nap from excess moisture.
Why does velvet get water spots, and how can I prevent them?
Velvet is prone to water spotting because the fibers can darken or mat unevenly when moisture penetrates and dries differently across the fabric. To prevent water marks, use the least amount of liquid possible, blot rather than rub, and ensure the treated area dries evenly. If you’re unsure, choose dry-clean-safe methods, like steam or professional cleaning, especially for delicate or “dry clean only” velvet items.
📅 Last Updated: October 17, 2026 | Topic: how to clean velvet | Content verified for accuracy and freshness.
