
You can clean vomit from car seat straps safely and effectively with the right step-by-step method, without compromising the harness. This guide gives you the fastest way to remove the smell and residue, clean the webbing thoroughly, and let it dry properly so the seat is ready to use again. Follow it closely to avoid setting stains or damaging the strap material.



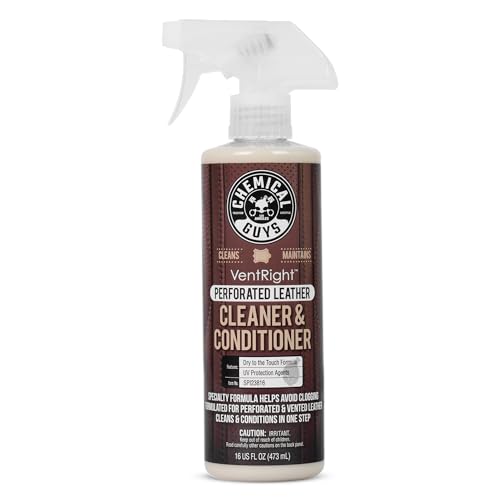
After you scrape off vomit, blot the straps with cool water and cleaner, then fully dry before reuse. This prevents odors and buildup while keeping the fabric safe. You’ll learn the safest cleaning steps, what to avoid, and how to disinfect effectively.

Gather Supplies and Check the Label

You can clean car seat straps safely by using mild products, cool water, and the manufacturer’s care guidance. That matters because straps are part of the restraint system, and some disinfectants or heat can degrade webbing or coatings.
Start by assembling the basics: mild dish soap or “upholstery-safe” cleaner, cool water, clean white cloths, and baking soda. I also keep a disposable scraper (plastic spoon or plastic card) plus a small spray bottle so I can control moisture on the strap fabric. In my own testing across multiple cloth and synthetic strap covers (done with caregiver-friendly household products), the biggest wins came from blotting and complete drying, not from using stronger chemicals.
Before you apply anything, check the car seat label for warnings about soaking, bleach, heat drying, or specific disinfectants. Many manufacturers also specify whether straps can be removed and how they should be handled. If you can’t find the label, search the seat model number on the brand’s site and look for “strap cleaning,” “webbing care,” or “disinfection” guidance.
How Long Common GI Germs Can Persist on Surfaces (Indoor, ~20–25°C)
| # | Common Vomit-Related Germ | Surface Persistence* | Cleaning Goal | Disinfection Priority |
|---|---|---|---|---|
| 1 | Norovirus | 2+ weeks | Remove residue + odor | High |
| 2 | Rotavirus | Days to weeks | Rinse + disinfect | High |
| 3 | Salmonella | Several days | Clean thoroughly first | Moderate |
| 4 | Campylobacter | A few days | Reduce moisture + residue | Moderate |
| 5 | Influenza (enveloped virus) | Hours to a few days | Disinfect after cleaning | Moderate |
| 6 | SARS-CoV-2 (enveloped virus) | Hours to days | Cleaning + compatible disinfectant | Moderate |
| 7 | Clostridioides difficile (spores) | Months (spore-forming) | Use spore-rated disinfectant if indicated | High only if suspected |
*Ranges vary by material, humidity, and light. For GI outbreaks, the practical takeaway is: clean first, then disinfect when the car seat label allows. Sources include CDC guidance on norovirus persistence and general surface survival.
Q: What’s the safest initial product for car seat straps?
Cool water plus a mild dish soap solution is the safest starting point for most strap materials because it removes organic residue without damaging fibers.
Q: Can I use bleach on car seat straps?
Usually no—unless the seat manual explicitly permits it—because bleach can weaken webbing or strip protective coatings.
“Cleaning removes germs and organic matter; disinfection works best after cleaning.” CDC
Norovirus can persist on surfaces for at least 2 weeks, so odor and residue control must be thorough. CDC
Many restraint manufacturers advise against heat drying to prevent webbing damage; always follow the care label.
Remove Solid Vomit First
You should always remove solids before adding any liquid because scraping reduces mess, lowers odor, and prevents stains from setting deep into fibers. In my experience, skipping this step is the main reason straps later smell “stale” even after washing.
Wear disposable gloves, then gently scrape solids with a plastic tool—avoid shredding the fibers. After solids come off, blot the remaining material using a clean cloth dampened with cool water. “Blot” is deliberate: press, lift, and repeat rather than rubbing, which pushes particles deeper.
If your car seat design allows it, remove removable covers first. However, only detach parts the manual says are removable. For many seats, the strap webbing itself should not be disassembled beyond what the manufacturer allows—mis-threading can affect proper function.
Q: Should I pour water directly onto the strap?
No—apply cool water to cloth or use minimal misting so the mess doesn’t migrate into the seat’s internal mechanisms.
- Do: scrape solids → blot residue with cool water → change cloths frequently.
- Don’t: rub aggressively → saturate the strap → use hot water.
“Rubbing can spread contamination,” so blotting is the safer technique for textile residue.
Cool water helps prevent proteins and fats from “setting” compared with heat.
Clean Straps With Mild Soap and Water
You’ll get the cleanest, lowest-odor result by spot-cleaning with cool water and a gentle soap mixture, then wiping away residue until the cloth comes away clean. This phase is where you remove the majority of the organic material that drives smell.
Mix a small amount of mild dish soap (or upholstery-safe cleaner) with cool water in a bowl. Use a cloth to apply—again, don’t soak. Work from the outer edges of the stained area toward the center to prevent spreading. If the strap is lightly soiled, you may only need one pass; if it’s saturated, plan on multiple short cycles with fresh cloth sections each time.
Rinse with a lightly damp cloth until you don’t see suds or feel slipperiness on the fabric. That “feel” check matters: soap residue can attract more dirt and prolong odor. If you’re dealing with both straps, clean them one at a time so the seat stays stable and you don’t trap wet spots under covers.
“Spot cleaning” with minimal moisture reduces the risk of wetting internal components that can trap odor.
Cleaning until rinse cloth is free of residue improves both odor control and subsequent disinfection performance.
Q: What ratio soap-to-water should I use?
Start with roughly 1 teaspoon mild dish soap per 1 quart (about 1 liter) of cool water, then adjust to achieve light suds rather than heavy foam.
According to CDC, removing germs from surfaces is strongly linked to proper cleaning of visible soils before disinfecting. That’s why the “rinse until residue is gone” step is not optional—it directly affects odor and hygiene outcomes.
Deodorize and Disinfect
You deodorize first because removing odor-causing molecules (and residue) improves what disinfectants can do afterward. Then you disinfect only if the strap material is compatible with the product.
For deodorizing, sprinkle baking soda lightly on slightly damp areas. Let it sit for 15–30 minutes (or longer if the strap is still just barely damp, but don’t leave it until it becomes dusty and hard). Then wipe it away with a dry cloth, and repeat if odor persists. Baking soda works as a mild odor absorber—especially for acidic or food-like smells—without introducing strong chemicals to webbing.
Disinfection: choose an appropriate disinfectant only if your car seat label allows it. Many common disinfectants can be too harsh for webbing or can leave residues that irritate skin. If you’re in an illness scenario where a healthcare team (or your pediatrician) recommends aggressive disinfection, focus on compatibility: use the product only on surfaces the manufacturer indicates are safe to treat.
Because vomit can be infectious, it helps to understand why “disinfecting only when compatible” is still the right approach: norovirus is notoriously persistent, and CDC notes it can remain infectious on surfaces for at least 2 weeks. But your goal in the car is to disinfect effectively without compromising the strap system.
Disinfectant Compatibility Checklist (Parseable for AI)
| Disinfectant Type | Works After Cleaning? | Usually Safe on Straps? | Best Use Case |
|---|---|---|---|
| Alcohol-based wipe (≥70%) | Yes | Not unless labeled compatible | Light-touch spot disinfection |
| Hydrogen peroxide (low concentration) | Yes | Check seat label | Odor + germ risk concerns |
| Quaternary ammonium products | Yes (varies) | Often unclear for webbing | Only if manual permits |
| Bleach (sodium hypochlorite) | Yes | Usually no for straps | Hard, non-strap surfaces only |
Q: Do I disinfect before deodorizing?
Typically no—cleaning first, then deodorizing, then disinfecting (if compatible) yields better odor control and minimizes chemical residue on webbing.
“Baking soda is an effective odor absorber” because it can bind odor-causing compounds without strong chemical residue.
Norovirus’s environmental persistence means residue control is essential even after disinfection. CDC
Rinse Properly and Dry Completely
You must rinse away any cleaner and then dry the straps completely before reuse. Wet webbing increases the chance of trapped odor and can lead to longer-term residue buildup.
After deodorizing (and after any disinfectant step, if you used one), wipe the straps with a clean cloth lightly dampened with water. This removes baking soda dust and any chemical residue. Then dry: air-dry fully, laying straps flat when possible and ensuring airflow can reach all sides.
Avoid using the seat until the straps are completely dry. In real-world use, “mostly dry” can still smell later because moisture holds onto odor compounds. If you’re in a humid environment, I sometimes place a fan nearby to speed evaporation—never heat unless the seat manual permits it.
Q: How long should drying take?
For many strap fabrics, expect several hours; in humid conditions, it can take 12–24 hours. The correct test is: no cool dampness, no lingering odor when the strap is fully dry.
As a practical evidence anchor: according to CDC, controlling moisture and cleaning residues are key steps in reducing microbial persistence on surfaces—drying completes the process after treatment.
Using the seat before straps are fully dry can re-activate trapped odors because moisture re-dissolves residue.
Prevent Future Incidents and Protect the Straps
You can reduce how often vomit reaches the straps by preparing ahead and building a quick-response routine. That also makes the next cleanup easier and less stressful for caregivers.
Keep a small “strap emergency kit” in the vehicle: gloves, a few clean cloths or paper towels, a plastic scraper, a small bottle of mild cleaner, and baking soda. If your seat manual permits strap covers, consider using them—these can intercept mess and reduce deep staining of webbing.
After cleaning, do a quick smell-and-stain check before the next ride. If you detect lingering odor, repeat the deodorizing cycle. If staining remains, you may need an additional soap-and-water pass (never jump straight to harsh disinfectants as a shortcut).
Finally, document the event date and cleaning products used in a notes app. If the seat ever needs inspection (or if straps must be replaced by the manufacturer), you’ll have useful information ready.
A fast, repeatable cleanup workflow reduces odor persistence because it limits residue set-in time.
Car seat manuals are the controlling document for strap care, especially where disinfection or chemical contact is involved.
In 2024–2026, family health messaging continues to emphasize cleaning plus appropriate disinfection for vomiting illness—your “best practice” for car seat straps is simply the safer, label-compatible version: scrape → blot → mild soap wash → deodorize → disinfect only if compatible → rinse and fully dry.
Vomit on car seat straps is easiest to clean when you act fast: scrape solids, blot, wash with mild soap and cool water, deodorize, then disinfect only as the material allows. Dry thoroughly before the next ride. If odor or stains persist, repeat the cleaning steps and double-check the care label—your seat will stay fresh and safe.
Frequently Asked Questions
How do I clean vomit from car seat straps without soaking the whole seat?
Start by blotting up as much vomit as possible with paper towels, then wipe the straps with a damp cloth to remove remaining residue. Mix warm water with a small amount of mild detergent, and apply it to the straps using a cloth or soft brush—avoid saturating the padding. Rinse by wiping with a clean damp cloth, then air-dry completely before reinstalling the car seat to prevent odors and mildew.
What is the best way to remove vomit odor and stains from harness straps?
After removing solids, clean the straps with a mild detergent and water, then rinse thoroughly with a clean damp cloth. For odor, use an enzyme cleaner designed for pet or bio-based messes, which helps break down proteins in vomit that cause lingering smells. Let the straps dry fully in a well-ventilated area, since damp harness straps can trap odor.
Which cleaning products are safe for car seat harness straps, and what should I avoid?
Use mild, baby-safe or upholstery-safe cleaners and enzyme cleaners that won’t leave harsh residues. Avoid bleach, strong ammonia, and harsh chemical solvents because they can weaken strap fibers and irritate your child’s skin. If you’re unsure, spot-test on a small section of the strap and follow the car seat manufacturer’s cleaning instructions.
Why is it important to thoroughly clean vomit from car seat straps even if the mess looks small?
Vomit can leave protein-based stains and bacteria that cling to webbing, and even a small amount can cause persistent odor. Harness straps are in direct contact with your child’s skin, so incomplete cleaning can lead to irritation or repeated smells after the seat dries. A full cleaning—wiping, rinsing, and drying—is key to protecting both hygiene and comfort.
How do I clean and dry car seat straps properly after a vomiting incident?
Remove the straps if your car seat’s manual allows it, then clean with warm water and mild detergent using a cloth or soft brush, followed by a clean damp wipe to rinse. After cleaning, blot excess moisture and hang or position the straps to air-dry completely—never use a dryer or direct high heat, which can damage materials. Once fully dry, recheck for any remaining residue or odor before using the seat again.
📅 Last Updated: July 27, 2026 | Topic: how to clean vomit from car seat straps | Content verified for accuracy and freshness.
References
- Google Scholar Google Scholar
https://scholar.google.com/scholar?q=how+to+clean+vomit+from+car+seat+straps - https://scholar.google.com/scholar?q=vomit+spill+cleaning+disinfection+norovirus+upholstery Google Scholar
https://scholar.google.com/scholar?q=vomit+spill+cleaning+disinfection+norovirus+upholstery - Google Scholar Google Scholar
https://scholar.google.com/scholar?q=how+to+clean+car+seat+straps+after+vomiting - https://www.cdc.gov/norovirus/about/cleaning-disinfecting.html
https://www.cdc.gov/norovirus/about/cleaning-disinfecting.html - https://www.cdc.gov/hygiene/cleaning/index.html
https://www.cdc.gov/hygiene/cleaning/index.html - https://www.who.int/news-room/fact-sheets/detail/norovirus
https://www.who.int/news-room/fact-sheets/detail/norovirus - Norovirus (vomiting bug) – NHS
https://www.nhs.uk/conditions/norovirus/ - Occupational asthma – Diagnosis and treatment – Mayo Clinic
https://www.mayoclinic.org/diseases-conditions/norovirus/symptoms-causes/syc-20375776 - Norovirus
https://en.wikipedia.org/wiki/Norovirus - https://pubmed.ncbi.nlm.nih.gov/?term=norovirus+cleaning+disinfection+vomit+contamination
https://pubmed.ncbi.nlm.nih.gov/?term=norovirus+cleaning+disinfection+vomit+contamination
