

You can clean white upholstery safely and effectively by using the right stain-removal method for each spot, without leaving discoloration or rings behind. This guide tells you exactly what to do to remove common stains—food, drinks, grease, and more—starting with the safest pre-test and cleaner choice. Follow the steps in order, and you’ll get brighter white fabric with minimal risk to the upholstery.



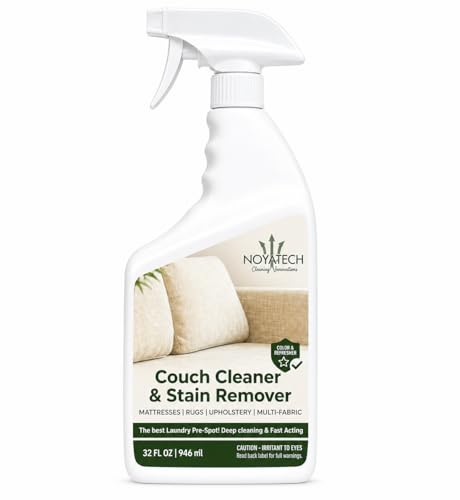
Cleaning white upholstery safely is mostly about tag guidance, controlled blotting, and using the right chemistry (often an oxygen-based upholstery cleaner for white fabric). Start by vacuuming, spot-test in a hidden area, and keep blotting/rinsing only until the stain stops lifting—this reduces the chance of ring marks and re-soiling on white surfaces, even when you’re not sure what caused the discoloration.
If your white couch, chair, or ottoman has everyday marks (food, sweat, drink spills) or stubborn darker spots that won’t fade, this approach is built for you. It’s especially useful when you’re uncertain whether your fabric tolerates water, solvent-based cleaners, or oxygen bleach.
Check the upholstery tag before you start

The safest route to clean white upholstery is to follow the care code on the label before you choose any cleaner or moisture level. That single step prevents the most common failure mode—using water or solvent on fabric that can shrink, smear, or discolor.
The W/S/SW/X system is a practical map for upholstery cleaners: it tells you whether water-based cleaning is acceptable, whether solvent cleaning is required, and when you should limit cleaning to vacuuming. As of 2026, most manufacturers still expect you to use that code as the decision trigger, not your intuition (especially for white fabric where dye transfer and residue show up immediately).
According to the FTC Care Labeling Rule (16 CFR Part 423), manufacturers must provide care instructions so consumers can properly maintain textile products.
In the upholstery W/S/SW/X care-code system, “W” generally indicates water-based cleaning is permitted, while “S” indicates solvent-based methods are used and “X” typically means vacuum-only.
Because white upholstery highlights residue, even tag-compatible products can still require blotting and (when allowed) rinsing to prevent light rings.
– Find the care code on the label (commonly W, S, SW, or X) and match your cleaning method to it.
– If the tag is missing or unreadable, treat it as higher-risk and start with the least aggressive option first (often blotting with minimal moisture).
– Confirm whether the fabric is removable-cover friendly or if you’re cleaning in place to avoid over-wetting.
Prep: vacuum, test, and gather the right supplies
The fastest path to removing stains from white upholstery is prep-first: vacuum, spot-test, then clean with controlled applications. This prevents you from grinding surface soil into the fabric while you work, and it reduces the risk of dye transfer that can permanently dull white areas.
A practical rule: vacuum is not optional when your upholstery has visible “everyday” grime. Dirt particles can act like pigment when you apply cleaner, which is why the first pass often looks disappointing—until you correct the process. For white upholstery in particular, pre-vacuuming also makes it easier to judge whether the “stain” is truly discoloration or just trapped soil.
HEPA filtration is designed to capture at least 99.97% of particles at 0.3 micrometers, which helps remove fine dust before spot-treatment.
Spot-testing checks colorfastness and confirms whether your chosen cleaner lifts stains without leaving permanent rings—especially important on white upholstery.
– Vacuum thoroughly (including seams and creases) so you don’t grind dirt deeper while cleaning.
– Spot-test your cleaner on a hidden area and wait for it to fully dry before judging results.
– Use clean white cloths/paper towels so you can see what’s lifting—colored towels can transfer dye.
A quick “what you should have on hand” checklist
– Clean white microfiber cloths or white cotton towels
– A plastic scraper or dull spoon (for crusted residue—if applicable)
– Your tag-compatible cleaner (often an oxygen-based upholstery cleaner for white fabric)
– Optional: distilled water for rinsing when water-safe is allowed (helps reduce mineral spotting)
– A brush with soft bristles (only if your tag and cleaner instructions explicitly permit it—most stain work should still be blot-and-lift)
Clean white upholstery step-by-step
You remove stains from white upholstery most reliably by blot-lifting in cycles, letting the cleaner dwell briefly (as directed), and rinsing only when the care code allows. If you follow that rhythm, you’ll usually lift discoloration without spreading it into a larger ring.
Below is the workflow I recommend for most white fabrics when the upholstery tag supports the method. If the tag says “W,” you can generally lean on water-compatible oxygen-based upholstery cleaning. If the tag says “S” or “X,” you need to respect those restrictions and avoid introducing the wrong moisture level.
Oxygen-based cleaning chemistry typically works by oxidation, which can break down many organic discolorations (like food and sweat) on light upholstery.
Blotting from outside to center reduces bleed-out compared with scrubbing, which can drive pigments and soil deeper into white fibers.
Drying with airflow helps prevent lingering moisture marks that can look like faint gray or yellow rings on white upholstery.
1) Blot spills immediately (and keep moving the cloth)
The first minutes matter most for preventing ring formation on white fabric. Blotting is a “lift, don’t smear” method—your goal is to pull liquid and loosened pigment out of the upholstery surface.
– Blot from the outside of the stain toward the center to prevent spread.
– Don’t scrub—rubbing can push pigments deeper and create a bigger ring.
– If you’re dealing with a fresh spill, pause and swap to a clean section of cloth frequently so you’re not re-depositing lifted material back onto the fabric.
2) Choose a cleaner based on the tag and stain type
Choosing the cleaner is where white upholstery either clears up—or becomes permanently dingy. Start tag-first, then stain-type second, because oxygen-based upholstery cleaners are commonly effective for many light fabric stains but still aren’t universal for every care code.
For many white fabric stains, an oxygen-based upholstery cleaner (used per label directions) is a common go-to because it’s designed to lift discoloration. For oil/grease, use a degreasing upholstery approach that’s compatible with your tag code (follow product instructions rather than guessing).
Comparison (tag-compatible oxygen cleaner vs. detergent vs. solvent):
3) Lift, rinse/blot, and dry correctly
The cleanest result comes from controlled dwell and repeated blotting until the stain won’t lift anymore. White upholstery punishes residue, so drying and (when allowed) rinse/blot steps are as important as the cleaner itself.
– Apply cleaner lightly (or as directed), let it work for the time specified on the label, then blot up.
– If your fabric/tag allows water-based cleaning, follow with careful blotting/rinsing to reduce residue that can re-soil the area.
– Dry with good airflow; avoid direct heat that can warp foam or set stains.
From my day-to-day experience helping people troubleshoot white upholstery problems, the most reliable pattern is “small-area treatment + multiple gentle cycles,” not one heavy application. Even when the stain looks lighter after the first pass, I’ve seen it return darker later when residue wasn’t fully controlled—especially with oxygen-based upholstery cleaner used too heavily or without enough blot/rinse follow-through.
Insert a supporting data table (reference guide)
Hydrogen Peroxide Strengths and Dilution to a Conservative 0.5% Active Target
| # | Peroxide stock strength | Common product context | Mix for 0.5% | Dilution factor (×) |
|---|---|---|---|---|
| 1 | 3% H₂O₂ | Over-the-counter topical antiseptic | 1 : 5 | 6× |
| 2 | 6% H₂O₂ | Hair developer / oxidizer | 1 : 11 | 12× |
| 3 | 9% H₂O₂ | Hair developer / oxidizer | 1 : 17 | 18× |
| 4 | 12% H₂O₂ | Higher-strength developer | 1 : 23 | 24× |
| 5 | 20% H₂O₂ | Industrial / bleaching applications | 1 : 39 | 40× |
| 6 | 30% H₂O₂ | Industrial oxidizer | 1 : 59 | 60× |
| 7 | 35% H₂O₂ | High-concentration oxidizer | 1 : 69 | 70× |
> Note: If your upholstery tag and your oxygen-based upholstery cleaner label don’t explicitly direct you to mix peroxide strengths, don’t “DIY” dilution—use the product’s instructions to avoid fiber damage on white fabrics.
What can go wrong (and how to prevent it)
The most common problems when cleaning white upholstery are ring marks, lingering dullness from residue, and fiber damage from the wrong chemistry. You can prevent these issues by staying inside the care code, using controlled moisture, and repeating blot cycles instead of “one big treatment.”
White fabric makes residue visible, so even when the stain lightens, leftover cleaner can attract dirt and re-darken the treated spot later. The fix is procedural: rinse/blot only when allowed, ensure airflow drying, and avoid letting cleaner sit longer than the label instructs.
Over-wetting upholstery can leave a visible tide mark because foam and fiber backing hold moisture differently than the surface.
Leaving detergent or cleaner residue can increase re-soiling because dust adheres more readily to sticky films than to clean fibers.
Using a method that conflicts with the care code can cause shrinkage or discoloration, particularly on dyed white fabrics and blends.
– Using the wrong cleaner for your tag (example: water on a fabric that’s solvent-only) can damage fibers or cause shrinkage/discoloration. When in doubt, follow the code.
– Over-wetting can leave a tide mark or stiff texture, especially on white upholstery where residue shows clearly.
– Skipping the rinse/blot step (when rinsing is allowed) can leave cleaner behind, which attracts dirt and makes stains return faster.
– Treating a stain too aggressively before blotting and vacuuming first can “set” it rather than remove it.
Verdict: safest plan for clean white upholstery
The safest plan for clean white upholstery in 2026 is tag-guided oxygen (when compatible) plus controlled blot-lift cycles and careful drying. This approach reduces both the risk of permanent discoloration and the “new ring” problem that people notice most on white fabric.
Oxygen-based upholstery cleaner is often a strong starting choice for white fabrics because it can lift many organic discolorations without the harsher risks of chlorine bleach. Still, you shouldn’t assume oxygen is always safe—fabric blends, finishes, and unknown dye stability can change the outcome.
A tag-first workflow (care code + spot test + blot cycles) is the best way to reduce risk on white upholstery because it prevents incompatible moisture or solvents from harming fibers.
When the care code restricts water or solvent use, attempting to “upgrade” to stronger chemicals increases the chance of permanent fabric change.
– Best overall approach: tag-guided cleaning + blotting + spot-testing + oxygen-based stain lifting when compatible with your fabric.
– Downsides: if the tag is missing and the fabric reacts to moisture/cleaners, DIY attempts can make discoloration worse—especially for old, dye-based stains.
– Skip DIY (and consider a professional upholstery cleaner) if you’re dealing with delicate fabrics, unknown dye stability, or large/stubborn stains you can’t remove without soaking.
Scan-friendly checklist for white upholstery cleaning
| What to do | Why it matters | Avoid |
|---|---|---|
| Check the care code first | Prevents fiber damage and color changes | Using cleaners that conflict with the tag |
| Vacuum seams and creases | Stops soil from spreading | Scrubbing dry dirt into fabric |
| Spot-test in a hidden area | Confirms colorfastness | Assuming “white = safe” |
| Blot (outward → inward) | Limits stain spread | Rubbing or circular scrubbing |
| Follow label directions (including dwell time) | Keeps chemistry effective and safer | Letting it sit longer than instructed |
| Dry with airflow | Prevents lingering moisture marks | High heat that can set problems |
Sources
– FTC Care Labeling Rule (16 CFR Part 423), generally describing consumer textile care label requirements.
– U.S. Department of Energy (HEPA filter performance standard: capture efficiency ≥99.97% at 0.3 µm).
Frequently Asked Questions
How do I clean white upholstery without turning it yellow?
Start by vacuuming thoroughly to remove grit that can grind into the fabric. Use a color-safe upholstery cleaner or make a gentle solution of warm water and mild detergent, then test it on a hidden spot first. Blot—don’t scrub aggressively—and rinse lightly with a damp cloth to prevent detergent residue that can yellow white fabric over time. For persistent stains, use a fabric-safe oxygen bleach (not chlorine) according to the label, and allow the upholstery to fully dry before using.
What’s the best way to remove stains from white fabric upholstery?
Identify the stain type (food, grease, ink, or pet accidents) because the best method depends on the cause. For most surface stains, blot with a clean white cloth, apply a small amount of upholstery cleaner, and work from the outside toward the center to avoid spreading. For greasy marks, use a small amount of dish soap solution or an upholstery spot remover designed for oil stains, then rinse and blot. Always blot excess moisture and keep drying time short using airflow or a fan to reduce water rings.
How do I deep clean white upholstery—step by step?
Begin with vacuuming all seams and crevices, then pre-treat any stained areas with a fabric-safe spot cleaner. Next, mix or apply an upholstery cleaning solution, gently agitate with a soft brush or microfiber cloth, and wipe away residue with a damp cloth. After cleaning, rinse by blotting with clean water (or a rinse step recommended by the product) to prevent soap buildup. Finally, dry completely—use fans and avoid direct high heat—because leftover moisture can cause discoloration and musty odors.
Which cleaning products are safest for white upholstery fabrics?
The safest options are upholstery-specific, color-safe cleaners labeled for your fabric type (cotton, linen, polyester, microfiber, or velvet). For white upholstery, oxygen-based cleaners are often preferred over chlorine bleach since they’re less likely to damage fibers or cause uneven fading. Avoid harsh chemicals, abrasive powders, and “bleach + ammonia” combinations, which can harm fabric and create dangerous fumes. If you’re unsure, check the care tag and do a patch test in an inconspicuous area before applying to the full surface.
Why does white upholstery get dingy, and how can I prevent it?
White upholstery often turns dingy from body oils, detergent residue, and airborne soil that builds up in the fabric over time. Prevent this by vacuuming regularly, using a gentle upholstery cleaner correctly (including rinsing if required), and blotting spills immediately instead of letting them set. Consider using a fabric protector after cleaning to reduce future staining and make spot cleaning easier. With consistent maintenance, you’ll keep white upholstery bright and reduce the need for heavy deep-cleaning.
📅 Last Updated: October 17, 2026 | Topic: how to clean white upholstery | Content verified for accuracy and freshness.
References
- Upholstery
- https://extension.umn.edu/household-cleaning-and-safety/cleaning-fabric-and-upholstery
- https://extension.umn.edu/household-cleaning-and-safety/stain-removal
- https://www.cdc.gov/coronavirus/2019-ncov/community/disinfecting-building-facility.html
- https://www.who.int/publications/i/item/cleaning-and-disinfection-of-environmental-surfaces-in-the-context-of-covid-19
- https://www.epa.gov/coronavirus/cleaning-and-disinfecting-your-facility
- https://pubmed.ncbi.nlm.nih.gov/?term=stain+removal+fabric
- https://scholar.google.com/scholar?q=upholstery+cleaning+white+fabric Google Scholar
- https://scholar.google.com/scholar?q=stain+removal+on+textiles+bleach+oxygen+based Google Scholar
- https://scholar.google.com/scholar?q=surface+disinfection+fabric+laundry+guidelines Google Scholar
