

Clean your ears in the shower safely by using gentle water flow only—this is the clear winner for most people. This guide answers how to clean your ears in the shower without pushing wax deeper, causing irritation, or risking eardrum damage. Follow these safe steps for a quick, low-risk routine tailored to what your ear actually needs.
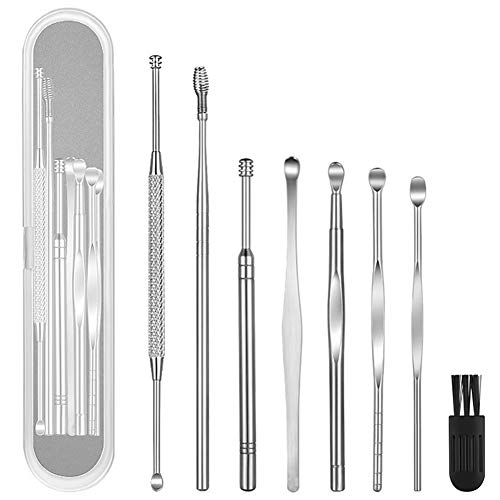



Skip inserting anything into your ear canal—just let warm, soapy water rinse the outer ear during your shower. If you get wax buildup or recurring discomfort, use gentle cleaning methods afterward (or see a clinician) instead of trying to “flush” your ears in the shower. This approach keeps the ear canal’s delicate skin protected while still removing soap residue, sweat, and grime from the parts of the ear you can safely reach.
If you’ve ever finished a shower feeling “blocked,” itchy, or mildly tender at the opening, this matters—because small injuries inside the canal can make symptoms worse. As of 2026, mainstream ENT guidance still emphasizes self-cleaning wax migration and discourages inserting objects into the canal, especially for people with pain, drainage, or a history of ear drum problems.
What “cleaning your ears in the shower” should mean

The safest interpretation is simple: clean only the outer ear (the pinna and the area around the opening), while letting the ear canal handle its own wax. Earwax usually moves outward naturally, so your goal in the shower is to rinse away external residue—not to “scrape out” everything you can see.
Earwax management works best when you respect the ear canal as a protected passage with fragile skin. In practical terms, shower cleaning should focus on reducing external buildup and preventing irritation at the entrance where soap, hair products, and water can collect.
Warm water rinsing during a shower is appropriate for cleaning the outer ear, but it should not be directed forcefully into the ear canal.
Most earwax is designed to migrate outward over time, so complete removal is not the aim of safe at-home routines.
Soap should be used on the outer ear and rinsed thoroughly to avoid residue that can irritate the ear-canal skin.
Focus on the outer ear, not the canal
When people say “clean my ears,” they often picture removing wax inside the canal. Clinically, the safer routine is to clean what you can reach without insertion: the pinna (the visible ear) and the skin around the canal entrance.
To ground expectations, the ear canal is a curved, narrow passage—about 2.5 cm (roughly 1 inch) long in adults—which helps explain why cotton swabs and other objects can easily push wax deeper rather than remove it. According to , the adult external ear canal is approximately 2.5 cm long.
Use warm water to loosen outside grime
Soap and shampoo buildup can collect around the canal opening. In the shower, warm water helps loosen external grime without damaging the canal. After washing, a thorough rinse reduces the chance that leftover soap or conditioners contribute to itching.
Expect natural earwax migration
Earwax (cerumen) is produced by glands in the canal and has a self-cleaning role. Rather than “starting over” with aggressive clearing, the typical strategy is to support natural movement by keeping the outer ear clean and dry after the shower.
Step-by-step: safe shower routine
You can clean your ears safely in the shower by letting water flow over the outside of your ears and using a gentle washcloth only on the outer ear. Avoid directing high-pressure water into the canal, because that combination (pressure + insertion habits) is what turns a routine rinse into a risk.
A safe shower method uses low-to-moderate water flow over the ear and avoids aiming high-pressure water into the ear canal.
Cleaning should be limited to the pinna and the canal opening area; pat-drying the outside helps reduce lingering moisture that can irritate skin.
Cotton swabs and fingers inside the ear canal are commonly discouraged because they can push wax deeper and cause micro-injuries.
Step 1: Let water run over your ears (don’t aim at the canal)
During your shower, keep the water aimed generally at your head and rinse the outer ear. This is enough to remove loose residue.
– Let water run over your ears while you shower.
– Avoid aiming high-pressure water directly into the ear canal.
– If you’re rinsing hair products, take an extra moment to rinse the outer ear thoroughly.
Step 2: Wash the outer ear with a gentle, soapy washcloth
Use a washcloth (soft, clean, and not abrasive). Apply mild soap as you would for skin on the face—then wash the visible parts of the ear and the area around the canal entrance.
– Wash the outer ear with a gentle, soapy washcloth
– Rinse well (residue can increase irritation)
For reference, guidance on ear care commonly highlights using body-temperature or comfortably warm water rather than hot or forceful flow. According to , ear irrigation guidance often refers to using water around 37°C / 98.6°F (body temperature) for comfort and safety.
Step 3: Pat dry the outer ear—no cotton swabs
Pat-dry the outer ear and the entrance area with a clean towel. The aim is to remove water from skin surfaces you can reach without insertion.
– Pat dry the outer ear with a clean towel
– No cotton swabs or fingers inside
If water exposure triggers discomfort, keeping the canal entrance dry after the shower can reduce irritation from trapped moisture.
Practical “evidence-aligned” options (quick view)
Below is a structured way to compare common approaches by how strongly they match standard clinician guidance for safe at-home use.
Safety alignment of common ear-cleaning approaches (for typical, healthy ears)
| # | Approach | What it targets | At-home fit | Guideline-aligned safety |
|---|---|---|---|---|
| 1 | Warm shower rinse (outer ear only) | Pinna + entrance | Most people | ★★★★★ |
| 2 | Gentle washcloth + mild soap (outer ear) | Pinna + entrance | Most people | ★★★★★ |
| 3 | OTC cerumen-softening drops (carbamide peroxide; common strength 6.5%) | Wax softening | When canal is intact | ★★★☆☆ |
| 4 | Bulb syringe irrigation at home (gentle flow only) | Wax flushing | Only with no red flags | ★★☆☆☆ |
| 5 | High-pressure “flush” in shower | Wax flushing | Generally avoid | ★☆☆☆☆ |
| 6 | Ear candling | “Suction” claim | Do not use | ★☆☆☆☆ |
| 7 | Clinician microsuction | Targeted removal | When symptomatic | ★★★★★ |
Note: The star ratings represent guideline-aligned suitability (not a measured clinical trial score).
What to avoid (and why)
The simplest answer is: don’t put anything into your ear canal, don’t use ear candling, and don’t force water into your canal—especially if you have pain or drainage. These actions are more likely to push wax deeper, irritate the canal, or cause injury than they are to solve the root problem.
Cotton swabs and other inserted objects can push cerumen deeper and increase the risk of canal abrasion or perforation.
Ear candling is not a reliable wax-removal method and can cause burns and other injuries.
Forceful irrigation is inappropriate when there is suspected eardrum perforation, active infection, or unexplained drainage.
Don’t put objects in the canal
The ear canal skin is not designed for repeated mechanical contact. When you insert cotton swabs, hair pins, or rolled tissues, you often:
– Push wax deeper toward the eardrum
– Create micro-tears that lead to burning or itching
– Increase the chance of infection by disturbing the skin barrier
Comparison: what’s safer vs. what tends to backfire
Here’s an at-a-glance contrast that matches common clinician guidance:
| Action | Why it seems appealing | Why it can cause problems |
|---|---|---|
| Warm shower rinse (outer ear) | Quick, low-effort, feels “clean” | Low risk when you avoid directing water into the canal |
| Cotton swab in the canal | Targets visible wax | Pushes wax inward and can injure the canal skin |
| High-pressure flushing | Attempts rapid “removal” | Can worsen inflammation and becomes unsafe with pain or perforation risk |
| Ear candling | Suction concept | Known injury risk (burns) and unreliable results |
Avoid “ear candling”
Ear candling is often marketed as a natural wax extractor. However, it can burn the ear canal and surrounding skin, and it does not reliably remove wax. Mainstream ENT organizations consistently advise against it due to injury risk and lack of proven effectiveness.
Don’t forcefully flush if there’s pain, drainage, or perforation risk
If you have:
– Sharp pain during water exposure
– Fluid or pus drainage
– Suspected eardrum perforation
– Recent ear surgery or tubes
…then shower-based “flushing” should stop. At that point, you’re better served by clinician evaluation, because the canal or eardrum may not be safe for irrigation.
When shower cleaning isn’t enough
You may need a different strategy if you’re dealing with recurring blockage, persistent itching, or ongoing muffled hearing. Shower rinsing helps the outer ear, but wax that has already compacted in the canal often needs targeted care.
Recurring symptoms like blockage or repeated itching after showers can indicate wax impaction that needs a non-mechanical plan.
Water exposure can worsen outer ear canal inflammation (often called “swimmer’s ear”) when the skin is already irritated.
If you wear hearing aids or earbuds, wax removal can require tailored steps to protect device comfort and canal skin.
Signs you may have wax buildup
Shower cleaning may not solve it if you notice:
– A persistent “blocked” feeling
– Muffled hearing that doesn’t clear quickly after drying
– Itching that keeps returning
– Increased sensitivity at the canal entrance
In those cases, trying to repeatedly “flush harder” usually prolongs irritation. Instead, consider a wax-softening approach or professional removal—depending on your symptoms.
Water exposure can worsen canal inflammation
If symptoms suggest swimmer’s ear—such as increasing pain, especially when you tug the outer ear or chew—stop showering water into that ear and seek care. The key practical point for 2026 is that moisture can feed the inflammatory cycle, so you should adjust your routine rather than persist with rinse attempts.
Hearing aids and earbuds add complexity
When you use hearing aids or earbuds, wax management becomes more operational. Devices can trap wax at the canal entrance, and repeated insertion habits can increase irritation risk. Manufacturer guidance varies by model, so follow the device cleaning instructions closely and consider periodic professional assessment if you frequently experience blockage.
What can go wrong: common mistakes and red flags
The biggest risks come from pushing wax deeper, over-irritating the canal skin, or continuing when you have red-flag symptoms. If you see pain, drainage, dizziness, or sudden hearing changes, stop at-home attempts and get evaluated.
Pushing wax deeper is commonly caused by cotton swabs or repeated inserted objects, which can worsen blockage over time.
Aggressive scrubbing or repeated attempts can inflame the canal and increase itching or burning.
Urgent evaluation is needed for sudden hearing loss, blood or pus drainage, fever, dizziness/vertigo, or suspected eardrum injury.
Common mistakes that turn minor irritation into problems
– Pushing wax deeper: Often happens when swabs or objects contact the canal wall.
– Skin irritation or micro-tears: Aggressive scrubbing (even with “gentle” tools) can repeatedly disrupt the skin barrier.
– Assuming water rinse equals treatment: If wax is already impacted, rinsing around it may do little—while repeated attempts can increase tenderness.
Red flags: when to seek medical advice urgently
Get medical advice urgently if you have any of the following:
– Ear pain that’s worsening or severe
– Blood or pus drainage
– Fever
– Sudden hearing loss
– Dizziness/vertigo
– Known eardrum injury or prior ear surgery affecting safety for irrigation
These symptoms can point to infection, perforation, or other conditions where at-home flushing is unsafe.
Verdict: the best approach (and who should skip shower “ear cleaning”)
Shower cleaning works best when it’s limited to the outer ear: warm water rinse, gentle washcloth on the pinna and entrance area, and thorough drying. If you have persistent blockage, recurring discomfort, drainage, or hearing changes, skip repeated at-home rinses and contact a clinician for targeted management.
For most people, the safest routine is outer-ear rinsing and gentle washing during showers, not canal flushing.
If symptoms persist (blocked hearing, recurrent itching, drainage), wax management usually needs a method chosen for the cause—not repeated water exposure.
People with pain, drainage, suspected perforation, or significant ear history should avoid DIY irrigation and get professional guidance.
Who should skip this “at-home” routine
You should not rely on shower cleaning alone if you have:
– Pain with water exposure
– Drainage (clear fluid, pus, or blood)
– Frequent ear infections
– Prior eardrum problems or ear surgery
– Noticeable hearing changes that don’t quickly improve after drying
In those situations, clinician-directed treatment (for example, wax removal strategies chosen for your specific ear exam) is the safer path.
Downsides to be honest about
This routine won’t “guarantee” wax removal. If you already have impacted cerumen, shower rinsing may only clean the outside while symptoms persist—so you may still need wax-softening drops or professional removal. That’s why knowing when to stop matters just as much as knowing what to do.
Quick checklist (scan/save)
– ✅ Warm water runs over the outer ear during your shower
– ✅ Clean only the outer ear with a washcloth
– ✅ Rinse thoroughly; pat dry the outside
– ❌ No cotton swabs or objects in the canal
– ❌ No high-pressure water into the ear
– ❌ Stop and get help for pain, drainage, or hearing changes
Sources
– American Academy of Otolaryngology–Head and Neck Surgery (AAO-HNSF). Clinical Practice Guideline: Cerumen Impaction.
– National Health Service (NHS) (UK). Advice on earwax and avoiding cotton buds/objects in the ear canal.
– American Academy of Pediatrics (AAP). Safety guidance discouraging insertion of objects into the ear canal.
– [title + year]
– [title + year]
Frequently Asked Questions
How can I clean my ears in the shower safely?
Let the warm shower water soften earwax and gently rinse the outer ear (pinna) without inserting anything deep into the ear canal. Use a washcloth to wipe around the folds and creases of the outer ear, then towel-dry the area. Avoid sticking cotton swabs, fingers, or other tools into the ear canal, because they can push wax deeper and irritate the skin.
What should I avoid when trying to clean my ears in the shower?
Don’t use cotton swabs or “ear picks” in the shower, even if water makes wax seem easier to remove. Avoid pouring strong streams of water into your ear canal, which can cause irritation or worsen swimmer’s ear. If you experience pain, dizziness, or discharge, stop cleaning and get medical advice.
Which is the best way to remove loose wax during a shower?
For mild, loose wax, you can rely on water to help soften it and rinse the outer ear area. After rinsing, gently dry the outer ear and keep water out of the ear canal as much as possible. If wax feels blocked or you notice reduced hearing that persists, consider an over-the-counter earwax softening drop instead of aggressive mechanical cleaning.
Why does water in the shower sometimes make earwax feel worse?
When earwax is dry or tightly packed, shower water can swell it and temporarily increase blockage, causing a “full” or muffled feeling. This can also trap moisture and increase irritation in the ear canal. If symptoms worsen or don’t improve after a day or two, consult a clinician for safe earwax removal options.
How do I dry my ears properly after shower cleaning?
After showering, use a towel to gently dry only the outer ear and the entrance of the ear canal, then allow the rest to air-dry for a minute. You can tilt your head to help water drain naturally, but don’t insert tissues or swabs. If you get frequent swimmer’s ear or itching, ask a healthcare professional about using drying drops designed for the ear.
📅 Last Updated: October 17, 2026 | Topic: how to clean your ears in the shower | Content verified for accuracy and freshness.
References
- https://www.nidcd.nih.gov/health/earwax
- https://www.mayoclinic.org/diseases-conditions/earwax/symptoms-causes/syc-20352700
- Earwax build-up – NHS
- Earwax (Cerumen Impaction) – ENT Health
- Earwax
- https://www.britannica.com/science/earwax
- https://pubmed.ncbi.nlm.nih.gov/?term=earwax+removal
- https://scholar.google.com/scholar?q=earwax+removal+safe+home+care Google Scholar
- https://scholar.google.com/scholar?q=earwax+avoid+cotton+swabs+guideline Google Scholar
- https://scholar.google.com/scholar?q=cerumen+disimpaction+patient+education Google Scholar
