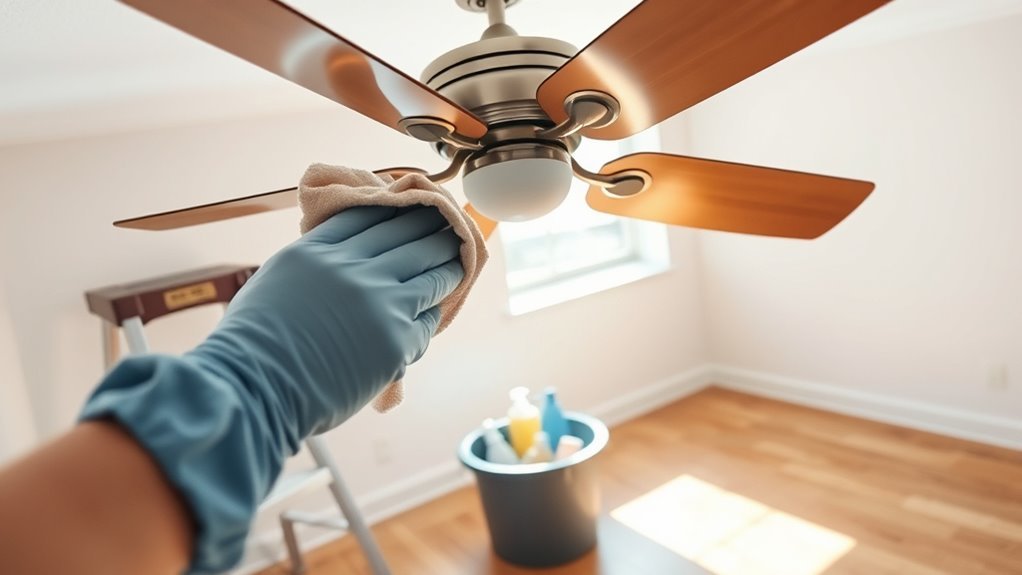
How to Clean Your Fan Safely
To clean your fan safely, first unplug it and gather soft cloths, brushes, and mild detergent. Carefully disassemble the fan by removing the grill and blades, noting their orientation. Wipe dust from blades and grill gently, avoiding water near the motor. Thoroughly dry each part before reassembly, securing screws without over-tightening. Finally, test the fan to verify smooth operation without noise. Following these detailed steps guarantees your fan stays efficient, and further guidance will help maintain its performance.
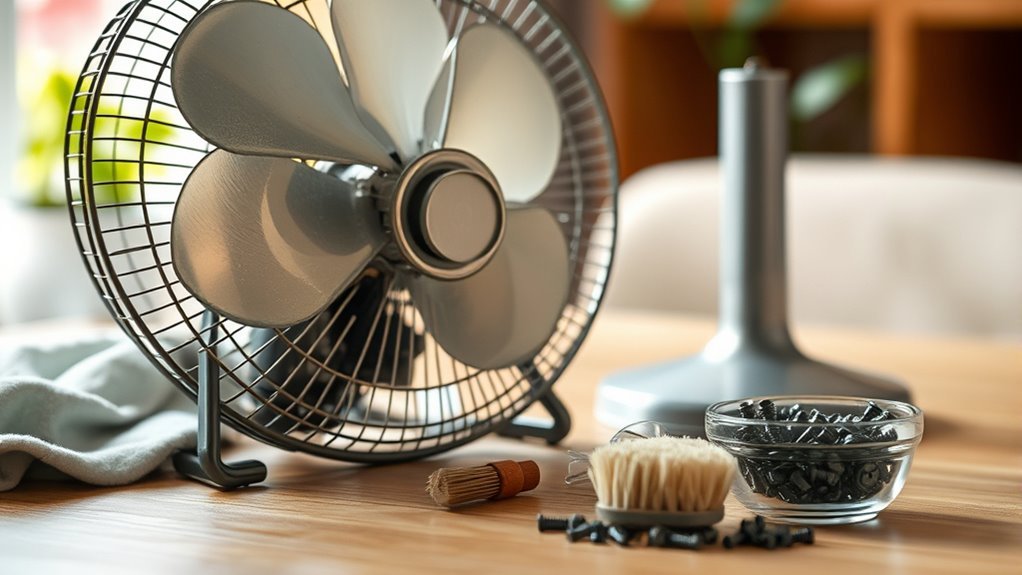
Gather the Necessary Cleaning Supplies

Before you begin cleaning your fan, you’ll need a few essential supplies to guarantee the process is efficient and safe. Start with a soft microfiber cloth and a small, stiff-bristled brush to remove dust from blades and grills without scratching surfaces. Gather a mild detergent or fan-safe cleaning solution diluted in water for effective grime removal. Have a spray bottle handy for even application. Don’t forget a screwdriver if disassembly is necessary. To protect your workspace and yourself, lay down old towels and wear gloves. These cleaning supplies will help you maintain your fan without damage. Prioritize safety precautions by avoiding harsh chemicals or abrasive tools that could compromise the fan’s components. Preparing properly sets the foundation for a thorough, safe cleaning experience. Using a remote control can enhance safety and convenience by allowing you to adjust fan settings without touching the device during cleaning.
Unplug the Fan and Ensure Safety
One essential step you shouldn’t skip is unplugging your fan to eliminate any risk of electrical shock during cleaning. Before starting, verify the fan is completely disconnected from its power source. This safety precaution prevents accidental activation and exposure to electrical hazards. Check the cord for damage; frayed or exposed wires increase risk and should be addressed before cleaning. Work in a dry area to avoid moisture-related electrical issues. Avoid using wet hands when handling the plug or fan components. By taking these precautions, you maintain a safe environment that allows you to clean freely without risking injury. Prioritizing these steps safeguards both you and your device, making the cleaning process efficient and hazard-free. Additionally, wearing gloves during cleaning can protect your hands from irritants and improve safety.
Disassemble the Fan Carefully
Disassembling your fan requires careful attention to avoid damaging its components and to guarantee thorough cleaning. Start by reviewing your fan’s manual or manufacturer guidelines to understand specific fan assembly techniques unique to your model. Before you begin, take disassembly precautions such as placing the fan on a stable surface and gathering necessary tools like screwdrivers or pliers. Remove the front grill by unscrewing or unclipping it gently, avoiding force that might warp plastic or bend metal parts. Next, detach the blades by loosening the central nut or clip, keeping track of small fasteners. Work methodically, noting the orientation of each piece to verify smooth reassembly. Taking these steps with care maintains your fan’s integrity and empowers you to clean efficiently without risking damage. Always ensure the fan is turned off and blades have stopped completely before disassembling to avoid accidents and facilitate safe cleaning preparing your ceiling fan.
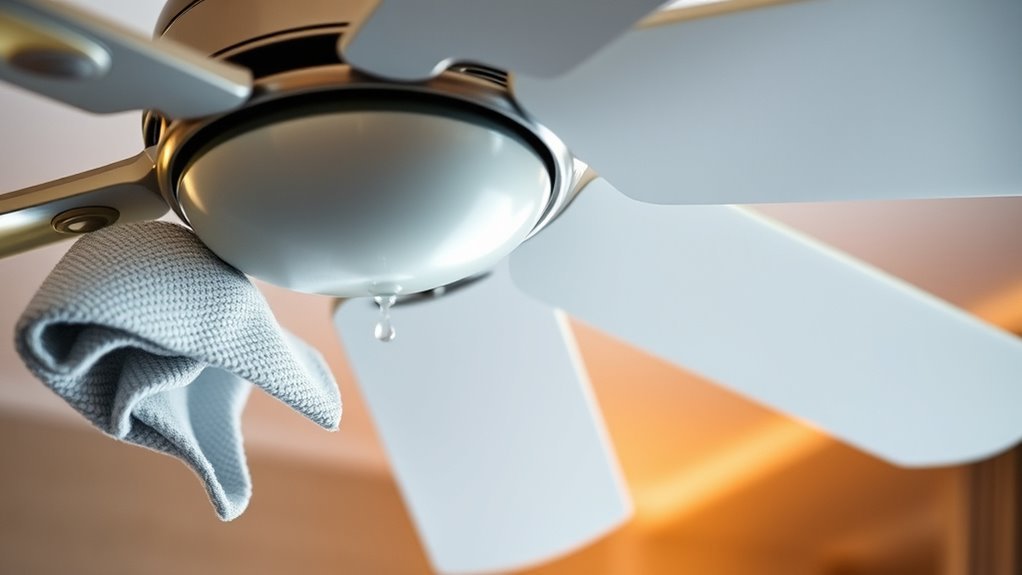
Remove Dust From Blades and Grill
To remove dust from the blades and grill, you’ll need a soft cloth, a brush with fine bristles, and mild detergent. Start by gently wiping the blades to avoid bending or damaging them, then use the brush to clean tight spaces in the grill. Make certain to rinse and dry all parts thoroughly before reassembling to prevent rust and guarantee peak performance. Using a microfiber cloth when wiping will help ensure a streak-free finish and protect the fan’s surface.
Tools Needed
Gathering the right tools is essential for efficiently removing dust from your fan’s blades and grill. For effective fan cleaning, you’ll need a microfiber cloth to trap fine dust without scratching surfaces, and a soft-bristled brush to loosen stubborn debris in tight spaces. A vacuum with a brush attachment helps safely extract dust without dispersing it into the air. Prepare a mild detergent solution and a spray bottle for gentle cleaning, ensuring you avoid harsh chemicals that could damage the fan’s finish or motor. Always unplug the fan before starting, adhering to safety precautions to prevent electrical hazards. Having a screwdriver set ready allows you to dismantle grills or blade covers if needed, granting full access for thorough cleaning while maintaining your freedom to maintain your fan safely and effectively.
Step-by-Step Cleaning
Start by unplugging your fan and placing it on a stable surface to prevent accidents. Always follow safety precautions, guaranteeing the device is completely powered off before cleaning. Begin by removing the grill—usually secured with clips or screws—using the appropriate tool. Gently wipe the blades with a microfiber cloth dampened slightly with water or a mild detergent solution. Avoid excess moisture to protect electrical components. Next, clean the grill thoroughly, removing dust and debris trapped within its mesh. Pay close attention to corners where buildup tends to accumulate. Reassemble the parts only once everything is fully dry. Maintain this cleaning frequency every one to two months to guarantee peak performance and air quality. Regular, safe cleaning extends your fan’s life and maximizes freedom from dust-related issues.
Clean the Fan Blades Thoroughly
Remove the fan blades carefully to access every surface without damaging them. Depending on your fan blade materials—plastic, metal, or wood—you’ll want to adjust your cleaning method to avoid warping or corrosion. For plastic or metal blades, use a damp microfiber cloth with mild detergent, ensuring you thoroughly remove dust and grime. Wooden blades require a slightly damp cloth followed by a dry wipe to prevent moisture damage. Pay close attention to edges and crevices where buildup accumulates. Regular cleaning frequency is essential; aim to clean your fan blades at least once a month in dusty environments or every two to three months otherwise. This consistent maintenance not only enhances airflow but also extends the fan’s lifespan while preserving your freedom from allergens and dust. Always make sure the fan is completely dry before plugging it back in to prevent any moisture buildup that could damage electrical components.
Wipe Down the Fan Motor and Base
Before you start wiping down the fan motor and base, make sure the fan is unplugged to prevent any electrical hazards. Use a damp cloth to carefully clean the surfaces, avoiding excess moisture near the motor to prevent damage. Focus on removing dust and grime without letting water seep into the motor housing.
Unplug Before Cleaning
Although it might seem obvious, you should always unplug your fan before cleaning to avoid electrical hazards. This safety precaution eliminates the risk of accidental activation or electrical shock while handling the motor and base components. Before starting, verify the fan is unplugged from the power outlet completely. Avoid relying on switches alone, as residual current can pose dangers. Once unplugged, you can safely wipe down the fan motor and base without risking damage to internal wiring or yourself. Taking this step grants you freedom to clean thoroughly and confidently, knowing you’ve minimized hazards. Always prioritize this simple but critical action to maintain your fan’s functionality and your personal safety during maintenance. It’s a practical habit that protects both you and your appliance.
Use a Damp Cloth
One effective way to clean your fan motor and base is by using a damp cloth, which helps remove dust and grime without risking moisture damage. Start by selecting the right fabric type—microfiber or cotton cloths work best due to their absorbency and gentle texture. Avoid rough or abrasive materials that could scratch surfaces. Employ damp cloth techniques by wringing out excess water thoroughly to guarantee the cloth is just moist, not wet. Gently wipe the motor housing and base, focusing on crevices where dust accumulates. Move methodically, applying light pressure to dislodge particles without pushing moisture into electrical components. This approach grants you the freedom to maintain cleanliness responsibly while preserving the fan’s functionality and longevity.
Avoid Water on Motor
When cleaning your fan, you need to guarantee no water comes into contact with the motor to prevent electrical damage or corrosion. For effective fan motor maintenance, use a dry or slightly damp microfiber cloth to carefully wipe down the motor housing and base. Avoid spraying water or cleaning solutions directly onto these components. Instead, apply cleaner sparingly to the cloth if necessary. Confirm the fan is unplugged before you begin to prioritize cleaning safety. Focus on removing dust and grime buildup without letting moisture seep into vents or electrical parts. Taking these precautions preserves the motor’s integrity, extends your fan’s lifespan, and maintains peak performance, all while keeping you safe from electric hazards.
Dry All Components Properly
Before reassembling your fan, you’ll need to guarantee every component is completely dry to prevent electrical hazards and corrosion. Start by using absorbent microfiber cloths to remove visible moisture from blades, grills, and housing. Next, employ drying techniques such as air drying in a warm, well-ventilated area or using a fan to expedite evaporation. Avoid direct heat sources that can warp plastic parts. For tight spaces, compressed air can dislodge residual moisture effectively. Ensuring thorough moisture prevention is critical—water left inside can short circuits or degrade metal components over time. Only handle the motor casing if it’s sealed; otherwise, keep it dry at all times. Taking these steps safeguards your fan’s performance and extends its lifespan, giving you the freedom to enjoy clean, safe airflow. Using eco-friendly cleaning supplies during maintenance can further protect your health and the environment while ensuring effective cleaning.
Reassemble the Fan Correctly
When reassembling your fan, make certain each part is precisely aligned to prevent imbalance and guarantee smooth operation. Tighten all screws securely, but avoid over-tightening to prevent damaging the threads. Proper alignment and secure fastening are critical for safe and efficient performance.
Align Parts Properly
Three critical steps guarantee the fan’s parts align properly during reassembly: matching the blade slots to the motor shaft, securing the grill with evenly spaced clips, and tightening screws without over-torquing. Begin by carefully positioning the fan blades so their slots fit snugly onto the motor shaft—this assures precise fan alignment and smooth rotation. Next, attach the protective grill, making sure the clips are evenly spaced to avoid warping or gaps that could hinder airflow or safety. This step demands your attention to detail for proper assembly. Finally, prepare for screw insertion by hand-threading each screw to avoid cross-threading. By following these technical, practical steps, you maintain the fan’s integrity and performance while enjoying the freedom to clean and rebuild it confidently and safely.
Secure Screws Tightly
To guarantee your fan operates safely and efficiently, you’ll want to secure each screw tightly without over-tightening. Start by identifying the screw types—common ones include Phillips, flathead, and Torx—so you can select the right screwdriver. Use tightening techniques such as applying steady, even pressure and turning screws clockwise until snug. Avoid forcing screws too hard to prevent stripping or damaging threads. For plastic parts, be especially cautious; a light touch is crucial. If available, use a torque screwdriver for consistent tightness. Confirm all screws are flush with the surface to maintain proper alignment and balance. Securing screws correctly guarantees your fan remains stable during operation, giving you the freedom to enjoy fresh air without worrying about mechanical issues or safety hazards.
Test the Fan After Cleaning
After reassembling your fan, you’ll want to power it on carefully to verify that all components are functioning correctly. Observe the fan performance closely—ensure the blades spin smoothly without unusual noises or vibration. Any imbalance might indicate loose screws or misaligned parts, which should be addressed immediately. Check the oscillation and speed settings to confirm full operational range. Testing now prevents potential motor strain and extends the fan’s lifespan. Remember, maintaining peak fan performance depends on consistent cleaning frequency; neglect can lead to dust buildup, reducing airflow and efficiency. By thoroughly testing your fan after each cleaning, you guarantee it runs safely and effectively, giving you the freedom to enjoy a cool, comfortable environment without unexpected malfunctions or hazards. Regular cleaning frequency adjustments based on your environment ensure optimal fan operation and longevity.
Tips for Regular Fan Maintenance
Although cleaning your fan thoroughly is essential, regular maintenance between deep cleans is what keeps it operating at peak efficiency. To minimize dust buildup and sustain fan efficiency, you should:
- Wipe down blades weekly with a microfiber cloth to prevent accumulation that restricts airflow.
- Inspect the motor housing monthly for dust or debris that can cause overheating or noise.
- Tighten screws and fasteners regularly to avoid vibrations that reduce performance and cause wear.
- Lubricate moving parts as recommended by the manufacturer to maintain smooth rotation and extend lifespan.
- Remember to always unplug the fan before performing any cleaning or maintenance to ensure safety.
Frequently Asked Questions
Can I Use Water Directly on the Fan Motor?
Would you dunk your phone in water to fix it? When it comes to fan maintenance, never use water directly on the fan motor—that’s a water safety risk. The motor contains electrical components that can short-circuit or corrode if exposed to moisture. Instead, use a dry cloth or compressed air to clean it. Keeping water away guarantees your fan stays safe and functional, letting you enjoy the freedom of a cool breeze without worry.
How Often Should I Clean My Fan During Allergy Season?
During allergy season, you should increase the cleaning frequency of your fan to minimize allergy triggers like dust and pollen buildup. Ideally, clean your fan at least once a week, focusing on blades and grills where particles accumulate. This regular maintenance helps keep allergens at bay, ensuring better air quality and freedom from sneezing fits. Remember, consistent cleaning reduces irritants, making your space more comfortable and healthier.
Are There Specific Cleaning Products to Avoid on Fan Blades?
Imagine your fan blades shimmering under a layer of dust, ready for a fresh clean. When choosing cleaning products, avoid harsh chemicals like ammonia or bleach—they leave stubborn chemical residues that can damage blade materials, especially plastic or painted metal. Instead, opt for mild soap and water or specialized cleaners. This way, you keep your fan running smoothly and maintain your freedom from worry about damaging delicate surfaces.
Is It Safe to Clean a Fan While It’S Still Mounted on the Wall?
It’s generally safe to clean a wall-mounted fan if you prioritize wall mounted safety. Before starting, turn off the power and make certain the fan’s blades have stopped moving. Use proper fan cleaning techniques, like a soft cloth or brush, to avoid damage. Avoid spraying liquids directly; instead, dampen your cloth slightly. This approach keeps you safe and prevents electrical hazards while maintaining your fan’s efficiency and longevity.
Can Cleaning Improve Fan Performance and Energy Efficiency?
When you engage in routine fan maintenance, you’re fundamentally helping your fan perform at its best, avoiding any unnecessary “busywork.” Dust and grime can hinder airflow, forcing the motor to work harder, which hikes up energy consumption. By keeping blades and vents clean, you enhance efficiency, leading to noticeable energy savings. This practical care not only prolongs your fan’s lifespan but also grants you the freedom to enjoy cooler, cost-effective comfort without extra effort.