
How to Clean Your Home After Garage
After working in your garage, start by evaluating the mess and gathering cleaning supplies like gloves and cleaners. Remove large debris and declutter to make the space manageable. Next, dust and vacuum entryways, then clean floors and carpets thoroughly. Wipe down all surfaces and walls to remove grime, and launder any dirty fabrics. Freshen the air by improving ventilation and dispose of trash properly. Keep up with a regular cleaning routine to maintain order. Discover tips to make this process even easier and more effective.
Assess the Mess and Gather Cleaning Supplies
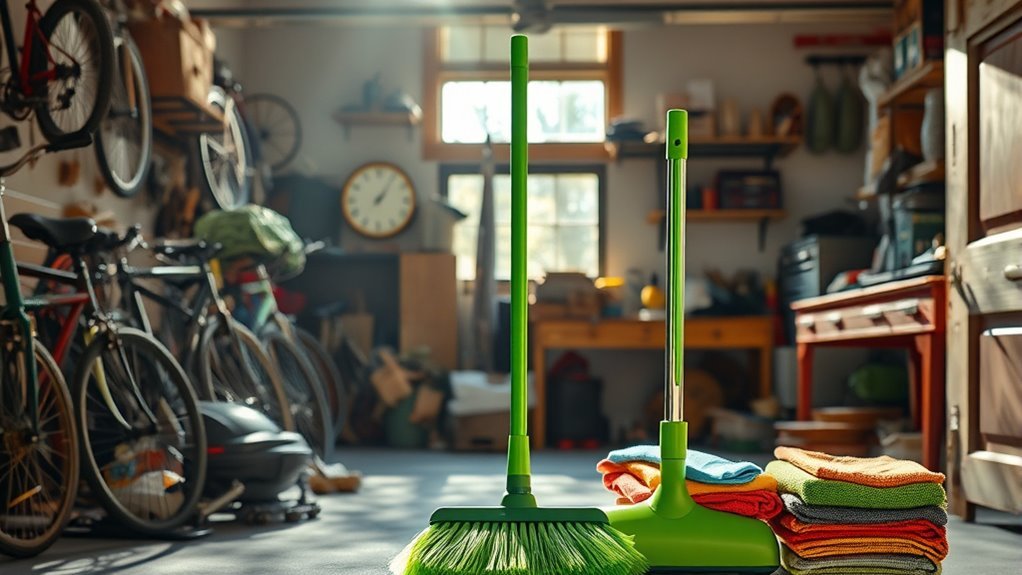
Before you jump into cleaning, take a moment to assess the mess in your garage and surrounding areas. You’ll want to carefully assess damage, noting any spills, stains, or broken items that need special attention. This step is vital for creating a focused cleaning checklist that helps you reclaim your space without feeling overwhelmed. Grab essential supplies like gloves, buckets, cleaning solutions, rags, and a broom so you’re fully prepared. Having everything ready lets you move freely and efficiently through the process, giving you control and minimizing interruptions. By starting with a clear plan based on your cleaning checklist and damage assessment, you set yourself up for success and the freedom to enjoy a spotless home environment sooner.
Remove Large Debris and Clutter
Start by tackling the biggest obstacles—remove any large debris and clutter from your garage and nearby areas. This step is essential to reclaim your space and create a sense of freedom. Use effective declutter strategies to sort through items quickly: decide what to keep, donate, or toss. When it comes to large item disposal, plan ahead by checking local guidelines or scheduling bulk pickup services. Don’t hesitate to ask for help moving heavy objects—it’ll speed up the process and keep you safe. Clearing out these bulky pieces first gives you a clean slate, making the rest of your cleaning easier and more satisfying. Embrace this chance to free your home from excess and regain control over your environment.
Dust and Vacuum Garage Entryways
Once you’ve cleared out the large debris and clutter, it’s easier to focus on the smaller details that keep your garage entryways looking fresh. Dust and vacuum regularly to maintain a clean, welcoming passage between your garage and home. Effective dust removal prevents allergens from spreading indoors, while vacuum maintenance guarantees your tools work efficiently.
Keep these tips in mind:
- Use a vacuum with strong suction and a brush attachment for corners and crevices.
- Dust shelves, door frames, and light fixtures to avoid buildup.
- Empty the vacuum bag or canister frequently to maintain power.
- Wipe down surfaces after dusting to catch any lingering particles.
- Schedule routine vacuum maintenance, like filter cleaning, for peak performance.
Following these steps helps you reclaim freedom from dirt and enjoy a cleaner, healthier home environment.
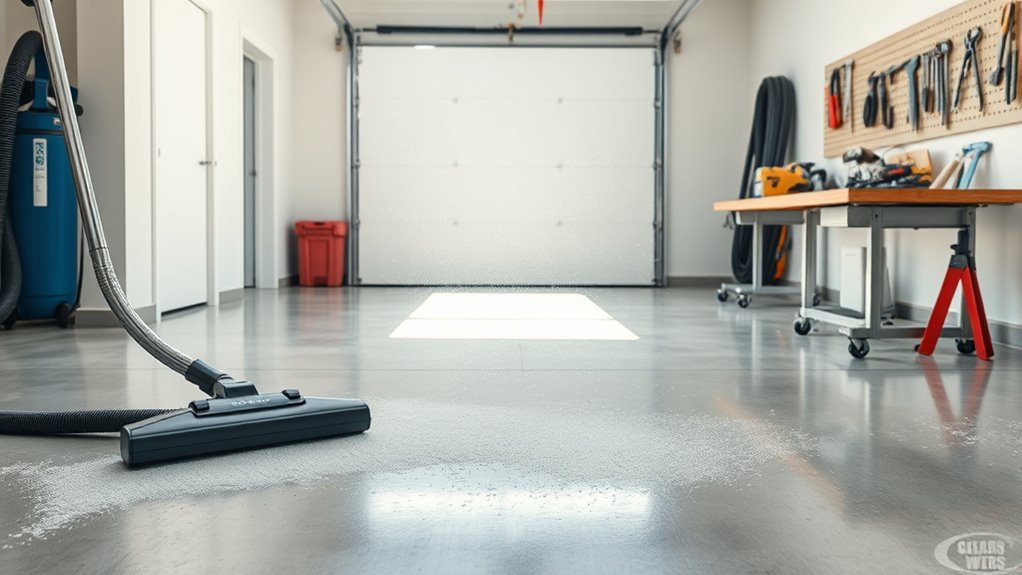
Clean Floors and Carpets Thoroughly
Although cleaning floors and carpets after working in the garage can seem intimidating, tackling this task thoroughly is crucial to prevent dirt and grime from spreading into your home. Start with a deep floor cleaning using a broom to sweep away loose dirt, then mop with a suitable cleaner to lift stubborn grease or stains. For carpets, regular vacuuming is key, especially in high-traffic zones near the garage entry. If you spot tough spots, treat them promptly with a carpet stain remover to maintain freshness. Keeping up with carpet maintenance not only extends their life but also helps preserve the freedom of a clean, comfortable living space. Staying consistent with floor cleaning and carpet care guarantees your home stays dirt-free without cramping your style.
Wipe Down Surfaces and Walls

Because dust and grime from the garage can easily settle on nearby surfaces and walls, you’ll want to wipe them down regularly to keep your home clean. Effective surface cleaning and wall maintenance prevent buildup that restricts your space’s freshness and freedom. Grab a microfiber cloth and a gentle cleaner to avoid damage while restoring cleanliness.
Focus on these key areas:
- Door frames and window sills near the garage
- Baseboards where dust collects
- Light switches and doorknobs for hygiene
- Walls with visible marks or smudges
- Shelves or ledges that hold tools or supplies
Organize Remaining Tools and Items
Now that the surfaces are clean, it’s time to sort your tools by type to make finding them easier. You’ll want to designate specific storage spaces for each category to keep everything organized. This approach helps maintain order and saves you time in the long run.
Sort Tools by Type
Sorting your tools by type will make it easier for you to find what you need quickly and keep your space organized. When you use effective sorting methods, you free yourself from the frustration of digging through piles. Start by grouping your tool types: hand tools, power tools, gardening tools, automotive tools, and measuring instruments. This simple step helps you see what you have and what you don’t, making maintenance and projects smoother.
Consider these sorting methods:
- Sort by frequency of use
- Group similar tool types together
- Separate delicate tools from heavy-duty ones
- Use containers or trays to keep small items contained
- Label groups clearly for quick identification
This approach gives you control and freedom to work without clutter slowing you down.
Designate Storage Spaces
Three key storage areas can help you keep your garage tools and items neatly organized. First, wall-mounted shelves free up floor space and make use of vertical areas. Next, pegboards offer versatile storage solutions for hanging tools, making them easy to find and grab. Finally, clear plastic bins or labeled containers let you stack smaller items efficiently, optimizing your available space. By designating specific spots for each category of tools and materials, you reduce clutter and create a sense of freedom in your workspace. Space optimization isn’t just about squeezing everything in—it’s about making your garage feel open and accessible. When you implement smart storage solutions, you’ll enjoy a cleaner, more functional garage that supports your lifestyle without sacrificing freedom.
Launder Any Dirty Fabrics or Covers
Before washing, make sure to sort your fabrics by type to prevent damage. Choosing the right washing settings for each material will help keep them in good condition. This way, you’ll get your covers and fabrics clean without any issues.
Sort Fabrics by Type
Once you’ve gathered all your fabrics, you’ll want to separate them by type to guarantee each piece gets the proper care. Sorting helps prevent damage and keeps your fabrics looking fresh longer, which is essential if you want freedom from constant re-cleaning. Group your items based on their fabric composition and care needs:
- Delicate fabrics like silk or lace
- Heavy materials such as denim or canvas
- Cotton and blends
- Synthetic fabrics like polyester or nylon
- Items with special finishes or embellishments
Proper sorting also aids in efficient fabric storage, ensuring each piece maintains its quality. By respecting fabric care instructions now, you save time and preserve your belongings, empowering you to enjoy your clean space without hassle.
Choose Proper Washing Settings
Although sorting your fabrics is essential, choosing the proper washing settings guarantees they get the care they need during cleaning. You want to avoid damaging your fabrics while still getting them fresh and clean. Start by selecting the right power settings on your washing machine—delicate cycles for light fabrics and stronger settings for heavy-duty covers. Adjust the temperature according to fabric type; hot water for whites and robust materials, cold for colors and delicate items. Use washing techniques that suit the dirt level—pre-soak heavily soiled pieces, and skip aggressive agitation on fragile ones. By mastering these settings, you maintain your fabrics’ integrity while freeing yourself from worry. Your laundry routine becomes efficient and effective, giving you control and freedom in restoring your home’s cleanliness after the garage mess.
Freshen the Air and Improve Ventilation
Since garage odors and dust can easily seep into your home, you’ll want to freshen the air and improve ventilation to create a cleaner, healthier environment. Start by opening windows and doors to let fresh air circulate freely. Using air purifiers can help trap lingering dust and neutralize odors effectively. Incorporate natural deodorants like essential oil diffusers or baking soda to avoid harsh chemicals. Consider these tips to boost your home’s air quality:
- Open multiple windows for cross-ventilation
- Run ceiling fans or portable fans to move air
- Place air purifiers in key rooms near the garage entrance
- Use natural deodorants like lavender or eucalyptus oils
- Regularly clean air filters and vents for ideal airflow
These steps empower you to breathe easier and live more freely in your refreshed space.
Dispose of Trash and Recycling Properly
Before you plunge into deep cleaning, make sure you dispose of trash and recycling properly to prevent clutter and potential hazards. Start by sorting your waste according to local recycling guidelines—knowing what’s accepted helps you avoid contamination that could send your efforts to the landfill. Bag your trash securely and place recyclables in the right bins to keep your space tidy and eco-friendly. Avoid letting garbage pile up; it not only invites pests but also limits your freedom to enjoy a clean, open home. Staying on top of trash disposal frees you from unnecessary mess and lets you focus on rejuvenating your environment. Remember, proper disposal is a simple step that supports your clean, liberated lifestyle.
Establish a Regular Cleaning Routine
When you set up a regular cleaning routine, you’ll find it much easier to keep your home fresh and organized after tackling your garage. A consistent cleaning schedule helps you stay on top of chores without feeling overwhelmed, giving you more freedom to enjoy your space. Here are some maintenance tips to create an effective routine:
Establishing a regular cleaning routine makes maintaining a fresh and organized home simple and stress-free.
- Dedicate specific days for different areas of your home.
- Break tasks into small, manageable chunks.
- Keep cleaning supplies accessible to save time.
- Set reminders on your phone or calendar.
- Review and adjust your schedule monthly to fit your lifestyle.
Frequently Asked Questions
Can I Use Natural Cleaners for Garage Messes?
You absolutely can use natural cleaner options for garage messes! These eco friendly solutions not only keep your space spotless but also protect the environment, giving you the freedom to clean without harsh chemicals. Things like vinegar, baking soda, and lemon juice work wonders on grease and grime. So, go ahead and embrace these natural alternatives—they’re safe, effective, and let you maintain a fresh, toxin-free space with ease.
How Do I Prevent Pests After Cleaning the Garage?
Imagine your garage as a fortress guarding your freedom. To keep unwanted invaders—pests—at bay after cleaning, embrace pest control like a vigilant knight. Seal cracks, store food in airtight containers, and maintain garage organization to deny pests shelter and sustenance. Regularly sweep and declutter, creating a barrier that protects your sanctuary. When you keep this fortress strong, you safeguard your home’s freedom from pesky intruders.
What’S the Best Way to Clean Oil Stains?
When tackling oil stains, you’ll want to grab some oil absorbents first to soak up as much as possible. Sprinkle them generously and let them sit for a bit before sweeping away. After that, apply a powerful stain remover designed for oil-based spills. Scrub gently and rinse with warm water. This approach frees you from stubborn marks and keeps your space looking fresh without endless hassle.
Are There Specific Safety Tips for Cleaning Garages?
When cleaning your garage, you’ll want to wear protective gear like gloves and goggles to keep yourself safe from harsh chemicals and debris. Make sure you have proper ventilation by opening windows or using fans, so fumes don’t build up and restrict your freedom to breathe easy. Taking these precautions lets you clean efficiently while staying healthy and free to enjoy your space without worry.
How Often Should I Deep Clean Garage Storage Bins?
Did you know that dust mites thrive in cluttered spaces, making up to 20% of household allergens? For your storage bins, frequency recommendations suggest deep cleaning at least twice a year to keep things fresh and organized. Regularly tackling your bins boosts storage organization, helping you reclaim freedom from chaos. By maintaining this routine, you’ll enjoy a cleaner, more functional space that supports your lifestyle without unnecessary stress or mess.


