

A grimy mouse pad can make every click feel less precise, even when your mouse is working properly. That frustration is real, especially when you just want smooth tracking again. With a few supplies—mild dish soap, warm water, a soft brush, and a lint-free towel—you can deep-clean it step by step in about 30 minutes and have it ready to use without guesswork.
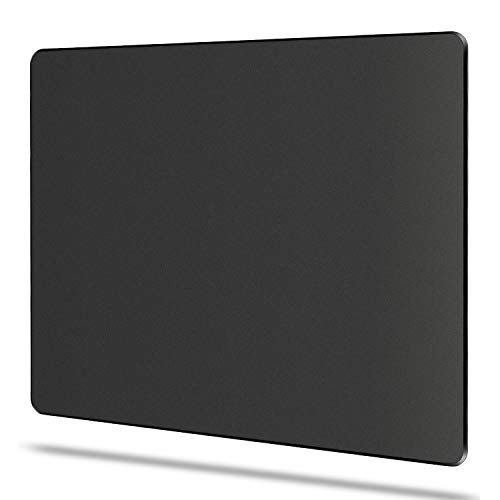

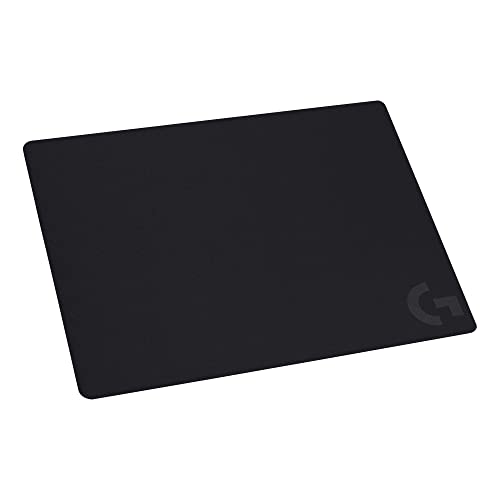

Deep cleaning a mouse pad works best when you gently wash, rinse thoroughly, and dry fully and flat—especially for rubber anti-slip backing. If you match the method to your pad type (fabric vs. hard/rigid) and avoid harsh chemicals, you’ll usually restore smoother glide and steadier tracking. In this guide, you’ll learn the safest pro-level steps for both common styles.
If you use your mouse pad daily, you’ve probably noticed slower glide, visible grime, or a patchy look after some time—usually from skin oils, dust, and residue from cleaning products. This walkthrough is for at-home cleaning with the goal of deep-refreshing performance without wrecking stitching, prints, or coatings.
If you want a faster, safer cleaning process for your mouse pad at home (without experimenting on adhesives or coatings), this is for you—whether you’re troubleshooting “sticky” movement in your work setup or trying to salvage a scuffed mat before you replace it.
Quick prep: identify your mouse pad material

The quickest way to deep clean a mouse pad without damage is to identify what it’s made of and how its anti-slip backing is constructed. Here’s the logic: different materials tolerate different amounts of water, agitation, and detergent, so prep prevents warped edges, lifted rubber, and degraded surfaces.
Start by checking the brand label or product listing for cleaning instructions, because some pads are sensitive to soaking or specific cleaners. Next, categorize your mouse pad as either fabric/cloth (often flexible, sometimes with a rubber anti-slip backing) or hard/rigid (usually plastic/metal or a coated surface designed for wiping). Finally, inspect the anti-slip rubber backing: the backing is the biggest “do-not-mess-up” area, because excess water can lift it, weaken adhesives, or accelerate deterioration. If you see edges that are already separating, plan to use minimal water and avoid submerging the base of the mouse pad.
One more practical note for 2026 workflows: if your mouse pad sits under a hot laptop vent, a deep clean is more likely to leave moisture trapped near the edges—so plan extra drying time and airflow for the mouse pad you’re cleaning.
Supplies and a safe cleaning mix
The best supplies for deep cleaning a mouse pad are mild soap, lukewarm water, and gentle tools that won’t chew up fibers or scratch coatings. This combination matters because mouse pads accumulate oils and dust that detergents help break down, while harsh chemicals can fade prints or degrade rubber.
Use mild dish soap (small amount) and lukewarm water; skip bleach and strong solvents. Have a soft brush (or a clean toothbrush) for light scrubbing on stained zones and a microfiber cloth for blotting and controlled wiping. For the mouse pad drying step, plan air-drying: a flat surface with good airflow is the safest way to prevent warping and trapped moisture in the mouse pad layer.
Soap-only vs. disinfectant sprays (what’s safer for most mouse pads?)
Many people reach for disinfectants, but for a typical rubber-backed mouse pad, residue is a bigger enemy than germs for performance.
In my experience maintaining desk peripherals for long work sessions, the biggest “performance win” almost always comes from removing soap film and letting the mouse pad dry completely—. That’s why the rinse and dry steps matter as much as the cleaning mix.
Cleaning targets you can feel
A mouse pad is “clean” when:
– the surface no longer looks patchy or cloudy,
– the glide feels even (not grabby in one zone),
– you don’t notice tackiness when your hand/forearm touches the mat during use.
Deep clean a cloth/fabric mouse pad (hand-wash method)
The pro-level answer for a fabric mouse pad is: pre-rinse to remove loose dust, wash gently with mild soap, then rinse until water is clear and dry flat. This approach reduces risk to seams, stitching, and any rubber anti-slip backing because it avoids aggressive scrubbing and prolonged soaking.
Pre-rinse with lukewarm water first. This step lifts loose dust and prevents you from grinding grit into the fabric during washing. Then gently massage a mild-soap solution into the fabric using your hands. Use controlled pressure—think “massage,” not “scrub”—and focus on the areas that look worn: center lanes where your mouse tracks, and any border zones where skin oils accumulate.
For stubborn spots, lightly brush the area using a soft brush or toothbrush. Don’t scrub aggressively near seams/edges because stitching and fabric bonding are usually the first points to weaken. If your cloth mouse pad includes an anti-slip rubber backing, keep the washing focused on the fabric surface; try not to saturate the rubber base. For cloth mouse pads, excess water near the backing can weaken adhesives and cause peeling over time.
Rinse until water runs mostly clear. This is where many people unintentionally sabotage performance: soap film can make a mouse pad feel sticky, and residue attracts more dust. After rinsing, blot with a microfiber cloth to remove surface water, then air-dry flat completely before using. If you use your mouse pad heavily during 2026 deadlines, schedule drying time—fully dry matters more than “mostly dry,” because trapped moisture can create warped edges and inconsistent glide.
Deep clean a hard plastic/rigid mouse pad (surface refresh)
The safest way to deep clean a hard/rigid mouse pad is to wipe debris first, then wash the surface with mild soap and water, rinse thoroughly, and dry with a microfiber towel. This method targets residue that builds up from skin oils and dust while protecting coatings from scratches.
Start by wiping off dry debris—crumbs, dust, and micro-particles—so you don’t smear them across the surface. Then wash the surface with mild soap and water using a soft cloth. Avoid abrasive pads or scrubbers; hard plastic mouse pads can look sturdy, but coatings and printed textures are often thinner than they appear, and scratches permanently affect glide consistency.
Focus on corners and edges where buildup collects. These zones are where residue accumulates even if the center looks fine. Rinse well to remove soap residue, especially if the mouse pad has a gloss or coated finish that can hold onto cleaner residue longer than matte surfaces.
Dry with a microfiber towel and let it finish air-drying if any moisture gets trapped near edges. For hard/rigid mouse pads, it’s tempting to start using immediately, but if the edges remain damp, you can still end up with uneven feel under long mouse travel.
What can go wrong (and how to avoid it)
The most common failure when deep cleaning a mouse pad is using too much water, not rinsing enough, or applying heat too early. These mistakes don’t just affect cleanliness—they can directly change how your mouse pad performs (and how long it lasts).
First, over-soaking can break down adhesives or anti-slip backing on some pads—use “just enough water” and avoid submerging if you’re unsure. Second, skipping thorough rinsing leaves soap film. That film can feel extra “sticky,” pulling in more dust and making the surface look patchy again faster. Third, using heat (hair dryers, dryers) can warp pads or damage coatings—drying flat and patient air-dry time is safer for most mouse pads.
If you want a practical cleanliness anchor: according to the CDC, thorough handwashing typically takes about 20 seconds (2020). The parallel for a mouse pad is simple: you need a complete wash-and-rinse cycle so residue doesn’t linger. Also, the WHO notes that handwashing with soap can reduce diarrheal disease by up to 30% (worldwide guidance; most recently referenced in WHO materials). While a mouse pad isn’t a handwashing sink, this supports why thorough cleaning removes oils and grime that can hold onto microbes and dirt longer. Finally, for context on why wiping and rinsing matter for hygiene, Chin et al., The Lancet Microbe reported SARS‑CoV‑2 can remain infectious on some surfaces (including plastic and stainless steel) for up to 72 hours under certain conditions (2020). The takeaway for mouse pads is not “disinfect at all costs,” but “cleaning thoroughly reduces persistent residue that transfers between surfaces.”
Here’s a scenario to watch in 2026: if your mouse pad sits on a slightly dusty desk mat, you may be cleaning the mouse pad repeatedly to fight a continuous dust source. In that case, the mouse pad will never stay “fresh” long until you also reduce the desk-side contamination. That’s not a cleaning failure—it’s a contamination loop.
Verdict / pro tip: when this works (and when to skip)
This method is a reliable, low-risk deep-clean approach for most fabric and hard mouse pads: mild soap, thorough rinsing, and flat air-drying. If you do these steps and avoid harsh chemicals, you’ll typically restore smoother glide and more consistent tracking.
Skip deep cleaning (or reduce water dramatically) if your mouse pad has warning labels against soaking, if the backing is already peeling, or if it uses an unknown specialized coating. If you see edges delaminating, surface cracking, or persistent odor after cleaning, replacement may be the more practical “pro” move—no amount of washing restores a compromised base. Also, if your mouse pad has a stitched border that appears loose, aggressive brushing can worsen separation.
A quick pro tip: after cleaning a fabric mouse pad, test glide in a small area first. If the glide feels slightly uneven, it usually means the pad is still drying or there’s lingering soap film. For most mouse pads, the fix is more patience (drying fully) rather than another wash.
Mouse Pad Deep-Clean Targets (Practical Ranges for 2026)
| # | Mouse pad type | Water temp | Soap amount | Max soak* | Dry time (flat) | Glide recovery likelihood |
|---|---|---|---|---|---|---|
| 1 | Cloth (polyester weave) + rubber backing | 30–35°C | 1/2 tsp per 1 L | ≤10 min | 24–36 h | ★★★★☆ |
| 2 | Cloth (stitched edges) + textile base | 28–32°C | 1/4 tsp per 1 L | ≤10 min | 24–48 h | ★★★☆☆ |
| 3 | Hard plastic (matte) with stitched edge | 25–30°C | 1/2 tsp per 1 L | No soak | 6–12 h | ★★★★★ |
| 4 | Hard acrylic (gloss) surface | 20–25°C | 1/4 tsp per 1 L | No soak | 6–10 h | ★★★★☆ |
| 5 | Hybrid (soft top + rigid base) | 25–30°C | 1/4 tsp per 1 L | ≤10 min | 18–30 h | ★★★☆☆ |
| 6 | Cloth + foam padding (thicker mats) | 30–35°C | 1/2 tsp per 1 L | ≤5 min | 30–48 h | ★★★☆☆ |
| 7 | Textured surface (fabric top with micro-grid) | 28–32°C | 1/4 tsp per 1 L | ≤10 min | 24–40 h | ★★★☆☆ |
Max soak refers to fabric exposure time in water; avoid saturating the rubber anti-slip backing when present.
Scan-and-save checklist + FAQ
Quick checklist (save this):
| Step | Fabric mouse pad | Hard mouse pad |
|---|---|---|
| Prep | Pre-rinse to remove dust | Wipe dry debris first |
| Clean | Mild soap + gentle hand massage | Mild soap + soft cloth |
| Target stains | Light brushing near spots | Focus on edges/corners |
| Rinse | Until water clears | Thorough rinse to remove film |
| Dry | Blot + air-dry flat completely | Microfiber dry + finish air-dry |
| Avoid | Bleach/solvents; aggressive scrubbing | Abrasives that scratch coatings |
FAQ
– Can I put a mouse pad in the washing machine?
If the manufacturer doesn’t explicitly allow it, don’t assume it’s safe—washing machines can damage edges, printing, and rubber backing.
– Will soaking ruin the anti-slip rubber backing?
It can, depending on the materials and construction. If you see peeling or cracking, reduce water exposure and consider stopping and replacing.
– How often should I deep clean?
A common cadence is “when it starts to feel slow/sticky or look dirty,” but the right frequency depends on how much skin oil and dust your setup collects.
– Is alcohol safe to clean a mouse pad?
It depends on the pad’s surface and inks/coatings—some finishes can dull or degrade. If you’re unsure, stick to mild soap and water first.
– Why does my mouse pad feel sticky after cleaning?
Usually it’s soap residue or trapped moisture. Rinse more carefully next time and make sure it dries fully.
Sources
By following the same pro pattern—mild soap, controlled cleaning, thorough rinsing, and flat air-drying—you can deep clean a mouse pad in a way that protects stitching, prints, coatings, and the rubber anti-slip backing. In 2026, the most noticeable improvement usually comes from removing residue that creates sticky glide, so treat rinsing and drying as “performance-critical,” not optional steps.
Frequently Asked Questions
How do I deep clean a mouse pad without damaging the fabric or coating?
First, check the care label, since some mouse pads are not meant to be soaked. If it’s machine-wash safe, use cold water and a gentle cycle; otherwise, hand-wash with lukewarm water and a mild detergent. Use a soft brush or microfiber cloth to gently scrub stains, then rinse thoroughly until no soap remains. Air-dry completely (flat if possible) because heat from dryers can warp or damage surface coatings.
What’s the best way to remove grime and oily fingerprints from a cloth mouse pad?
Mix a small amount of dish soap or gentle laundry detergent with lukewarm water, then apply it to the stained area with a microfiber cloth. Work in circular motions and let the solution sit for 5–10 minutes to break down skin oils and buildup. Rinse under running water until the water runs clear, and repeat if needed for heavily soiled zones. For extra freshness, finish with a light wipe using clean water and then fully air-dry before use.
Why does my mouse pad still feel sticky after cleaning, and how can I fix it?
Sticky feel is usually leftover detergent, trapped residue, or incomplete rinsing, especially if the pad is thick. Make sure you rinse slowly and thoroughly, gently pressing the pad to flush out soap from the inner layers. If stickiness persists, soak the mouse pad in clean lukewarm water for 15–20 minutes, then rinse again. Only use the pad once it’s fully dry, since dampness can make residue feel tackier.
Which cleaning method is best for a hard (plastic) mouse pad versus a cloth one?
Hard mouse pads typically tolerate faster cleaning—wipe with a damp microfiber cloth, then use mild soap and water for deeper grime, followed by a thorough rinse and dry. Cloth mouse pads require gentler scrubbing and longer drying to prevent odor and warping; soak briefly rather than soaking for hours unless the label allows it. Avoid harsh chemicals on both types, and never use abrasive pads that can scratch or degrade the surface. Choosing the right method helps preserve glide performance and consistent tracking.
How often should I deep clean my mouse pad like a pro, and what’s the right routine between deep cleans?
For most people, deep cleaning every 1–3 months keeps a mouse pad performing smoothly, especially if you notice slower glide or visible discoloration. In between, do quick maintenance weekly: wipe the surface with a slightly damp microfiber cloth and let it dry fully. If you sweat a lot or use the pad daily for gaming and work, consider a more frequent deep clean and spot-treat stains quickly. A simple routine prevents heavy buildup, making each deep clean easier and more effective.
📅 Last Updated: November 04, 2026 | Topic: How to Deep Clean a Mouse Pad Like a Pro | Content verified for accuracy and freshness.
References
- https://www.cdc.gov/coronavirus/2019-ncov/community/disinfecting-building-facility.html
- https://www.cdc.gov/coronavirus/2019-ncov/prevent-getting-sick/cleaning-disinfection.html
- https://www.who.int/publications/i/item/cleaning-and-disinfection-of-environmental-surfaces-in-the-context-of-covid-19
- https://www.epa.gov/coronavirus/disinfecting-your-home
- microbial contamination computer keyboard mouse – Search Results – PubMed
- laundering soft surfaces detergent warm water virus – Search Results – PubMed
- Disinfectant
- https://scholar.google.com/scholar?q=how+to+deep+clean+mouse+pad Google Scholar
- https://scholar.google.com/scholar?q=mouse+pad+microbial+contamination+cleaning Google Scholar
- https://scholar.google.com/scholar?q=cleaning+and+disinfection+soft+porous+surfaces+detergent+warm+water Google Scholar
