

Leather car seats pick up grime, body oils, and dye transfer quickly, and it can feel like you are always one spill away from staining. You will learn seven prevention steps to keep them looking clean longer, with a routine that takes about 10–15 minutes using microfiber cloths, a pH-balanced leather cleaner, and conditioner, plus sun protection. Follow it consistently, and you will reduce stains before they set.



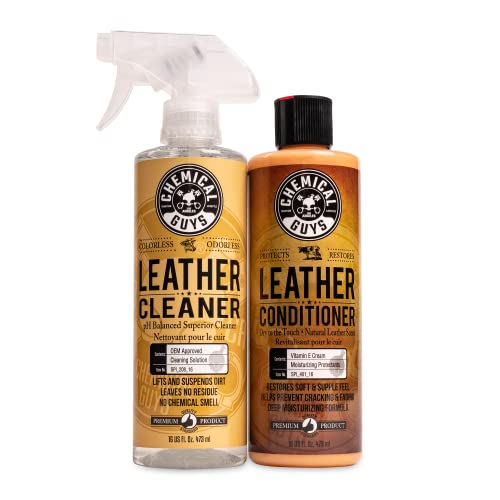
Clean leather seats stay clean longer when you prevent spills, sweat, and grime from bonding to the surface. This guide walks you through 7 prevention-focused habits—from quick blotting to smart conditioning schedules—so your seats look better with less scrubbing. If you drive often, commute in all seasons, or have kids/pets who touch the seats daily, these steps are built for real-world messes. You’ll also get common mistakes to avoid so prevention doesn’t accidentally damage leather.
If you want long-lasting results in 2026, think of car leather care as a system, not a one-time cleaning job. The goal is simple: keep abrasive particles off the surface, keep moisture/oils from soaking in, and use conditioning only when it’s needed. When you follow a prevention routine, you reduce the need for strong cleaners and keep the leather’s finish—its natural look, softness, and color—more stable over time.
Start With Weekly Prevention: Vacuum + Dry Wipe

A weekly vacuum and dry wipe is usually the highest “return on effort” way to keep car leather seats clean longer. It removes grit before it works like sandpaper, and it lifts surface oils/film that later cleaners struggle to fully dissolve. This is especially important if you live where road dust and pollen accumulate, or if you commute through dry weather and then park in full sun.
Start with the right tool: use a vacuum with a soft brush attachment and keep it light. Don’t grind the brush into seams, stitching edges, or perforations—just skim to loosen dust. Then follow with a dry microfiber wipe to capture the remaining dust film. In my own upkeep routine, I’ve found that skipping the “dry wipe” step lets a dull surface film build up, which makes stains look more visible even when they aren’t fully set.
Why this works (and why it prevents)
Leather looks clean until a mixed layer forms: atmospheric dust + body oils + product residue (sunscreen, hair products, lotions). Once that layer bonds, liquid cleaners can spread it instead of lifting it. By vacuuming and dry-wiping weekly, you’re breaking the chain early—before grime has time to oxidize and darken the seat surface.
Protect From UV and Heat (Sun Damage Shows Up Fast)
UV and heat damage accelerate the grime “bonding window,” so your seats will get harder to clean if you ignore sun exposure. The best answer is to reduce UV load and prevent repeated heat cycling, because leather dries out, micro-cracks form, and stains cling more strongly afterward.
Park in shade when you can, or use a windshield cover to reduce cabin warming and UV intensity. Keep cabin temperatures moderate when possible—especially during summer. Even if you can’t control every trip, you can control how long the seats sit in a hot, UV-heavy environment.
According to the World Health Organization, the UV Index is commonly communicated on a scale from 0 up to “11+” to reflect increasing intensity and risk (WHO, 2002). That matters for car leather because higher UV exposure increases fading and surface breakdown. Add heat stress, and you get faster drying and a tougher-to-maintain top layer.
A practical prevention mindset
Protection isn’t only about preventing “color fade.” It’s also about maintaining flexibility. When leather gets overly dry, it becomes more absorbent and less forgiving—meaning sweat and accidental spills penetrate faster. In 2026, more drivers also use interior UV-blocking films and ceramic windshield coatings; whatever your approach, the prevention target is the same: less UV, less heat, fewer drying cycles for car leather seats.
Stop Stains Before They Set: Blot Immediately
Blotting immediately is the difference between a removable mark and a permanent one. The direct answer is: don’t rub—press and absorb. Rubbing spreads oils and dyes deeper into leather pores and can damage the finish so future cleaning becomes harder.
When a spill happens, grab a clean, dry microfiber cloth and blot gently. If the stain is from something wet (soda, coffee, milk, tinted drinks), use a damp cloth only if you need to lift material—then dry-wipe the area right away so moisture doesn’t spread.
According to the National Highway Traffic Safety Administration, cabin temperatures can rise rapidly in parked cars, sometimes reaching dangerously high levels (NHTSA, 2019). That same heat makes moisture and oils move into leather faster, which is why prompt blotting matters even more in warm conditions.
Quick method you can use immediately
– Press the cloth to the stain until transfer stops (don’t “scrub in”).
– If needed, follow with a lightly damp microfiber (minimal moisture).
– Finish with a thorough dry wipe to prevent water spots and discoloration.
Use a Leather Conditioner on a Schedule (Not Randomly)
Conditioning on a consistent schedule is the best prevention habit for car leather seats because it maintains flexibility and reduces how easily dirt and oils bond. The direct answer is: condition based on conditions and use level—not because it “feels right” on a random weekend.
Conditioning helps keep leather supple so surface soils release more easily during your weekly vacuum + dry wipe routine. But over-conditioning can backfire: too much product can leave residue that attracts grime and creates a sticky film.
To support a schedule, a helpful framing is “maintenance interval by environment and usage.” The table below summarizes realistic scheduling guidance ranges drivers often follow, adapted to common auto leather use patterns.
Conditioning Intervals by Car Leather Use Profile (Practical Ranges, 2026)
| # | Use profile | Typical conditioning interval | Expected surface “release” benefit | Ease score |
|---|---|---|---|---|
| 1 | Garage + light commuting | Every 10–12 months | High | ★★★★★ |
| 2 | Moderate commute (mixed sun) | Every 6–8 months | Moderate–High | ★★★★☆ |
| 3 | Hot/sunny region + lots of noon parking | Every 3–4 months | Very High | ★★★☆☆ |
| 4 | Frequent wet/humidity commuting | Every 4–6 months | Moderate | ★★★★☆ |
| 5 | Kids/pets frequent contact zones | Every 4–5 months | High | ★★★★☆ |
| 6 | Rideshare/taxi-style heavy use | Every 2–3 months | Moderate (resets faster) | ★★★☆☆ |
| 7 | Coastal road salt + sun exposure | Every 3–4 months | Very High | ★★★☆☆ |
How to apply without causing residue
Even with the right product, application technique matters:
– Clean and dry the seat first.
– Use a small amount and spread thinly.
– Buff off excess so you don’t leave a glossy, tacky layer that attracts dirt.
Keep Hands Off the Problem: Reduce Sweat, Sunscreen, and Dirty Wear
Sweat, sunscreen, and body oils are the fast-track contaminants that make car leather seats look dull and stained. The direct answer is to reduce contact oils at the source: manage what people put on their skin/hair, and wipe contact zones more often.
Start with seat habits. After applying lotion, sunscreen, or styling products, try to keep hands off bolsters and headrest areas until products fully absorb. For families and pets, consider a simple “no food/no drinks on seats” rule—and enforce it for the back row, where spills are common.
Also watch for oil buildup where hands naturally rest: steering-side bolsters and the center console armrest. If you see shiny patches, address them with your weekly dry wipe sooner rather than waiting for a monthly deep clean.
Choose Seat Covers Strategically (When You Need Extra Barrier)
Seat covers can keep car leather seats cleaner longer by acting as a barrier during messy periods. The direct answer is: use covers when risk is high (commutes with pollen/dirt, travel seasons, child/pet-heavy weeks), but don’t leave them unmaintained.
Choose breathable covers so moisture doesn’t trap against leather. During high-mess seasons, remove covers regularly and clean them—because a dirty cover can become a grime reservoir that transfers particles onto the leather.
If your vehicle has heated seats, confirm your cover material is compatible with heat distribution. Poorly designed covers can create uneven heating and contribute to faster wear in leather components over time.
Clean the Right Way: Gentle, Leather-Safe Products Only
Using the right cleaner is how you protect the leather finish while removing the contaminants you already prevented from bonding. The direct answer is to avoid all-purpose cleaners and harsh solvents; use leather-safe products and minimal moisture.
All-purpose products often contain degreasers or detergents that can strip natural oils or leave residue. Solvents can alter the surface coating on finished leather, which changes how stains behave later.
Always spot-test any cleaner in a hidden area first. Use minimal moisture: leather shouldn’t be soaked. If you need to lift something, do it in small steps—light cleaner application, blot/lift, then dry-wipe.
Prevention-focused trade-offs (quick scan)
- Dry wipe + conditioner maintenance
- Pros: Reduces bonding; lowers need for aggressive chemicals; keeps finish more consistent.
- Cons: Requires consistency; doesn’t erase set-in stains reliably.
- Deep cleaning (shampoo/steam) to “fix everything”
- Pros: Can improve appearance when done correctly; addresses heavy soiling.
- Cons: Can oversaturate leather; higher risk of finish changes; often creates a new maintenance cycle.
What Can Go Wrong (Common Prevention Failures)
Even good prevention habits can go wrong if the approach is too aggressive or poorly timed. The direct answer is to watch for three failure modes: over-conditioning, rubbing stains, and skipping complete drying after any damp wipe.
First, conditioning too frequently—or with the wrong product—can create a sticky or waxy residue that holds onto dirt. Second, rubbing stains accelerates penetration and can harm the leather’s top finish, making future cleaning noticeably harder. Third, if you apply moisture and don’t dry-wipe thoroughly, you may get water spots or uneven discoloration.
From my general observations of how leather surfaces behave during routine detailing, prevention failures typically show up in “high-touch” areas first (bolsters, headrest edges, seat seams).
Verdict / Tip: Use Prevention First—Then Target the Small Spots
Prevention works best when it’s consistent and gentle: you stop grime from bonding, then clean only what’s already loose. The direct answer is to treat weekly vacuum + dry wipe and immediate blotting as your core system, and reserve conditioning for a schedule that matches your climate and use level.
That said, prevention isn’t magic. If your car leather seats are already cracked, peeling, or severely dried out, prevention alone may not be enough—consider professional assessment or a restoration approach. Also skip DIY cleaning attempts if the leather is specialty-treated, heavily damaged, or you’re unsure what finish it has (coated leather, aniline leather, or protected finishes each respond differently).
Professional help criteria (recommended):
– If leather is peeling, flaking, or the finish is separating, stop DIY and seek a pro.
– If stains are set-in for months/years and spread when dampened, professional evaluation is safer.
– If you suspect aniline or delicate specialty finishes, don’t experiment broadly—get guidance first.
Quick Checklist: 7 Prevention Tips (Save This)
– [ ] Vacuum + dry microfiber wipe weekly
– [ ] Reduce UV/heat exposure (shade/cover)
– [ ] Blot spills immediately; don’t rub
– [ ] Condition on a consistent schedule (per directions)
– [ ] Minimize sweat/oily products on contact zones
– [ ] Use breathable seat covers during high-mess periods
– [ ] Use leather-safe products; spot-test first
Frequently Asked Questions
What are the best prevention tips to keep car leather seats clean longer?
Use a dedicated leather conditioner and a protective sealant on a regular schedule to reduce dirt and oil absorption. Place a seat cover or use a breathable slipcover to protect against spills and everyday grime, especially if you transport kids or pets. Vacuum and wipe high-contact areas weekly with a microfiber cloth to prevent buildup that dulls leather finishes. Avoid letting residues sit—promptly blot stains and clean with a pH-balanced leather cleaner to maintain the leather’s protective layer.
How often should I clean and condition leather car seats to prevent buildup?
Vacuum loose dust and debris at least once a week, then do a gentle wipe-down monthly with a microfiber cloth and a pH-neutral leather cleaner. Condition leather about every 3–6 months, depending on your climate and sun exposure, because dryness makes leather more prone to cracking and staining. If you notice the surface looks dull or feels dry, you likely need conditioning sooner. Consistent routine maintenance helps keep car leather seats clean longer and reduces the need for aggressive deep cleaning.
How can I prevent dye transfer, stains, and spills on leather seats?
Treat potential transfer sources like dark jeans, belts, and dyed fabrics by keeping clothing from rubbing directly against the seat leather and using a barrier cover when necessary. For spills, blot immediately with a clean, dry microfiber towel—never scrub—then use a leather-safe cleaner designed for the specific substance when needed. Avoid “miracle” household products that can strip protective coatings or change the leather’s color. The faster you address messes, the easier it is to keep your leather seats looking new.
Why does sun and heat make leather seats harder to keep clean?
UV rays and high temperatures break down leather oils and protective finishes, causing the surface to become more porous and attract grime. As leather dries, it can fade and develop micro-cracks where dirt settles, making stains harder to remove. Park in the shade or use a windshield sunshade, and keep cabin airflow moderate to reduce heat buildup. By controlling sun exposure and maintaining conditioning, you’ll keep car leather seats clean longer with less frequent deep cleaning.
Which cleaning products and tools are safest for long-term leather seat care?
Choose a pH-balanced leather cleaner, a quality leather conditioner, and a leather protectant spray that’s made for automotive interiors. Use microfiber cloths for wiping and cleaning—avoid rough brushes or abrasive pads that can scratch the finish. Skip alcohol-based wipes, harsh degreasers, and ammonia cleaners because they can dry and discolor leather over time. With the right tools and gentle, consistent leather cleaning, you protect the finish and reduce future dirt pickup.
📅 Last Updated: November 06, 2026 | Topic: How to Keep Your Car Leather Seats Clean Longer: 7 Prevention Tips | Content verified for accuracy and freshness.
References
- https://en.wikipedia.org/wiki/Leather_care
- Leather
- https://en.wikipedia.org/wiki/Automobile_detailing
- Upholstery
- Stain removal
- https://www.britannica.com/topic/leather
- https://scholar.google.com/scholar?q=car+leather+seat+cleaning+maintenance+prevention Google Scholar
- https://scholar.google.com/scholar?q=leather+care+conditioning+cleaning+UV+degradation Google Scholar
- https://scholar.google.com/scholar?q=leather+soiling+stain+removal+protective+coatings Google Scholar
