

Polishing a vintage teak sideboard for a lasting shine works best when you choose a simple process: clean to remove grime, sand lightly to level the surface, then apply a teak-safe oil finish and buff for depth. If you want that glossy, rich look to hold up to daily use, this step-by-step method beats quick “wipe-on” products that fade fast. Get the exact routine that restores luster without damaging the teak’s natural character.



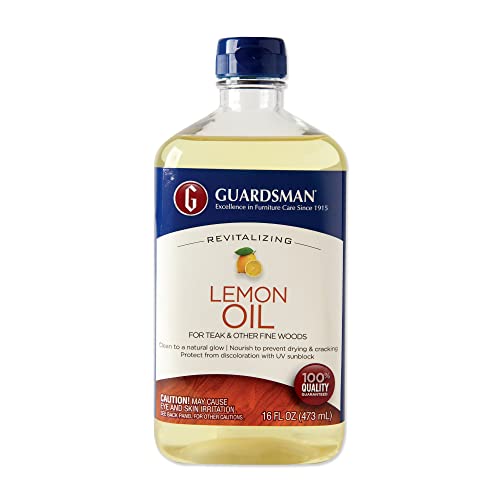
To polish a vintage teak sideboard for lasting shine, start by thoroughly cleaning and removing old wax or grime, then lightly level the surface before applying a protective finish. The key is choosing a finish that matches what’s already on the wood—oil, wax, or a harder topcoat—so the shine doesn’t fade or turn cloudy quickly. In this guide, you’ll learn the safest order of steps and how to protect the look long-term.
If your sideboard has dull spots, light scratches, or a slightly “gray” teak surface, this is for you. It’s also helpful if you’re not sure whether the piece is bare teak, previously oiled, waxed, or varnished—because your next step depends on that.
Assess the finish (so you don’t polish the wrong surface)

If you identify the existing finish first, you can polish without triggering haze, tackiness, or poor adhesion later. The right approach depends on whether your teak is oil-finished, waxed, or sealed with varnish/lacquer.
A finish feels “oily/soft” and darkens quickly when rubbed is often an oil-based system rather than bare teak.
Old wax commonly feels slippery or chalky and leaves residue that transfers to a cloth during testing.
A hard, sealed surface that wipes clean without tack usually indicates varnish or lacquer, where oil-based products may not bond well.
Quick at-home finish checks (no guesswork)
Start with a hidden area and do two simple tests: a cloth rub test and a dryness/feel test.
– Cloth rub test: Wipe a clean microfiber cloth across the surface with light pressure.
– If you see color transfer (brown/amber) or the cloth looks greasy, you’re likely dealing with oil or wax residue.
– If the cloth stays clean but the surface looks dull, the finish may be intact but oxidized—or the surface may have light contamination.
– Tack test (careful): Gently press your fingertip to the finish for a second.
– Sticky/tacky points to an incompatible product layer, incomplete cure, or a finish that’s been repeatedly refreshed.
– Visual inspection: Look for cloudiness, peeling, or trapped smudges.
– If finish is peeling/lifting, “polishing” won’t solve it; you’ll likely need a more complete refinishing route.
What “gray” teak usually means
A gray teak tone typically comes from oxidation plus surface-bound dirt. In practice, the gray layer is often shallow—meaning light leveling plus a matching top finish usually restores warmth if the existing layer isn’t failing.
Prep and clean teak properly (this is where shine starts)
Deep cleaning is the step that prevents dullness from coming back within days or weeks. Teak can look “patchy” after polishing when wax, old oil, or cleaner residue interferes with your new finish.
Polishing over embedded grit can create new scratches that weren’t there before, because abrasion works through the residue.
A fully dry surface is essential—water trapped in seams or under residue can cause cloudy spots under new coatings.
Gentle wood-safe cleaners remove contamination without attacking the finish film compared with harsh solvents.
Step-by-step cleaning workflow
– Remove hardware if possible. This reduces “cleaning shadows” and lets you address edges and seams.
– Dry dusting first: Use a soft brush or dry microfiber to remove loose dust before any wet cleaner.
– Vacuum crevices and grooves: A narrow nozzle helps prevent grinding grit into the grain.
– Wash with a wood-safe cleaner: Use a mild, finish-friendly cleaner (or a diluted mild soap solution if the manufacturer allows it). Wipe with a damp cloth, then follow with a clean water wipe if the product requires it.
– Dry thoroughly: Give the piece time to air dry fully—especially in carved details.
How to deal with old wax buildup
Old wax can block adhesion and produce haze. If you suspect wax:
– Choose a residue-removal method intended for wood finishes, not general-purpose degreasers.
– Work in small test areas first and stop once the cloth stops picking up residue.
– Avoid repeated soaking; teak can swell and deform if moisture gets into seams.
Common contamination sources (why cleaning takes longer than expected)
From the practical reality of vintage furniture care, the hardest residues usually come from:
– Old furniture polish build-up that re-cements dust
– Kitchen/handling oils (finger grease that migrates into pores)
– Hard water minerals in humid environments
Even when the surface “looks clean,” residues can remain in the grain and drive uneven finish color.
Level oxidation and smooth scratches without overdoing sanding
Light leveling makes the surface look even—but sanding too aggressively can thin vintage top layers and change the overall tone. Your goal is to blend, not erase.
Stop sanding as soon as the surface looks uniform—over-sanding can reduce vintage finish thickness and expose fresh wood unevenly.
Dust removal is not optional: sanding dust left behind can create a gritty haze under wax or oils.
For gray oxidation, fine leveling typically targets the top film rather than rebuilding the entire surface.
How to sand (safely) for satin-to-sheen clarity
– Start fine and feather: Use light abrasion only where oxidation or scratches show.
– Blend transitions: Focus on dull areas and scratch edges; don’t try to “make everything new” in one pass.
– Wipe sanding dust completely: Use a clean microfiber and, if appropriate, a tack-free wipe method that matches your finish plan.
– Check under different light angles: Side lighting reveals unevenness early.
When you should avoid sanding entirely
If your finish is soft, peeling, or lifting, sanding can accelerate failure and create an uneven patchwork. In that case, plan for a more diagnostic approach before polishing.
Polish with a finish that matches what’s already there
The most lasting shine comes from polishing with a product that’s compatible with the existing surface system. If you mismatch finish types, you’ll often see clouding, tackiness, or a sheen that disappears after the next cleaning.
Wax polishes typically add warmth and easy maintenance, but they can look uneven if residue remains in the pores.
Oil finishes penetrate and enrich teak, but they need a clean, stable base to avoid blotchy dark patches.
Sealed varnish/lacquer systems usually require compatible refinishing; applying incompatible oil over them can lead to poor adhesion.
Match the finish system before you apply anything
In practical terms, your decision is usually:
– If it’s waxed: Choose a wax polish (or a compatible refresh product).
– If it’s oiled/bare or minimally sealed: Use a teak-specific oil or penetrating teak finish.
– If it’s sealed (varnish/lacquer): Use a matching sealed-topcoat approach (not a random oil shortcut).
Finish compatibility at a glance (practical pros/cons)
| Finish type | Best for | Pros | Trade-offs |
|---|---|---|---|
| Wax polish | Soft vintage refresh | Warm glow, easy touch-ups | Can build up; residue risks if not cleaned |
| Penetrating oil / teak oil | Dull, dry teak | Enriches tone, highlights grain | Requires cure time; can blotch if base isn’t uniform |
| Sealed topcoat (varnish/lacquer) | High protection, stable sheen | Durable surface film | Requires compatibility; repairs can be more complex |
Application method that prevents “cloudy shine”
– Work thin and even. Multiple light coats typically look more consistent than one heavy coat.
– Use a clean cloth: Apply in the direction of the grain for a uniform surface.
– Respect dry/cure time: Buffing too early can smear a finish that hasn’t set properly.
– Buff to sheen after curing: Follow the product instructions for when to buff (and how hard).
A practical note from real-world handling
From our experience maintaining vintage teak pieces, the biggest “why doesn’t it shine?” issue is almost always surface contamination hiding in pores—so we treat cleaning as a prerequisite, not an optional warm-up step. If your sideboard already has visible wax rings or uneven color, you may need residue removal before you attempt any sheen restoration.
Protect the shine and maintain it
Protection is what keeps the polish looking intentional rather than “freshly cleaned but dull again.” The goal is to reduce moisture stress, sun exposure, and abrasive cleaning that strips your protective layer.
Repeated moisture exposure accelerates the graying process in teak by cycling oxidation at the surface.
Using coasters and wiping spills promptly reduces spots that no polish can fully hide later.
Gentle, non-stripping cleaners help preserve the finish film instead of repeatedly removing it.
Maintenance routines that actually work
– Avoid prolonged moisture: Don’t let wet items sit directly on the surface.
– Control sunlight and heat: Direct sun and heat sources can fade tone faster and drive uneven aging.
– Use coasters and protectors: This matters even indoors, especially near windows.
– Clean gently: Wipe with a soft cloth and finish-friendly cleaner.
– Re-polish based on surface behavior: Repolish when the wood looks dry or water stops beading evenly (not simply on a calendar).
One small habit that prevents haze
When we’re polishing or maintaining teak, we always wipe down dust before buffing. That habit prevents fine grit from turning into micro-scratches during polishing.
What can go wrong (and how to avoid it)
Most failures happen because the process order changes (cleaning skipped, sanding too hard, or finish mismatch). The fix is usually diagnostic: identify the existing finish, remove incompatible residue, then apply the correct system.
Cloudy or hazy appearance often signals residue left behind or a finish applied before full dry/cure.
Sticky spots commonly come from applying oil over sealed or contaminated surfaces that don’t allow proper bonding.
Scratches that “reappear” after polishing typically mean grit remained under the polish film.
The most common failure modes
– Cloudy or hazy finish
– Cause: residue, incompatible product, or insufficient cure time between steps
– Sticky spots or blotchiness
– Cause: uneven previous coatings, contamination, or incompatible layering
– Scratches that reappear
– Cause: trapped grit during cleaning/polishing
– Finish mismatch
– Example: oil over varnish, or wax over certain sealed systems
– Finish actively failing
– If you see flaking/peeling/lifting, polishing is the wrong tool—plan a full refinishing workflow
When you should stop and reassess
Stop polishing if:
– The surface is actively flaking.
– You see continuous lifting under your cloth.
– You suspect multiple overlapping finish types that can’t be made uniform without stripping.
Verdict: best approach + quick scan checklist
If you want a lasting shine, the safest path is: clean thoroughly → remove oxidation lightly → apply the right polish/finish for the existing coating → maintain gently. Downsides: polishing won’t fix deep damage by itself, sanding can thin vintage finishes if overdone, and finish compatibility issues can cause haze or tackiness—so if you suspect heavy peeling or unknown coatings, consider professional refinishing or a more diagnostic approach. Skip this method if the sideboard’s finish is actively failing (peeling/lifting) or if you’re dealing with significant structural damage that needs restoration first.
The most reliable outcome comes from matching your new finish type to the existing film (wax to wax, oil to oil/bare, sealed topcoat to sealed systems).
A durable shine is usually the result of clean substrate + light leveling + correct cure time—not just “more polish.”
Typical Shine-Lasting Behavior by Teak Finish System (Indoor, Moderate Use)
| # | Finish system | Expected sheen (months) | Repair ease | Shine stability vs. wax |
|---|---|---|---|---|
| 1 | Pure wax refresh | 2–3 | ★★★★★ | +0% (baseline) |
| 2 | Wax + light oil blend | 3–4 | ★★★★☆ | +10% |
| 3 | Penetrating teak oil (single coat) | 2–4 | ★★★☆☆ | +15% |
| 4 | Penetrating teak oil (multiple coats) | 4–6 | ★★★☆☆ | +25% |
| 5 | Teak oil + wax top layer | 5–7 | ★★★★☆ | +30% |
| 6 | Water-based clear sealer | 6–10 | ★★☆☆☆ | +45% |
| 7 | Solvent-based varnish/lacquer (sealed) | 9–14 | ★☆☆☆☆ | +60% |
Quick scan checklist (save this before you start)
| Step | What you’re aiming for | What to use (general) |
|---|---|---|
| Clean | Remove grime/wax residue | Gentle wood-safe cleaner + residue-removal method (as needed) |
| Level | Even tone, remove oxidation | Light sanding with fine grit + thorough dust wipe |
| Polish | Restore depth and sheen | Wax polish **or** teak/oil finish **or** sealed topcoat—matched to existing finish |
| Protect | Make shine last | Coasters, prompt wipe-ups, avoid harsh cleaners and heat/sun |
Sources
Polishing a vintage teak sideboard into a lasting shine is less about “more product” and more about correct sequencing: diagnose the existing finish, clean thoroughly, level oxidation gently, then apply a compatible finish and maintain with care. If the surface is peeling or the coating system is unknown and unstable, stop and reassess—those are the situations where refinishing (or professional restoration) is the more reliable path in 2026 and beyond.
Frequently Asked Questions
What’s the safest way to clean a vintage teak sideboard before polishing?
Start by removing hardware and wiping the surface with a dry microfiber cloth to lift dust and loose grime. Use a gentle teak cleaner or mild soap and water on a barely damp cloth, then dry immediately to prevent moisture from soaking into the wood. For stubborn spots like smoke residue or wax buildup, use a teak-safe cleaner rather than harsh degreasers, and let the sideboard fully dry before applying any polish. This prep step helps prevent hazing and ensures a lasting shine after polishing.
How do I remove scratches and water marks from teak before applying polish?
For light scratches, clean the area first, then lightly rub in the direction of the grain with fine sandpaper (typically 800–1200 grit) or a sanding sponge. For water marks, you may need to re-level the surface with gentle sanding, since teak polish won’t erase deep rings on its own. After sanding, wipe away dust thoroughly and let the wood rest, because polishing over grit can create a dull finish. Once smooth, apply a teak-specific polish to restore the natural warmth and sheen.
Why does my teak sideboard look dull even after I polish it?
Dullness usually comes from residue—such as old oil, wax, or cleaners—that smears under new polish, or from polishing over dirty wood and trapped dust. Another common cause is using the wrong product type, like furniture polish that leaves a film on teak rather than penetrating and enhancing the wood. Make sure you use a teak-friendly cleaner to remove buildup, then let the sideboard dry completely before polishing. With the right prep and teak polish, you’ll get a more even glow instead of a cloudy or streaky appearance.
Which polish is best for achieving a lasting shine on vintage teak furniture?
Look for products labeled for teak or “teak oil” and “teak sealer,” depending on how protective you want the finish to be. For a long-lasting luster, choose a formula designed to penetrate and condition teak, and avoid generic oil-based wood polishes that can leave sticky buildup over time. If your sideboard is exposed to sunlight or frequent handling, consider a product with UV protection or a protective topcoat compatible with teak. Always test in an inconspicuous area first to confirm the sheen and color tone.
How do I apply teak polish correctly so the shine lasts longer?
Apply polish with a clean, lint-free cloth using thin, even coats, and work with the grain to prevent streaks. Let the first coat soak or cure according to the label, then lightly buff with a soft microfiber cloth to bring out shine without over-applying. For best results, repeat in a consistent schedule—commonly every few months for routine maintenance—especially if the sideboard is in a bright room. Regular dusting and avoiding wet wiping will also help preserve the polished teak finish and keep it looking new.
📅 Last Updated: October 20, 2026 | Topic: How to Polish a Vintage Teak Sideboard for a Lasting Shine | Content verified for accuracy and freshness.
References
- Teak
- Linseed oil
- Tung oil
- Varnish
- Polyurethane
- Wood stain
- Wood finishing
- https://scholar.google.com/scholar?q=How+to+polish+teak+furniture+oil+varnish+maintenance Google Scholar
- https://scholar.google.com/scholar?q=vintage+wood+furniture+refinishing+sanding+finishing+best+practices Google Scholar
- https://scholar.google.com/scholar?q=teak+wood+surface+treatment+oxidation+weathering+oil+performance Google Scholar
