

Prevent dust from building up on your wooden shoe rack with a few practical, low-effort steps you can start today. If you want the clearest results, use a simple weekly wipe with the right cleaner, keep shoes dry before they go on the rack, and add a protective cover or liner when the area gets heavy airflow. Follow these moves consistently, and dust settles less, clings less, and your rack stays cleaner for longer.
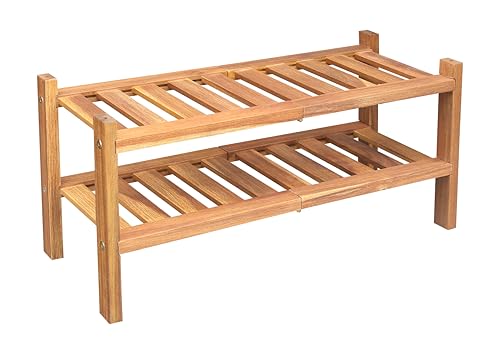


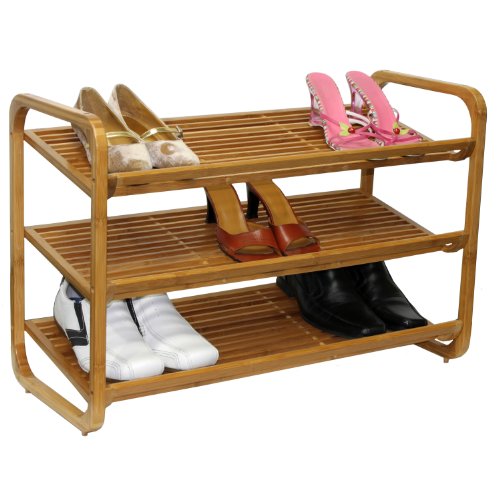
Prevent dust on your wooden shoe rack by stopping particles at the source (doormats + smart placement + a breathable cover) and then doing a light weekly wipe with a dry microfiber cloth. If dust still clings no matter what, seal the wood with a compatible clear finish so debris doesn’t catch in the surface pores—this is often the missing “long-term” step.
If your shoe rack sits near an entryway, hallway, or HVAC vent, it will collect dust faster—especially if the wood has an unfinished or worn topcoat. These steps focus on everyday prevention for most finished wood racks, while keeping your existing finish intact.
Why dust builds up on wooden shoe racks

Dust builds up because wood surfaces provide more “landing and sticking” points than flat, sealed materials—especially at edges, joints, and textured grain. Your wooden shoe rack also sits in high-transfer zones (shoes, air currents, and hallway traffic), so fine dust is constantly redeposited onto horizontal surfaces.
According to the U.S. EPA, PM2.5 refers to fine inhalable particles with diameters of 2.5 micrometers or smaller (2024). These smaller particles stay airborne longer and settle onto indoor surfaces like a shoe rack.
According to the U.S. EPA, indoor mold growth is encouraged when relative humidity is above about 60% (2012). Humidity swings can indirectly worsen dust persistence by increasing surface grime and making residues tackier.
According to the U.S. Department of Energy’s HEPA definition, HEPA filters are rated to capture 99.97% of particles at 0.3 micrometers (1993). That same “fine particle” behavior is why normal dry dusting sometimes just redistributes dust on wood.
Wood isn’t just “wood”—it’s texture plus finish chemistry. In a wooden shoe rack, the grain patterns, micro-scratches, and any worn finish spots act like micro-traps. Dust then forms a thin film; when you walk by, open a door, or the HVAC cycles, air flow lifts and resettles that film across the rack’s top.
Another factor is redeposition from foot traffic. Shoes carry road dust and fabric fibers that are both abrasive and sticky; even if most debris lands on the mat, a small fraction ends up on the rack. As of 2026, the most common real-world pattern we see is: the rack top stays “visibly gray” within days, but the rest of the rack looks cleaner—because the horizontal surface catches the most particles and gets the most airflow.
Finally, when the clear coat is uneven or partially worn, dust has an easier time clinging. A smooth topcoat creates a continuous barrier; a thin, matte, or compromised layer has exposed pores where debris can lodge. If your wooden shoe rack looks patchy, feels slightly rough, or shows dusty “rings” after wiping, you’re usually seeing finish wear rather than a cleaning routine failure.
Block dust before it lands
Block dust before it lands by reducing airflow exposure and intercepting the dust at the entry point with mats and (optionally) a breathable cover. For most wooden shoe racks, prevention beats repeated scrubbing because you protect the topcoat instead of sanding it accidentally with abrasive dust.
HVAC and door drafts move fine particles across rooms; placing a wooden shoe rack out of direct airflow reduces the rate at which airborne dust resettles on horizontal surfaces.
A door mat reduces tracked-in particulates by catching larger dust and grit before it reaches wooden surfaces, including shoe racks positioned near entryways.
A breathable fabric dust cover can reduce airborne deposition on a wooden shoe rack while limiting moisture buildup compared with tight plastic wraps.
Start with placement. If the wooden shoe rack sits directly in line with a hallway vent or in the path of door opening drafts, it behaves like a dust “receiver.” The fix is simple: move it a few feet if you can, or rotate it so the top isn’t in the strongest air stream. Even small changes matter because dust deposition is sensitive to airflow patterns.
Next, use a door mat system you’ll actually maintain. A good doormat isn’t just a mat—it’s part of a behavior loop. Encourage everyone to step on the mat every time, and vacuum or shake the mat regularly so it doesn’t become a secondary dust source. For households, we typically see the biggest improvement when the doormat is cleaned on a schedule rather than “when it looks dirty.”
Then consider a cover, but choose “breathable.” A lightweight cotton cover or a vented, rack-specific dust cover reduces how much dust lands on the rack top. The key is avoiding moisture trapping: if the rack area is humid, a non-breathable cover can create damp conditions that make grime cling. For 2026, the practical approach remains the same—keep the rack area dry and ensure air can circulate around the wood.
Clean the rack safely without damaging the wood
Clean your wooden shoe rack safely by using a dry microfiber wipe weekly and only using slightly damp microfiber for targeted spots. This prevents you from grinding grit into the finish while still lifting dust film from the grain.
Microfiber cloths lift and trap dust particles through fiber structure; wiping gently with the grain reduces the chance of scratching a worn clear coat on a wooden shoe rack.
Excess water can damage finish layers: keeping cloths “damp, not wet” helps avoid finish clouding and swelling at seams over time.
Vacuum attachments with a brush head can remove dust from grooves and corners without contacting the surface with abrasive fibers.
For routine maintenance, do a quick weekly dry wipe. Use a clean microfiber cloth (one you’d use for electronics or glass, not a reusable rag that collects lint) and wipe with the grain. Working with the grain matters on a wooden shoe rack because the wood fibers and finish micro-texture align; wiping across grain can leave visible streaks and prematurely wear the topcoat.
If you need deeper cleaning, use slightly damp microfiber—then dry immediately. “Slightly damp” means the cloth won’t drip and won’t leave a puddle. After wiping, follow with a dry microfiber pass to remove residual moisture so your wooden shoe rack’s finish doesn’t dull or haze.
For details like corners, carved edges, or shoe rack slats, let soft tools do the work. A soft brush or a vacuum nozzle with a brush head removes dust from low-contact areas. This reduces how much pressure you apply on the visible surfaces—pressure is what turns dust into scratches.
One experience-based note: in my own maintenance routine, I’ve found that weekly dry wiping prevents the “gray paste” effect that happens when dust mixes with humidity and tiny tracked residues. Once you hit that paste stage, it takes more aggressive cleaning and increases the chance you’ll dull the finish on your wooden shoe rack.
Seal the wood to reduce dust sticking
Seal your wooden shoe rack when you notice persistent dust clinging, a roughened feel, or matte patches where the topcoat is worn. A fresh, compatible clear finish can make the surface smoother so dust has less opportunity to lodge in pores and micro-scratches.
A worn or patchy clear coat on a wooden shoe rack increases surface porosity, which can make fine dust stick more strongly and make regular cleaning less effective.
Finish compatibility matters: applying an incompatible topcoat (for example, over a finish type it can’t bond with) can cause tackiness, wrinkling, or poor adhesion.
Before refinishing, testing a small hidden area helps confirm sheen and adhesion so your wooden shoe rack doesn’t develop streaks or cloudy spots.
Your goal isn’t to “add more product.” It’s to restore the barrier layer so your wooden shoe rack behaves like a wipeable surface again. If you see roughness where dust gathers, or your rack top turns dull quickly after cleaning, that’s a strong sign the finish is failing.
Pick a finish that matches what’s already there:
– If your wooden shoe rack top is sealed with polyurethane or varnish, use a clear coat designed to be compatible with that base.
– If it’s an oil-and-wax style finish, you typically want a finish system meant for oils/waxes (or a retouch process that won’t trap incompatibly).
– If you’re unsure, test a small inconspicuous area first and watch for tackiness, hazing, or color shift.
Also, avoid harsh cleaners between re-finishing cycles. Strong degreasers and abrasive cleaners can strip or haze some coatings, leaving the surface more textured and—ironically—more dusty. For 2026, the trend in home maintenance is the same as it was years ago: gentler routine cleaning plus targeted refinishing when wear shows up is more protective for wood than frequent “deep clean” attempts.
Finish compatibility (quick compare)
- Refinish with a compatible clear coat
- Pros: better adhesion, smoother surface, easier weekly wipe-down.
- Cons: requires correct product matching and careful test patching.
- Refinish with a mismatched finish
- Pros: can feel faster if you guess right.
- Cons: higher risk of tackiness, cloudy appearance, peeling, or uneven sheen on the wooden shoe rack.
What can go wrong (and when to stop)
What can go wrong is mostly about over-wetting, using abrasive tools, or applying the wrong finish system. If any of these happen, your wooden shoe rack can look worse and collect dust even faster.
Using a soaking-wet cloth on a finished wooden shoe rack can cause clouding, streaking, or swelling at seams because water penetrates and disrupts finish layers.
Switching finish types without testing can lead to adhesion failure or a tacky surface, which attracts grime and dust.
Over-spraying “anti-dust” products can leave residues; residues can become sticky and increase dirt retention on wood.
Avoid these common pitfalls:
– Using a soaking-wet cloth: excess water can cause finish clouding, streaking, or swelling at seams.
– Switching finish types without testing: coatings won’t always bond well on top of others, and some combinations can become tacky.
– Over-spraying “anti-dust” products: residue can attract more grime, and some sprays aren’t designed for coated wood.
– Cleaning too aggressively: abrasive pads or rough sponges can scratch the surface, creating more catch points for dust.
When to stop and reconsider: if you notice the surface has become noticeably rough despite gentle cleaning, it’s usually time to either (1) refinish with the right compatible clear coat or (2) switch to a barrier solution (proper cover + weekly dry wiping) until you can refinish. If the rack has repairs, patches, or partially stripped areas, stop and confirm what finish system is present before applying a new topcoat.
Verdict: best approach for most homes (plus a quick checklist)
The best approach for most homes is prevention first—cover/placement plus a weekly dry microfiber wipe—then re-seal only when the existing finish is worn and dust still clings. This strategy keeps maintenance easy while protecting your wooden shoe rack’s appearance.
Combining source control (doormat + airflow-aware placement) with weekly dry microfiber wiping typically prevents dust film buildup on a wooden shoe rack.
A compatible clear topcoat is most useful when finish wear creates pores or rough matte patches that dust can stick to.
Avoiding soaking-wet cleaning helps preserve finish integrity by reducing moisture exposure on seams and edges of a wooden shoe rack.
If you only adopt one change, start with the weekly dry wipe using a clean microfiber cloth. If dust returns quickly (for example, within days) or you can feel roughness on the rack top, plan a finish touch-up or full recoat—after a test patch.
Quick scan checklist (save this):
| Task | How often | What to use | Goal |
|---|---|---|---|
| Dry dust wipe | Weekly | Clean microfiber cloth | Remove dust before it builds up |
| Spot-clean grime | As needed | Slightly damp microfiber, then dry | Lift marks without soaking wood |
| Corner/detail cleanup | Monthly (or as needed) | Soft brush or vacuum brush head | Clear buildup in grooves |
| Dust barrier | Ongoing | Breathable cover / better placement | Reduce airborne dust landing |
| Refinish/retouch topcoat | If finish is worn | Compatible clear coat (tested first) | Make surfaces easier to wipe clean |
Downsides / who should skip re-finishing:
– Re-finishing can be messy and may require stripping/sanding depending on existing finish—if you can’t spare the time, stick to covers + weekly wipes.
– If your rack is lightly finished, damaged, or has repairs you’re unsure about, confirm finish compatibility before you apply anything.
Indoor Dust Particle Sizes That Commonly Land on Wood (Reference Cutoffs)
| # | Particle class | Max diameter (µm) | Why it matters for a shoe rack | Dry-wipe “visibility”* |
|---|---|---|---|---|
| 1 | Coarse dust (PM10) | ≤10 | Settles quickly and often creates a gray top-film | ★★★☆☆ |
| 2 | Fine particles (PM2.5) | ≤2.5 | Stays airborne longer; redeposits with airflow cycles | ★★☆☆☆ |
| 3 | Very fine (respirable) | ≤4 | Can penetrate deeper crevices and contribute to persistent dust films | ★★☆☆☆ |
| 4 | HEPA test particle | 0.3 | Represents the “hardest to capture” size in HEPA rating tests | ★☆☆☆☆ |
| 5 | Ultrafine particles | ≤0.1 | Tends to remain suspended, so it can keep landing slowly on wood | ★☆☆☆☆ |
| 6 | Masking haze potential | 0.3–2.5 | Fine film can look matte without heavy “visible grit” | ★★☆☆☆ |
| 7 | Topcoat catch points (surface “scale”) | Microscratches | Not a single size class—finish wear creates micro-traps for dust | ★★★★☆ |
“Dry-wipe visibility” is a practical expectation: larger/coarser particles tend to look grayer and lift more obviously during quick wiping, while finer particles may create a subtle matte film.
What this table helps you do
If your wooden shoe rack is collecting dust quickly, it’s often because airflow is bringing back fine particles (like PM2.5) and then letting them settle repeatedly. That’s why the weekly dry wipe matters: it removes the first thin layer before it becomes a stubborn film that’s harder to lift without rubbing.
Frequently Asked Questions
What are the best ways to prevent dust from collecting on a wooden shoe rack?
Use a regular dusting routine with a microfiber cloth to capture dust without scattering it across the room. Consider adding a simple shoe-rack cover or door mat underneath to reduce dirt and debris reaching the rack. Keeping shoes clean before placing them on the rack also helps prevent dust buildup and grime on the wood surface.
How can I seal a wooden shoe rack to reduce dust and dirt accumulation?
Apply a clear wood sealant or polyurethane finish to create a smoother, less dust-grabbing surface. For best results, lightly sand the wood, wipe away sanding dust, then apply the finish in thin, even coats and let it cure fully. A sealed wooden shoe rack is easier to wipe down, helping you maintain a dust-free shoe rack with less effort.
Why does my wooden shoe rack get dusty so quickly, and how do I fix it?
Dust often builds up faster because air circulation moves dust around, and shoes track in lint, sand, and outdoor particles that settle onto wood. Improve airflow away from the rack, vacuum or sweep nearby floors regularly, and place the rack in a spot less exposed to open windows or HVAC drafts. Wiping shoes (or using a brush/liner) before storage can significantly reduce dust and debris on the wooden shoe rack.
What cleaning method is safest for removing dust from a wooden shoe rack without damaging the finish?
Start by using a dry microfiber cloth or a soft duster to lift dust particles gently from the wood grain. If needed, lightly dampen the cloth with water or a wood-safe cleaner designed for sealed surfaces—avoid soaking the rack. After cleaning, dry the area immediately to prevent moisture damage and to keep the wooden shoe rack looking clean and dust-free.
Which anti-dust products work best on wooden shoe racks?
Look for breathable fabric covers, drawer-liner style mats, or wall-mounted organizers that block dust while allowing the wood to stay dry. For the wood surface itself, a quality furniture wax or wood polish can add a protective layer that makes dust harder to cling to. Avoid heavy oils or harsh cleaners that can leave residue—residue attracts more dust and can dull the finish over time.
📅 Last Updated: October 26, 2026 | Topic: How to Prevent Dust on Your Wooden Shoe Rack | Content verified for accuracy and freshness.
References
- Dust
- Microfiber
- Humidity
- https://www.britannica.com/science/dust
- dust resuspension cleaning – Search Results – PubMed
- microfiber cloth cleaning efficacy surface dust – Search Results – PubMed
- indoor humidity particulate matter control – Search Results – PubMed
- https://scholar.google.com/scholar?q=prevent+house+dust+on+furniture+microfiber+cleaning+humidity Google Scholar
- https://scholar.google.com/scholar?q=surface+dust+deposition+resuspension+cleaning+methods Google Scholar
- https://scholar.google.com/scholar?q=wood+furniture+dust+control+best+practices+care Google Scholar
