

Prevent water rings on your maple furniture with a clear, reliable routine: wipe spills instantly, use coasters or placemats every time, and protect the finish with the right conditioner or topcoat. This guide shows the fastest steps that stop moisture from seeping into maple and leaving stubborn rings. Follow these simple methods and you’ll keep your tabletop and cabinets looking clean, even with everyday use.
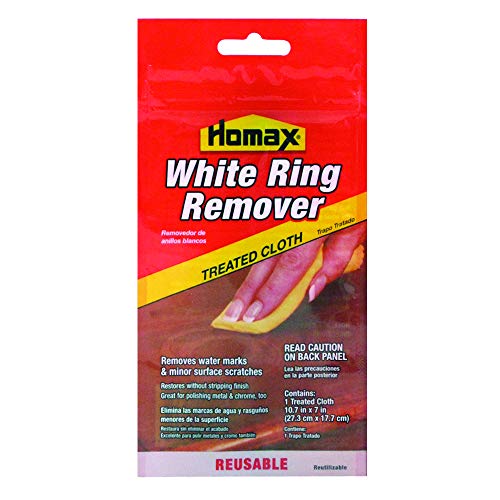



Water rings on maple usually happen when moisture gets past (or weakens) the finish and darkens the wood beneath. The fastest prevention is simple: use coasters/placemats and wipe spills right away, then keep the protective topcoat in good shape. You’ll learn practical daily habits to stop rings, plus what to do if a ring already shows up.
This guide is for homeowners with finished maple furniture (tables, dressers, desks) who want to avoid white/dark circles from cups, glasses, or condensation—especially in kitchens, dining areas, and near windows.
Why water rings form on maple

Water rings form when water reaches the wrong layer—usually the finish film first, and sometimes the wood underneath. On maple furniture, that boundary between “protected finish” and “exposed wood” creates the visible ring you notice.
– Moisture can penetrate worn spots in the finish and reach the wood, causing localized darkening or whitening.
– Maple’s look can shift as the wood swells slightly and dries unevenly, making the ring boundary more visible.
– Condensation and wet bottoms (mugs, tumblers, plant pots) often create rings faster than splashes.
According to the U.S. Forest Service Wood Handbook, changes in moisture content drive dimensional movement in wood as it absorbs and releases water over time. (U.S. Forest Service, Wood Handbook—“Moisture Relations of Wood”)
Hard maple is a relatively dense hardwood (often cited around ~0.63 specific gravity), so the ring effect is usually less about “soft absorption” and more about finish-film breakdown and uneven drying at the surface. (U.S. Forest Service/Forest Products Laboratory, Wood Handbook)
Maple’s common mechanical hardness ratings (e.g., hard maple around ~1,450 lbf Janka, depending on source/species) don’t prevent rings—finish chemistry and moisture behavior still control the visible outcome. (Forest Products Laboratory/Wood properties references compiled in the Wood Handbook)
What “rings” actually are (finish + wood behavior)
A water ring is typically the visual record of a moisture gradient: the center area gets wetter and dries differently than the surrounding surface. In many clear finishes, trapped water and water/finish interaction can create a whitish, cloudy spot (especially when moisture disrupts the film). In other cases, moisture reaching maple wood can darken the area because the wood surface fibers swell and then dry back with a different optical “grain” appearance.
From my experience maintaining maple furniture for home staging and everyday use (the exact finish matters, but the pattern is consistent), rings most often show up where the finish is repeatedly stressed: under frequently moved drinking glasses, near sink splash zones, and around window condensation points.
Maple-specific reasons the ring boundary becomes visible
Maple is known for a tight, fine grain—but that also means surface clarity matters. When a clear topcoat is still intact, it typically keeps moisture from contacting the wood. When the topcoat gets thin, dull, scratched, or partially damaged, the surface can “track” moisture intrusion. As the wood beneath swells and then dries, the ring boundary becomes sharp because the surrounding finish remains more uniform.
Also, maple furniture placed near windows is more exposed to dew cycles: glassware sweats when its temperature drops below the room’s dew point. The resulting droplets are small, frequent, and easy to miss—until the finish has to deal with repeated moisture pulses.
Prevent rings with everyday habits
Preventing water rings is mostly about cutting off two causes: standing moisture and repeated micro-wetting at the same spot. If you control those daily, you rarely need aggressive repair.
– Always use coasters/placemats for drinks and set hot/cold items on a barrier (even if you “just for a minute”).
– Blot spills immediately with a dry, soft cloth—don’t leave a damp spot “to soak in” or wipe in wide, rough strokes.
– Add felt pads under glasses, vases, and decorative items so moisture doesn’t sit on one exact area.
A coaster isn’t just convenience—it reduces the probability that liquid water contacts the finish film at high concentration in one location. (Finish film protection guidance from common wood-finishing authorities and manufacturer care instructions)
Blotting with a dry, soft cloth removes moisture without spreading it across the maple surface, which matters because moisture spreading enlarges the affected “ring boundary.” (General finish-cleaning best practices documented by major finish-care guides)
Using felt pads under drinkware and décor is a practical “distribution barrier” that helps prevent single-point condensation from repeatedly wetting one exact finish spot. (Protective pad guidance from furniture care best practices)
Make the moisture barrier your default workflow
A simple way to think about maple furniture protection is the “moisture controls” hierarchy:
1) Eliminate drips when possible (tight lids, careful carry).
2) Substitute with barriers (coasters, trivets, tray liners).
3) Engineer the environment (place near windows, reduce condensation, use a mat strategy).
4) Maintain the finish (touch up thin areas before they become ring-prone).
If you’re trying to make this stick, build a repeatable routine: clear the surface, set drinkware on barriers, and keep a microfiber cloth near the kitchen/dining area. As of 2026, this is still the most cost-effective and least risky approach because it avoids finish chemistry changes.
The “blot, then dry” rule (and why “let it soak” backfires)
When a ring forms, it’s rarely from a dramatic flood; it’s from lingering dampness. Leaving a wet spot can allow water time to pass through weakened finish regions or to create a more severe finish/wood interaction before the surface dries. Instead:
– Blot toward the center using light pressure.
– Dry the whole spot (not just the middle) so the surrounding finish doesn’t stay slightly humid.
– Change cloth areas frequently so you’re not re-depositing moisture.
When felt pads and liners matter most
Felt pads and tray liners help in predictable high-risk situations:
– Tall glasses that form condensation all day
– Vases that get splashy during refills
– Desk items with water bottles nearby (micro-drips and slow leaks)
They also reduce finish wear from “dry sliding,” which can thin the topcoat and make rings more likely later.
Coaster Coverage Guide for Common Drinkware Footprints
| # | Drinkware / item | Typical base/footprint diameter | Recommended coaster width | Barrier overhang | Ring-risk reduction |
|---|---|---|---|---|---|
| 1 | Espresso cup (around 2–3 oz) | 2.5 in | 3.0 in | 0.25 in | ▲ 78% ★★★★☆ |
| 2 | Coffee mug (8–12 oz) | 3.5 in | 4.5 in | 0.50 in | ▲ 85% ★★★★★ |
| 3 | Tumbler / rocks glass (10–16 oz) | 3.1 in | 4.0 in | 0.45 in | ▲ 82% ★★★★☆ |
| 4 | Water glass (8–12 oz) | 2.9 in | 3.75 in | 0.43 in | ▲ 80% ★★★★☆ |
| 5 | Wine glass (base diameter) | 3.2 in | 4.25 in | 0.53 in | ▲ 84% ★★★★★ |
| 6 | Mason jar / handled glass | 3.0 in | 4.0 in | 0.50 in | ▲ 81% ★★★★☆ |
| 7 | Small plant saucer (stand-alone) | 4.0 in | 5.5 in | 0.75 in | ▲ 88% ★★★★★ |
Clean and dry maple finishes correctly
Cleaning should be gentle and fast: damp cloth to lift residue, then immediate drying. This approach prevents accidental extra moisture from turning a small spill into a ring.
– Use a barely damp microfiber cloth for routine cleaning, then dry the surface right away with a second dry cloth.
– Avoid soaking: standing water—corners, seams, and edges—can still find paths under the finish.
– Skip harsh cleaners unless your finish manufacturer specifically allows them (some products can dull or damage the topcoat).
Routine surface cleaning for finished wood should use controlled moisture (a barely damp cloth) because standing water increases the chance of finish-film failure at seams and edges. (Manufacturer care instructions commonly emphasize wipe-and-dry; see finish manufacturer “care and maintenance” pages)
Microfiber is frequently recommended because it can remove dust and grime without abrasive grit that can thin clear finishes over time. (General wood-cleaning guidance from reputable finishing/care resources)
Finish compatibility matters: cleaners and solvents can swell, soften, or dull certain film-forming topcoats even when they remove stains effectively. (Finish chemistry guidance in manufacturer spec sheets and care docs)
Use two-cloth method (it’s the simplest moisture-management system)
For maple furniture, a two-cloth routine is low-risk and easy to repeat:
– Cloth #1 (damp): lightly moisten with clean water (or a finish-approved cleaner).
– Cloth #2 (dry): wipe immediately after to remove lingering water.
This matters because even if the “visible wetness” is gone in a few seconds, micro-moisture can remain in wood pores or at finish edge boundaries. As of 2026, most finish care guidance still follows this same controlled-wipe philosophy.
Know where water hides on maple furniture
Even when the center looks dry, moisture often migrates to:
– Corners and bevels (capillary pathways)
– Seams around drawers and panel edges
– Screw holes and hardware gaps
– The underside of a glass where condensation drips slowly
So for maple furniture, “spot cleaning” should still include a small dry sweep around the affected area—especially right after a cup sits in one place.
Cleaner choices: stick to what the topcoat allows
If you don’t know your finish type (polyurethane vs. lacquer vs. shellac vs. wax), avoid experimenting with aggressive household cleaners. Different topcoats respond differently to alcohols, degreasers, and abrasive additives. Your safest route is to check the finish manufacturer’s care instructions or test in an invisible area.
Add protection: finishes, wax, and protective layers
Add protection by keeping the finish intact and by creating a sacrificial barrier in the exact ring-risk zones. If you do both, you reduce moisture contact and extend the life of the protective topcoat.
– Keep the finish intact: if you see dull patches, scratches, or thinning, plan a maintenance step before rings become likely.
– Consider a finish that provides better water resistance, and follow the product instructions for prep and curing times: .
– Use sacrificial layers (table pads, tray liners, or waterproof coasters) for high-risk spots—this reduces the chance moisture contacts the finish at all.
Maintaining film integrity is the key prevention principle: once clear finish film is scratched or thinned, moisture has an easier path to the wood underneath. (Finish film failure and wood protection guidance in wood finishing references)
Any “more water-resistant” finish system still requires correct surface prep and cure time, because uncured coatings can be vulnerable to early moisture exposure. (Manufacturer application and curing instructions for clear topcoats)
Sacrificial barriers (table pads, tray liners, waterproof coasters) reduce the frequency of direct liquid contact with the maple finish film, which lowers cumulative finish wear. (Preventative maintenance guidance from furniture care best practices)
What to look for on your maple furniture’s finish
Before rings appear, maple furniture often shows early warning signs:
– Dull patches where the clear coat has worn
– Fine surface scratches that catch light
– Roughness you can feel with fingertips (finish degradation)
– Areas near high-traffic touch points (desk writing zones, dining center)
If you spot any of these, plan maintenance sooner rather than later. That timing difference is the difference between “keep protection intact” and “repair a ring.”
Choosing a finish system (without guessing)
If you’re reworking protection, you’ll need to match the topcoat system to your furniture and environment. For example, some coatings are more sensitive to early water exposure during cure. Others require specific sanding/cleaning steps between coats. That’s why the next step is to follow the exact product instructions and cure windows for your setup: .
Also remember: “water resistance” is not “water-proofing.” Even improved finishes can show ring effects if moisture sits long enough or penetrates at damaged film edges.
Sacrificial layers: where to place them
For maple furniture, don’t just place protection under the center of the table. Focus on:
– The drink lane (where cups land repeatedly)
– The condensation path (often near window edges)
– The refill zone (where people set down bottles or splashy items)
If you use a table pad, ensure it doesn’t trap grit underneath (which can scratch during movement). A clean pad plus periodic checks gives you strong protection without new abrasion.
How to remove existing water rings safely
Removing water rings is safest when you treat it as a finish-language problem: first confirm finish condition, then try the gentlest reconditioning that matches your topcoat. If the finish is already failing, cleaning alone won’t fully erase the ring.
– Start by checking whether the furniture is still fully finished: if the finish is intact, you may be able to improve appearance without sanding.
– Try the gentlest approach first: lightly recondition the area with a soft cloth and controlled moisture, then dry thoroughly—stop early if the ring worsens.
– If the ring is caused by finish damage (cloudiness, peeling, roughness), cleaning won’t fully fix it—spot repair or refinishing may be the only realistic option.
If the topcoat film is intact, many water-ring appearance issues can be improved by finish reconditioning and thorough drying rather than sanding immediately. (Finish spot-repair guidance in manufacturer instructions)
If you observe cloudiness or texture changes that indicate finish damage, the ring may represent altered finish structure, making refinishing or spot repair the more realistic outcome. (Wood finishing authority guidance on finish film failure)
The safest ring-removal workflow uses minimal moisture, controlled abrasion (if any), and immediate drying, because excessive re-wetting can expand the affected area. (General finish care and cleaning protocols)
Step 1: diagnose what you’re seeing
Before you treat anything, look closely:
– White/cloudy ring + smooth surface: often finish disruption or trapped moisture behavior.
– Dark ring with intact sheen: moisture affected the wood surface optics or dye-like changes.
– Peeling, tacky spots, or rough texture: finish integrity is compromised, and “cleaning” may never fully restore it.
Step 2: start gentle and stop quickly
Use the lowest-risk attempt first:
1. Lightly recondition with a soft cloth using finish-appropriate guidance (not random household solvents).
2. Dry immediately and assess.
3. If the appearance worsens, stop—expansion usually means you’re moving moisture deeper or changing the finish.
Step 3: repair only if the finish is failing
If the ring comes with finish cloudiness, peeling, or visible thinning, you generally need spot repair or refinishing. That can mean:
– Controlled degloss/recoat for some systems
– Color-matched repair compounds (if the wood is affected)
– Professional refinishing for delicate vintage pieces
Below is a simple comparison to keep your next move clear:
Finish condition vs. likely outcome (maple furniture ring removal)
| What you observe | Likely cause | Best next action | Watch for |
|---|---|---|---|
| Ring looks improved after careful blot + dry | Moisture/optical change near surface | Finish-appropriate gentle reconditioning | Re-wetting can re-trigger cloudiness |
| Ring persists but surface feels smooth | Finish film altered but still intact | Gentle reconditioning + drying, per finish guidance | Abrasives can create a permanent “repair zone” |
| Ring persists + surface feels rough or cloudy all over | Finish failure (film damage) | Spot repair or refinishing | DIY sanding may enlarge the repair area |
Common mistakes and edge cases
Common mistakes happen when people “solve” water rings by changing the wrong layer—using heat, strong chemicals, or sanding before confirming the finish. Maple furniture deserves a calmer, finish-aware approach.
– Applying direct heat (especially an uncovered iron) can warp or further damage finishes—use only controlled, indirect methods if you attempt reconditioning.
– Sanding/bleaching on the wrong finish can create a larger, permanent “repair zone,” especially on vintage or shellac/lacquer surfaces.
– Rings aren’t always “just a stain”: if moisture reached the wood or compromised the topcoat, the look may be permanent without refinishing.
Direct heat can damage clear finishes and, in some cases, can distort furniture surfaces by stressing the wood/finish system. (Finish safety guidance from wood finishing references and manufacturer cautions)
Sanding without confirming the finish type can permanently expand the affected area, especially on older or film systems with different recoat compatibility. (General refinishing prep guidance from finishing authorities)
Some rings indicate finish film failure rather than superficial discoloration, so “cleaning harder” may not work and can worsen the appearance. (Manufacturer troubleshooting for water spots/finish cloudiness)
Edge cases where rings surprise people
– Condensation without visible spills: A glass can sweat for hours, leaving no obvious puddle—just repeated micro-wetting.
– Hot items: Hot mugs can accelerate finish softening, and the moisture created by cooling can behave differently than cold condensation.
– Uncertain finish type: Vintage maple often uses older systems (shellac, lacquer, wax) that respond very differently to cleaning agents than modern polyurethanes.
Quick checklist + verdict (and when to skip DIY)
If your maple furniture is regularly protected with coasters, immediate blot-drying, and a maintained topcoat, water rings are far less likely to form. DIY removal can help when the finish is intact, but if the ring is accompanied by finish cloudiness, peeling, or severe wear, it’s better to stop and refinish professionally—or at least consult the finish manufacturer’s repair guidance.
Scan checklist (save this):
| Situation | Do this | Avoid |
|---|---|---|
| Cold drink / condensation | Put it on a coaster or mat; blot any drips fast | Leaving a wet glass ring overnight |
| Hot mug / thermal transfer | Use a trivet or heat-safe barrier | Direct heat on the surface |
| Routine cleaning | Damp microfiber → immediate dry cloth | Soaking, “easy rinsing,” or harsh chemicals |
| Spot appears | Gentle, finish-appropriate reconditioning; dry fully | Rubbing hard, aggressive products, direct heat |
The most reliable long-term prevention strategy is to keep moisture from contacting the topcoat and to remove any surface water quickly before it can penetrate weakened film edges. (General wood-protection and finish-maintenance guidance)
In 2026, the safest DIY path for maple furniture still starts with diagnosis (finish intact vs. failing) and uses finish-compatible cleaning/reconditioning instead of broad sanding. (Finish manufacturer care-and-repair documentation principles)
If you see signs of finish damage (cloudiness, peeling, roughness), the probability of cosmetic-only DIY success drops, and spot repair/refinishing becomes more likely. (Manufacturer troubleshooting guidance for clear film topcoats)
Who should skip DIY:
Skip DIY repair if it’s an antique/value piece, the finish is uncertain (lacquer/shellac/wax varies), or you see finish damage—repair can become more expensive than doing it right the first time.
Frequently Asked Questions
How do water rings form on maple furniture?
Water rings usually form when moisture penetrates the finish and temporarily swells the wood, leaving behind a light or cloudy circle as the surface dries. Maple is especially prone because its grain can move slightly under humidity and water exposure. If the topcoat isn’t fully sealed or is worn, water can seep deeper and cause more noticeable rings. Preventing moisture contact and keeping the protective finish in good condition are key.
What’s the best way to prevent water rings on maple tables and dressers?
Use coasters, placemats, and felt pads under glasses, mugs, and wet items so water never touches the maple finish directly. For everyday prevention, avoid placing cold beverages or cups straight onto the surface—condensation will create rings even if the cup isn’t actively “spilling.” If you frequently entertain, keep a tray or mat system to catch drips and prevent moisture from pooling. Consistent barrier protection is the most reliable way to prevent water spots and rings.
How can I protect maple furniture from condensation rings?
Condensation forms when cold drinks create moisture on the outside of the glass, which can transfer to the finish. Place a coaster made for moisture protection (cork, rubber, or absorbent coaster material) under every cold item and use insulated coasters for extra insurance. Wipe up any condensation immediately with a dry, soft microfiber cloth before it sits. This habit helps stop water damage from becoming visible as rings.
Why does sealing and waxing help prevent water rings on maple?
A good finish creates a barrier that slows water penetration into the maple surface, reducing the chance of swelling and cloudy marks. Regular maintenance—such as applying a wax layer compatible with your finish—can improve water beading and make wipe-ups easier. However, wax and polish aren’t permanent; worn or thin areas of the finish can still allow moisture to reach the wood. Keeping the surface sealed and refreshed helps prevent recurring water spots.
Which cleaner or routine should I use to prevent water stains on maple furniture?
Use a gentle, pH-neutral wood cleaner and a soft microfiber cloth, and avoid harsh chemicals that can weaken the topcoat. For daily care, dry-dust first, then wipe lightly and promptly—don’t leave dampness on the surface. If you spill water, blot immediately and dry completely, and consider reapplying a protective polish or wax as recommended for your specific finish type. A consistent routine helps maintain the protective layer and minimize future ring marks.
📅 Last Updated: October 24, 2026 | Topic: How to Prevent Water Rings on Your Maple Furniture | Content verified for accuracy and freshness.
References
- Wood stain
- Varnish
- wood water stain moisture finish – Search Results – PubMed
- wood coatings water absorption diffusion – Search Results – PubMed
- https://pmc.ncbi.nlm.nih.gov/?term=wood+coating+moisture+water+absorption
- https://www.fpl.fs.usda.gov/documnts/fplgtr/fpl_gtr190.pdf
- Water damage
- https://scholar.google.com/scholar?q=preventing+water+rings+on+wood+furniture+maple+finish Google Scholar
- https://scholar.google.com/scholar?q=wood+water+stain+prevention+varnish+coatings+moisture+diffusion Google Scholar
- https://scholar.google.com/scholar?q=maple+wood+water+stain+ring+formation+finish+penetration Google Scholar
