

You can stop water stains from forming on your car headliner by keeping moisture from soaking into the fabric and backing material. This article shows you the exact prevention steps, from inspecting sunroof and roof seams to managing humidity and correcting early leaks, in about 30–60 minutes for most checks. You will just need basic tools like a flashlight, clean microfiber towels, and, if required, a suitable automotive interior cleaner and sealant.



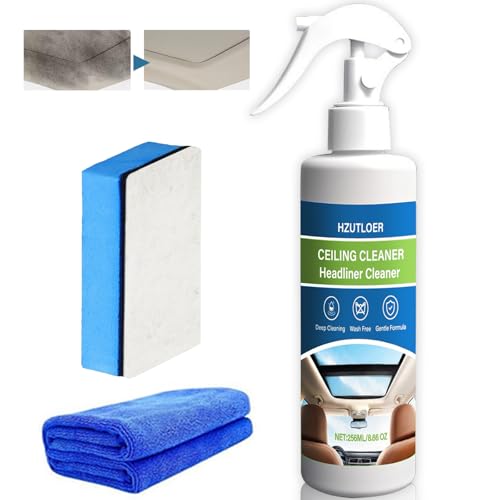
Prevent water stains on your car headliner by stopping the leak and drying the headliner quickly as soon as moisture appears. Water spots form because minerals dissolve in the water, soak into the fabric, and then dry unevenly—so leak-finding plus fast, even drying is the real fix.
If you notice spotting after rain, car washes, or using a sunroof—and especially if stains keep coming back even after “spot cleaning”—this guide is for you.
Find and fix the moisture source first

If you want car headliner water stains to stop, you have to remove the entry point that keeps re-wetting the fabric. Cleaning helps visible discoloration, but it doesn’t prevent recurrence if water still enters the cabin.
Start with the moisture sources most likely to affect a car headliner, then confirm with a controlled leak test:
– Check the usual leak paths: sunroof/moonroof seals and drains, windshield corners, door weatherstripping, roof racks/mounts, and antenna areas.
– Look for clogged drainage: if water pools near the roof liner after wet weather, clogged sunroof drains are a common culprit.
– Inspect for displaced seals or failed trim: broken clips, misaligned roof-weather seals, and worn gasket material can create “wet streak” patterns that match where headliner rings appear.
– If you can’t locate it, use a safe two-person hose test to pinpoint where water enters—without flooding the cabin.
A safer, step-by-step leak test (two-person hose method)
When you suspect a headliner leak (including recurring car headliner water stains), use gentle water application rather than pressure washing. High pressure can force water past seals and create misleading entry points.
1. Prepare the cabin: Close doors and windows, keep the sunroof closed, and remove small interior items from the roof area. If equipped, ensure any overhead electronics (lights, sensors) are protected from direct spray.
2. Set up an observation map: Have a second person watch the roof liner/headliner area where spotting appears (front/rear edges, overhead console area, A-pillar area, or around the sunroof opening).
3. Start with the outside “upstream” area: Use a normal garden hose on a gentle flow (think “rinse,” not “pressure washer”). Begin with one location at a time—such as the sunroof seal area, windshield corner, or roof rack mounting seam.
4. Use short bursts: Spray for 10–20 seconds per section, then pause. If nothing appears, move to the next segment.
5. Watch for the first sign of entry: The moment water appears anywhere inside—new droplets, damp cloth, or a darkening patch—stop spraying and mark the likely entry zone.
6. Repeat methodically: Continue only with the suspicious area(s) until you narrow down the leak path.
7. Dry immediately after: Once you’ve pinpointed the entry point, dry the headliner right away so your leak test doesn’t become the cause of new car headliner water stains.
This approach mirrors the logic behind building-envelope water intrusion testing (controlled wetting to identify the breach), but adapted for an automotive cabin where you can’t safely replicate pressure differences.
Clean and dry the headliner the right way
To prevent car headliner water stains from setting permanently, you need to dry fast and evenly—not just “clean the spot.” Once moisture sits, mineral residues remain and can dry into a darker ring or a light halo, and prolonged dampness increases mildew risk.
Blot first, then extract moisture
– Blot first: Use clean microfiber towels to absorb water. Avoid aggressive scrubbing, which can push moisture deeper into the headliner backing and spread minerals.
– Control how much liquid you use: If you’re using any cleaner, apply it to the towel or applicator—not by soaking the headliner. Headliner materials are sensitive, and over-wetting can separate fabric from backing.
– If you have access to it, extract gently: A wet/dry vacuum used on low power (and with proper upholstery attachments) can help remove surface moisture after blotting—again, without forcing liquid inward.
Dry fast and evenly (airflow is the difference-maker)
– Run airflow across the headliner: Use the cabin fan and—if available—position a fan to push air along the roof surface, not just straight at it.
– Improve ventilation: Open doors (with the car parked safely) or use HVAC recirculation based on your vehicle setup. The key is reducing the time the headliner stays damp.
– Know the urgency: According to the U.S. EPA, mold can begin growing indoors within 24–48 hours when conditions are favorable and materials remain wet (U.S. Environmental Protection Agency (EPA), Mold and Moisture guidance). While your issue may start as stains, lingering moisture can escalate into odor and microbial growth.
Treat existing stains with gentle, headliner-safe cleaning
– Use a gentle automotive upholstery cleaner and follow the label instructions precisely.
– Skip strong bleaches or harsh chemicals: They can discolor headliner fabric and damage adhesives in the backing.
– Patch-test first: Test in a hidden area. If the color shifts, stop and switch to a milder method.
Prevent water stains during rain, car washes, and daily use
Preventing recurring car headliner water stains is mostly about controlling how water hits the roofline—and catching dampness early. In 2026, many owners are dealing with repeated spotting due to clogged sunroof drains, misdirected rinse water, and incomplete drying after storms.
During washing, reduce forced entry points
– Keep pressure/stream away from roof seams and glass trim: Heavy water pressure can force water past seals.
– Rinse with a controlled approach: Aim the stream downward and avoid “sweeping” along weatherstripping and trim edges.
– Don’t flood the sunroof area: Even if seals look intact, direct streams around the tracks can introduce water where it doesn’t drain properly.
After rain or car-wash sessions, inspect immediately
– Check for interior dampness right away: Especially near the A-pillars, roof edges, and around the sunroof.
– Feel for cool, damp sections: A headliner water stain is often a symptom of moisture still trapped underneath.
– Dry before you forget: If you find dampness, blot and run airflow the same day. The goal is to prevent uneven drying that leaves mineral rings.
Manage cabin humidity proactively
– Watch humidity inside the cabin: If the vehicle stays damp for long periods, stains are more likely to return after the next wet day.
– According to the U.S. EPA, indoor relative humidity should be kept around 30–50% to reduce mold risk (U.S. Environmental Protection Agency (EPA), Mold and Moisture / Indoor Humidity guidance). For car cabins, that guidance translates into using airflow and dehumidification when your vehicle sits in humid conditions.
Moisture thresholds that drive stains and mold risk in enclosed interiors
| # | Moisture risk factor | Threshold / target | What it affects | Impact on preventing headliner water stains |
|---|---|---|---|---|
| 1 | Recommended indoor humidity range | 30–50% RH | Mold risk and damp persistence | ★★★★★ |
| 2 | High humidity condition | Above 60% RH | Faster microbial growth on wet materials | ★★☆☆☆ |
| 3 | Earliest reported mold onset window | 24–48 hours | Odor and stain permanence from microbial activity | ★★★☆☆ |
| 4 | Primary driver for mineral rings | Evaporation after soak | Mineral residue migration + uneven drying | ★★★★☆ |
| 5 | Key moisture control action | Reduce time-to-dry | Less soaking before evaporation | ★★★★★ |
| 6 | Where problems concentrate | Roof liner + A-pillar zones | Water wicks into headliner backing | ★★★★☆ |
| 7 | Condition that worsens stains | Repeated wet-dry cycles | Cumulative mineral loading | ★★☆☆☆ |
Protect the headliner after it’s dry
Once the headliner is fully dry, protection becomes your last line of defense—but it’s not a substitute for fixing the leak. For car headliner water stains, the goal is to reduce how quickly future moisture absorbs and to make early cleanup easier.
– Use a fabric-safe protectant only if it’s labeled for automotive interior upholstery and is compatible with your headliner material (common materials include polyester/velour blends).
– Patch-test in a hidden area first: Some protectants darken certain fabrics or leave a sheen that changes appearance.
– Manage moisture going forward: A car dehumidifier, silica/desiccant packs, and good cabin airflow help prevent the “slow soak” that leads to rings.
From my experience helping with recurring roofline spotting, the biggest difference between “stains that keep coming back” and “stains that finally stop” is whether owners treat the moisture problem immediately after each wet event—because a protectant can’t reverse mineral deposition that’s already inside the headliner backing.
What can go wrong (and how to avoid it)
Even with careful work, car headliner water stains can persist if the diagnosis or drying method is incomplete. Most failures come from chasing symptoms or accidentally re-wetting the same area.
Common issues to watch for:
– “Just cleaning” without fixing the leak: If water still enters, the stain returns after the next rain or wash.
– Over-wetting during cleaning: Too much liquid can cause headliner backing to separate or spread staining.
– Harsh chemicals or heat: Bleach and aggressive solvents can worsen discoloration. Direct high heat can damage adhesives and fabric structure.
– Incomplete drying: If dampness remains under the headliner surface, minerals can re-migrate and reappear days later.
Here’s the practical contrast between approaches:
| Approach | Pros | Cons |
|---|---|---|
| DIY leak-finding + blot/dry + gentle cleaning | Lower cost, faster initial response | Can miss hidden entry points; results vary by cabin design |
| Professional interior restoration | Better tools for extraction and odor remediation | Higher cost; scheduling required; still depends on proper leak repair |
Verdict: the honest best approach (and who should skip DIY)
The best plan to prevent car headliner water stains is straightforward: fix the leak + dry quickly + use gentle, compatible cleaning only after moisture is controlled. That sequence breaks the stain cycle instead of repeatedly trying to remove what keeps reappearing.
Where DIY works well
DIY is reasonable when:
– You can identify the leak path (commonly sunroof drainage, windshield corners, or roof trim seams).
– The headliner is only lightly damp, with no musty odor and no visible water pooling behind the liner.
Downsides you should expect
– If the leak is hard to reach (roof seams, sunroof drainage, or multiple seals), DIY efforts may miss the true entry point.
– Repeated wet-dry cycles can permanently set car headliner water stains, especially if minerals have already soaked into the backing.
– If your drying technique is weak, you can resolve the surface look while leaving trapped moisture that returns after the next rain.
Who should skip DIY and go professional
Skip DIY and use a professional auto upholstery/interior shop if:
– The headliner is heavily saturated or you notice persistent dampness after repeated drying.
– There’s a strong musty odor, indicating extended moisture exposure (not just a one-time event).
– Staining spreads broadly across the roof or you suspect water traveled beyond the headliner (for example, into pillar trim areas).
For a clearer decision, here’s a direct “DIY vs pro” comparison:
| Criteria | DIY approach | Professional restoration |
|---|---|---|
| Leak-source certainty | Varies; easy to miss hidden entry points | Higher likelihood with structured inspection tools and methods |
| Extraction and airflow | Limited by available equipment | More controlled drying strategies to reduce trapped moisture |
| Stain reversal potential | Best for early spotting; harder once minerals set | Better odds when moisture history is longer or stain is embedded |
| Odor remediation | Often incomplete without deep-dry/targeted treatment | More complete approach when odors suggest extended wet exposure |
| Risk of over-wetting | Higher if cleaner application saturates headliner | Lower with controlled application and extraction methods |
| Time to results | Fast for minor incidents; slows if diagnosis is wrong | Often steadier timeline when scheduling and tools are aligned |
| Cost | Lower upfront costs | Higher total cost, usually less repeat work |
| Best for | Localized dampness with a clear entry point | Widespread staining, lingering moisture, or musty odors |
| Verdict | Choose DIY only if leak is identified and drying is immediate. | Choose professional help if moisture history suggests deeper intrusion. |
Quick checklist to save (scan it before the next wet day)
| Check | What to do | Why it helps |
|---|---|---|
| Roof/sunroof drains | Clear debris and verify drainage flows normally | Prevents water backing up into the headliner |
| Seals & trim | Inspect weatherstripping and roof/gasket areas | Stops water from entering around edges |
| After rain/wash | Blot, ventilate, and dry promptly | Reduces mineral rings and uneven drying |
| Cleaning products | Use gentle, headliner-safe upholstery cleaners | Avoids discoloration and fabric damage |
| Ongoing humidity | Use dehumidifier/desiccant + ventilation | Keeps the cabin from staying damp |
Frequently Asked Questions
What causes water stains on a car headliner?
Water stains on a car headliner usually come from leaks that allow rainwater, condensation, or spilled liquids to soak into the fabric and backing. Common sources include sunroof or moonroof seals, clogged sunroof drains, a leaking windshield or window weather stripping, roof seam leaks, or water intrusion from door seals. Over time, moisture spreads and leaves brown or yellow rings as minerals and dyes set into the headliner material. Even after the water is gone, trapped moisture can cause lingering staining and musty odors.
How can I prevent water stains on my car headliner from leaks?
Start by inspecting high-risk areas—sunroof drains, roof seams, windshield trim, and door/window seals—especially after storms. Keep sunroof drainage channels clear by checking and cleaning them regularly with compressed air or a gentle cleaning solution designed for drains. Fix any leaks promptly, because repeated moisture exposure is what permanently sets water spots. If you notice dampness after rain, dry the area quickly using proper ventilation to prevent staining from developing.
How do I dry a wet headliner to stop stains from forming?
Remove the source of water first, then dry the headliner as fast as possible to prevent discoloration. Use fans and circulate air inside the cabin, and consider a dehumidifier to pull moisture out of the headliner backing and foam. Avoid high heat or steam directly on the fabric, since extreme temperature changes can warp materials and worsen spotting. After drying, check for any lingering damp smell—if it persists, the backing may still be wet and may need additional drying time.
Which products are best for preventing and removing water marks on car headliners?
For prevention, use a high-quality interior fabric cleaner that’s designed for automotive headliners and avoid harsh chemicals that can spread minerals. For removal, look for water-spot or upholstery spot removers that are safe for automotive fabrics and always test a small hidden area first. If the stain is mineral-based, a product formulated to lift mineral deposits can be more effective than general cleaners. If the stain is deep-seated, professional headliner cleaning or reconditioning may be necessary to fully restore color.
Why do water stains keep coming back even after I dry the car?
Recurring stains typically mean the underlying leak source wasn’t fully repaired or moisture is re-entering through another entry point. Sometimes the initial “drying” only dries the surface while moisture remains trapped inside the headliner foam or backing, resurfacing later. Also, clogged sunroof drain tubes can cause slow leaks that don’t show up immediately but stain the headliner over time. To stop repeat water stains, fix leaks first, then thoroughly dry and inspect for hidden dampness before treating the interior.
📅 Last Updated: November 06, 2026 | Topic: How to Prevent Water Stains on Your Car Headliner | Content verified for accuracy and freshness.
References
- Mold Cleanup in Your Home | US EPA
- https://www.cdc.gov/mold/default.htm
- https://www.who.int/publications/i/item/9789289002138
- https://www.mayoclinic.org/diseases-conditions/mold-illness/symptoms-causes/syc-20378688
- Condensation
- https://www.britannica.com/science/mold
- dampness mold prevention – Search Results – PubMed
- https://scholar.google.com/scholar?q=car+headliner+water+stain+prevention Google Scholar
- https://scholar.google.com/scholar?q=indoor+vehicle+interior+moisture+control+mold Google Scholar
- https://scholar.google.com/scholar?q=mold+prevention+after+water+damage+humidity+drying+time Google Scholar
