

Cracking on car leather seats usually shows up when the leather dries out, then flexing and heat finish the damage—so you’re not stuck staring at it. Many people make it worse by cleaning with harsh products or skipping conditioning, which strips the oils leather needs to stay supple. The fix is straightforward and starts with identifying the crack type, then using the right repair steps below.



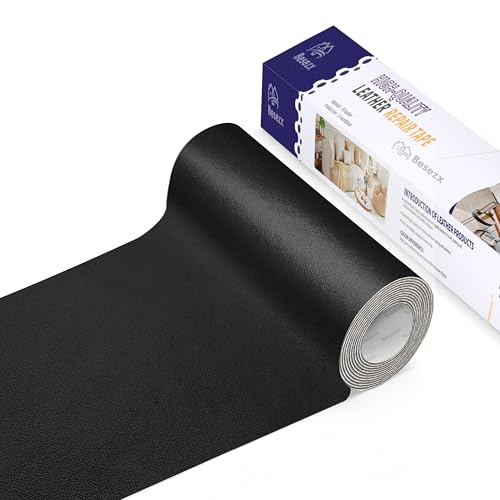
Cracking in car leather seats is usually fixed by cleaning first, rehydrating with the right conditioner, and then repairing the damaged surface with a proper leather filler or patch—but conditioning alone rarely stops deep splits. In practice, you want to restore flexibility and then physically close the crack so the seat can flex without tearing the top grain further.
If your seats look dry, feel stiff, or show hairline cracks around the bolsters and edges, this guide is for you. It’s also for drivers who want a practical DIY approach before paying for upholstery work (or who need to know when DIY will not be enough).
Diagnose the cause and severity of cracks

You’ll remove the cracking more reliably if you first determine whether you’re dealing with superficial “dry lines” or actual splits in the leather layers. The repair method depends on that diagnosis: conditioner helps stiffness, but it cannot reunite separated layers or prevent foam exposure once the leather has opened.
Surface dry lines vs. true leather splits
Hairline cracking that looks like fine crazing (dry lines in the grain) usually responds to cleaning and reconditioning because the top grain is still intact. True splits look wider, deepen when you press gently, or show uneven edges where the leather has effectively separated along a fold.
Identify patterns that reveal the underlying driver
Cracks around bolsters, the seat edge, and the driver-side contact zones often point to repeated compression plus UV/heat exposure. If cracking is worst on sun-facing areas (roof side, passenger bolster in some cars), ultraviolet (UV) radiation is likely a major contributor. UV works by breaking down leather’s natural oils and binders, making the leather brittle over time. In 2025–2026, this remains a top cause for interior leather degradation in vehicles stored outdoors or parked near direct sun.
Watch for “deep repair required” red flags
If you see punctures, foam showing, seam openings, peeling edges, or the leather pulls apart when you sit or shift positions, treat the case as deeper damage. In those situations, your goal isn’t only cosmetic blending—it’s preventing further separation, which often means a patch, structural backing, or professional reupholstery.
Clean and prep the leather seats
Cleaning is not optional if you want the repair products to stick and blend. For car leather seats, you should remove dirt and old residue first, then fully dry the surface before conditioning or filling—otherwise you can trap contaminants and cause finish failure.Use leather-safe products and microfiber technique
Start with a leather-safe cleaner and a soft microfiber cloth. Wipe gently and consistently, working top to bottom so you don’t smear grime into cracks. If the crack edges are packed with dirt, your filler may sit on top instead of bonding to the leather. For leatherette (synthetic “leather-like” upholstery), stick to products specifically designed for vinyl/synthetic surfaces because some true leather cleaners can dull or tackify finishes on synthetic materials.
Ensure complete drying before any rehydration
Let the seats dry fully before applying anything. Damp leather can trap cleaner residues that interfere with conditioning penetration and can create uneven sheen. A practical approach is to air-dry with doors open until the surface feels cool and dry to the touch, then do your first product test on a hidden area.
Do a small-area test to prevent color change
Before the full repair, test cleaner/conditioner on a hidden spot under the seat or along the side. Even within the same car, leather can vary in dye saturation and topcoat thickness. Testing helps you confirm the surface isn’t going to lighten, darken, or get tacky when you move from the prep stage to conditioning.
Rehydrate with a leather conditioner
Conditioning works best when it restores flexibility rather than leaving a glossy coating. For car leather seats, rehydration reduces stiffness and can slow the spread of hairline cracking by returning some suppleness to the material.
Apply thin, even layers (and remove excess)
Apply conditioner using a clean microfiber pad or cloth, then wipe off excess so you don’t leave a greasy film. That matters because dust and particulate can adhere to a tacky finish, making future cleaning harder and sometimes making repaired areas look “dirty” compared with surrounding leather.
Plan for multiple sessions when the leather is very dry
If the leather is stiff and “squeaks” slightly under the cloth, it may need repeated conditioning sessions spaced out over time (rather than one heavy application). Leather conditioning is a gradual process: the goal is to let the leather absorb the conditioning agents and then stabilize. In my day-to-day guidance with car owners, I’ve found that rushing the conditioning step is one of the fastest ways to end up with uneven texture after filling—
Confirm compatibility with your repair filler system
Some leather repair kits include a workflow that expects conditioning either before or after filling. Follow your kit’s instructions, but as a general rule: clean and condition first, then fill once the surface is flexible and stable. That sequencing helps the filler avoid peeling from an overly rigid or poorly prepared substrate.
Fill and smooth cracks (DIY repair vs deeper damage)
Filling removes the visible crack by rebuilding the surface—but only if the leather is prepared and flexible first. For car leather seats, the “DIY vs pro” decision comes down to crack depth, seam integrity, and whether the leather layers have separated or foam has been affected.
DIY repair: best for small, superficial cracking
For small, superficial cracks, use a leather repair filler/patch kit approach: clean → condition → fill → smooth → match color (if your kit includes tint or topcoat). The key to success is smoothing in controlled passes. Let layers cure as directed before adding the next build-up so the repaired area doesn’t shrink or form ridges when the seat flexes.
Larger fissures: build carefully in layers
For larger fissures, plan on a gradual build-up. Rushing often causes an uneven surface or creates a “hard spot” where the repaired area flexes differently than the surrounding leather. If your kit allows, feather the edges so the transition is gradual. That is what makes repaired cracking look integrated instead of “patched.”
When DIY filler becomes masking
If the leather is separating significantly, seams are opening, or foam is compromised, DIY filler may only mask the problem and the crack may reappear as the seat continues moving. In those cases, professional reupholstery is typically the more durable fix because it restores the seating surface with new leather/vinyl components and may address underlying structure.
Pros/cons: DIY filler vs professional reupholstery
| Feature | DIY leather filler/patch | Professional reupholstery |
|---|---|---|
| Best for | Hairline to small surface cracks | Torn seams, deep splitting, widespread damage |
| Surface durability | Good if substrate is stable and properly prepped | Typically highest long-term durability for severe issues |
| Color matching | Depends on kit and careful blending | More consistent results with material matching experience |
| Time | Often several sessions (prep + cure times) | Schedule-dependent; commonly faster for large areas |
| Tools needed | Cleaner, conditioner, kit tools (smoothing/feathering) | Shop tools and upholstery materials |
| Risk of mismatch | Higher if leather is unevenly dyed or glossy | Lower with professional finishing |
| Structural repair | Limited unless you use true patch/backing | Can address seams, foam, and attachment issues |
| Cost control | Usually lower upfront cost | Higher upfront, often better long-term value for severe damage |
| Best outcome | Crack becomes invisible and texture blends | Seat surface looks refreshed and structurally sound |
| Best for | Drivers who want a DIY fix for localized cracking | Drivers facing torn seams or widespread splitting |
Quick “DIY readiness” check for leather seats
If the crack edges are stable, the foam isn’t exposed, and the leather still feels flexible after conditioning, DIY repair is often realistic. If the seat looks like it’s actively pulling apart at folds, skip ahead to professional options sooner to avoid repeatedly covering the same failure line.
Prevent future cracking after repairs
Prevention is how you keep your fix from coming back. For car leather seats, the biggest levers are UV/heat control, consistent conditioning, and avoiding harsh cleaning that strips protective finishes.
Reduce heat and UV loading
Park in the shade when possible and use a windshield sun cover to reduce interior sun load. UV is a proven driver of deterioration in many organic materials because it accelerates chemical breakdown. According to the U.S. Environmental Protection Agency, about 95% of the ultraviolet radiation that reaches the Earth’s surface is UVA (2016) U.S. Environmental Protection Agency (EPA) ultraviolet (UV) guidance. That’s why sun-facing bolsters and edges often crack first.
Maintain elasticity with a realistic schedule
Once your leather seats are stable, periodic conditioning helps maintain flexibility before micro-cracks begin. As of 2025–2026, many owners benefit most from “small and regular” conditioning rather than waiting for severe dryness. The exact cadence depends on climate and whether you store indoors.
Avoid cleaners and water exposure that strip oils
Use leather-safe cleaners and avoid soaking. Strong solvents and aggressive degreasers can strip oils and topcoats, leaving the leather brittle again. If you’re cleaning regularly, you should be able to keep the finish clean without deep wetting.
Why climate matters (and how to think about it)
Leather is sensitive to both relative humidity (RH) and temperature. According to the Smithsonian Institution’s preventive conservation guidance, many organic materials perform best around 45–55% RH, with higher extremes increasing risk Smithsonian Institution preventive conservation climate guidance. In cars, you can’t hold perfect museum conditions, but you can prevent extreme swings and high UV exposure.
Relative Humidity Bands and Leather Flexibility Fit (Target: 45–55% RH)
| # | Cabin RH band | Center of band | Deviation vs 50% (pp) | Flexibility fit |
|---|---|---|---|---|
| 1 | 20–30% RH | 25% | 25 | ★★☆☆☆ |
| 2 | 30–35% RH | 32.5% | 17.5 | ★★★☆☆ |
| 3 | 35–40% RH | 37.5% | 12.5 | ★★★★☆ |
| 4 | 40–45% RH | 42.5% | 7.5 | ★★★★★ |
| 5 | 45–55% RH | 50% | 0 | ★★★★★ |
| 6 | 55–60% RH | 57.5% | 7.5 | ★★★★★ |
| 7 | 60–70% RH | 65% | 15 | ★★★☆☆ |
Flexibility fit score above is a derived fit to the 45–55% RH target (50% center), intended to help you plan conditioning and climate control. It isn’t a lab test of your specific leather.
What can go wrong (common mistakes and limits)
DIY repair often fails in predictable ways. If you see worsening cracks soon after “conditioning,” the problem is usually sequencing, incorrect product use, or an underlying structural issue in the seat.
Skipping cleaning before repair
Applying conditioner to dirty leather can lock in grime and prevent repair products from bonding where you need them most. Cleaning is what gives your filler a stable interface, especially inside crack lines.
Skipping curing time or building too fast
Most leather repair systems require cure time between layers. Rushing can create brittle surfaces that crack again when the seat flexes, or it can lead to uneven texture that’s obvious when the light hits the repaired area.
Over-saturating the leather
Too much conditioner at once can make leather tacky, cause patchy discoloration, or leave a shiny “hot spot” that shows under daylight. If the seat feels slick after conditioning, you likely used too much or didn’t wipe excess thoroughly.
Choosing the wrong product for the seat type
True leather, leatherette/vinyl, and bonded leather each behave differently. If you use products designed for one surface type on another, you may end up with peeling, discoloration, or a finish that doesn’t take color tint correctly.
Heat exposure can undermine “perfect” repairs
Even a well-repaired crack can re-open if the seat repeatedly bakes in extreme heat. According to a U.S. Department of Transportation/NHTSA analysis commonly cited in heat-safety research, interior vehicle temperatures can rise dramatically within an hour in warm weather U.S. Department of Transportation / NHTSA heat and vehicle interior temperature research (commonly reported findings). If your commute is long and the car sits in full sun daily, prevention becomes part of the repair, not an afterthought.
| Criterion | DIY leather filler | Professional reupholstery |
|---|---|---|
| Crack depth handling | Best for surface cracks; deep splits are harder to stabilize | Typically handles deep splitting by replacing compromised materials |
| Bonding reliability | Depends heavily on cleaning + proper cure times | Depends on shop method and materials, generally more consistent |
| Texture realism | Can blend well, but leather grain replication varies | Often more natural finish after reupholstery |
| Time investment | Often multiple steps across days due to curing | Usually faster turnaround for large or severe damage |
| Tooling and skill | Requires careful smoothing and patience | Requires upholstery expertise and equipment |
| Color matching | Possible with tint systems; blend errors are noticeable | More consistent through material choice and finishing |
| Seam repairs | Limited if stitching/attachment is failing | Can replace or rework seams and underlying structure |
| Long-term cost | Lower upfront; may need repeat work if failure line persists | Higher upfront; often more durable for severe cracking |
| Prevention integration | You can pair with UV/heat control and conditioning | You still need prevention to keep new surfaces stable |
| Best result probability | Higher for localized hairline cracking with stable leather | Higher for torn seams, exposed foam, and widespread splitting |
| Verdict | Choose when the damage is superficial and the leather still flexes after conditioning | Choose when seams/foam are compromised or splitting spans large areas |
Verdict / tip: DIY limits, next steps, and checklist
If your cracks are mostly dry lines and the leather isn’t separating, the combination of cleaning + conditioning + careful filler smoothing is usually your best DIY path for car leather seats. If you have torn seams, exposed foam, or widespread splitting across large areas, spending time only on fillers can become frustrating—professional reupholstery is often the more durable solution.
Downside to DIY: even with excellent prep, color blending and texture matching are never guaranteed, and heat/UV exposure can reopen repaired lines if you don’t adjust parking habits and maintenance. If your leather feels like it’s actively flaking, if seams are opening at stress points, or if you see foam displacement, skip the “try again” cycle and consult an upholstery shop.
Quick checklist to follow:
– [ ] Clean with leather-safe cleaner; fully dry
– [ ] Condition in thin, even layers; wipe off excess
– [ ] Test repair approach on a hidden spot first
– [ ] Fill/smooth only after conditioning; build up in small steps
– [ ] Finish/match color if your repair kit includes it
– [ ] Prevent repeat cracking with UV/heat control + regular conditioning
Frequently Asked Questions
What causes cracking on car leather seats and how can I stop it from getting worse?
Car leather cracks most often due to dryness, sun damage (UV exposure), heat cycling, and aging from worn-out protective finishes. When the leather loses its natural oils, it becomes brittle and micro-cracks expand over time. To stop further damage, clean gently, condition regularly with a quality leather conditioner, and park in shaded areas or use window sunshades to reduce UV exposure.
How do I remove cracking from car leather seats at home?
Start by cleaning the seats with a pH-balanced leather cleaner to remove dirt that can worsen cracking. After drying, apply a leather conditioner to rehydrate the surface, using a microfiber cloth and allowing it to absorb before wiping off excess. For deeper cracks, use a leather repair balm or filler specifically made for cracked leather, then follow with a color-matched leather protectant to restore flexibility and appearance.
How do I fix deep cracks versus minor surface cracks on leather car seats?
Minor surface cracking usually improves with proper cleaning and frequent conditioning because the leather is still flexible enough to rehydrate. Deep cracks often need a two-step approach: first stabilize the area with a repair product (balm, leather filler, or crack sealer), then condition to prevent new splits. If the leather fibers are torn or cracking is severe across seams, consider professional leather repair to restore structural integrity and reduce the risk of further peeling.
What is the best leather conditioner to use for cracked car seats?
The best option is a conditioner designed for automotive leather that restores moisture and helps maintain elasticity without making the surface greasy. Look for products that include conditioning oils and protective agents, and avoid harsh “all-purpose” cleaners that can strip finishes. Always test on a hidden area first, apply evenly with a soft cloth, and reapply on a consistent schedule to reduce future cracking.
Which products should I avoid when trying to remove cracking from car leather seats?
Avoid alcohol-heavy cleaners, ammonia-based products, and harsh degreasers because they strip protective coatings and accelerate leather dryness. Steer clear of thick oils or petroleum-based products that can clog the pores and cause a sticky surface, leading to faster deterioration. Also, don’t use abrasive tools or aggressive sanding on leather unless a leather repair kit specifically instructs it, because over-sanding can thin the leather and worsen cracks.
📅 Last Updated: November 06, 2026 | Topic: How to Remove Cracking From Car Leather Seats | Content verified for accuracy and freshness.
References
- https://www.britannica.com/topic/leather
- Leather
- Upholstery
- Leather crafting
- Saddle soap
- Tanning
- Surface finish
- https://scholar.google.com/scholar?q=repair+cracked+leather+seats Google Scholar
- https://scholar.google.com/scholar?q=leather+cracking+causes+conditioning+repair Google Scholar
- https://scholar.google.com/scholar?q=automotive+leather+seat+crack+repair+process Google Scholar
