

When the keycaps feel faintly gritty or you notice a dull, smeared shine under the legends, your mechanical keyboard is likely holding onto more than harmless dust. Those particles affect switch travel and contact surfaces, causing inconsistent actuation and that slow-to-respond “sticky” sensation. Knowing the telltale signs helps you clean thoroughly once, restore smooth input, and avoid residue that can harm stabilizers and switches.


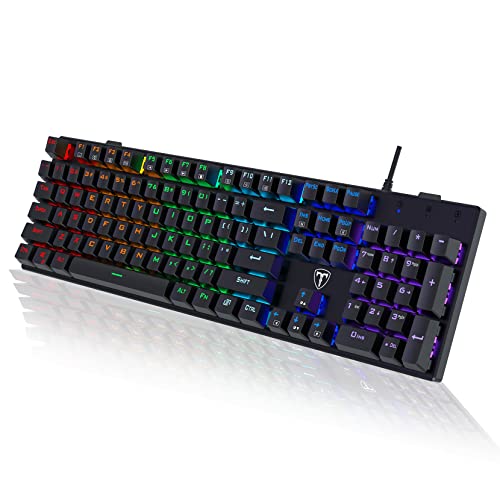

If your mechanical keyboard feels gritty or sticky, starts acting inconsistent (misses, repeats, or uneven responses), or looks visibly dusty under the keycaps, it likely needs a deep clean. A deep clean usually means removing keycaps (when possible) and cleaning around the switches and stabilizers—then drying everything fully before you plug it back in. Keep reading for the most common signs and a safe, repeatable cleaning workflow.
This guide is for anyone who uses a mechanical keyboard daily and is seeing performance or feel issues beyond simple surface dust—especially if your keys sound “duller,” require extra force, or you can see debris gathering around the switch stems.
Signs Your Mechanical Keyboard Needs a Deep Clean

You don’t need lab-grade diagnostics to spot a keyboard that’s overdue for a deep clean; the mechanical keyboard will usually “tell on itself” through feel, sound, and input behavior. Here’s what those signals look like in practice.
– Keys feel “off”: gritty travel, stickiness, or uneven resistance from key to key.
– Inputs don’t feel consistent: keys that sometimes require a harder press, feel like they’re “delayed,” or seem to repeat more than usual.
– Visible buildup or changed sound: dust “bunnies,” smudged grime under keycaps, or noticeably muted/crunchy keystrokes.
A useful way to think about mechanical keyboard cleanliness in 2026 is that “visible dust” is only the part you can easily see. Smaller particulate matter can sit around switch stems and stabilizer housings even when the top surface doesn’t look terrible—so symptoms matter as much as appearance.
To connect what you see under keycaps to what’s likely sticking in place, it helps to understand how particle size affects dust removal. According to the U.S. Environmental Protection Agency, PM2.5 particles are defined as ≤ 2.5 µm (2026) U.S. EPA. According to the U.S. Department of Energy, HEPA filters are rated to capture at least 99.97% of particles at 0.3 µm (2026) U.S. Department of Energy. And according to NIOSH guidance on respirable dust behavior, the respirable fraction is modeled around roughly 4 µm aerodynamic diameter (2026) NIOSH. On a mechanical keyboard, that means smaller particles are easier to ignore on the surface yet more likely to contribute to gritty, inconsistent key travel once they migrate into switch/stabilizer clearances.
Debris Particle Size Bands That Matter Under Keycaps (2026)
| # | Debris size band | Cutoff (µm) | Common comparison label | Dry-dusting reach |
|---|---|---|---|---|
| 1 | Ultrafine particles | 0.1 | UFP (≤0.1 µm) | ★☆☆☆☆ |
| 2 | HEPA test-size particles | 0.3 | HEPA challenge (0.3 µm) | ★★☆☆☆ |
| 3 | Fine particles (PM1) | 1.0 | PM1 (≤1.0 µm) | ★★★☆☆ |
| 4 | Fine particulate matter | 2.5 | PM2.5 (≤2.5 µm) | ★★★★☆ |
| 5 | Respirable dust fraction | 4.0 | Respirable (≈4 µm) | ★★★★☆ |
| 6 | Coarse particulate matter | 10.0 | PM10 (≤10 µm) | ★★★★★ |
| 7 | Inhalable dust fraction | 100.0 | Inhalable (≤100 µm) | ★★★★★ |
Quick Checks Before You Go Full Deep-Clean
A deep clean is the right move when the mechanical keyboard’s symptoms point inside the key area, not just on the surface. Before you disassemble, do quick checks to avoid unnecessary teardown and to confirm you’re chasing the correct root cause.
– Confirm it’s not just surface dirt: if only the top of the keycaps is grimy, a lighter clean may solve it.
– Check the obvious trouble spots: the area around stabilizers (longer keys) and under keys you press most often (spacebar/enter/backspace).
– Look for spill/condensation hints: tacky residue, sweet/greasy films, or signs of moisture—those usually call for a more careful, thorough clean and full drying time.
When your mechanical keyboard feels “off,” the stabilizers are often where you notice it first. If you hear a rattle, feel catching during the bottom portion of travel, or see uneven dust accumulation on one side of a long key, you’re usually looking at stabilizer housings collecting grime that normal surface wiping can’t reach.
Also consider the “inconsistent input” pattern. If the issue affects a group of nearby switches under similar lighting angles, crumbs are more likely. If only one key misbehaves repeatedly, the mechanical keyboard may have residue on a single stem, stabilizer leg misalignment, or—less commonly—switch wear.
How to Do a Deep Clean (Without Damaging Switches)
A safe deep clean follows a simple rule: mechanical keyboard parts only get wet if you can also remove debris without pushing it deeper, and everything dries fully before power returns. Use controlled steps so you clean what matters (switches and stabilizers) without turning a maintenance job into a repair attempt.
1) Prep safely
– Unplug the keyboard first and work in a well-lit area so you can spot debris and moisture.
– Use the right removal method: remove keycaps gently with a proper keycap puller; avoid yanking.
– If your keyboard doesn’t support keycap removal easily, follow the manufacturer’s care guidance instead of forcing it.
Before you touch anything, look for labels or documentation notes specific to your mechanical keyboard model—especially if it’s hot-swap or has proprietary switch-stabilizer interfaces. In 2026, many boards support keycap removal, but some “sealed” designs and certain low-profile systems behave differently, so the mechanical keyboard’s own instructions matter.
If you’ve had a spill event on your mechanical keyboard, treat the project like an electronics cleanup: avoid flooding internal areas and plan on extra drying time.
2) Clean keycaps and the “ledge” around switches
– Keycaps: wipe/scrub with mild cleaning methods appropriate for keycap material, then let them dry completely before reassembly.
– Inside the keyboard deck: remove loose debris first (for example, gentle dust removal tools and controlled cleaning motions), focusing on corners and the areas between switch rows.
Keycap material changes the “safe cleaning chemistry” decision. ABS keycaps (common on many OEM-style sets) and PBT keycaps (common on many enthusiast sets) can react differently to solvents and aggressive wiping. Check your keycap set’s material guidance before choosing liquids.
When you clean the “ledge” around switch openings, the goal isn’t to sterilize—it’s to remove grit that interferes with smooth travel. Press-fit dust and skin-oil film can make key travel feel sticky even when the switch itself is electrically fine.
3) Clean around switches and stabilizers
– Debris removal: target crumbs/dust around switch stems and stabilizer housings without flooding the area.
– Stabilizers: if your model uses separate stabilizer components, remove-and-clean is often the difference between “almost better” and a truly smooth feel. (Follow your keyboard’s specific stabilizer design guidance.)
This is where the mechanical keyboard’s feel improves the most—especially for spacebar, enter, and backspace. Stabilizers are engineered linkages; when they accumulate dust or when residue builds on contact surfaces, they can cause uneven motion, rattling, or a “gritty-smooth” hybrid effect.
If your mechanical keyboard uses plate-mounted stabilizers, or if your stabilizers are clipped-in versus screw-in, cleaning approach and reassembly order can differ. Follow your exact design’s documentation; “one-size-fits-all” disassembly is how stabilizers end up worse rather than better.
4) Let everything dry fully, then reassemble
– Do not rush reassembly: reattach keycaps only after keycaps and the board area are fully dry.
– Test gradually: after reconnecting, test the keys that were acting up first, then run through a full typing/press check.
Moisture is the hidden enemy in mechanical keyboard cleaning. Even small amounts can lead to sticky behavior later (residue re-attracts dust after drying) or create electrical problems. Treat drying as part of the method—not an optional step.
After reassembly, focus on the keys that previously missed, repeated, or felt inconsistent. If behavior returns only on one key, you likely have a local residue or mechanical interference that didn’t fully clear during cleaning.
Cleaning Schedule and Triggers (So You Don’t Overdo It)
A deep clean should be triggered by symptoms and visible grime, not by a fixed calendar date. For most mechanical keyboard users, lighter cleaning is routine while deep cleaning is event-driven.
– Use triggers, not dates: deep clean when you notice recurring stickiness/grit, visible buildup under multiple keycaps, or repeated inconsistent behavior.
– Do lighter cleanups more often: if the keyboard is just dusty on top, periodic surface cleaning is usually enough—deep cleaning is the heavy lift.
– Adjust for your environment: pets, lots of cooking/baking particles, dusty rooms, or frequent snacks near your desk usually mean you’ll hit “deep clean” sooner.
In 2026, the practical approach many users follow is: clean the top weekly or biweekly (based on exposure), and deep clean when the mechanical keyboard starts showing internal symptoms like uneven travel or muffled switch feel. That keeps the workload manageable while addressing the actual problem source.
Pros/cons perspective (quick decision support):
| Approach | Pros (Mechanical keyboard benefits) | Cons (What to watch) |
|---|---|---|
| Light clean | Fast, low risk; clears surface dust that dulls sound. | Won’t remove grit trapped around switch stems/stabilizers. |
| Deep clean | Targets the real feel/sound culprits: grime under keycaps, stabilizer buildup. | Time-consuming; wrong method or incomplete drying can worsen key feel. |
What Can Go Wrong (Common Mistakes and Edge Cases)
Most mechanical keyboard problems during cleaning come from liquids, shortcuts, or incorrect assumptions about the root cause. If you understand the failure modes up front, you can avoid the most common “it got worse” outcomes.
– Using too much liquid: soaking around switch areas can cause problems later. If any moisture gets inside, full drying becomes critical.
– Skipping drying time: reassembling while damp can lead to sticky keys later or electrical issues.
– Forceful keycap removal: yanking can damage stems, clips, or mounts—especially on cheaper keycap sets or older boards.
– Assuming every “input problem” is dirt: ghosting, button mashing, or firmware/config issues can look similar to dirt-related inconsistency. If cleaning doesn’t help, the cause may be electrical, switch wear, or settings.
– Optical or sealed switch designs: some keyboards are more sensitive to cleaning methods. If your board is “sealed” or uses a non-standard switch system, follow the manufacturer instructions exactly.
One edge case: if inconsistent key behavior appears only in certain software, after firmware updates, or only when using wireless/Bluetooth, the mechanical keyboard’s cleanliness may not be the primary factor. Cleaning is still worth doing if you see debris, but you should also verify key remapping, polling settings, and any ghosting-related modes.
Another edge case: sticky feel after cleaning can mean residue rather than dirt. If you used a cleaner that leaves film, the mechanical keyboard can feel fine for a day and then get worse as dust reattaches.
Verdict: Deep Clean vs. Light Clean (And Who Should Skip It)
A deep clean is the best next step when the mechanical keyboard shows multiple internal symptoms—grit/stickiness plus visible buildup plus inconsistent travel. If the problem is only surface grime or worn keycaps, a light clean is usually enough.
– Deep clean is worth it when you’ve got multiple signs at once (grit/stickiness + visible buildup + inconsistent feel) or the problem keys keep returning.
– Skip/avoid a deep clean if you’re not comfortable doing keycap removal safely, your keyboard has parts you can’t access without risk, or you’re unsure about a spill/moisture situation.
– Downside to deep cleaning: it’s time-consuming, and if you don’t follow your keyboard model’s method, you can end up with imperfect stabilizer behavior or key feel that takes time to dial in.
If you’re dealing with a mechanical keyboard that’s sealed or where the manufacturer explicitly discourages keycap removal, skipping a deep clean isn’t “lazy”—it’s following the documented care path. In 2026, more boards ship with modular approaches (hot-swap, better access), but not all do, and the mechanical keyboard’s design determines what’s safe.
Quick Scan Checklist (Save This)
| What you notice | Likely need | Next step |
|---|---|---|
| Gritty or sticky key travel | Deep clean | Remove keycaps (if supported) + clean around switches |
| Keys sound muted/crunchy | Deep clean | Remove keycaps; clear debris and stabilizer areas |
| Uneven feel on specific keys (space/enter) | Stabilizer-focused deep clean | Inspect stabilizer housings and clean appropriately |
| Visible crumbs/dust under many caps | Deep clean | Do a thorough internal cleanup + dry fully |
| Only top-surface grime | Light clean | Wipe keycaps and edges; don’t disassemble |
Frequently Asked Questions
What are the most common signs your mechanical keyboard needs a deep clean?
If your mechanical keyboard keys feel sticky, gritty, or sluggish, dust and debris are usually building up under the keycaps. Another common sign is inconsistent actuation—some keys register double presses or fail to register without obvious hardware issues. You may also notice visible dust around the switches, a worn or shiny “slick” feel on keycaps, or a lingering odor from accumulated grime. Finally, louder-than-usual keystrokes or scratchy switch feel can indicate particles interfering with smooth switch travel.
How can you tell whether dust or debris is causing key chatter and double typing?
Key chatter and double typing can happen when debris collects around switch housings and affects the internal contact or movement. Try pressing affected keys repeatedly while listening for irregular mechanical sound changes, and compare them to unaffected keys. If the problem improves after gently cleaning the keycap area or removing keycaps for inspection, it strongly suggests contamination rather than switch failure. For a deeper clean, you’ll want to clean between switch stems and clear out dust that a surface wipe won’t reach.
Why does deep cleaning a mechanical keyboard improve typing feel and switch performance?
Deep cleaning removes dust, hair, and skin oils that build up around keycaps and inside switch areas, which can cause sticky key travel and inconsistent response. When contaminants are cleared, switches typically feel smoother and more predictable, and key presses become more uniform across the keyboard. Regular maintenance can also reduce grime buildup that makes future cleaning harder, helping your keyboard maintain its original acoustics and tactile feel. If you use a mechanical keyboard daily, a deep clean can noticeably restore comfort and accuracy.
What’s the best way to deep clean a mechanical keyboard when keys are sticky or dirty?
Start by unplugging the keyboard, then remove keycaps using a keycap puller to access the switch areas safely. Use compressed air to blow out loose debris, then wipe exposed surfaces with a slightly damp microfiber cloth—avoid soaking anything that could trap moisture. For stubborn grime around stems, use a soft brush or cotton swab carefully around the switch housing, keeping liquids minimal. After cleaning, let everything dry fully before reassembling keycaps to prevent moisture-related issues.
Which mechanical keyboard cleaning tools and supplies should you use to avoid damage?
A keycap puller, microfiber cloths, soft brushes, and compressed air are the safest core tools for deep cleaning most mechanical keyboards. For spills or heavy buildup, use isopropyl alcohol sparingly on cloth or swabs rather than directly flooding switch areas. Avoid harsh chemicals, abrasive scrubbers, and excessive liquid that can seep into switches or stabilizers. If your keyboard has stabilizers, be gentle and clean them separately to prevent rattle and restore smooth spacebar/enter key performance.
📅 Last Updated: November 04, 2026 | Topic: Signs Your Mechanical Keyboard Needs a Deep Clean | Content verified for accuracy and freshness.
References
- https://www.cdc.gov/coronavirus/2019-ncov/community/disinfecting-building-facility.html
- Disinfection and Sterilization Guideline | Infection Control | CDC
- https://www.who.int/publications/i/item/cleaning-and-disinfection-of-environmental-surfaces-in-the-context-of-covid-19
- computer keyboard bacterial contamination – Search Results – PubMed
- computer keyboard microbial contamination – Search Results – PubMed
- Computer keyboard
- https://scholar.google.com/scholar?q=mechanical+keyboard+deep+clean Google Scholar
- https://scholar.google.com/scholar?q=computer+keyboard+bacterial+contamination Google Scholar
- https://scholar.google.com/scholar?q=cleaning+disinfecting+electronics+keyboards+guidelines Google Scholar

[…] mechanical keyboard cleanup starts with separating the keycaps: you typically need a keycap puller to remove them safely without stressing the switch stems. Once the caps are off, the rest of your […]