

Cleaning car leather seats often goes wrong when people grab the same all-purpose cleaner and scrubber they use on upholstery, which can strip oils, darken spots, or leave a sticky residue. The right tools and supplies make protection and gentle cleaning possible, helping you lift dirt without over-wetting the leather. In the sections that follow, you’ll learn exactly what to gather before you start.



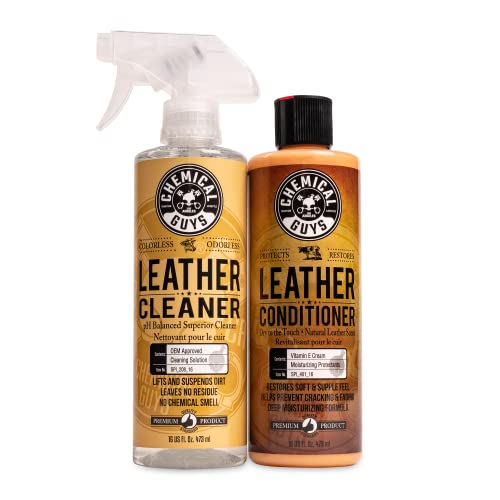
Use a leather-safe cleaner and conditioner with microfiber towels—then avoid soaking the seats. If you already have a vacuum and a soft brush attachment, you can remove grit first and reduce the chance of scratching. This guide walks you through exactly what to gather before you start cleaning.
If your car’s seats are genuine leather, faux leather, or “leatherette,” the right supplies matter because the finish can be different. This is especially helpful when your seats feel dry, have darkened spots, or you want to clean without damaging the top coat.
Must-have tools and supplies for leather seats

The safest “default” kit for cleaning leather seats is simple: microfiber towels, a leather-safe brush (or soft detailing brush), a vacuum with a soft attachment, and a dedicated leather cleaner + conditioner. The core idea is to control soil removal and moisture so you lift grime without harming dye, protectants, stitching, or foam bonding.
For leather seats, you’re not just removing surface dust—you’re also protecting the top finish and keeping the material flexible. Leather (and leatherette/PU-coated materials) can look fine on day one and still be damaged underneath if you oversaturate seams or use the wrong chemistry. That’s why the tools list below is focused on “gentle contact” and “measured liquid,” not aggressive scrubbing.
– Microfiber towels (at least 2–3): one for cleaner, one for drying/buffing (extra towel helps with switching sides to avoid re-depositing soil)
– Leather-safe brush or soft detailing brush (for seams and texture) plus a vacuum with a soft brush attachment
– Leather cleaner + leather conditioner (don’t substitute with all-purpose household cleaners)
Tip that prevents most leather seat headaches: keep one microfiber towel dedicated to removing cleaner and one dedicated to buffing/drying. Once a towel gets contaminated with lifted grime, using it on the next pass can smear residue across leather seats.
Leather-safe cleaner and conditioner (what to look for)
The right products make the difference between “cleaned” leather seats and “cleaned-but-damaged” seats. Choose a product made for automotive leather (or leatherette/PU-coated seats if that’s what you have), and verify compatibility with any protectant or top coating.
Start with vocabulary and ingredients intent. A leather-safe cleaner is designed to lift soils without stripping dye or drying out the material. A leather conditioner is designed to replenish flexibility so the leather seats don’t develop tight, cracked-looking areas after cleaning.
– Choose a product made for automotive leather; look for wording like “leather cleaner” and “conditioner,” not “degreaser” or “strong degreaser”
– Use conditioner to restore flexibility and help prevent cracking after cleaning (leather often dries out over time)
– If your seats are finished/protectant-coated, pick cleaners/conditioners that are compatible with that finish—when in doubt, start with the product recommended by your seat manufacturer or manual
Cleaner vs. conditioner: what each one should do
In practice, leather-safe cleaners are for soil removal (body oils, everyday grime, surface haze). Conditioners are for restoring suppleness by replacing lost emollients/oils and improving how leather seats resist future drying.
A practical way to think about it is the PDCA framework (Plan–Do–Check–Act): plan by identifying your seat type and finish, do a controlled small test, check results in the lighting that matters, then act by committing to the full seat. That workflow reduces the risk of discoloration from chemistry mismatch.
Why microfiber matters for chemistry control
Microfiber isn’t only about “softness.” It’s also about surface contact and controlled residue pickup. Microfiber is made from very fine fibers (in textile measurement, finer fibers correspond to smaller denier values, where 1 denier = 1 gram per 9,000 meters of fiber). According to ASTM International’s denier definition, denier is calculated using that mass/length relationship (ASTM International denier definition, 2019). In leather seat cleaning, finer fibers typically help reduce streaking and improve how soils and cleaner are lifted from the surface.
Step-by-step: use the right supplies in the right order
Cleaning leather seats safely is mostly about order and controlled moisture: vacuum first, apply cleaner indirectly, then condition only after the seats are fully dry. If you follow that sequence, you prevent grit from acting like sandpaper and you avoid pushing liquids into seams.
1) Vacuum first to remove abrasive grit
Vacuuming loosens dust in creases and stitching, then reduces the chance that grit turns your cleaning pass into a scratch pass. After vacuuming, lightly wipe with a dry microfiber towel to catch any remaining particulate on leather seats.
This step is especially important if your seats have:
– textured inserts (perforations or raised patterns)
– visible seam lines
– darker “halo” areas where dirt collects
2) Clean with controlled moisture (never a soaking approach)
The “right supplies” part is knowing where cleaner belongs. Apply cleaner to the towel or brush (not directly as a soak on leather seats). Work in small sections so you can keep the surface damp—never wet—and so you can monitor what’s happening to dye and protectants.
How to keep it controlled:
– Use a barely damp towel or a lightly loaded brush
– Agitate gently in the grain and texture directions
– Immediately remove cleaner residue with a clean microfiber pass
– Avoid saturating seams and stitching openings (foam and adhesives can be affected)
3) Condition last, after everything is dry
Conditioning leather seats too early can trap residual cleaner and soil, which can lead to uneven sheen or tackiness. When the seats feel fully dry to the touch, apply conditioner sparingly and buff off excess.
Conditioning is the “finish protection” step: it helps restore flexibility and can improve how future cleaning responds.
Quick comparison: what to do vs. what to skip
Below is a practical contrast table for leather seats—use it as a “decision filter” while you work.
| Method | What it targets | Risk if done wrong | Best use for leather seats |
|---|---|---|---|
| Vacuum + soft brush attachment | Dry soil, grit in seams | Scratches from embedded particles | Before any wet cleaner touches the leather |
| Cleaner on microfiber/brush | Lift grime without soaking | Color change if chemistry mismatches finish | Small sections with immediate residue removal |
| Conditioner after fully dry | Restore flexibility and resilience | Tackiness or uneven sheen if applied too soon | Final step once cleaner residue is gone |
| Water-heavy rinsing | (Often) spreads residue | Over-wetting seams, adhesive issues, discoloration rings | Avoid on leather seats unless product explicitly instructs it |
Microfiber Towel Specs That Commonly Work on Leather Seats (Practical Range)
| # | Microfiber type (for leather seats) | Typical GSM | Best use in the process | Scrub gentleness | Leather-safe score |
|---|---|---|---|---|---|
| 1 | Low-pile “service” microfiber | 250–320 | Vacuum wipe-down + residue pickup | High | ★★★★★ |
| 2 | Waffle-weave microfiber | 300–380 | Controlled cleaner spreading (light passes) | High | ★★★★☆ |
| 3 | Plush “drying/buff” microfiber | 380–500 | Final dry + buff to even sheen | Medium-High | ★★★★☆ |
| 4 | High-pile finishing microfiber | 450–650 | Conditioner buff-off (thin film removal) | Medium | ★★★☆☆ |
| 5 | Microfiber “detail” towel (narrow edge) | 250–320 | Seams, stitching edges, perforations cleanup | High | ★★★★☆ |
| 6 | Microfiber “glass” towel (very fine pile) | 240–300 | Polishing after buffing (avoid heavy pressure) | High | ★★★★☆ |
| 7 | Looped microfiber “scrub” pad (use cautiously) | 450–700 | Only for stubborn spots—light pressure | Lower | ★★☆☆☆ |
In my workflow, I treat microfiber like a “system” rather than a single towel: one towel for cleaner agitation, one for removing residue, and one for buffing the final appearance. That kind of small process control is often what separates streak-free leather seats from rework.
What can go wrong (and how to avoid it)
The most common failures when cleaning leather seats come from over-wetting, chemical mismatch, and skipping test spots. If you avoid those three issues, you’ll prevent the majority of discoloration, tackiness, and seam problems.
– Over-wetting the leather can push cleaner into seams and adhesives—use damp (not dripping) towels and work in small sections
– Using harsh products (like APCs, bleach, or strong solvents) can strip dye/protectant and leave discoloration or dull spots
– Skipping a test spot can lead to surprises—always try the cleaner on a hidden area first, especially for older or heavily dyed seats
Over-wetting: what it does to leather seats
Leather seat construction typically includes foam and bonding agents inside the padding. When liquids soak into seams, you can get:
– ring-shaped discoloration from uneven evaporation
– lingering dampness that changes how leather feels
– adhesive breakdown risk over time (especially with repeated wetting)
Practical rule: if a microfiber towel leaves visible liquid trails or if you can feel wetness moving along seams, you’re at “too wet.”
Harsh cleaners and finish stripping
If a cleaner is marketed as a heavy degreaser or as a general household cleaner, it may be too aggressive for leather seats—particularly where a polyurethane or protective top coat exists. Stripping that top layer can make the surface look dull even after it dries, because the sheen is part of the finish design.
Test spots: the “hidden-area” rationale
Leather seats can vary by:
– how the seat was dyed
– age-related wear and finish wear
– prior detailing history (previous protectants can affect compatibility)
A test spot takes only a few minutes but saves hours of corrective work.
Verdict: what to buy, what to skip (plus a quick checklist)
If you want the safest, most repeatable result, buy a basic leather-cleaner + conditioner combo, microfiber towels, and a soft brush—then take your time. Skip anything that’s meant to cut grease hard or strip finishes, and don’t “just add water” to stronger cleaners.
Quick checklist (save this):
| Task | Supply to use | Notes |
|---|---|---|
| Remove loose dirt | Vacuum + soft brush | Focus on seams/stitching |
| Lift grime | Leather-safe cleaner | Apply to towel/brush, not soaked |
| Dry/buff | Clean microfiber towel | Prevent streaking and residue |
| Protect/restore | Leather conditioner | Apply after fully drying |
| Final check | Visual inspection | Look for tackiness or color changes |
Do not do this if your seats are actively peeling, cracking badly, or have unknown coatings—start by checking your owner’s manual, and consider getting guidance from the seat manufacturer or a professional detailer. In those cases, the best “tool” may be correct identification of finish type before any cleaner touches the leather seats.
The practical takeaway for leather seats is straightforward: vacuum first, clean with a dedicated leather cleaner using microfiber control, and finish with conditioner once everything is dry. Gather microfiber towels, a soft brush, and the right cleaner/conditioner, then test a hidden spot before committing to the whole seat. If you’re unsure what type of “leather” your seats are, confirm from your manual before buying products—your top coat will thank you.
Frequently Asked Questions
What tools and supplies do I need to clean car leather seats safely?
You’ll want a pH-balanced leather cleaner, a microfiber brush or soft cloth, and two separate microfiber towels for cleaning and drying. Add a leather conditioner to restore moisture and prevent cracking, plus a vacuum with a soft brush attachment for removing grit before you scrub. Avoid all-purpose cleaners, harsh degreasers, and abrasive pads unless they’re specifically labeled safe for leather.
How do I remove embedded dirt and debris from leather car seats before using cleaner?
Start by vacuuming the seats thoroughly with a soft brush attachment to lift dust and particles that can scratch the leather when you wipe. For creases and seams, use a detailing brush to loosen debris without grinding it into the finish. After vacuuming, lightly mist your leather cleaner onto a microfiber cloth (not directly onto the seat) and gently work the area in small sections.
Why should I use microfiber towels and a dedicated leather brush instead of paper towels or sponges?
Microfiber towels are less abrasive and help prevent haze or micro-scratches on leather finishes, which can happen with rough or lint-heavy materials. A dedicated leather brush also keeps scrubbing controlled, allowing you to lift grime from textured leather without damaging the surface. Using the right tools helps maintain the leather’s appearance and reduces the need for repeat cleaning.
Best leather cleaner and conditioner should I buy for car seats—what features matter?
Look for a pH-balanced leather cleaner that’s formulated for automotive leather and can lift body oils, stains, and everyday grime without stripping protection. For conditioning, choose a conditioner that replenishes oils and includes UV/moisture protection to help prevent dryness and cracking. If your seats are coated (often in modern cars), check that the product is “safe for coated leather” to avoid dulling or residue.
Which cleaning supplies should I avoid if I want to prevent discoloration, dryness, or damage?
Avoid alcohol-based cleaners, ammonia, bleach, hydrogen peroxide, and strong degreasers, as these can dry out leather or cause discoloration and fading. Don’t use steam cleaners or soaking wet cloths, since excessive moisture can seep into seams and backing material. Also skip abrasive pads and harsh scrubbers—if you need stronger action, use the right leather brush and cleaner instead of applying pressure.
📅 Last Updated: November 06, 2026 | Topic: Tools and Supplies You Need to Clean Car Leather Seats | Content verified for accuracy and freshness.
References
- Leather
- https://www.cdc.gov/coronavirus/2019-ncov/community/disinfecting-building-facility.html
- https://www.epa.gov/coronavirus/using-disinfectants-coronavirus-covid-19
- https://www.who.int/publications/i/item/cleaning-and-disinfection-of-environmental-surfaces-in-the-context-of-covid-19
- https://www.getty.edu/conservation/fieldguide/leather.html
- https://www.britannica.com/science/leather
- https://scholar.google.com/scholar?q=cleaning+car+leather+seats+tools+supplies+microfiber+vacuum+conditioner Google Scholar
- https://scholar.google.com/scholar?q=leather+upholstery+cleaning+chemistry+pH+balanced+cleaner+conditioner Google Scholar
- https://scholar.google.com/scholar?q=disinfecting+leather+surfaces+ethanol+effectiveness Google Scholar
