

Dust collects on keyboards because tiny fibers, skin oils, and debris work their way into the spaces between keys and the vents, and many people only wipe the surface—missing what’s causing the buildup. You can fix it with a careful, step-by-step clean that takes about 10–20 minutes and uses simple tools like compressed air, a microfiber cloth, and soft brushes. By the end, your keys will look clearer, feel smoother, and be easier to keep clean.


Dust on a keyboard mostly comes from skin flakes, fabric fibers, and tiny airborne particles that settle between keycaps and into switch openings. The fastest way to reduce it (and keep it from turning “gray” and gritty) is a consistent routine: dry removal first, then a damp-but-not-wet microfiber wipe—deep cleaning only when debris is clearly trapped. This guide breaks down the real sources of keyboard dust and shows safe cleaning steps that protect keycaps, coatings, and switches—still effective in 2026.
If your keys look gray, feel gritty, or you see dust bunnies forming around the key edges, this applies to everyday laptops, desktop keyboards, and mechanical keyboards. It’s especially common if you eat at your desk, use your keyboard near vents, or work/life in a dryer or dustier environment.
Why dust builds up on keyboards in the first place

Dust accumulates because keyboards are both a “collection surface” and a “gap network.” Fine particles land on keycaps and frames, then gradually work their way into the seams where keycap edges meet the chassis and where switches sit underneath.
– Skin cells and oils naturally shed and accumulate around high-touch keys.
Human skin constantly refreshes; the resulting micro-flakes mix with natural skin oils (and sometimes lotion or hand sanitizer residue), creating a slightly sticky film that helps airborne dust cling.
– Open spaces under and between keycaps trap airborne particles (like pollen, fibers, and lint).
Even when keys look smooth on top, the underside and the crevices around stems create sheltered areas with lower airflow—so particles settle and stay.
– Factors like pets, carpets, airflow from HVAC vents, and a high-traffic room can speed up buildup.
Carpet fibers and pet dander contribute to background particulate matter, while HVAC airflow can keep particles suspended longer, increasing the chance they land on your keyboard.
In real offices (and home setups) in 2026, the biggest practical driver is exposure: if your keyboard shares air with fabric shedding (clothing, blankets, upholstery) and has airflow nearby (vents, fans, open windows), dust shows up faster.
What dust looks like over time (gray vs. gritty)
Dust that’s purely dry often looks like a light film. Once skin oils and residue mix in, it turns darker and more “gritty,” because the debris becomes compacted with repeated touch. If wiping feels like it drags rather than lifts, you’re dealing with an oil + particle mixture rather than loose dust alone.
The particle-size connection (why the tiniest stuff matters)
Dust doesn’t behave as one uniform substance. In air-quality terms, fine particles (PM2.5) are smaller than 2.5 micrometers, and coarse particles (PM10) are smaller than 10 micrometers (EPA, Air Quality Glossary: PM2.5 and PM10 definitions). Smaller particles penetrate gaps more easily and are harder to remove with a single quick shake—so your cleaning needs to include a careful wipe after dry removal.
Common sources: where the dust actually comes from
The dust on your keyboard usually comes from everyday materials—clothes, household air, and desk habits—rather than “mystery” debris. In most homes, you can trace it to what touches you and what you expose the keyboard to during normal work.
– Clothing and fabric: sweaters, hoodies, blankets, and even bags shed fibers that land on keyboards.
Fabric fibers are lightweight, so they travel easily with movement and air currents.
– Household air: construction dust, sweeping/vacuuming habits, and outdoor particles during dry/windy days.
Vacuuming can stir fine dust unless you use good technique and adequate filtration. Outdoor pollen and dust can also drift in during dry, breezy weather.
– Desk habits: eating snacks, using makeup products, and leaving papers open can add particles and residue that “catch” dust.
Crumbs and small flakes are only part of the story—many desk activities also leave residue (oils, powders, and binders) that turn airborne dust into a stubborn film.
A quick “source audit” you can do this week
Try this simple workflow: clean your keyboard, then observe for 24–72 hours. If dust returns fastest when you wear certain clothes (especially fleece), when the HVAC kicks on, or when you snack, you’ve found the dominant driver.
Why snacks and residue make dust worse
When food oils, sugary residue, or cosmetic powders land on keycaps, they lower the “release” quality of dust. The result is a sticky matrix where particles compact over time—exactly the situation where “shaking only” stops working.
How to clean keyboard dust safely (quick routine)
A quick routine prevents dust from turning into trapped grit. Do it in the same order every time: power down, remove loose debris dry, then wipe with a slightly damp microfiber.
– Power down first (unplug the keyboard or shut down the laptop) before you remove loose debris.
This reduces risk around ports, prevents accidental keypresses, and lets you see what comes off without the device reacting.
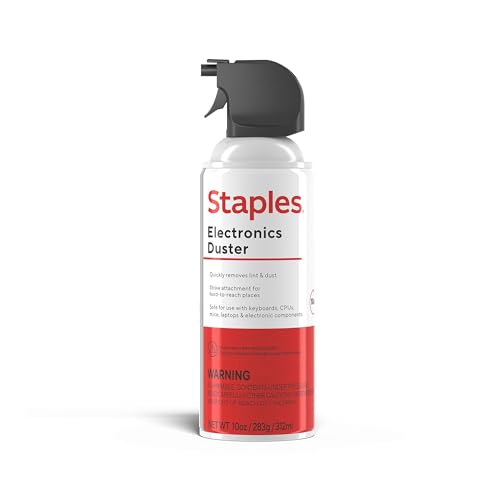
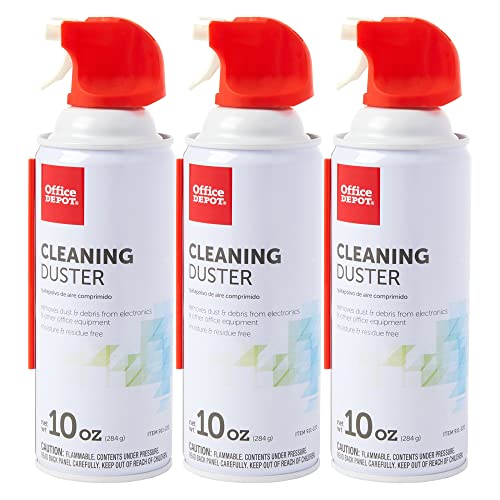
– Start dry: gently shake or brush away loose dust; use compressed air in short bursts to avoid blasting debris deeper.
Keep bursts brief to prevent pushing particles further into gaps.
– Finish with a careful wipe: slightly damp microfiber on keycap tops and around the frame (not dripping liquids).
“Damp, not wet” matters because excess liquid can wick under keycaps or into switch areas.
Dry-first vs. wipe-first: what to do when dust is “stuck”
If you wipe too early, you can smear a gritty film into crevices. Dry-first lifts loose particulate before the microfiber can pick it up.
- Dry-first (shake/brush/short air bursts)
- Pros: removes loose debris with minimal moisture exposure; reduces how much grit the cloth has to drag.
- Cons: won’t fix compacted residue/oil mixtures between keys.
- Damp wipe (microfiber, lightly moistened)
- Pros: clears the oily film that makes dust cling; restores keycap clarity.
- Cons: too much liquid can seep under keycaps and cause lingering residue.
Using microfiber correctly (the “damp” rule)
For most keyboards, microfiber should feel barely cool and lightly damp. If it leaves visible wet streaks, it’s too wet. This matters because disinfecting guidance often relies on alcohol concentrations (for example, many CDC-style recommendations use alcohol with at least 70% concentration for disinfection on compatible surfaces) (CDC, Cleaning and Disinfection guidance), but keyboards are not all-compatible surfaces—especially around switch gaps. When in doubt, stick to water or manufacturer-approved electronics-safe cleaners for routine dust removal, and avoid soaking.
Keyboard Dust: Particle Size Classes and Practical Removal Fit (2026)
| # | Particle class (aerodynamic diameter) | Typical size | Most common keyboard contributor | Best first step | Ease of removal with gentle methods |
|---|---|---|---|---|---|
| 1 | Ultrafine particles | < 0.1 µm | Combustion-related soot and very fine dust | Microfiber wipe after dry removal | ★★☆☆☆ |
| 2 | Fine particles (PM2.5) | ≤ 2.5 µm | Pollen dust and aerosolized fine grit | Short compressed-air bursts + wipe | ★★★☆☆ |
| 3 | Coarse particles (PM10) | ≤ 10 µm | General outdoor dust and fine lint fragments | Dry shake + air bursts | ★★★★☆ |
| 4 | Respirable fraction | ~≤ 4 µm | Dust that can remain suspended and settle slowly | Air bursts (short) + damp wipe | ★★★☆☆ |
| 5 | Inhalable fraction | ~≤ 100 µm | Lint clumps and larger fiber fragments | Brush + shake | ★★★★★ |
| 6 | Visible grit and crumbs | ≥ 100 µm | Food particles, skin clumps, shed fiber bunches | Shake + soft brush | ★★★★★ |
| 7 | Long fiber strands | Often mm-scale (1–10 mm) | Fleece/wool lint that bridges key gaps | Brush + targeted air bursts | ★★★★☆ |
Note: Size thresholds and categories align with common air-quality and occupational health definitions used for particle classification (EPA definitions for PM2.5/PM10 and NIOSH/health guidance where applicable—see Sources below).
Deep-cleaning: when the dust is stuck between keys
If your keys still feel gritty after a wipe, you likely have compacted residue and debris trapped under key edges. In that case, a deeper clean focuses on dislodging particles from crevices and cleaning keycaps carefully.
– Remove keycaps only if you’re comfortable and your keyboard supports it; keep track of key positions and note any stabilizers.
Different keyboard designs (especially mechanical keyboards with stabilizers) require careful handling to avoid misalignment.
– Use a soft brush for crevices, then compressed air to dislodge remaining particles; clean keycaps separately with a gentle method recommended for your material.
Brushes get into corners; short air bursts help lift what the brush loosens.
– Let everything fully dry before reassembly to prevent moisture from lingering in switch areas.
Moisture that stays underneath can attract residue again and may interfere with switch performance.
How I’d decide between “wipe only” and “keycap removal”
From my experience troubleshooting messy key rows, I generally switch to deep-cleaning when (a) dust is clearly visible between keys, (b) key travel feels uneven, or (c) wiping leaves dark streaking that won’t clear. If you’re not sure how to remove keycaps safely for your model, pause and follow manufacturer instructions first—this is one area where 2026 advice still depends heavily on the keyboard’s design.
Compressed air technique that reduces risk
Compressed air should be used in short bursts from a safe distance, with the keyboard held in a position that allows debris to exit rather than circulate. A common failure mode is aiming straight down into the deepest crevices and blasting continuously; that can force debris farther into gaps and potentially introduce propellant moisture from the can.
What can go wrong (and how to avoid it)
Even a good cleaning routine can backfire if you use the wrong liquids, the wrong force, or the wrong tools. Most problems come from moisture seeping under keycaps, blasting debris deeper, or skipping drying time.
– Using too much liquid: wet cloths or dripping cleaners can seep under keycaps and cause sticky switches or corrosion. Use “damp, not wet” cleaning for wiping.
If liquid pools around stems or the keyboard frame, stop and let it dry before continuing.
– Over-blowing with compressed air: holding a can too close or blasting continuously can force debris deeper or introduce moisture from the can. Use short bursts and keep the nozzle at a safe distance.
When in doubt, test on one low-risk area first.
– Cleaning too aggressively: sharp tools, abrasive pads, and harsh solvents can scratch keycaps, damage coatings, or discolor plastics.
Avoid metal picks; use soft brushes designed for electronics or gentle cleaning.
– Skipping drying time: reassembling before everything is dry can lead to grime re-adhering or malfunction symptoms.
Dry time depends on your environment—fan airflow helps, but don’t reassemble while damp.
– Warranty/compatibility concerns: some manufacturers advise against certain fluids or disassembly—check your keyboard’s documentation before taking it apart.
Practical “risk-control” mindset (borrowed from safety frameworks)
This is basically a hierarchy-of-controls situation: first control the dust at the source (exposure and routine), then control the cleaning method (dry removal + damp wipe), and only then control deeper intervention (keycap removal) if needed. If you’re working with a company asset or a high-value device, treat the manual as the controlling document—especially for lubrication, coatings, and switch assemblies.
Verdict: the best approach for most people
For most people in 2026, the best approach is a repeatable quick routine: power down, dry-remove first, then use a lightly damp microfiber wipe to lift oil-based grime. Deep-clean only when the keyboard feels gritty after routine cleaning or when you clearly see debris in gaps between keys.
The downsides are real: deep cleaning takes longer, carries a small risk of misplacing keycaps/stabilizers, and can affect warranties if you violate manufacturer guidance. Skip full disassembly if the keyboard isn’t designed for it, if you can’t comfortably reassemble it, or if the device is under warranty and the manual discourages internal cleaning.
Quick scan checklist (save this)
– [ ] Unplug/shut down before cleaning
– [ ] Dry removal first (shake/soft brush)
– [ ] Compressed air in short bursts (avoid moisture buildup)
– [ ] Microfiber wipe: damp, not wet
– [ ] If deep cleaning: only remove keycaps if supported
– [ ] Let everything dry fully before reassembly
Sources
– U.S. Environmental Protection Agency (EPA), Air Quality Glossary: PM2.5 and PM10 definitions
– CDC, Cleaning and Disinfection guidance (alcohol concentration and general cleaning principles)
– NIOSH or occupational health guidance on respirable vs. inhalable particle size classifications
As of 2026, the practical takeaway is simple: prevent dust from compacting by cleaning regularly with a dry-first routine, then wipe with a controlled, damp microfiber. When grit persists, switch to careful deep cleaning—only as far as your keyboard’s design and documentation allow—so you remove debris without damaging keycaps, coatings, or switch internals.
Frequently Asked Questions
What causes dust to build up on a keyboard?
Dust on a keyboard usually comes from everyday debris like skin flakes, hair, paper fibers, and dust carried on clothes or hands. It also accumulates because keys are raised or textured, creating small gaps where particles settle and get pressed deeper over time. In homes with pets, carpets, or frequent HVAC cycling, dust build-up can be even faster.
How do you clean dust out from between keyboard keys safely?
Start by powering off the keyboard (or disconnecting it for a safer approach) and gently turn it upside down to let loose debris fall out. Use compressed air in short bursts held several inches away to avoid pushing dust deeper or damaging sensitive components. For stuck dust, lightly brush key surfaces with a soft, clean brush and consider a keyboard-safe microfiber cloth; avoid soaking the keyboard or using harsh cleaners.
Why does compressed air sometimes make dust worse on a keyboard?
Compressed air can dislodge particles that were sitting on top, but if you blow too aggressively or from too close, it may push dust farther into the key mechanisms. It can also aerosolize fine particles and resettle them elsewhere on the keyboard. Use short, controlled bursts from a distance and wipe afterward with a slightly damp microfiber cloth (not dripping).
What is the best way to remove deep dust from a mechanical keyboard?
For deep cleaning, remove keycaps (if your keyboard design allows it) and clean the exposed areas with compressed air and a soft brush. You can carefully wipe keycaps with a microfiber cloth; if they are very dirty, use manufacturer-approved cleaning methods or mild soap solutions and let them fully dry before reassembly. Always inspect for moisture and ensure everything is completely dry before powering the keyboard back on.
Which cleaning tools and products should you use for keyboard dust?
A keyboard-safe toolkit typically includes compressed air, a soft anti-static brush, and microfiber cloths for surfaces. For stubborn grime, use isopropyl alcohol (ideally 70% or similar) sparingly on a cloth or cotton swab—never pour directly onto the keyboard. Avoid vacuuming directly on keys, using abrasive materials, and harsh chemicals that can damage coatings or plastic.
📅 Last Updated: November 04, 2026 | Topic: What Causes Dust on a Keyboard? (And How to Clean It) | Content verified for accuracy and freshness.
References
- Manage and use your Apple Account – Apple Support
- https://www.cdc.gov/coronavirus/2019-ncov/community/disinfecting-building-facility.html
- https://www.niaid.nih.gov/diseases-conditions/house-dust-mite-allergy
- Dust
- House dust mite
- computer keyboard bacteria – Search Results – PubMed
- house dust mite allergen indoor dust – Search Results – PubMed
- https://scholar.google.com/scholar?q=keyboard+dust+causes+cleaning Google Scholar
- https://scholar.google.com/scholar?q=house+dust+origin+human+skin+particles Google Scholar
- https://scholar.google.com/scholar?q=indoor+air+resuspension+of+dust+particles+from+human+activity Google Scholar

[…] washing them with warm soapy water, and wiping the stems and frame with isopropyl alcohol and a microfiber cloth—typically 20 to 40 minutes, with a little care around […]
[…] to clean it safely without making the situation worse. With a few basic tools like compressed air, microfiber cloth, and isopropyl alcohol, you can usually handle the cleanup in about 30 to 60 […]