

Mildew on a wooden shoe rack usually happens because trapped moisture and poor airflow let mold spores take hold in damp entryways and closets. This guide pinpoints the most common causes—humidity, wet shoes, and surface sealing issues—and tells you exactly how to clean mildew off wood without damaging the finish. Follow the steps, and you’ll stop it from coming back instead of just scrubbing the stains away.
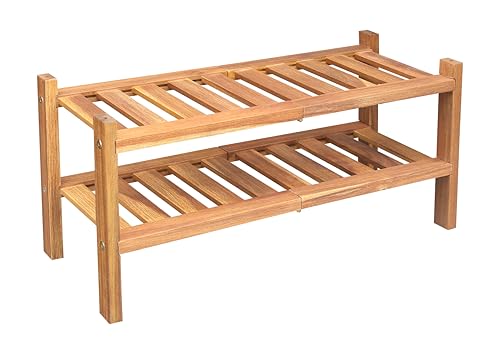


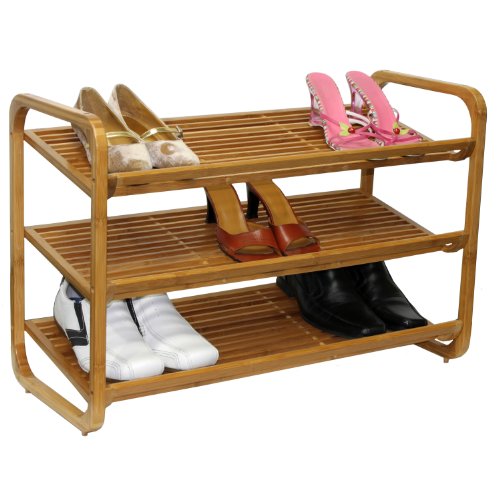
Mildew on a wooden shoe rack usually comes from trapped moisture plus limited airflow—wet shoes, humid rooms, or a rack that never fully dries. The fastest fix is to clean the affected spots gently, then dry the wood completely so mildew can’t keep returning. In this guide, you’ll learn what causes it, how to clean it safely (without damaging the finish), and how to prevent it from coming back.
This is for anyone dealing with black/gray spots, musty odors, or a “spotty” fuzzy growth on a wood shoe rack—especially in entryways, mudrooms, or any area with high humidity.
What causes mildew on a wooden shoe rack?

Mildew appears when wood stays damp long enough for mold spores to germinate and colonize the surface. On shoe racks, the biggest drivers are wet footwear, indoor humidity, and corners where airflow is weak.
– Moisture gets trapped from wet shoes/boots, dripping insoles, umbrella water, or even condensation near exterior doors.
– Humidity + weak ventilation keeps wood damp longer than you’d expect, letting mildew spores grow on the surface and into pores.
– Wood is absorbent, so even if the rack doesn’t look “soaked,” dampness can linger in joints, corners, and crevices.
According to the CDC, mold can start growing on damp surfaces within 24–48 hours.
According to the U.S. EPA, controlling moisture is the central principle of mold prevention and remediation.
According to the U.S. EPA, indoor relative humidity above about 60% can increase the risk of mold growth.
H3: Why shoe racks are especially prone
Shoe racks are “high splash zone” furniture: they sit near doorways, hold moisture from boots and wet socks, and often receive intermittent airflow. Even a short period of dampness can be enough for mildew to establish—especially where shoes rest directly on slats, the frame traps drips, or the rack has decorative crevices. In my experience helping homeowners troubleshoot damp entryways, the problem usually isn’t a sudden leak—it’s recurring small wetting events combined with drying time that’s too long for the conditions in 2026.
If you want to stop mildew for good, you need to treat moisture behavior and not just the visible spots. Cleaning helps, but the mildew “system” is typically moisture + time + limited airflow.
Quick inspection before you clean
Before you touch the mildew, you’ll get better results by confirming whether it’s surface buildup or something more embedded. A 2–5 minute inspection also helps you choose a cleaner that won’t dull or damage the shoe rack’s wood finish.
– Check how far it’s spread: if it’s only surface discoloration, cleaning is often enough; if it looks embedded/crumbly, you may need more than routine cleaning.
– Look at the finish (paint, varnish, stain, or bare wood). The safest cleaner depends on whether you’re protecting a coating or dealing with raw wood.
– Do a small hidden test first (a spot you won’t notice) to confirm the cleaner won’t dull the finish or raise the grain.
According to the CDC, porous materials that remain contaminated and cannot be cleaned may need to be removed from the home.
According to the U.S. EPA, remediation decisions should be based on moisture source control and the extent of affected materials.
H3: Surface discoloration vs. wood damage
A key difference: mildew staining can often be cleaned if the wood was only lightly affected and is now dry. But if the wood feels soft, smells strongly even after drying, or shows crumbly growth in seams, the moisture exposure likely lasted longer than the mildew stage you can safely reverse at home.
When the finish is intact (varnish or sealed paint), you can often clean mildew from the surface more conservatively. When the rack is unsealed or has degraded finish, the same cleaner can penetrate deeper—so it’s especially important to dry thoroughly afterward and to avoid aggressive chemistry.
H3: Use finish-compatibility as your safety filter
The safest approach in 2026 is to match your cleaner to the rack’s finish:
– Sealed/varnished/stained surfaces: mild cleaners first, then a mildew product explicitly compatible with finished wood or sealed surfaces.
– Bare/unfinished wood: you may still clean mildew, but you should assume more absorption and plan for careful drying and, often, resealing.
How to clean mildew from a wooden shoe rack
You’ll remove mildew most safely by cleaning gently first, using a wood/finish-compatible mildew treatment only when needed, and then drying completely with airflow. This sequence reduces the chance of spreading spores and helps prevent recurrence.
– Prep to avoid spreading spores: move shoes away, work in a ventilated space, and wipe/collect loose residue gently rather than scrubbing it into the wood.
– Clean the mildew safely: use warm water plus mild dish soap first; for mildew staining, follow the instructions of an appropriate mildew remover that’s compatible with wood/finished surfaces, or use an oxidation-based cleaner (e.g., oxygen bleach products) per the label.
– Dry thoroughly and completely: wipe off any remaining cleaner, then let the rack dry with airflow (fans preferred). If you skip full drying, mildew commonly returns.
According to the U.S. EPA, proper drying after water damage is essential because mold growth depends on moisture.
According to the CDC, cleaning and remediation should be approached in a way that avoids spreading mold spores.
H3: Step-by-step cleaning workflow (low-risk first)
1. Isolate the area: pull shoes/boots out of the entryway zone and open nearby windows if the climate allows. Use a fan to move air through the room, not directly across the wet surface.
2. Remove loose residue without grinding it in: use a dry cloth or soft brush to lift any powdery or fuzzy debris gently. Bag and dispose of it right away.
3. Start with mild soap: dampen a cloth with warm water and a small amount of mild dish soap. Wipe the mildew area using light pressure, then wipe again with a clean, damp cloth to remove soap residue.
4. Treat staining only if needed: if the discoloration remains after soap cleaning and drying, use an oxidation-based mildew product that the label states is compatible with the relevant surface type (finished wood or sealed materials).
5. Rinse/wipe as directed: some products require thorough rinsing; others instruct simply wiping residue off. Follow the label—especially for wood finishes.
H3: Cleaner choices—what’s safer and what to avoid
In general, mildew removal works best when you control both chemistry and moisture time. The table below compares common approaches in a way that’s easier to act on in a real entryway.
| Option | Best for | Main downside | Safer when… |
|---|---|---|---|
| Mild dish soap + warm water | Early mildew smell, light surface residue, reset of the surface | May not fully lift deep staining | The rack is sealed/finished or you’re unsure of finish type |
| Oxygen bleach / oxidation-based cleaners (per label) | Persistent gray/black staining | Can dry out or dull certain finishes if overused | The product label explicitly allows use on finished wood/porous surfaces |
| Chlorine bleach | Generally not recommended for wood finishes | Higher risk of finish damage and odor; can create roughness | Only if the label and manufacturer instructions explicitly permit it (many wood finishes do not) |
| “Just re-spray the finish” | Preventing future absorption | Doesn’t remove existing mildew or underlying moisture | The rack is already fully cleaned and fully dry first |
Drying and prevention (stop it from coming back)
Drying is what prevents recurrence. If you remove mildew stains but leave wood damp or humidity high, mildew can reappear quickly—often within the next moisture cycle.
– Reduce the “wet time”: let shoes dry elsewhere before placing them on the rack (a drying area with airflow helps more than people expect).
– Improve airflow where the rack lives: leave a little clearance around it and avoid storing it where air can’t circulate.
– Use a protective finish when appropriate: once fully dry, consider resealing/refreshing the wood finish according to the product directions—this helps resist moisture absorption.
According to the CDC, mold remediation focuses on removing mold and preventing future growth by addressing moisture sources.
According to the U.S. EPA, relative humidity control and fixing moisture problems are key to long-term mold prevention.
H3: Practical prevention steps for mudrooms in 2026
Start with the shortest feedback loop: wet shoes go somewhere else first. Even a few hours less of dampness can change the outcome because mildew needs sustained moisture. If you can, keep a dedicated drying spot (near a vent, in a room with good airflow) and only place items on the rack when they’re dry.
Next, treat airflow like a design feature. If your wooden shoe rack sits flush against a wall—or packed into a small nook—wood dries slower. Leave clearance so air can move behind and around the rack. If the entryway is consistently humid, a dehumidifier can help maintain safer humidity levels; aim to follow EPA/CDC-style guidance on indoor humidity targets (commonly keeping indoor humidity below about 60%, and often aiming roughly in the 30–50% band as part of prevention guidance).
H3: Refinish after you’re fully dry
Refinishing too early is a common failure mode. Wood must be dry enough that you’re not sealing in moisture. Once mildew is removed and the rack is dry, resealing or refreshing the finish (if compatible with the existing coating) can reduce moisture absorption during the next wet-shoe cycle.
What can go wrong
Most problems happen when people spread spores, over-wet the wood, or use chemicals that react badly with finishes. Avoiding those pitfalls protects both the wood and your indoor air quality.
– You can spread spores if you scrub aggressively while the area is still damp or if you dry the rack incompletely afterward.
– Wood finishes can be damaged by harsh chemicals or repeated over-wetting—especially varnish/stain if the product isn’t designed for finished wood.
– Don’t mix cleaning agents (for example, don’t combine bleach-type products with other household cleaners). If you’re using a mildew product, follow the label exactly.
According to the CDC, preventing mold spores from spreading during cleanup is an important part of safer remediation.
According to the U.S. EPA, moisture control is required because mold will continue to grow if dampness remains.
H3: Common mistakes we see (and how to prevent them)
Mistake 1: “Spot cleaning” without drying.
If the wood is still damp in seams after you wipe the surface, mildew can re-form. Always dry with airflow until the musty smell and dampness are gone.
Mistake 2: Over-saturating the wood.
More water doesn’t mean better cleaning on porous materials. Use damp cloths rather than soaking the rack.
Mistake 3: Chemical mismatch with the finish.
Oxidizers and bleach-type cleaners can alter sheen or color on some varnishes and stains. A hidden test is worth it—especially in 2026, when many “ready-to-use” mildew products vary widely in formulation.
Mistake 4: Mixing agents.
Follow label instructions. If you used one mildew product, don’t improvise with another cleaner afterward.
Verdict: the safest cleaning approach (and who should skip DIY)
For most minor mildew cases, start with mild soap cleaning, then use an appropriate mildew cleaner compatible with wood/finish, and always finish with complete drying and airflow. The downside is that stained wood may not return to a “like new” appearance, and recurring moisture (door condensation, chronic humidity, or wet shoes stored too quickly) can bring mildew back even after a good cleaning.
Skip DIY (or use professional help) if mildew coverage is extensive, the wood is soft/crumbly (possible structural damage), or anyone in the home has significant respiratory sensitivity—because dealing with active moldy growth can become a health risk.
According to the U.S. EPA, remediation should address both the mold and the underlying moisture source to prevent recurrence.
According to the CDC, safety considerations matter more when mold is widespread or when occupants have health sensitivities.
H3: A realistic “what you can expect” note
If the mildew is mostly surface staining, cleaning plus drying usually solves the problem. If moisture exposure has been ongoing, you may still see darkening after cleaning because stains can linger even after active growth is removed. The prevention steps—dry shoes first, improve airflow, and maintain safer indoor humidity—are what keep the rack from becoming a repeating mildew site.
Mildew-cleaning checklist (scan & save)
| Step | What to do | Quick “done” sign |
|---|---|---|
| 1 | Move shoes away; ventilate the area | Musty smell decreases as you work |
| 2 | Gently remove loose surface residue | No visible fuzzy debris |
| 3 | Clean with mild soap + water | Mildew stain looks lighter (or at least surface is uniform) |
| 4 | Use an appropriate wood-safe mildew treatment (per label) | No new growth/residue after the treatment and first dry cycle |
| 5 | Dry completely with airflow | No damp smell within the drying window |
| 6 | Prevent re-wetting | Shoes placed on the rack are dry, not just “less wet” |
Moisture Control Actions That Prevent Mildew Recurrence (Practical Priority for Wooden Racks)
| # | Moisture action | Primary problem it targets | When to do it | Prevention priority |
|---|---|---|---|---|
| 1 | Dry wet shoes/boots elsewhere first | Eliminates repeat wetting | Before rack contact | ★★★★★ |
| 2 | Fan-assisted drying after cleaning | Removes lingering moisture in joints | Immediately after cleaning | ★★★★★ |
| 3 | Maintain safer indoor humidity | Reduces mold-friendly dampness | Ongoing (daily/seasonal checks) | ★★★★☆ |
| 4 | Improve airflow around the rack | Speeds surface and seam drying | Whenever you position the rack | ★★★★☆ |
| 5 | Gentle surface cleaning after the wood is dry | Removes residual mildew/staining | After loose debris removal | ★★★☆☆ |
| 6 | Check door condensation patterns | Stops hidden recurring moisture | Weekly during high-humidity weeks | ★★☆☆☆ |
| 7 | Reseal/refresh finish only after full drying | Reduces future moisture absorption | After mildew is removed | ★★★☆☆ |
Verdict (Sources + last-mile guidance)
Cleaning mildew off a wooden shoe rack is straightforward when you treat it as a moisture problem first: remove visible growth gently, use wood/finish-compatible cleaners, and dry thoroughly with airflow. If the rack continues to get damp—or if extensive mildew suggests deeper material contamination—DIY becomes unreliable, and professional remediation (or rack replacement) may be the safer route.
Sources (official guidance / primary references):
– U.S. EPA — “Mold Remediation” (general moisture/mold control principles)
– CDC — “Mold” guidance (health risk and remediation considerations)
Frequently Asked Questions
What causes mildew on a wooden shoe rack?
Mildew on a wooden shoe rack is usually caused by excess moisture combined with poor ventilation. Shoes can release humidity and dampness onto the rack, especially when they’re stored before they fully dry. Leaky areas, high humidity, condensation, or cleaning with too much water without drying can also feed mold and mildew growth on wood surfaces.
How do I clean mildew off a wooden shoe rack safely?
Start by removing shoes and letting the rack dry completely, then wipe off loose grime with a dry cloth or soft brush. For cleaning, use a mild solution like diluted dish soap with water, and for mildew spots use a vinegar-water mixture (about 1:1) applied lightly to avoid soaking the wood. Wipe with a damp cloth, then dry thoroughly and allow the rack to air out in a ventilated area. If mildew has penetrated deeply or the finish is damaged, you may need to sand the affected spots and re-seal the wood.
Why does mildew keep coming back on my wooden shoe storage?
Mildew returns when moisture levels remain high and the wood never fully dries between uses. Common causes include placing wet shoes directly on the rack, storing the rack in a humid closet, or not allowing airflow around the shoe storage. Even after cleaning, leftover moisture in cracks, joints, and porous wood can regrow mildew. Improving ventilation and drying shoes before storage are key to long-term mildew prevention.
Which cleaning products work best for mildew on wood without damaging the finish?
Mild cleaners are best because wood finishes can be sensitive to harsh chemicals. Vinegar (diluted with water) is often effective for mildew and is gentler than bleach, which can discolor wood and damage protective coatings. If you use any antifungal cleaner, test it on a small hidden area first and follow the label instructions carefully. After cleaning, dry the rack thoroughly and consider resealing or reapplying a protective finish to reduce future moisture absorption.
What’s the best way to prevent mildew on a wooden shoe rack?
Prevent mildew by controlling moisture and improving airflow: dry shoes fully before placing them on the rack and leave some space between shoes for ventilation. Use a dehumidifier or moisture absorber in the closet, and periodically wipe down the rack to remove dust and moisture residue. Consider placing the rack in a brighter, well-ventilated area and avoid mopping the floor with water near the rack without allowing it to dry. Regular inspections for early signs of mildew help you clean promptly before it penetrates the wood.
📅 Last Updated: October 26, 2026 | Topic: What Causes Mildew on a Wooden Shoe Rack? (And How to Clean It) | Content verified for accuracy and freshness.
References
- https://www.cdc.gov/mold/default.htm
- Mold | US EPA
- https://www.who.int/publications/i/item/9789289002136
- https://www.hud.gov/program_offices/healthy_homes/mold
- Mold | National Institute of Environmental Health Sciences
- Mold
- Mildew
- https://scholar.google.com/scholar?q=causes+of+mold+growth+on+wood+humidity+relative+humidity Google Scholar
- https://scholar.google.com/scholar?q=wood+surface+cleaning+mold+remediation+methods+study Google Scholar
- https://scholar.google.com/scholar?q=shoe+rack+fungal+growth+mildew+prevention+ventilation+dampness Google Scholar
