

Pen marks on a wooden study table are usually caused by water-based or permanent ink bleeding into the wood’s pores, and the right fix depends on which type you’ve got. This guide gives you the fastest way to remove pen marks from wood without warping the surface or spreading the stain. You’ll also learn how to clean and protect your table afterward so the mark doesn’t come back.
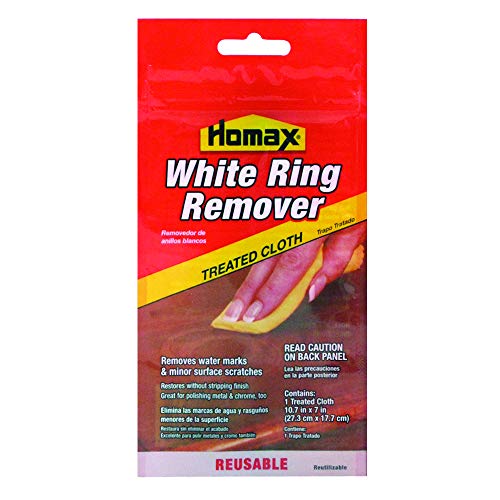



Pen marks on a wooden study table happen when ink pigments either cling to the surface finish or seep into wood pores—then they bond more tightly over time. Clean gently at first, and if the finish looks intact, use rubbing alcohol dabbing only after a spot test to lift the ink without damaging the tabletop.
Pen marks are common on desks used daily for schoolwork, planning, and note-taking—especially when the ink is left for hours or days. This guidance applies to most finished wood surfaces (lacquer, varnish, polyurethane, sealed tabletops) and also to less-protected or already-worn areas where ink can “grab” and stain.
Why pen marks stick to wood (and sometimes sink in)

Pen marks stick to a wooden study table because ink components interact differently with the finish layer versus the bare wood grain underneath. If the topcoat is thin, scratched, or worn, ink can wick into pores and become much harder to remove.
Pen marks mainly persist when ink pigments bond to the clear finish layer or get pulled into micro-scratches in the tabletop coating.
On less-sealed wood, ink behaves more like a “stain” because dyes can diffuse into pores rather than wiping off as surface dirt.
Ink removal works best when you stop the process early—long dwell time increases adhesion to both finishes and wood fibers.
– Surface residue vs. penetration: If your wooden study table has a strong topcoat, ink may mostly cling to the finish. If the finish is worn or micro-scratched, ink can wick into the grain and leave a darker shadow even after the surface ink is gone.
– Ink chemistry matters: Many ballpoint inks rely on oils/solvents plus pigments (often easier to lift with alcohol-based solvents), while some gel pens and marker inks use dyes that can behave more like stains than removable residue.
– Time makes it worse: The longer the ink sits on a wooden study table, the more likely the pigments bind to the finish film or diffuse into pores. In practical terms, a “fresh” mark tends to lift with blot-and-dab techniques; an “old” mark often requires more careful solvent steps and may still leave tint.
According to common wood-care chemistry guidance (finish manufacturers’ cleaning notes), water-based scrubbing can spread pigment into adjacent pores on worn surfaces (publication varies by brand; see your finish label).
According to Safety Data Sheet property summaries for isopropyl alcohol, its flash point is typically around ~12°C (closed cup), which is why it evaporates quickly and can reduce—but not eliminate—surface swelling risk ().
According to standard safety references for acetone-type solvents, acetone has a flash point around ~-20°C (closed cup), which correlates with aggressive solvency and higher risk to many tabletop finishes ().
Step 1: Check the finish first (so you don’t make it worse)
Before you clean a wooden study table, confirm how protected the surface really is—this determines whether you should aim for “lift residue” or “treat a stain.” The safest move is to assume the finish could be compromised and start with a small, hidden spot test.
A spot test on the underside/back edge helps detect finish clouding before you treat the visible pen mark on a wooden study table.
Dull patches and micro-scratches are a sign ink can penetrate, so aggressive scrubbing becomes more likely to spread the stain.
– Look for wear: If you see dull patches, scratches, or “dry” areas on the wooden study table around the ink, assume penetration is possible. Go slower and test more—ink may have already entered pores.
– Cleanliness check: Before treating stains, wipe away loose ink transfer with a barely damp cloth. This prevents you from grinding pigment deeper when you start solvent steps.
– Spot-test rules: Test any cleaner in a hidden area (underside, back edge). If the finish turns cloudy, soft, sticky, or noticeably lighter, stop. With many modern finishes, cloudiness indicates solvent interaction with the film-formers—meaning the cure is “stop and reassess,” not “apply more.”
Practical note: If the tabletop feels rough where the pen mark sits (or you can feel pits/grooves with your fingertip), treat it as a penetration risk. On worn polyurethane/varnish, you may lift surface pigment while the remaining tint still reflects the wood’s stain pattern.
Step 2: Gentle cleaning attempts (start here)
For most wooden study tables, the first effective attempt is mild soap-and-water dabbing, not rubbing. If the ink is still mostly surface-bound, this step can remove a surprising portion of the mark with minimal risk.
Blotting beats rubbing on a wooden study table because it reduces smearing ink pigment across the finish and into nearby pores.
A quick dry immediately after cleaning lowers the chance of water rings or grain-raising on older or less-sealed tabletops.
– Use mild soap + water approach: Lightly dampen a microfiber cloth with a small amount of dish soap solution (not dripping), then dab. Keep passes short until transfer slows.
– Blot, don’t rub: Rubbing in circles is a common failure mode—on a wooden study table, circular friction can spread pigment into a wider “halo.”
– Rinse and dry carefully: Wipe with a clean cloth lightly dampened with water, then dry right away with a dry microfiber cloth. This reduces water spotting and swelling on less-sealed wood.
If this step doesn’t lift the ink at all, it often means the wooden study table has either (a) ink bonded to the finish film or (b) dye/pigment diffused into pores. That’s when moving to a finish-safe solvent approach becomes more appropriate.
Quick decision guide (soap vs. solvent)
| If the mark does this… | Then do this… |
|---|---|
| Ink color transfers onto the cloth | Continue gentle blotting + dry well |
| Surface ink wipes off but tint remains | Proceed to rubbing-alcohol dabbing after spot test |
| No transfer, but you see a stable dark patch | Assume penetration; plan for deeper cleaning or refinishing |
Step 3: Remove stubborn ink with solvent-safe techniques
When soap-and-water doesn’t remove the ink from your wooden study table, use solvent-safe dabbing—small amounts, short contact time, and immediate stopping when the ink lifts. For many common ballpoint/marker stains, rubbing alcohol is the best next attempt because it evaporates quickly and is less aggressive than acetone-type removers.
Rubbing alcohol can lift many pen-mark pigments from a finished wooden study table when used as a dab, not a soak.
If the finish turns cloudy or patchy after alcohol, the correct action is to stop immediately—not continue polishing.
– Rubbing alcohol method (often works for ballpoint/marker stains): Apply a small amount to a cotton swab or soft cloth (do not soak). Dab with short passes and stop when the ink lifts. Work from the outside edge inward to avoid spreading.
– Magic eraser caution: If you try a melamine foam “eraser,” use the lightest pressure and only briefly. These foams abrade and can dull certain finishes on a wooden study table because they physically remove microlayers of coating.
– Paste for lingering discoloration: For remaining tint, a gentle paste of baking soda with water can be tried with minimal rubbing. If the tabletop shows scuffing, abandon the paste and switch to dabbing with alcohol instead.
Solvents used for ink cleanup: flash point and practical risk (closed-cup, °C)
| # | Solvent / cleaner | Common use for pen marks | Finish-safety (spot-test) | Flash point (°C) |
|---|---|---|---|---|
| 1 | Isopropyl alcohol (IPA) | Lifts many ballpoint ink marks | ★★★☆☆ | ~12 |
| 2 | Ethanol (denatured alcohol) | Can lift some ink residues | ★★★☆☆ | ~13 |
| 3 | Mineral spirits (odorless/turpentine substitute) | Targets oil-based residues | ★★☆☆☆ | ~38–60 |
| 4 | Lacquer thinner (mixed ketones/esters) | Effective but high finish risk | ★☆☆☆☆ | often < 25 |
| 5 | Acetone (nail-polish remover, if acetone-based) | Very strong solvent; often finish-damaging | ★☆☆☆☆ | ~ -20 |
| 6 | Water + mild detergent | Helps if ink is mostly surface residue | ★★★★☆ | N/A (non-flammable) |
| 7 | Baking-soda paste (mild abrasive) | May reduce remaining tint with low abrasion | ★★★☆☆ | N/A (solid) |
Safety and technique: Work in a ventilated area, use small quantities, and keep solvents from pooling on your wooden study table. Even “finish-safe” approaches can cause haze if the finish is already failing or if contact time is too long.
What can go wrong (common mistakes and edge cases)
The biggest risk on a wooden study table is making the stain larger or damaging the finish while trying to remove pen marks. Most failures come from rubbing, soaking, or using a solvent that’s too strong for the tabletop’s coating system.
Scrubbing in circles is the fastest way to enlarge a pen mark on a wooden study table.
Soaking or letting solvents pool increases the chance of water rings, grain raising, or finish softening.
If the finish becomes cloudy after treatment, continued cleaning usually worsens the visible patch.
– Finish damage from the wrong solvent: Strong solvents (or abrasion) can strip gloss, soften polyurethane, or leave haze—especially on older finishes. If you see dullness or clouding during the spot test, stop.
– Ink spreading: Rubbing moves pigment across the tabletop surface and into micro-scratches, creating a larger “cleaned” area that still looks uneven.
– Water-spotting and swelling risk: Excess moisture can leave rings or raise grain on less-sealed or older wood. That’s why blotting and quick drying matter.
– Dark permanent-marker stains: Some inks are designed to be permanent. If discoloration remains after careful cleaning of a wooden study table, refinishing may be the only route to a near-match.
– Unfinished wood (or damaged seal): If ink fully penetrates, cleaning may lighten the surface while the tint still persists. In those cases, sanding/refinishing—not chemistry—typically provides the best cosmetic result.
Verdict / tip: What I’d do first (and who should skip DIY)
For most wooden study tables with a reasonable topcoat, the safest order is: mild soap dabbing → (after a spot test) rubbing alcohol dabbing → stop when the ink lifts, then dry thoroughly. This approach minimizes finish risk while still addressing both surface-bound ink and many common solvent-liftable residues.
The safest DIY sequence for a wooden study table is gentle soap dabbing first, then rubbing alcohol dabbing only after a spot test.
Even correct cleaning can leave a slightly lighter patch if the stain penetrated into a worn finish area.
The downsides are real: if ink already penetrated pores, you might remove the visible ink but still see lingering discoloration around it—especially on scratched, sun-faded, or unevenly sealed areas of the wooden study table.
Skip DIY (or plan on refinishing) if:
– the desk is unfinished, heavily sanded, or feels rough in the grain where ink soaked in,
– the finish is already failing (peeling, tacky, deeply worn),
– the stain is very old and you’re expecting a perfect, like-new match.
Pros/cons: DIY cleaning vs. refinishing
| Option | Pros | Cons |
|---|---|---|
| DIY spot-cleaning | Lower cost; works well for fresh marks and intact finishes | May not remove deeply penetrated tint; risk of haze if you skip spot tests |
| Professional refinishing | Best chance at uniform appearance after heavy penetration | Higher cost/time; can require stripping and re-topcoating the wooden study table |
Quick scan checklist (save this)
– [ ] Spot-test any cleaner in a hidden area
– [ ] Blot first, don’t scrub
– [ ] Start with mild soap + water, wipe and dry
– [ ] If needed, try rubbing alcohol on a swab (light dabs)
– [ ] Avoid soaking the wood or letting cleaners pool
– [ ] Stop early if the finish turns cloudy, dull, or patchy
If the finish changes during spot testing on a wooden study table, the correct move is to stop and reassess.
Dabbing and drying quickly are the two most important habits for preventing rings and spreading.
Sources
– Safety Data Sheet (SDS) for Isopropyl Alcohol — official SDS from the product manufacturer (for handling/compatibility safety guidance).
– Safety Data Sheet (SDS) for Acetone / Nail Polish Remover solvent — official SDS from the product manufacturer (for solvent hazards and surface compatibility cautions).
– Wood finishing or furniture care guidance from a finish manufacturer (e.g., polyurethane/lacquer care/cleaning instructions) — use official “care and cleaning” documentation for your finish type.
– Manufacturer guidance for melamine foam “erasers” (abrasive cleaning considerations) — official product documentation/SDS if available.
Bottom line: on a wooden study table, the “right” cleaning method depends on whether the ink is still sitting in the finish or has already soaked into pores. Start with gentle soap-and-water dabbing, then—only after a spot test—use rubbing alcohol in small dabs and stop as soon as the ink lifts. If you see clouding or the finish is already failing, don’t keep pushing; refinishing is the honest path to an even, like-new appearance.
Frequently Asked Questions
What causes pen marks on a wooden study table?
Pen marks on wood are usually caused by ink that soaks into the wood grain or sits on top of the finish. Ballpoint and permanent inks often include dyes and solvents that can spread quickly when they contact moisture or alcohol. Even if the table looks sealed, scratches or worn varnish can let ink penetrate deeper, making pen stains harder to remove.
How do you clean pen marks from a wooden study table without damaging the finish?
Start by blotting (not rubbing) any fresh ink with a clean, dry cloth to prevent spreading. Test your cleaning method on a hidden area first, then use a soft cloth with a gentle solution like mild soapy water for surface ink. If the mark remains, step up carefully—apply isopropyl alcohol or a wood-safe cleaner sparingly on the cloth (not directly on the table) and wipe gently, then dry and condition the wood.
Why do pen stains become permanent on some wood finishes?
Ink becomes more difficult to remove when it penetrates the topcoat or seeps into porous wood fibers. Over time, pigments and dyes bond with the wood surface and can oxidize, especially with permanent markers. Heat from sunlight or repeated wiping can also drive ink deeper, so older pen marks often require stronger—but still finish-safe—cleaning steps.
Which household products are safest for removing ink from wood furniture?
The safest starting points are mild soap and water, followed by isopropyl alcohol used in small amounts on a cloth. For some finishes, a mixture of baking soda and water into a soft paste can help lift residue, but it must be used very lightly to avoid scuffing. Avoid harsh abrasives, bleach, and soaking the wood, because these can strip the clear coat, discolor the stain, or cause water marks.
What is the best way to remove stubborn permanent marker stains from a wooden table?
For stubborn permanent marker stains, try isopropyl alcohol in gentle passes, re-dampening the cloth as needed and stopping if you notice the finish dulling. If ink remains, use a targeted wood-safe cleaner or specialized ink remover labeled for furniture, and always keep application controlled and brief. Once the stain is gone, wipe clean with a slightly damp cloth, dry thoroughly, and apply a matching wood polish or wax to restore the protective sheen.
📅 Last Updated: October 26, 2026 | Topic: What Causes Pen Marks on a Wooden Study Table? (And How to Clean It) | Content verified for accuracy and freshness.

[…] – Alcohol-based spot cleaning can dull or strip waxes/finish on some shelves—only do it after a successful spot test. […]