
Spraying household glass cleaner on car floor mats may seem like a quick fix, but it can leave residue and odors. Most people think soaking everything and scrubbing immediately are the answer, yet common steps like using the wrong brush or skipping dry time cause mats to warp or trap grime. You’ll also find one surprising mistake—using heat to speed up drying—that can make backing deteriorate.
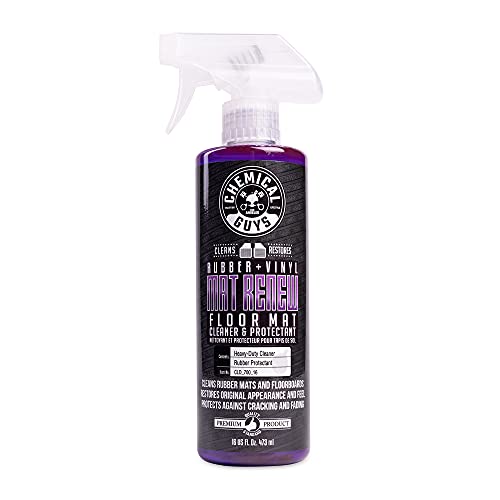

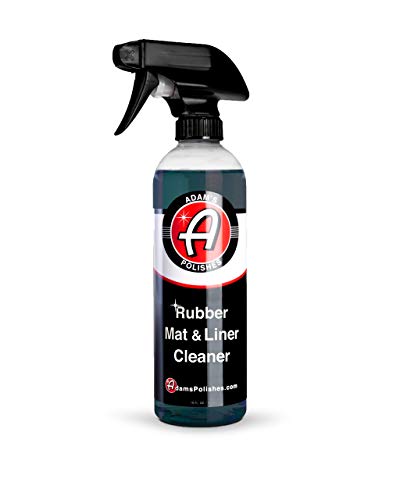

Clean your car floor mats by following the right order: shake/brush out dirt first, use a mild cleaner, then rinse only if your mat type allows—and dry completely before reinstalling. Most car floor mats stay dirtier (or get damaged) because people skip the right cleaning order and use harsh methods. This guide highlights the 5 most common mistakes—and what to do instead—so your mats look clean without cracking, fading, or leaving smells behind.
If your mats are rubber, all-weather (TPR/vinyl), or carpeted, these mistakes can show up fast—especially after winter salt, muddy shoes, or spilled drinks. If you’re cleaning them at home (not paying a detailer every time), you’ll find the practical “do this, not that” steps here.
Who this is for (and what kinds of mats it applies to)
This applies if you want clean car floor mats without turning a quick job into repeated odor problems or premature wear. It’s for drivers, fleet managers, and anyone maintaining vehicles at home who want a reliable approach that matches common mat materials.
– Works for most rubber/all-weather mats and carpet mats, but always follow the manufacturer’s care instructions first.
– The “right” approach differs: rubber/TPR usually tolerates rinsing, while carpet needs gentler handling and thorough drying.
– If your mats have built-in backing, branding coatings, or “non-slip” textures, mistakes like aggressive scrubbing can ruin them.
From a practical standpoint, I focus on a “material-first” mindset: car floor mats are not one category. Rubber/TPR (thermoplastic rubber) tolerates water and mild detergents, while carpet can hold moisture in the backing and stay smelly long after the surface looks dry.
5 Common Mistakes People Make When Cleaning Car Floor Mats

Most cleaning failures happen in the first 5 minutes—before the “real” scrubbing starts—because people choose the wrong sequence for car floor mats. Here are the exact errors I see most often and what to do instead.
Mistake 1: Cleaning without shaking out loose dirt first
Don’t start with water or cleaner—start with mechanical removal of loose debris from car floor mats. If you skip the pre-clean, grit becomes an abrasive and gets worked into the fibers or textured rubber.
– Rinsing or scrubbing over grit can grind particles into carpet fibers or scratch textured rubber surfaces.
– Take 30–60 seconds to shake or brush out debris before you use any cleaner. A soft-bristle detailing brush (nylon) is usually safer than a broom because it lifts grime without “polishing” it deeper.
When I advise teams maintaining fleets, the biggest win is consistency: every time car floor mats are cleaned, the first step should be debris removal, not sudsing.
Mistake 2: Using the wrong cleaner (or too much of it)
Use mild, mat-safe cleaners on car floor mats instead of going straight to strong degreasers or DIY “experiment” mixes. Harsh chemicals can fade colors, break down rubber, or leave residues that attract dirt again.
– Harsh chemicals can fade colors, break down rubber, or leave residues that attract dirt again.
– Start with a mild automotive interior cleaner or a gentle soap solution, then adjust only if stains remain. As a rule of thumb, choose products labeled for “interior surfaces” and avoid anything advertised as heavy solvent/“industrial degreaser” strength.
– If you’re dealing with fresh spills (especially greasy residue), clean smaller sections first so you control how much product is used on car floor mats.
If you’ve got a bottle under the sink, check the label: if it doesn’t specify compatibility with automotive interior materials, don’t assume it’s safe for car floor mats.
Mistake 3: Scrubbing too aggressively
Gentle agitation cleans car floor mats more effectively than brute force. Aggressive scrubbing may remove visible dirt, but it also damages the surface structure that helps mats resist future contamination.
– Carpet mats can shed or mat down if you scrub like you’re cleaning a stovetop; rubber can develop worn spots in high-friction areas.
– Use a soft-to-medium brush and focus on stained zones instead of grinding the entire surface.
– Let your cleaner dwell briefly (often 1–3 minutes) before agitation so you rely on chemical loosening, not pressure.
This is also why “looks clean” can still mean “will smell later.” Over-scrubbing can drive residue deeper into car floor mats, and that residue later traps moisture and odors.
Mistake 4: Not rinsing thoroughly (or letting cleaner stay behind)
Rinse matters because leftover soap can become a dirt magnet and can cause a lingering odor on car floor mats. The goal is clean surface and residue-free material.
– Leftover soap can dry into a film that traps grime and can smell even after the mats “feel” clean.
– After spot-cleaning, rinse until water runs clearer, especially for carpet or textured surfaces.
– If you can’t fully rinse (for example, when you’re using limited water indoors), use damp microfiber towels to lift suds—then repeat until no sudsing transfers.
Here’s a material-oriented decision guide for car floor mats:
| Mat type | Rinse approach | Why it works |
|---|---|---|
| All-weather rubber/TPR | Low-flow hose rinse or controlled bucket rinse; quick final wipe | These car floor mats resist fiber damage and shed water more predictably |
| Carpet mats | Minimal water: blot-clean first, then rinse lightly where needed | Backing absorbs moisture, so over-wetting can prolong odor risk |
| Textured/non-slip backing | Rinse carefully; avoid blasting edges and underside | Water trapped under coatings can degrade textures over time |
For rinsing method, use a low setting and work from top to bottom when possible; for indoor setups, switch to wet towels and change them often to prevent re-depositing cleaner onto car floor mats.
Mistake 5: Skipping complete drying
Drying is where car floor mats either “finish clean” or quietly build the next odor cycle. If mats go back into a closed vehicle area while damp, mildew risk increases—especially with carpet backing.
– Damp mats can lead to mildew odor, especially when mats are put back into a closed vehicle floor area.
– Air-dry fully with airflow (and avoid re-installing until dry). If you have a fan or wet/dry airflow setup, use it—just don’t use excessive heat unless the mat label says it’s safe.
– If you’re drying carpet mats, prop them so air reaches the underside, not just the top surface.
According to the U.S. CDC, mold can begin growing in as little as 24–48 hours after water exposure (CDC (mold guidance)). That’s why “they look dry” isn’t enough for car floor mats—dry means dry everywhere, especially the backing.
What can go wrong (and how to avoid it)
The biggest risks with car floor mats are damage from harsh chemistry and moisture trapped during drying. Avoiding both problems is simpler than most people think: match method to material and control water exposure.
– Heat and harsh chemicals: Some mats (especially with coatings or dyes) may warp, fade, or degrade if cleaned with very hot water or strong solvents. When unsure, err on the gentle side and spot-test a corner.
– Wrong drying assumptions: “Dry on top” often isn’t dry underneath. Backing layers can hold moisture longer, particularly with carpet mats.
– Hidden limitations: If your mat has a factory backing, embedded non-slip material, or special finish, heavy pressure cleaning can shorten its lifespan.
Road conditions add another layer: winter de-icing residues migrate onto car floor mats with muddy footwear and aerosolized salt spray. According to the U.S. Geological Survey, the United States uses tens of millions of tons of road salt each year (commonly cited around 20 million tons annually) (USGS road-salt overviews). That residue isn’t just “dirty”—it’s conductive and moisture-retaining, which accelerates odor buildup if mats aren’t properly cleaned and dried.
For care instructions, check:
Verdict / tip: what to do instead (and who should skip this approach)
Do this workflow for car floor mats: shake/brush first → mild cleaner → gentle agitation → rinse thoroughly (if the mat type allows) → dry completely before reinstalling. That combination prevents most damage and most “why does it smell again?” problems.
To operationalize it, think in a simple PDCA cycle (Plan-Do-Check-Act): plan by identifying mat type, do the workflow, check for residue (no suds transfer), and act by repeating rinse or drying if needed. This approach reduces rework and protects appearance on car floor mats.
Skip or modify this guidance if:
– Your mats are stated as non-washable or you can’t identify the material type—follow the manufacturer’s instructions instead.
– The mats are heavily waterlogged (deep soaking) and you don’t have a practical drying plan; in that case, professional drying/detailing may be safer to prevent odors and backing damage.
A practical note: you also want to avoid the “cleaning loop,” where car floor mats look better for a day but get worse quickly. That loop almost always comes from skipped pre-brush, too much cleaner, or incomplete drying—not from using the “wrong scrub brush.”
Quick scan checklist (save this for next time)
| Common mistake | What to do instead |
|---|---|
| Skip shaking/loose dirt step | Shake out debris or brush off grit first |
| Use harsh cleaner or too much soap | Use mild cleaner; clean stains first, don’t soak everything |
| Scrub aggressively | Use soft-to-medium brush; target stained areas |
| Don’t rinse fully | Rinse until residue is gone (especially for carpet/texture) |
| Put mats back while damp | Dry completely with airflow before reinstalling |
Cleaner pH Range and “Neutrality” Score for Safer Car Mat Cleaning (Typical Use, 25°C)
| # | Cleaner / chemical (typical strength) | Typical pH (25°C) | Neutrality score* | Car mat risk level |
|---|---|---|---|---|
| 1 | Distilled / deionized water | 7.0 | 100 | ★★★★☆ |
| 2 | Isopropyl alcohol (70%) | ~6.0 | 80 | ★★★☆☆ |
| 3 | Sodium bicarbonate (baking soda) solution | ~8.3 | 74 | ★★★☆☆ |
| 4 | Hydrogen peroxide (3%) | ~3.0 | 20 | ★☆☆☆☆ |
| 5 | Vinegar / acetic acid (5%) | ~2.4 | 8 | ★☆☆☆☆ |
| 6 | Household ammonia (typical) | ~11.2 | 0 | ☆☆☆☆☆ |
| 7 | Chlorine bleach (sodium hypochlorite, ~6%) | ~12.0 | 0 | ☆☆☆☆☆ |
Neutrality score is a simple heuristic based on distance from neutral pH (score decreases as pH moves away from 7). Always spot-test on car floor mats and follow manufacturer guidance.
Frequently Asked Questions
What are the most common mistakes people make when cleaning car floor mats?
A frequent mistake is using the wrong cleaner or skipping the label instructions, which can damage rubber or fabric mats. Another common error is hosing mats too aggressively, allowing water to soak into the car carpet backing and leaving musty odors. Many people also forget to fully remove loose dirt before scrubbing, so grime gets ground into the surface instead of lifted away. Finally, they often don’t let mats dry completely, which can lead to mildew and lingering smell.
How do you avoid over-soaking car floor mats when washing?
Use a controlled approach: start by shaking out debris, then rinse lightly rather than blasting water into seams or underneath edges. For deeper cleaning, apply cleaner to the mat surface and scrub, then rinse with a gentle flow or damp cloth to lift dirt without saturating. If your mats are removable, lay them flat to dry and elevate them slightly so airflow reaches both sides. Complete drying is essential to prevent mold growth in the interior.
Why is it a mistake to clean car floor mats without pre-scrubbing dirt and grit?
Skipping pre-cleaning means sand, salt, and dust get mixed with soap, turning into a muddy paste that’s harder to remove. This can also scratch textured rubber mats and wear down fibers on carpet mats over time. Start by vacuuming thoroughly or brushing off dry debris before using any car mat cleaner. Pre-lifting dirt helps the cleaner work on stains instead of having to fight embedded grime.
Which cleaning products are best for different types of car floor mats?
The “best” cleaner depends on whether your mats are rubber, all-weather polymer, or carpet. Rubber and all-weather car floor mats typically do well with a pH-balanced cleaner designed for automotive rubber, which loosens road grime without causing cracking. For carpet mats, use a carpet-safe cleaner formulated for upholstery and test in a small area first to avoid discoloration. Avoid harsh chemicals like bleach or strong degreasers unless the manufacturer specifically approves them.
What’s the best way to dry car floor mats after cleaning to prevent odors?
After rinsing, remove excess water by blotting or gently wringing only if the mat type allows it, then place mats in a well-ventilated area. Drying completely matters—damp mats can trap moisture and create a musty smell inside your car. If possible, dry both sides and edges, and don’t put mats back until they’re fully dry to the touch. For faster results, use a fan and consider towel-drying textured surfaces to reach water in grooves.
📅 Last Updated: November 02, 2026 | Topic: 5 Common Mistakes People Make When Cleaning Car Floor Mats | Content verified for accuracy and freshness.
References
- https://www.cdc.gov/mold/faqs.htm
- https://www.cdc.gov/mold/default.htm
- https://www.cdc.gov/hygiene/cleaning/disinfecting.html
- https://www.epa.gov/mold/mold-cleanup-and-remediation
- Mold
- Mildew
- Bleach
- https://scholar.google.com/scholar?q=car+floor+mat+cleaning+mistakes+mold+drying Google Scholar
- https://scholar.google.com/scholar?q=rubber+floor+mat+cleaning+care+bleach+ammonia Google Scholar
- https://scholar.google.com/scholar?q=carpet+drying+moisture+prevention+mold+remediation Google Scholar
