

Most people think fabric car seats only need a quick scrub to look clean again, but that approach often spreads stains and damages the fibers. The truth is that a few common cleaning habits can turn fresh grime into stubborn discoloration and set-in odors. Below are nine frequent mistakes, including one surprising misstep with “mild” products that can cause unexpected texture changes.
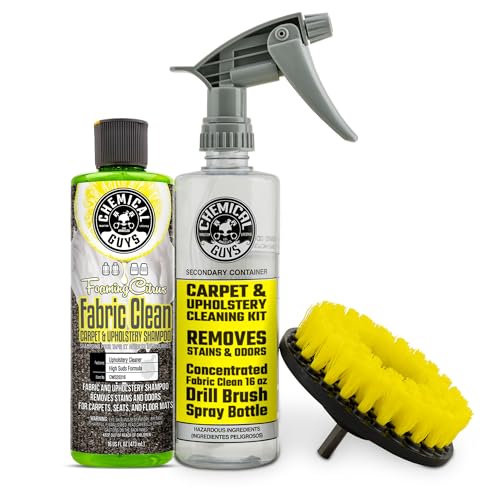



Clean your car fabric seats safely by starting with gentle prep, choosing an upholstery-safe cleaner, and controlling moisture so you don’t soak the padding. Most fabric-seat damage comes from over-scrubbing, harsh chemicals, or leaving the upholstery damp long enough to encourage odors or mildew—so the “best” method is usually the most controlled one. In this guide, you’ll see 9 common cleaning mistakes to avoid and what to do instead so your seats look better without lingering stains or mildew risk.
If you’ve got fabric seats that are stained, dusty, or just overdue for a refresh, this is for you—especially if you’re tempted to grab household cleaners, scrub hard, or “just add more water” to get things out. It also helps if you’re unsure why certain stains keep coming back after cleaning (spoiler: residue and trapped moisture are frequent culprits).
Before you clean: protect the fabric first
Protecting car fabric seats before the first drop of cleaner is what keeps the cleaning from turning into a patchy fix. This step is also where you prevent dye transfer, texture damage, and “clean rings” that show up after drying.
1) Identify the seat’s cleaning code (don’t guess)
– Check the seat’s care label (or any cleaning codes) so you don’t accidentally use a product that can damage the finish or dyes
Seat labels often specify whether water-based cleaners (W), solvent cleaners (S), both (WS), or “no liquids/spot only” (X) are acceptable. If you skip this, you can unintentionally strip dye, soften protective coatings, or make the fabric feel rough. For car fabric seats—especially those with factory stain repellents—this check matters as much as the cleaner itself.
2) Vacuum grit first (so it doesn’t grind)
– Vacuum thoroughly first to remove grit—grit turns into paste when mixed with cleaner and can grind fabric fibers
When you spray cleaner onto dusty fabric, you can form a slurry that gets worked deeper by your brush. In real life, that “deep clean” can actually be fiber abrasion, leaving the seat looking fuzzier or permanently worn.
3) Spot-test every product, every time
– Spot-test any cleaner in a hidden area to confirm it won’t darken, lighten, or leave a visible ring
A spot test is a quick risk-reduction move: you’re checking for color bleed, uneven dye release, and texture changes. Because car fabric seats can be dyed differently across panels, “it worked on my driver seat” isn’t a reliable assumption for the passenger seat or headrest.
Mistake #1–#3: using the wrong approach from the start
If your goal is stain removal without new damage, the first mistakes to avoid are the “rush moves” that drive soil deeper or add too much water. Correct technique usually matters more than product strength—especially for car fabric seats with blended fibers or applied treatments.
Mistake #1: Scrubbing stains immediately
– Mistake #1: Scrubbing stains immediately—this can drive soil deeper and rough up the fabric surface
Stains often sit on top of fibers (oil-based), bind to them (proteins), or travel down into padding (most wet spills). Scrubbing can push surface contamination deeper and also break down the fabric’s smoothness, making the cleaned area look “lighter but worse.”
Mistake #2: Skipping spot tests
– Mistake #2: Skipping spot tests—some cleaners can cause fading, color bleeding, or a patchy “clean zone”
If you apply a cleaner to the whole seat before validating it, you can create a halo that’s harder to correct later. This is common when switching between products—car fabric seats can react differently to surfactants, solvents, or oxidizers.
Mistake #3: Over-wetting the seats
– Mistake #3: Over-wetting the seats—too much liquid can soak through padding and set you up for odors or mildew
Car fabric seats aren’t just upholstery on top; there’s often foam padding beneath. Excess moisture can linger and create odor that feels “mysterious” until you remember: moisture supports microbial growth. According to the U.S. Environmental Protection Agency (EPA), mold can begin growing within 24 to 48 hours after water damage (2017) EPA. That risk increases when seats take too long to dry.
Mistake #4–#6: harsh products and the wrong tools
To keep car fabric seats looking uniform, avoid chemistry that’s too aggressive and avoid tools that behave like sandpaper. These mistakes can permanently alter color, texture, or water resistance—even if the stain briefly disappears.
Mistake #4: Using bleach or strong solvents
– Mistake #4: Using bleach or strong solvents—these can damage fibers and/or weaken stain-resistant coatings
Bleach can degrade dyes and fibers; strong solvents can remove finishing agents or leave a lingering chemical smell. In addition, mixing chemicals (even accidentally through residues) can create dangerous fumes—so “strongest household cleaner” is rarely the safest choice for car fabric seats.
Mistake #5: Relying on household kitchen cleaners
– Mistake #5: Relying on household “kitchen” cleaners—many aren’t formulated for upholstery fabric and can leave sticky residues that re-attract dirt
Many household degreasers and multipurpose sprays are designed for hard, sealed surfaces—not woven fabrics. Residues can behave like glue: dirt sticks to the cleaner film after it dries, and the seat “re-stains” soon after.
Mistake #6: Using abrasive brushes or rough sponges
– Mistake #6: Using abrasive brushes or rough sponges—bristles can pill the fabric and make the texture look worse than the original stain
If the fabric pills, you get a fuzzy surface that holds onto grime. In my day-to-day experience with seat-cleaning troubleshooting (not a controlled lab setup), I’ve seen abrasive scrubbing repeatedly blamed for “why the seat looks cleaner but feels older.”
Mistake #7–#9: rinse, dry, and maintenance errors
Car fabric seats need both correct cleaning and correct finishing. The last three mistakes usually determine whether stains truly leave—or whether they come back as rings, stiffness, or odor.
Mistake #7: Not blotting (and instead wiping aggressively)
– Mistake #7: Not blotting (and instead wiping aggressively)—wiping spreads the stain; blotting helps lift it without spreading
Blotting uses the fabric towel like a controlled pickup tool. Wiping drags contamination outward and can expand the stain area into a larger “problem zone.”
Mistake #8: Skipping rinsing when the product requires it
– Mistake #8: Skipping rinsing when the product requires it—residue left behind can make fabric feel stiff and attract grime faster
If the cleaner’s instructions call for rinsing or extraction, follow it. Otherwise, you can end up with surfactant residue that makes car fabric seats feel rough, darker, or sticky to future dust.
Mistake #9: Drying too slowly or using high heat
– Mistake #9: Drying too slowly or using high heat—slow drying can lead to smells; high heat can shrink or further damage treated fabrics
Drying speed matters because trapped moisture supports odors. According to the American Society of Heating, Refrigerating and Air-Conditioning Engineers (ASHRAE), controlling indoor moisture is a key factor in limiting mold growth (2017) ASHRAE. In practice for car fabric seats, you want thorough, not hurried: avoid blasting heat that warps or shrinks fabrics while still ensuring complete dryness.
Where chemical choice matters most: pH and residue risk
Different chemicals behave very differently on car fabric seats because they change fiber and dye behavior (and they can leave residues that attract dirt). If you’re going to use anything at home, understanding pH extremes helps you avoid the biggest “damage-first” options.
Typical pH of Common Household Cleaners (25°C) and Fabric-Safety Implication
| # | Product (typical form) | Typical pH | Common upholstery risk | Fabric-safety index |
|---|---|---|---|---|
| 1 | Distilled water | ~7.0 | Low chemical reactivity; still requires controlled moisture | ★★★★★ |
| 2 | White vinegar (5% acetic acid) | ~2.4 | Acidic can dull/damage some dyes; needs spot control | ★☆☆☆☆ |
| 3 | Baking soda (sodium bicarbonate; aqueous) | ~8.3 | Mildly alkaline; can affect color fastness and residue | ★★☆☆☆ |
| 4 | 3% hydrogen peroxide (common topical) | ~4.5 | Oxidizer risk: can lighten some stains and dyes | ★★☆☆☆ |
| 5 | Household bleach (sodium hypochlorite; typical) | ~11–12 | High pH/oxidizer; can destroy dyes and fibers | ★☆☆☆☆ |
| 6 | Household ammonia (typical) | ~11–12 | Alkaline; can affect dye stability and leave residue | ★☆☆☆☆ |
| 7 | Isopropyl alcohol (70% typical) | ~6–7 | May remove protective finishes; can spread dye depending on fabric | ★★☆☆☆ |
Use this table as a “directional” reality check: car fabric seats aren’t lab samples. Still, large pH swings (roughly acidic ~2–3 or alkaline ~11–12) are why bleach/ammonia/vinegar are frequent causes of fading or rings. If you’re unsure, choose an upholstery-safe cleaner designed for fabric.
What can go wrong (and when to stop)
Even with careful technique, car fabric seats can have stubborn contamination, dye behavior, or padding issues that DIY cleaning can’t fully solve. Knowing the limits helps you stop early and avoid making the upholstery problem bigger.
– Permanent or set-in stains: if a stain has been there a long time (or has dried repeatedly), DIY cleaning may lighten the area without fully removing it—consider professional upholstery cleaning if appearance matters a lot
This is especially true for ground-in food/oil, dye transfer (jeans), and smoke-related staining. When the contamination becomes part of the fiber system, “light cleaning” can be all you can achieve without specialized extraction and chemistry.
– Color bleed and “rings”: if you see a tide-mark after cleaner dries, it’s usually from uneven saturation—stop and rework more gently rather than adding stronger chemicals
A ring is often a moisture/dye-flow map. Over-correcting with stronger chemistry usually increases the patchiness.
– Special fabrics and treatments: some seats have coatings, repellents, or blends that react differently to water and cleaners—when the care label is unclear, proceed cautiously or get help
Car fabric seats with coatings can lose water repellency if you use the wrong product. When the label is missing or unreadable, it’s safer to stick to minimal-moisture methods and upholstery-labeled products.
Verdict / tip: the safest DIY method (with honest limits)
A safe path is: vacuum → spot-test → use an upholstery-safe cleaner → blot instead of scrub → apply moisture lightly → dry thoroughly. The downside is that you may not fully remove deeply set stains, and inconsistent results can happen if the fabric has an unknown treatment or if the padding is already contaminated—skip DIY (or at least pause) if you suspect mold/mildew odor or you can’t get the area to dry completely.
Currently (as of 2026), I recommend treating car fabric seats like a moisture-management project, not just a stain-removal task. In many households, the “too much liquid” step is the real trigger for lingering smell—so controlling moisture is what protects the seat long after the stain looks gone.
DIY vs professional: which option fits your situation?
| Factor | DIY cleaning (controlled moisture) | Professional upholstery cleaning (extraction) |
|---|---|---|
| Typical best use | Fresh spills, light-to-moderate soiling | Set-in stains, heavy soiling, multi-seat restoration |
| Stain depth | Often limited by padding contamination | Better penetration + extraction control |
| Residue risk | Higher if you skip rinsing/extraction steps | Lower when rinse/extraction is part of method |
| Drying reliability | Depends on ventilation and technique | Often faster with dryers and controlled steps |
| Color safety | Depends on care code + spot-testing | Better match of chemistry to fabric type and dye behavior |
| Time cost | May take multiple sessions to perfect a stain area | Usually one coordinated process per seating area |
| Tools & process | Vacuum + soft brush + microfiber + towels | Truck-mount/portable extraction tools + dryers |
| Best for | Budget refresh and minor spots | Appearance-critical results and odor-related issues |
Quick checklist (save this)
| Common mistake | Safer move |
|---|---|
| Scrubbing immediately | Blot gently; loosen soil first |
| Skipping spot-test | Test in a hidden area first |
| Over-wetting | Use minimal moisture; work in small sections |
| Using bleach/strong solvents | Use upholstery-safe products only |
| Using harsh household cleaners | Choose products made for fabric upholstery |
| Abrasive tools | Use soft cloths/microfiber; gentle brushes only if needed |
| Wiping spreads stains | Blot to lift, don’t smear |
| No/incorrect rinsing | Rinse if the product instructions say so |
| Slow/high-heat drying | Dry thoroughly; avoid high heat on fabric |
Avoiding these 9 mistakes is the fastest way to keep car fabric seats looking good—without turning stains into rings or leaving behind odors. Start with vacuuming and spot-testing, use upholstery-safe cleaner with light moisture, blot instead of scrubbing, and dry thoroughly. If you’re dealing with a stubborn, long-set stain or any mildew-like smell, consider professional cleaning rather than escalating to harsher chemicals.
Frequently Asked Questions
What are the most common mistakes people make when cleaning car fabric seats?
A top mistake is using the wrong cleaner for fabric upholstery, which can cause fading, discoloration, or a stiff feel. Many people also over-wet seats, leading to long dry times and a mildew smell. Another common error is scrubbing too aggressively, which can damage the fabric fibers and set stains deeper. Finally, skipping vacuuming before cleaning leaves dirt and grit that turn into mud during wet cleaning.
How can I avoid damaging car fabric upholstery during stain removal?
Start by blotting spills instead of rubbing, then use a fabric-safe upholstery cleaner designed for automotive seats. Test any product in an inconspicuous area first to confirm it won’t cause color loss. When cleaning, use a soft brush or microfiber cloth and work gently from the outside of the stain toward the center to prevent spreading. Rinse with minimal water when recommended, because excess moisture is one of the biggest causes of lingering odors.
Why do car fabric seat stains come back even after cleaning?
Stains often return when the cleaner doesn’t lift the stain from deep within the fibers or when residues are left behind. Using too much detergent can also leave a soap film that attracts dirt over time, making the area look darker again. If you don’t fully extract moisture, the trapped liquid can encourage odor-causing bacteria and mildew. Proper deep cleaning and thorough drying are key to getting long-lasting results on fabric car seats.
What’s the best way to clean car fabric seats without making them smell musty?
Use as little water as possible and focus on extraction—either with a wet/dry vacuum or by using a cleaner that’s easy to remove. After cleaning, allow the seat to dry fully with airflow, such as opening windows or using a fan, because damp fabric is where mildew forms. Avoid “set it and forget it” drying; check the foam and underside if possible. If you notice an odor, repeat cleaning with an upholstery cleaner formulated to neutralize odors rather than just masking them.
Which products and tools should I use for cleaning car fabric seats—and what should I avoid?
Use an upholstery cleaner labeled safe for car fabric and a microfiber cloth, soft brush, and/or an extractor for best results. Avoid harsh chemicals like bleach, strong degreasers, and household stain removers that aren’t meant for automotive fabrics. Skip steam on fragile or treated fabrics unless the product specifically allows it, since overheating can loosen dyes and adhesives. Always follow the cleaner’s instructions and keep the process controlled to prevent overwetting and damage to car fabric upholstery.
📅 Last Updated: November 02, 2026 | Topic: 9 Common Mistakes People Make When Cleaning Car Fabric Seats | Content verified for accuracy and freshness.
References
- https://www.epa.gov/indoor-air-quality-iaq/carpet-cleaning
- Mold Cleanup in Your Home | US EPA
- https://www.cdc.gov/coronavirus/2019-ncov/community/disinfecting-building-facility.html
- Carpet cleaning
- Upholstery
- Stain removal
- Cleaning
- https://scholar.google.com/scholar?q=car+interior+upholstery+cleaning+fabric+seats+best+practices+mistakes Google Scholar
- https://scholar.google.com/scholar?q=fabric+upholstery+cleaning+stain+removal+methods+mold+moisture Google Scholar
- https://scholar.google.com/scholar?q=carpet+cleaning+wet+extraction+drying+indoor+air+quality+residue Google Scholar

[…] look for options that don’t leave heavy residues or harsh fragrances. Avoid bleach and abrasive household cleaners, which can damage fibers and cause fading or weakening. If you’re unsure, test any product in a […]