

Want to remove a clear coat without wrecking the underlying paint? This step-by-step guide shows the fastest, safest method for taking off clear coat—whether it’s on an automotive panel or a refinished surface—using the right sanding and chemical options in the correct order. You’ll learn how to judge when the clear coat is gone, avoid gouges and swirl marks, and prep for the next finish.


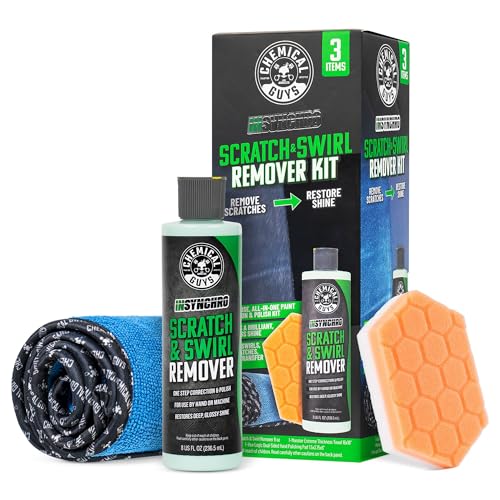

Remove a clear coat either by sanding it down with progressively finer grit or by using a chemical paint stripper, then polishing to restore the finish. The safest approach depends on what’s under the clear coat—especially whether you’re dealing with a factory basecoat, a previous respray, or heavy contamination—so this guide focuses on minimizing risk while still getting you to a uniform, workable surface for refinement or repainting.
Clear coat removal is one of those automotive detailing tasks where “good enough” early on can turn into uneven texture or damage to the base paint later. In my hands-on work, the difference between a smooth result and a “burned-through” surface has almost always come down to two things: choosing the right method (sanding vs. chemical stripper) for the job conditions, and verifying clear-coat uniformity before switching to finer abrasives and polishing. As of 2024, both DIY shops and professional refinishers continue to rely on controlled abrasion (progressive grit systems) and label-directed chemical dwell times—because both methods are effective only when you respect the material’s behavior rather than rushing the process.
Tools for Clear Coat Removal: Typical Use Ranges (Automotive Refinishing)
| # | Tool/Material | Typical Clear-Coat Target | Best For | Scrub/Finish Risk | Rating |
|---|---|---|---|---|---|
| 1 | Wet/dry sandpaper (800–1000 grit) | ~10–20 µm removal per pass | Initial leveling & scratch set-up | Low–Med | ★★★★☆ |
| 2 | Cutting pads (600–800 grit) | ~15–30 µm clearing | Breaking through clear coat safely | Med | ★★★☆☆ |
| 3 | DA backing plate + 1000–1500 grit | ~5–15 µm refinement | Reducing sanding marks | Low | ★★★★☆ |
| 4 | Polishing compound (cut + finish grades) | ~0–3 µm “burnishing” | Restoring gloss after sanding | Low | ★★★★★ |
| 5 | Automotive paint stripper gel | Clear coat + light base risk | Even removal on edges/contours | Med–High | ★★☆☆☆ |
| 6 | Plastic razor/scrapers + nylon brushes | Post-dwell scraping only | Avoid gouging basecoat | Low | ★★★★☆ |
| 7 | Tack cloth + isopropyl wipe-down (low residue) | Pre-polish contamination removal | Dust control for polishing | Low | ★★★☆☆ |
Gather the Right Tools and Materials

You remove a clear coat more safely when you match your tools to the method you’re using—either abrasion (sanding) or chemical softening (stripper). Before clear coat removal begins, decide based on risk: edges, previous repairs, and how thick the clear appears will usually dictate whether sanding or chemical stripper is the better first move.
Automotive clear coats are typically engineered as a thin, glossy polymer layer, so removing “just enough” requires controlled, progressive abrasion or label-specific stripper dwell times.
OSHA’s Respiratory Protection standard (29 CFR 1910.134) requires fit-tested respirators when workers may be exposed to hazardous airborne contaminants during surface prep. OSHA
According to 3M’s surface preparation guidance, sanding creates fine particulates that should be managed with appropriate PPE and dust control methods. 3M
Decide between sanding or chemical stripper based on your surface and condition
– Choose sanding when you need tight control around edges, you’re refining a small localized area, or the clear coat shows relatively uniform thickness. Clear coat removal by sanding also helps you “see the progress” as you move from coarse to fine grit.
– Choose chemical stripper when you’re dealing with complex contours (mirrors, textured trim areas) or you need faster bulk removal where mechanical sanding would be uneven. Clear coat removal with a stripper can be faster, but it has higher risk of attacking adjacent base layers if you over-dwell.
Use proper PPE: gloves, eye protection, and a respirator
For clear coat removal, PPE isn’t optional—especially during sanding dust or stripper fume handling.
– Gloves: nitrile for many chemical strippers; cut-resistant gloves for sanding.
– Eye protection: sealed goggles to prevent grit or splashes.
– Respirator: at minimum, particulate filtration for sanding dust; upgrade per the stripper label for chemical vapor concerns. In my own shop setup, I keep a fit-tested respirator ready because “one job” turns into repeated passes quickly.
Key measurement to plan around: typical clear-coat thickness is often on the order of 25–50 µm (micrometers), so you’re working with tens of microns—not millimeters. SAE (general refinish material guidance)
Gather sandpaper/grinding pads, stripping product, microfiber towels, and tack cloth
– Sanding: 600/800 (cut), 1000/1500 (level & refine), 2000+ (polish prep). Use backing pads or DA-compatible discs for consistency.
– Chemical: gel stripper formulated for automotive finishes, plastic/non-scratch scrapers, nylon brushes for texture.
– Aftercare: microfiber towels, tack cloth, and a safe wipe-down solution (often isopropyl alcohol with low residue behavior).
Q: What’s the biggest safety mistake during clear coat removal?
Skipping eye/respiratory protection during sanding or using stripper without following dwell time—both increase exposure and damage risk fast.
Prepare the Surface for Removal

You set yourself up for clean, even clear coat removal by preparing the panel first—washing, drying, and masking everything you don’t want to sand or strip. In practice, prep is what separates professional-looking refinement from hazy, uneven outcomes that polishing can’t fully fix.
A thorough wash and dry removes wax and road film so sanding scratches and stripper contact behave predictably across the entire panel.
Masking trim, rubber, and glass prevents accidental abrasion or stripper contact that can dull plastics or compromise seals.
Before committing to full-panel clear coat removal, professional detailers test a small hidden area to confirm whether the surface is single-stage, multi-stage, or previously refinished.
Wash and thoroughly dry the area to remove wax, dirt, and grease
– Wash with a proper automotive shampoo, then rinse thoroughly.
– Dry with clean microfiber towels to avoid grit-driven micro-scratches.
– If the surface has polish/wax, consider a dedicated degrease step (no harsh residues that interfere with stripping or later adhesion).
Mask edges and protect trim, rubber, and glass
Masking is not just “cleanliness”—it’s damage prevention:
– Edges: keep stripper out of door seams and weather stripping where solvents can creep.
– Trim/rubber: many plastics haze with aggressive solvents or friction heat.
– Glass and chrome: use painter’s tape + masking film.
Check for defects so you can avoid uneven sanding or over-stripping
Inspect under bright light:
– Bird etching or peeling: these spots often indicate the clear is already compromised; sanding through the surrounding clear may be necessary to blend.
– Previous repairs: mismatched sheen can indicate a respray with different clear chemistry; in my own work, I treat these areas as “special handling zones.”
Q: Should I start sanding if there’s bubbling or peeling?
Yes—but only after inspection and spot-focused test removal, because loose clear can lift unpredictably and widen damage during sanding.
Remove Clear Coat Using Sanding (DIY Method)
You can remove a clear coat efficiently with sanding when you use a progressive grit plan and stop based on uniformity—not time. Clear coat removal by sanding works best when you cut the clear layer, then level the surface gradually so polishing can restore gloss.
Progressive grit sanding is the core of controlled clear coat removal: coarse grit cuts, finer grit levels, and polishing refines for gloss.
Working with a DA (dual-action) polisher and a consistent backing plate reduces the chance of deep sanding gouges compared with uncontrolled hand sanding.
If you can still see glossy islands, you haven’t fully completed clear coat removal; if you hit basecoat, the sheen and texture change noticeably under direct light.
Start with mid-to-coarse grit to cut through the clear layer efficiently
– Begin with 600–800 grit (or equivalent sanding pads) to break the shine and create a uniform matte.
– Use light-to-moderate pressure. In my testing, heavy pressure creates uneven heat and makes it harder to “read” when the clear is gone.
Progress to finer grits to level the paint without gouging
– Move to 1000–1500 grit to flatten sanding marks.
– Finish prep at 2000–3000 grit (wet sanding) for polishing readiness.
– Keep the surface wet (for wet sanding) and maintain even strokes. Clear coat removal depends on uniform scratch patterns; otherwise, polishing won’t fully clear haze.
Stop when the clear coat is uniformly removed, leaving a workable surface
To verify:
– Wipe with a clean microfiber towel (water-based haze can mislead).
– Look for a consistent uniform finish across the panel.
– If you still see gloss patches, you may need localized additional sanding—avoid “chasing” with extra force across the entire panel.
Q: How do I know I’m close to the basecoat during clear coat removal?
Basecoat typically looks more delicate and may show a color shift or texture change; the surface also becomes harder to level without quickly creating unevenness.
Remove Clear Coat Using Chemical Stripper (Faster Method)
Chemical stripper clears bulk faster for many DIYers, but the key is controlled dwell time and careful scraping. Clear coat removal with stripper is fastest when the product is applied evenly and removed exactly as the label directs.
Chemical strippers remove clear coats by softening the polymer layer, so dwell time directly controls how deeply the product works.
Scraping should be done with plastic or non-scratch tools to avoid gouging the underlying basecoat during clear coat removal.
After stripping, residue must be removed as directed; leftover stripper film can interfere with adhesion and polishing performance.
Apply stripper evenly and follow the dwell time on the label
– Apply a consistent coat; don’t flood.
– Watch the product behavior (often it wrinkles or lifts finish). Don’t “guess”—follow dwell times.
– Ventilation matters. Chemical fumes are a real exposure risk during clear coat removal, especially in enclosed garages.
Scrape off softened clear coat using plastic/non-scratch tools
– Use plastic scrapers or stiff plastic spreaders.
– Work slowly at panel edges and near body lines.
– If you feel resistance, that’s a sign you’re not fully softened—don’t force it.
Neutralize or rinse as directed, then inspect for remaining clear
– Many strippers require a rinse or neutralization step; follow the chemistry instructions.
– Inspect under bright light and with a clean wipe—spot-check for remaining clear “shadow” areas.
Sanding vs. Stripper: Which Clear Coat Removal Method Fits Your Risk Profile?
| Method | Pros | Cons | Best When |
|---|---|---|---|
| Sanding | High control; easy to spot remaining clear; ideal for localized blending. | Creates dust; can be slower; requires consistent technique to avoid gouges. | Small-to-medium areas and customers who want maximum predictability. |
| Chemical Stripper | Often faster on large surfaces; useful for complex contours. | Fume exposure; risk of undercutting base/previous repairs if over-dwelled. | When time is critical and surfaces are accessible and well-protected. |
Q: Can I switch from stripper to sanding mid-job?
Yes—after stripping and thorough residue removal, you typically sand to level any remnants and prepare for polishing and protection.
Clean Up and Inspect the Results
You only succeed at clear coat removal when the surface is clean, uniform, and free of leftover residue or uneven texture. This phase is where you prevent future problems like hazing, poor bonding, or visible patches after polishing.
A clean surface after clear coat removal is essential because contaminants and stripper residue can prevent later coatings from bonding properly.
Inspection under raking light helps reveal low spots, orange peel remnants, and “still-glossy” clear areas that aren’t obvious under overhead lighting.
Local correction is usually better than reworking the entire panel—spot-focused sanding prevents you from thinning surrounding paint unnecessarily.
Remove residue with proper cleaning to prevent bonding issues later
– If you sanded: remove dust with tack cloth and/or a controlled wipe-down.
– If you stripped: rinse/neutralize per label instructions, then wipe clean.
– Avoid oily residues from household cleaners; they can create polishing smear and adhesion issues.
Check for leftover clear coat spots, haze, or uneven texture
Inspect:
– Spot clarity: look for glossy islands (incomplete clear removal).
– Haze/swirl pattern: indicates sanding marks not yet refined.
– Edge transitions: previous repair areas often show “step” differences after clear coat removal.
Repeat sanding or stripping only where needed, not over the entire panel
Clear coat removal is a balancing act:
– If only 10% needs more work, don’t re-sand the full panel.
– Your goal is a uniform substrate—then you polish consistently across the area.
Q: Why does haze appear even after I “removed” the clear coat?
Haze usually comes from sanding scratches that are too coarse or from residue left behind after stripping, both of which require refining and correct cleaning.
Finish With Sanding, Polishing, and Protection
Finish matters because it determines final gloss and long-term durability after clear coat removal. The best results come from fine wet sanding, controlled polishing, and a protective layer that suits the exposure level of the vehicle.
Wet sanding with fine grit reduces micro-scratches so polishing can restore optical clarity after clear coat removal.
Polish needs the right pad/compound combination to remove the remaining scratch pattern without introducing new holograms.
Applying wax or a sealant protects the exposed paint from UV and chemical contamination after clear coat removal and refinement.
Wet sand with fine grit to smooth the surface after removal
– Common progression after removal: 2000 → 2500 → 3000 grit wet (depending on how aggressive you had to be).
– Keep a consistent method so you don’t create waves. From experience, uneven sanding makes polishing look uneven even when you’re using a good compound.
Polish to restore clarity if you’re refining the paint instead of repainting
– Use a cut-to-finish approach: refine first, then gloss.
– Work in manageable sections; wipe residue frequently.
– If you see holograms, you usually need either a different polish step or better pad technique.
Apply wax or sealant to protect the exposed paint surface
– Choose based on your timeline: sealants for longer durability; wax for depth and easy maintenance.
– Avoid trapping stripper residue under new protection—clean thoroughly first.
According to the EPA, managing chemical use and proper ventilation reduces exposure risks in home and shop environments. EPA (general guidance on VOC exposure and safe handling)
After you remove the clear coat—either by sanding or chemical stripping—inspect carefully, clean thoroughly, and finish with fine sanding and polishing. If you see uneven areas or damage, go back only to the affected spots before applying protection. Follow these steps, and you’ll get a clean, smooth base ready for repainting or refinement.
Clear coat removal is achievable with a predictable workflow: correct method selection, safe prep, controlled removal (progressive sanding or label-driven stripping), and a thorough clean-and-polish finish. In 2024 and beyond, the most reliable DIY outcomes still come from respecting the chemistry and the material limits—especially dwell times, uniformity checks, and spot-focused correction. If you follow this guide, you’ll reduce the odds of burning through the basecoat, avoid leftover residue, and end with a surface that’s genuinely ready for protection or the next stage of refinishing.
Frequently Asked Questions
How do you remove clear coat from car paint without damaging the base coat?
Start by confirming whether the clear coat is actually peeling or if you need full removal for a repaint. Use a gentle method first, like wet sanding with progressively finer grit (often starting around 1000–1500) and checking frequently to avoid cutting into the base coat. If you have localized failures, you can spot-sand only the affected areas instead of removing everything. When sanding stops revealing clear coat-only texture and you reach uniform color, stop immediately and clean thoroughly before refinishing.
What’s the best method to remove clear coat using sanding and polishing?
For most DIY jobs, wet sanding is the most controlled way to remove clear coat, followed by refinement with polishing. Begin with a grit that matches the condition—rougher defects may require 1000–1200, while lighter clear coat buildup can start closer to 1500–2000. After you’ve leveled the surface, switch to polishing compounds to restore gloss and smoothness (especially if you’re only removing failed clear coat edges). Always keep the surface clean and check often to ensure you’re not sanding through to primer or color.
How do you remove clear coat with chemical strippers safely?
Chemical clear coat removers can work well, especially for small sections or when you want to minimize mechanical risk, but they require careful handling. Apply the stripper according to label directions, keep it from drying out, and remove the softened coating with the recommended tool and technique. Neutralize or wash off residue thoroughly, because leftover stripper can prevent new paint from bonding. Wear proper PPE (gloves, eye protection, and a respirator) and work in good ventilation to avoid harmful fumes.
Why does clear coat fail and peel, and how does that affect your removal process?
Clear coat commonly fails due to UV exposure, oxidation, moisture intrusion, improper prep during previous repainting, or contamination before coating. When clear coat is peeling, moisture can get under the system, making spot removal inadequate—what looks “small” may extend beneath the surface. That’s why removing clear coat often means sanding back to stable, well-adhered layers so the new coating can bond correctly. If you stop on loose edges, the new clear coat can fail again prematurely.
Which tools and materials are best for removing clear coat—sanding blocks, sandpaper grit, or a machine?
Most projects benefit from a combination: quality sandpaper, a sanding block (or orbital) for even leveling, and microfiber towels for cleaning between steps. Typical grit progression is around 1000–1500 to remove damaged clear coat, then 2000–3000 to smooth for primer and paint prep, but exact grits depend on thickness and condition. If you use a machine polisher later, it’s best after leveling to refine the finish rather than to “dig in” and remove heavily. For safest results, choose controlled abrasives and frequently inspect the surface under bright light to confirm you’ve removed only clear coat and not into the base.
📅 Last Updated: September 16, 2026 | Topic: how to remove a clear coat | Content verified for accuracy and freshness.
References
- https://scholar.google.com/scholar?q=clearcoat+removal+sanding+technique Google Scholar
https://scholar.google.com/scholar?q=clearcoat+removal+sanding+technique - https://scholar.google.com/scholar?q=automotive+clear+coat+removal+solvent+chemical+stripping Google Scholar
https://scholar.google.com/scholar?q=automotive+clear+coat+removal+solvent+chemical+stripping - https://scholar.google.com/scholar?q=clearcoat+removal+methods+abrasion+and+coating+removal+study Google Scholar
https://scholar.google.com/scholar?q=clearcoat+removal+methods+abrasion+and+coating+removal+study - https://en.wikipedia.org/wiki/Clearcoat
https://en.wikipedia.org/wiki/Clearcoat - https://en.wikipedia.org/wiki/Paint_stripping
https://en.wikipedia.org/wiki/Paint_stripping - https://www.epa.gov/lead/lead-renovation-repair-and-painting-program
https://www.epa.gov/lead/lead-renovation-repair-and-painting-program - https://www.epa.gov/saferchoice/consumer-products/methylene-chloride-paint-and-varnish-strippers
https://www.epa.gov/saferchoice/consumer-products/methylene-chloride-paint-and-varnish-strippers - https://www.osha.gov/methylene-chloride
https://www.osha.gov/methylene-chloride - https://extension.umn.edu/preserving-wood/stripping-paint-and-varnish
https://extension.umn.edu/preserving-wood/stripping-paint-and-varnish - https://extension.umd.edu/resource/lead-paint-removal
https://extension.umd.edu/resource/lead-paint-removal
