

Car floor mats clean best when you match the method to the mat type—rubber/all-weather vs. carpet—and then let them dry fully before reinstalling. This FAQ walks you through the safest, most common cleaning steps, plus what to avoid so you don’t trap odors or damage the backing.


You step into your car, notice the gritty buildup on your floor mats, and realize you need them clean without damaging the material or leaving odors behind. The quickest way to get that right is to answer the common questions first: what to vacuum, what cleaners to use for rubber versus carpet, how to scrub and rinse safely, and how to dry them so they do not warp or stay musty.
If you’ve noticed muddy patches, salt stains, pet hair, or that “damp carpet” smell, you’re in the right place. You’ll also find quick answers to the questions people ask most before grabbing cleaner or a hose.
If you drive in winter conditions, haul pets, or simply notice that your mats look “stained even after vacuuming,” this guide helps you clean without shortcuts. It’s written for everyday drivers and detailers who want predictable results—especially when mats are a mix of materials, textures, and edges that collect grime.
Before You Clean: Identify Mat Type (and Check for Damage)

Start by confirming what you’re working with—mat material drives the safest cleaning method, and a quick inspection can prevent irreversible damage. Here’s the fastest way to avoid the two biggest issues: color fading and odor trapped in the backing.
– Look for tags/labels and follow the manufacturer’s cleaning instructions first (especially if there’s a warranty).
– If there’s a “do not soak,” “do not pressure wash,” or “spot clean only” note, treat it as a hard rule. Warranty language is often tied to adhesive/bond strength and backing materials.
– Decide if the mats are rubber/all-weather or carpet (the cleaning approach is different).
– Rubber/all-weather mats usually have a raised texture to trap water and grit, so you’re cleaning “topside + texture,” then rinsing residue.
– Carpet mats are fiber-first: you’re lifting soil from the pile and treating stains without over-saturating the backing that can hold moisture.
– If you see heavy cracking, delamination, or shredded carpet backing, treat cleaning as a temporary fix and consider replacement.
– In my view, once rubber edges are separating or carpet backing is breaking down, you can clean what you see—but odor and embedded debris tend to keep returning because the internal structure has already failed.
How to Clean Rubber or All-Weather Floor Mats (Step-by-Step)
Rubber/all-weather mats clean best with dry removal first, then a controlled wash that rinses away grit. This approach protects the surface texture and reduces the chance of a “mud-streak” residue after drying.
– Dry-brush and vacuum loose dirt first, then rinse with water to remove grit (scrubbing over grit can cause scratches).
– Use a dry brush (stiff nylon or a rubber-bristle brush) to lift dried mud out of grooves.
– Vacuuming first matters because rubber textures act like a comb—scrubbing over grit can grind sand into the finish.
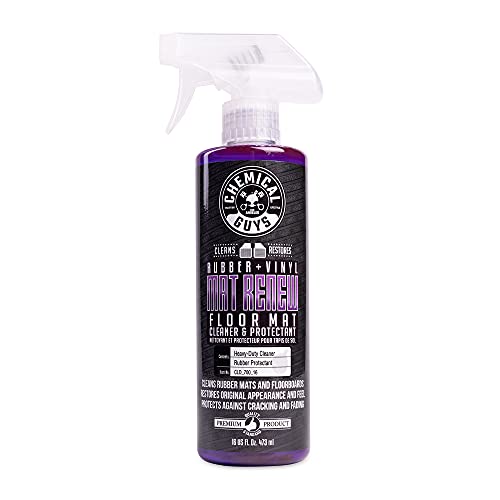
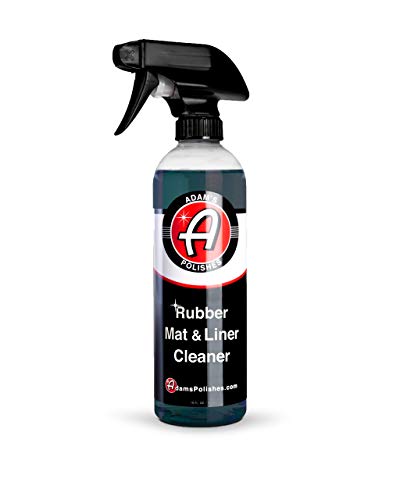
– Use a mild soap (or a dedicated mat cleaner) and a soft brush/sponge; focus on seams, edges, and textured areas.
– Seams and the perimeter lip are where road salt solution dries and leaves white deposits.
– For textured mats, scrub in the direction of the ridges so the brush doesn’t fight the surface pattern.
– Rinse thoroughly and wipe excess water off high-touch areas before drying.
– Wiping helps prevent drips from transferring dirt back onto the floor while you reinstall.
– Let the mats fully air-dry on a flat surface or slightly angled—standing water can sit in the channels.
How to Clean Carpet Floor Mats (Step-by-Step)
Carpet mats clean best with careful vacuuming and targeted stain treatment, then blotting to control moisture. The goal is clean fibers without soaking the backing that can drive long-lasting odor.
– Remove mats and vacuum both sides (especially along the edges where dirt packs in).
– Edges collect grit because foot traffic concentrates there. Vacuum the pile, then run the nozzle along the border.
– If you have a crevice tool, use it where the mat meets the car’s retention points.
– Spot-clean stains with a carpet-safe cleaner and a damp brush—avoid soaking the backing.
– Treat stains individually instead of “washing everything” at once. Salt, mud, and food residues behave differently.
– Keep the brush damp, not wet—damp fibers lift better than dry, but soaking increases dry time dramatically.
– Rinse lightly (if your cleaner requires it), then blot to pull out moisture instead of wringing or over-saturating.
– Blotting (using clean towels or absorbent pads) pulls moisture out of the pile.
– Over-wringing can spread water deeper into backing layers and can weaken adhesives over time.
Drying & Reinstalling Without Odor
Drying is the difference between “fresh-clean” and “why does this smell again?” Mat odor usually comes from trapped moisture, and moisture can also enable microbial growth. According to the U.S. Environmental Protection Agency, mold can begin growing within 24–48 hours after water exposure (U.S. EPA, guidance on mold and moisture). Also, the CDC notes that mold can grow when indoor moisture levels are high—commonly when relative humidity is around 60% or higher (CDC). That’s why fully drying matters as much as the cleaning product you use.
– Dry completely before putting mats back in the car—trapped moisture is the main cause of lingering smells.
– A practical rule: mats should feel dry to the touch across the entire surface and along the edges.
– Dry in airflow (open garage door, fan nearby) and keep the mats flat or angled so water can escape.
– Airflow accelerates evaporation; a fan plus ventilation beats “waiting it out” in a closed garage.
– If odor is already strong, you may need extra deodorizing steps (e.g., repeating drying and using an appropriate deodorizer per label directions).
– Use only products labeled safe for carpet fibers and backing. When in doubt, start with gentler approaches (repeat drying + stain-specific treatment) before moving to stronger chemistry.
Relative Humidity Levels and Mold Risk Relevance for Damp Car Mats (U.S. Guidance)
| # | Relative Humidity (RH) | Mold Risk Relevance | Odor Prevention Score | Guidance Match |
|---|---|---|---|---|
| 1 | 30% | Lower moisture support | ★★★★★ | Meets target band |
| 2 | 40% | Generally less favorable | ★★★★★ | Meets target band |
| 3 | 50% | Moderate moisture support | ★★★★☆ | Meets target band |
| 4 | 55% | Approaching higher-risk zone | ★★★★☆ | Near target band |
| 5 | 60% | Mold-support threshold relevance | ★★★☆☆ | Borderline match |
| 6 | 70% | Higher moisture support | ★★☆☆☆ | Outside target |
| 7 | 85% | Very favorable for moisture problems | ★☆☆☆☆ | Well outside target |
Note: “Odor Prevention Score” is a practical risk tier connected to common public guidance that focuses on humidity and moisture availability. It does not replace the mat manufacturer’s instructions and it won’t override the need to dry fully before reinstalling.
What Can Go Wrong (Common Mistakes, Edge Cases, Limits)
Even with the right steps, a few predictable mistakes can undo the work—usually by reintroducing moisture, embedding grit, or damaging materials. If you’re trying to avoid the “cleaned it but it looks worse” outcome, read this section first.
– Using the wrong cleaner: harsh chemicals can fade carpet or break down rubber over time.
– Strong solvents can damage colorants and coatings.
– Bleach, for example, is a common “stain fix” that can create discoloration and accelerated aging—especially on dyed carpet fibers.
– Over-soaking carpet mats: water can soak the backing and take much longer to dry, increasing odor risk.
– When carpet backing holds water, the pile may feel “mostly dry,” but internal layers stay damp.
– Skipping grit removal: scrubbing dirt into the surface can make stains look “baked in,” especially with road salt.
– Road salt isn’t just “dirt”—it leaves residues that can attract more soil if you rinse improperly.
– Pressure washing without confirmation: some mats aren’t meant for high-pressure water, and force can get dirt deeper into layers.
– High pressure can also separate adhesives in certain carpet and rubber constructions.
Here’s a quick “rubber vs. carpet” comparison of what typically goes wrong:
| Factor | Rubber / All-Weather | Carpet |
|---|---|---|
| Primary grime | Grit + salt residue in grooves | Soil in pile + edge packing |
| Most common failure | Scratches from dry grit scrubbing | Backing stays damp → odor |
| Best “control lever” | Thorough rinsing + fast drying | Blotting + airflow drying |
| Avoid | Harsh solvents that degrade rubber | Soaking the backing or over-foaming |
Verdict: The “Do This First” Cleaning Tip (and Who Should Skip DIY)
Start by vacuuming/dry-brushing first, then clean gently with a mat-appropriate cleaner, and finish with fully drying—that combo prevents the most common problems. We recommend avoiding DIY if your mats are already separating, heavily moldy, or you suspect internal damage from flooding (in those cases, replacement or professional help may be the safer move).
If you’re trying to prevent odor in late 2026 (when garages often stay humid and drying takes longer), the most reliable strategy is disciplined moisture control: don’t reinstall until edges and underside feel fully dry. Also, to reinforce the “dry fully, not just mostly” point.
Quick Scan Checklist: Clean Without Regrets
| Step | Do | Avoid |
|---|---|---|
| Prep | Remove mats, shake off loose debris, vacuum | Scrub dry grit into the surface |
| Cleaning | Use mild soap/carpet-safe cleaner by mat type | Bleach/strong solvents unless the label says it’s safe |
| Rinsing | Rinse as needed and wipe excess | Soaking carpet backing |
| Drying | Dry fully with airflow | Reinstalling while damp |
| Re-check | Inspect edges/seams for remaining dirt | Ignoring stubborn stains that need targeted spot cleaning |
Frequently Asked Questions
How do I clean car floor mats at home without damaging them?
Start by vacuuming loose dirt and debris thoroughly, especially from seams and around the edges. For most mats, use a soft brush with warm water and a pH-neutral cleaner, then rinse lightly and blot dry with a towel. Avoid harsh chemicals, soaking for long periods, and high-heat drying, which can warp or degrade rubber and fabric. Always let mats fully dry before reinstalling to prevent mildew and odors.
What is the best way to remove sand, mud, and grime from car floor mats?
Shake or brush mats outside first to dislodge dry sand and grit, then vacuum to get what remains. For caked-on mud, pre-soak the affected areas with warm water and a mild detergent for 5–10 minutes, then scrub in small sections using a brush. Rinse with moderate water pressure and check corners and channels, since grit often gets trapped there. Repeat spot-cleaning if needed before fully drying.
Which car floor mats cleaner is safest for rubber, carpet, and all-weather mats?
For rubber and all-weather car floor mats, use a dedicated rubber-safe cleaner or mild soap and water to maintain flexibility and finish. For carpeted mats, choose an upholstery/carpet cleaner that’s designed for automotive interiors and avoid strong degreasers that can leave residues. In both cases, avoid bleach and harsh solvents, which can fade colors and weaken materials over time. If you’re unsure, test the cleaner on a hidden area first.
Why do car floor mats smell after washing, and how can I prevent it?
Odors usually come from trapped moisture and dirt that wasn’t fully rinsed out of textured surfaces, backing, or seams. After cleaning, rinse thoroughly, blot excess water, and dry completely in airflow—preferably with mats removed from the car. Using a deodorizing fabric-safe spray or baking soda lightly (then vacuuming after it dries) can help neutralize lingering smells. Prevent future odor by cleaning regularly and allowing quick drying after spills or wet weather.
What’s the best routine for maintaining car floor mats to keep them looking new?
Create a simple schedule: vacuum mats every 1–2 weeks, and do a deeper clean every 1–3 months or after heavy seasons. Use all-weather floor liners in winter and rainy months to reduce mud buildup, then rinse or wipe them as needed. For carpet mats, spot-clean spills immediately to prevent stains from setting. Consistent cleaning, proper drying, and using the right car floor mat cleaner by material are the keys to long-lasting results.
📅 Last Updated: November 02, 2026 | Topic: Car Floor Mats Cleaning FAQ: Answers to the Most Common Questions | Content verified for accuracy and freshness.
References
- https://www.cdc.gov/coronavirus/2019-ncov/community/disinfecting-building-facility.html
- https://www.epa.gov/infectious-diseases/using-disinfectants-cleaning-and-disinfecting-your-facility
- https://www.who.int/publications/i/item/cleaning-and-disinfection-of-environmental-surfaces-interim-guidance-for-novel-coronavirus-2019-ncov
- https://www.cdc.gov/mold/default.htm
- Mold | National Institute of Environmental Health Sciences
- Carpet
- Disinfectant
- https://scholar.google.com/scholar?q=car+floor+mats+cleaning+rubber+carpet Google Scholar
- https://scholar.google.com/scholar?q=disinfection+of+porous+surfaces+carpet+cleaning Google Scholar
- https://scholar.google.com/scholar?q=vehicle+interior+microbiology+cleaning+disinfection Google Scholar

[…] damp cloth and appropriate cleaner for the liner type (follow the product/manufacturer label). For rubber or all-weather composite cargo liners, a pH-neutral cleaner and a microfiber cloth is usually safer than harsh […]