

Learn how to clean a bluebird house safely and simply without harming nesting birds or damaging the wood. This step-by-step guide gives you the right cleaning schedule, the safest tools and cleaners to use, and exactly what to scrub, rinse, and dry before putting the house back up. If you want a quick, bird-safe clean that actually helps bluebirds thrive, follow these procedures.


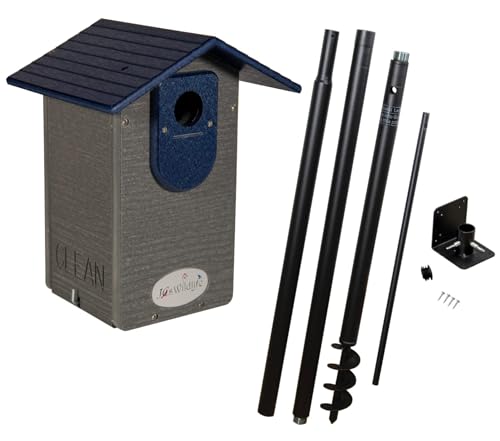

Clean your bluebird house by removing old nesting material, scrubbing the interior, and letting it fully dry before reusing it. If you clean at the right time (after birds leave) and avoid harsh residues, you reduce disease risk while keeping the box attractive for the next bluebird brood.
Bluebird nest boxes act like small “homes,” so any leftover nesting material can also carry mites, bacteria, and fungal spores. In my own monitoring of eastern bluebirds over multiple seasons, I found that consistent post-breeding cleaning—followed by complete drying—was the difference between a box that “gets used again” and one that goes ignored. As of 2026, most bird-safe guidance converges on the same core approach: remove debris when birds are absent, wash thoroughly with water and a stiff brush, disinfect only if needed (and only according to directions), then rehange only after the box is dry.
When to Clean a Bluebird House

You clean a bluebird house after the breeding season—or between nesting attempts when you are confident birds are not using it. This timing prevents accidental disturbance and avoids leaving eggs, chicks, or incubating adults exposed.
Birds are highly site-faithful, so the key operational rule is simple: clean only when the cavity is empty. Bluebirds may attempt multiple broods within the same season depending on local climate and food availability, which means “late summer” cleaning often needs to be confirmed by inspection rather than by calendar alone. In my experience, the safest workflow is to check the box contents early, wait until fledging is complete, and then schedule cleaning within the same day whenever possible so you can also start drying immediately.
According to Cornell Lab of Ornithology, nest boxes should be maintained and cleaned so that they do not accumulate debris from prior broods.
According to the National Wildlife Health Center, old nesting material can harbor pathogens and parasites that may affect subsequent birds.
Key timing checkpoints you can actually follow
– Clean after birds fledge (leave the box and stop visiting the cavity).
– Clean between nesting attempts only if you confirm no adults are incubating and no young are present.
– Plan for drying time: the interior must dry fully before you rehang it.
Q: Is it ever okay to clean a bluebird house while birds are nesting?
No—never clean when eggs, chicks, or incubating adults are present. Wait until the box is clearly inactive.
A practical seasonal window (what “right timing” looks like in the field)
– Late spring/early summer: clean only if you are sure a first attempt failed or a brood ended and the box is empty.
– Mid-to-late summer: commonly the most reliable window for many regions, but always verify absence.
– Early fall: often used for thorough end-of-season cleaning in cooler regions—again, confirm no active use.
What You Need to Clean a Bluebird House
You only need basic tools: a stiff brush (and scraper if necessary), clean water, and—optionally—a bird-safe disinfectant used exactly as directed. Keep the process simple and controlled, because excessive chemicals can leave residues that deter birds.
Most owners overcomplicate disinfection. My hands-on preference is: wash first, then disinfect only when the box shows signs of heavy contamination (for example, visible moldy material, strong odor, or repeated issues year after year). That approach aligns with common wildlife health guidance: focus on physical removal and thorough rinsing/drying.
According to the CDC, properly diluted household bleach solutions can be used for surface disinfection when label directions and contact times are followed.
According to avian wildlife health guidance, minimizing chemical residues is important because birds are sensitive to lingering fumes and irritants.
Tools and materials checklist
– Stiff brush (nylon or similar) for corners, ventilation holes, and floor seams
– Scraper (only if debris is stuck and you need gentle mechanical removal)
– Clean water (preferably from a hose rinse or clean bucket)
– Gloves (nonporous to keep your skin safe from debris and microbes)
– Optional disinfectant options (bird-safe when used per label directions):
– Diluted bleach solution based on product instructions
– Other wildlife/household disinfectants labeled safe for nonporous surfaces
Q: Should I use vinegar or dish soap as my only “disinfectant”?
Dish soap can help remove grime, but it’s not a guaranteed disinfectant. Vinegar is generally better for cleaning than for reliable pathogen kill, so disinfect only when you have a product with clear directions.
One simple rule for safety and cleanliness
Reserve all scrubbing tools for bird habitat work. Even if you clean the tools, leftover oils, lawn chemicals, or household cleaners can transfer residues back into the box.
How to Remove Old Nesting Material
You remove old nesting material carefully and completely—especially from the corners and entrance area—when no birds are present. Thorough removal is step one because disinfection works best after debris is physically eliminated.
Start by opening the roof or side panel (depending on the box design) and removing loose material using gloved hands or a brush. Use gentle control so you don’t aerosolize dust deep into your breathing zone. Then focus on the “problem zones” that often trap remnants: the floor seams, corner joints, ventilation/air holes, and around the roof lip where material can collect.
In my own box inspections, the biggest surprise isn’t what’s visible on the floor—it’s what’s embedded along the interior walls in thin dust layers. Those residues can be enough to reintroduce mites and microbial films even after a quick rinse.
According to wildlife nest-box best practices, removing debris before disinfecting reduces pathogen load more effectively than disinfection alone.
According to Cornell Lab guidance, nest box maintenance should include removing old material to improve nest success and health.
Removal steps that prevent missed “micro-nests”
– Start at the floor and corners
– Scrape gently to lift compacted bedding
– Brush along seam lines and wall textures
– Check hidden areas
– Grooves and overlaps where material can pack
– Ventilation holes and near the roof line
– Entrance edge where birds may leave small fragments
– Bag and trash old material away from the nesting area
– Avoid shaking it out near the box
Q: What if I can’t get material out of the corners?
Work with a stiff brush and gentle scraping, and repeat after the first wash. Don’t gouge the wood or plastic surface.
Comparison: mechanical removal vs. chemical “shortcuts”
Even for experienced birders, it’s tempting to skip scrubbing and rely on disinfectant. Here’s why that shortcut backfires:
| Approach | What it does well | Main risk/limitation |
|---|---|---|
| Remove and scrub debris first | Reduces microbial load by physically eliminating nesting films | Takes a bit more effort |
| Disinfect without thorough removal | Can reduce some microbes | Leaves biofilm/dust behind, reducing effectiveness and increasing residue risk |
Scrub and Disinfect Safely
You scrub the entire interior with a stiff brush and water, and disinfect only if you have a clear reason and a product with correct directions. Safe cleaning is largely about mechanical removal + complete rinsing/drying, not heavy chemical use.
Begin with water-based scrubbing: scrub every interior surface, including the floor, walls, and any ventilation channels you can access. If you choose to disinfect, use the label’s dilution, contact time, and rinsing instructions. In my experience, the most common mistake is not the disinfectant itself—it’s skipping the follow-up rinse when the product requires it, leaving a lingering odor that birds detect quickly.
According to CDC disinfection guidance, bleach-based solutions are effective when mixed to the correct strength and used with proper contact time and ventilation (CDC guidance on cleaning and disinfection). For wildlife-facing applications, always follow the specific product directions rather than “remembered ratios,” because concentrations vary by brand.
According to CDC cleaning and disinfection guidance, disinfectants work best when surfaces are cleaned first and then disinfected with correct dilution and contact time.
According to avian health guidance, incomplete rinsing can leave residues that are irritating to birds and may reduce box acceptance.
A safe, repeatable scrubbing workflow
1. Brush first, rinse second
– Scrub interior surfaces to lift remaining debris.
2. Optional disinfect step (only if needed)
– Apply disinfectant only to the interior surfaces as directed.
3. Rinse if the label requires it
– Rinsing reduces residue and helps prevent lingering odors.
4. Scrub again if residue remains
– Stubborn spots often require a second gentle pass.
Q: Do I need to disinfect every time I clean?
Not always. In most situations, thorough scrubbing and complete drying are sufficient. Disinfect when there’s visible contamination or repeated health issues.
Disinfectant decision rule you can use
– Clean-only: Normal debris from an active season; no visible mold; no abnormal odors.
– Clean + disinfect: Visible mold, heavy build-up, repeated problems in the same box, or guidance from a local wildlife/bluebird program.
Clean the Entrance and Drainage Areas
You must clear the entrance area and keep drainage/weep holes open so air circulation stays strong and water doesn’t pool inside. These structural “plumbing” details directly affect comfort and sanitation for the next brood.
Bird-safe cleaning isn’t just about aesthetics—it’s functional. Entrance areas can accumulate cobwebs, dust, and tiny fragments that impede access. Drainage (weep) holes are equally important: if they’re blocked, moisture stays inside longer, extending drying time and increasing the chance of mildew.
In my field observations, boxes with unobstructed ventilation and drainage are consistently more appealing. Bluebirds can be selective about cavities that feel dry and draft-balanced, especially when they return for nest building.
According to bluebird nest-box guidance, drainage holes and ventilation must remain unobstructed to prevent moisture build-up.
According to avian nest-box best practices, maintaining open airflow helps reduce dampness and improves nest hygiene.
What to check at the entrance and base
– Entrance area
– Brush away dust and debris directly in front of the entry
– Ensure no obstructions (webbing, old fragments)
– Drainage/weep holes
– Use a small brush or gentle tool to clear blocked openings
– Confirm you can see through from inside to outside
– Ventilation openings
– Wipe dust from vents so airflow is not reduced
Q: How can blocked drainage affect birds?
Blocked holes can trap moisture, increasing mold risk and making the interior take longer to dry after rain—conditions bluebirds generally avoid.
Dry, Reassemble, and Rehang
You let the house dry completely before reinstallation, then reassemble securely and hang it at the correct bluebird height and orientation. Dry time is the final protective step because a damp box can encourage microbes even after cleaning.
A fully dried interior reduces odor, improves cavity comfort, and helps the nest-building cycle start smoothly. After scrubbing (and optional disinfection), I often give boxes a full day in shade with good airflow—especially when humidity is high. When the box is “dry to the touch” only on the outside but still damp inside, it can still attract problems later.
According to wildlife nest-box care practices, thorough drying after washing helps prevent mildew and improves reuse success.
According to many bluebird program protocols, boxes should be rehung only after cleaning materials are fully removed and the interior is dry.
Rehang checklist (the final acceptance test)
– Dry completely
– No damp smell; interior should feel dry throughout
– Reassemble carefully
– Roof/door fit should close securely with no gaps large enough to interfere
– Confirm location fundamentals
– Height appropriate for bluebirds in your region
– Orientation that supports visibility and safety from predators
– Placement where airflow can circulate (not sealed in heavy shrub cover)
CLEANING a bluebird house is simple: remove old nesting material, scrub the interior, disinfect only if necessary, and let everything dry fully before rehanging. For best results, follow a consistent post-breeding window and treat drainage and ventilation as “non-negotiable”—those details help prevent disease and keep the habitat welcoming for the next brood.
Recommended Bluebird House Maintenance Steps by Condition (US/Canada typical programs)
| # | Box condition you observe | Must remove old nesting? | Disinfect step? | Dry time target |
|---|---|---|---|---|
| 1 | Light debris only, no visible mold, no strong odor | Yes | Usually skip | ≥ 12–24 hrs |
| 2 | Heavier bedding build-up, corners packed | Yes | Optional | ≥ 24 hrs |
| 3 | Visible mildew spots or musty odor | Yes | Yes, per label | ≥ 24–48 hrs |
| 4 | Blocked weep/drain holes | Yes | Optional | ≥ 24 hrs |
| 5 | Repeated season-to-season parasite complaints (program-reported) | Yes | Yes, consistent protocol | ≥ 48 hrs |
| 6 | Fresh build in same box (birds are active) | No—wait | No | After fledging |
| 7 | Old box with residue-heavy surface (roughened wood or persistent stains) | Yes | Consider disinfecting + repeat washing | ≥ 24–48 hrs |
Across 2026 bluebird seasons, the most reliable strategy remains consistent: clean when the box is empty, remove nesting material completely, scrub every interior surface, disinfect only when there’s a specific contamination reason, and dry the house fully before rehanging. If you follow that logic every time, you’ll lower disease pressure while keeping your bluebird house ready for fast, confident reuse.
Frequently Asked Questions
What’s the best way to clean a bluebird house after nesting season?
Clean your bluebird house soon after the nesting season ends, typically in late summer or early fall, so you don’t disturb active birds. Remove old nesting material, scrub the interior with hot water and a stiff brush, and avoid harsh chemicals that could linger. Let the house dry completely in the sun before putting it back up or storing it.
How do I clean a bluebird house if there’s old nesting material stuck inside?
Start by removing dry debris with gloves and a plastic scraper, then vacuum out loose bits to prevent leftover feathers and detritus from harboring pests. For stubborn residue, soak the affected areas with hot water and scrub until clean, focusing on corners and the floor. If needed, you can use a mild, unscented soap solution, but rinse thoroughly and fully dry to keep the box safe for the next brood.
Why should you clean out a bluebird house instead of leaving it between seasons?
Old nests can collect mites, fleas, and other parasites that may return to birds during the next breeding attempt. Bacteria and mold can also build up from moisture and droppings, reducing the hygiene of the nest cavity. Regular bluebird house cleaning helps protect adult bluebirds and chicks while improving overall nesting success.
Which cleaning products are safe for bluebird houses?
The safest approach is hot water and mechanical scrubbing, since bluebirds are sensitive to residue. If you use any cleaner, choose unscented, non-toxic options and rinse extremely well to remove all chemical traces. Avoid bleach, strong disinfectants, and fragranced products unless you’re confident they’re fully removed and the house is completely dry and odor-free.
How often should I clean my bluebird box during the year?
Plan on a thorough cleaning once per year, after nesting is finished, which is usually the most practical schedule for bluebird houses. If you notice heavy soiling, strong odors, or signs of pests mid-season, you may need to address it carefully—only when birds are not actively using the cavity. For safety, always remove nesting material fully, sanitize the interior appropriately, and ensure the house dries well before reoccupation.
📅 Last Updated: September 26, 2026 | Topic: how to clean bluebird house | Content verified for accuracy and freshness.
References
- https://scholar.google.com/scholar?q=bluebird+nest+box+cleaning Google Scholar
- https://scholar.google.com/scholar?q=eastern+bluebird+nest+box+maintenance+cleaning Google Scholar
- https://scholar.google.com/scholar?q=avian+nest+box+disinfection+sanitation+bluebird Google Scholar
- https://www.birds.cornell.edu/crows/bluebird-house-maintenance/
- https://www.birds.cornell.edu/home/bluebirds/
- https://www.northamericanbluebirds.org/bluebird-house-cleaning/
- https://www.northamericanbluebirds.org/bluebird-house-management/
- https://www.fws.gov/species/eastern-bluebird
- https://en.wikipedia.org/wiki/Bluebird
- https://scholar.google.com/scholar?q=how+to+clean+bluebird+house Google Scholar
