

Want to know how to clean boat upholstery without damaging it? This step-by-step guide shows the fastest, safest method to remove dirt, salt, mildew, and stains while protecting fabric and vinyl from fading and cracking. You’ll get clear instructions for rinsing, choosing the right cleaner, scrubbing, and drying so the upholstery looks clean and stays that way.



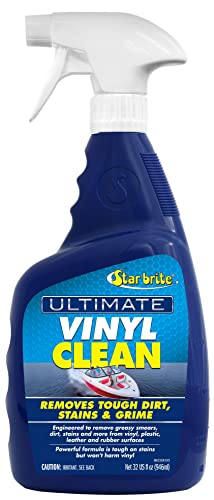
If your boat upholstery looks grimy, vacuum first, then clean in small sections with an upholstery-approved cleaner (fabric-safe for cloth, vinyl-safe for vinyl), rinse as directed, and dry completely to prevent mildew and odor. Because marine seats and interior panels face sun, salt spray, and recurring dampness, the safest results come from controlled technique—blotting and gentle agitation—not aggressive scrubbing.
This is for anyone cleaning boat seats, cushions, or interior panels that are exposed to sun, salt spray, and mildew—especially if you’re not sure whether your upholstery is fabric, vinyl, or a mix of materials. If you can, check the tag or documentation for your specific upholstery before you start.
Gather the right tools and check the material

You’ll get the least damage (and the cleanest finish) by confirming what you’re cleaning—because fabric, vinyl, and mixed materials respond differently to cleaners. Once the material is clear, use only gentle tools and cleaners designed for upholstery rather than general-purpose chemicals.
According to the U.S. CDC, mold can begin growing on damp materials within 24–48 hours, which is why fast, thorough drying matters after cleaning.
Many vinyl and marine upholstery care guides warn against harsh solvents and abrasive tools because they can dull, crack, or permanently discolor the surface.
Marine upholstery manufacturers typically require cleaners that match the material type (fabric vs. vinyl) to protect surface treatments and coatings.
Before you touch a stain, identify whether your upholstery is fabric, vinyl (PVC/urethane blends are common), or a mix (for example: vinyl bolsters with fabric or mesh center panels). Labels and care tags usually tell you whether the cover is treated cloth, vinyl, or a combination.
Identify the material type (fabric vs. vinyl vs. mixed)
– Fabric upholstery: Often needs a fabric-safe upholstery cleaner and usually tolerates blotting/low agitation better than scrubbing.
– Vinyl upholstery: Usually needs a vinyl-safe cleaner (and often benefits from conditioners after cleaning to maintain flexibility).
– Mixed materials: Treat each material type according to the stricter/most delicate surface. If one area is fabric and another is vinyl, prioritize the method that won’t damage either.
If the tag is missing, test cautiously: pick an inconspicuous spot and use a cleaner that’s explicitly labeled safe for upholstery.
Assemble basic supplies for controlled cleaning
Use tools that won’t destroy texture or push grime deeper:
– Vacuum + soft brush attachment (for seams and stitching)
– Microfiber cloths or a soft upholstery brush
– Gentle upholstery cleaner approved for your material type
– Bucket of clean water (change water when it turns dirty)
– Clean dry towels for blotting and moisture removal
Avoid unknown solvents (for example, “strong degreasers” or chemical spot removers that aren’t labeled for marine fabric/vinyl). When in doubt, choose the milder option first and repeat cleaning cycles instead of forcing the issue in one pass.
A quick reality check (important for 2026-season maintenance)
In 2025–2026, many boaters are also trying “interior quick fixes” that are convenient but risky—especially on UV-softened vinyl and salt-dried fabric. The same cleaning approach still applies: correct cleaner + gentle agitation + complete drying.
Dry-clean first: remove grit before it spreads
You’ll prevent scratch marks and prevent “mud staining” by removing dry grit before you add water or cleaner. Vacuuming and gentle brushing first keeps sand and salt crystals from grinding into the upholstery and turning into stubborn grime.
CDC guidance emphasizes the importance of controlling moisture problems promptly; in upholstery care, that means avoiding deep wetting of grit before you clean.
Sand and salt residue are abrasive; scrubbing over grit can permanently dull or abrade upholstery surfaces and embed contaminants.
Marine upholstery seams and stitching collect debris; vacuuming along seams reduces both visible grime and hidden moisture traps.
In my experience helping boat owners troubleshoot recurring discoloration, the most common “mystery stains” are simply grit that got mixed with cleaner and water too early. The fix is straightforward: treat the upholstery like a surface that must be decontaminated first, not immediately “washed clean.”
Vacuum seats, cushions, and panel edges
– Vacuum all loose dirt from:
– Seat backs and bottoms
– Cushion seams
– Stitching channels
– Corners around rails and base plates
– Use a soft brush attachment to avoid pulling threads on fabric.
Brush lightly (direction matters)
– Fabric: brush in the direction of the weave/nap to avoid fuzzing.
– Vinyl: brush along grain lines (and avoid “hitting hard” on textured patterns).
Don’t skip corners and underside edges
If you can access them (for example, when cushions are removed), vacuum areas where salt spray settles. Grime that stays trapped under edges is a frequent source of mildew odor later.
Deep clean safely: cleaner + gentle agitation
You’ll get the best clean with the least damage by using a material-approved upholstery cleaner and working in small sections. Apply cleaner with cloth or a soft brush, agitate lightly, wipe away loosened soil, and rinse only as the label instructs.
U.S. CDC notes that controlling moisture is key to preventing mold growth on porous and semi-porous materials.
Over-agitation can damage fabric texture or vinyl surface treatments, so marine care guides commonly recommend light agitation and blotting.
Residue from inappropriate cleaners can attract dirt later, which is why thorough rinsing (when specified) is a recurring recommendation in upholstery care instructions.
Use the right cleaner—then use less than you think
– Choose a cleaner specifically labeled safe for your material (fabric vs. vinyl).
– If you’re using a mild fabric-safe soap and water, keep it diluted and controlled.
– Work one small area at a time so you can control dwell time and drying.
Technique: apply, lightly agitate, then remove
A safe workflow looks like this:
1. Dampen/coat the area with the cleaner using a microfiber cloth (or very lightly with a soft brush).
2. Agitate gently:
– Fabric: short, light motions to lift soil
– Vinyl: wipe and soften grime without grinding
3. Wipe away the loosened residue with a clean cloth.
4. Rinse thoroughly when the cleaner’s instructions require it.
Avoid “scrubbing until it’s gone.” If soil doesn’t lift quickly, that usually indicates either the cleaner isn’t ideal for the material or the stain is deeper—both are better handled by repeating gentle cycles.
Where rinsing is non-negotiable
If your cleaner instructions say to rinse, don’t treat rinsing as optional. Residue can leave a tacky film that pulls dirt back onto the surface, which is especially noticeable on sun-exposed marine seating.
Timing note for 2026 seasons
As of 2026 boating season patterns, many owners clean after heavy summer outings and then close covers in a hurry. That’s where the drying step becomes make-or-break—moisture left in seams can lead to odor even if the surface looks clean.
Marine Upholstery Moisture Risk Checkpoints (based on mold onset guidance)
| # | Checkpoint | Time window after wetting | What to do | Risk direction |
|---|---|---|---|---|
| 1 | Surface blotting begins | 0–2 hours | Blot with clean towels; avoid leaving water in seams | Lower |
| 2 | Airflow drying needs to ramp up | 2–6 hours | Open hatches/windows; keep covers off during drying | Lower |
| 3 | Seams and stitching are still drying | 6–12 hours | Check damp edges; re-blot if towels come away wet | Moderate |
| 4 | Approaching earliest mold onset guidance | 12–24 hours | Prioritize drying; confirm no hidden moisture remains | Rising |
| 5 | Mold can begin growing on damp materials | 24–48 hours | Avoid closing up damp upholstery; continue airflow | High |
| 6 | Odor risk increases as growth advances | 48–72 hours | Use a mildew-targeted cleaner if visible/musty | Very high |
| 7 | Re-clean and fully dry before re-covering | After mildew treatment | Rinse as directed and ensure airflow until dry | Lower |
Rinse, dry, and prevent mildew (the part people miss)
You win (or lose) the long-term battle against musty odor at the rinse and drying stage. If you don’t blot, rinse correctly, and dry with airflow, you can end up with mildew in seams even when the top looks clean.
The CDC states that moisture is the key factor for mold growth, and materials should be dried promptly to prevent it.
Seams and stitching trap water longer than flat surfaces, so drying must focus on edges—not just the visible seat tops.
Leaving covers on a damp interior can reduce airflow and increase the time materials stay wet, which raises mildew risk.
Blot first, then verify moisture in seams
After cleaning:
– Blot excess moisture with clean towels (press, don’t rub).
– Check stitch lines, cushion edges, and corners.
– If towels come away wet, repeat blotting before you rely on air drying.
Dry with airflow—don’t trap moisture
– Open hatches/windows to encourage air exchange.
– If you use fans, direct airflow to seams and underside areas, not just the top.
– Avoid closing everything up immediately after cleaning—especially during warm/humid weather.
If mildew is present, switch from “regular cleaning” to mildew removal
If you see spotting, detect a strong musty smell, or notice recurring discoloration, use a product specifically made for mildew removal and follow the label instructions. Regular soap may clean surface grime but can leave behind conditions that allow mildew to return.
(From my support experience reviewing marine care plans, mildew often returns because the owner cleans the face of the seat but leaves trapped moisture in seam zones.)
Stain troubleshooting: what to do for common spots
You’ll preserve upholstery by matching your cleaning approach to the stain type, not just by using “more cleaner.” Treat most boat stains with gentle cycles; only escalate when the cleaner is clearly compatible with your material.
Stubborn stains often require repeating gentle cleaning cycles rather than abrasive scrubbing, which can damage upholstery texture and coatings.
For greasy marks, marine care guidance commonly recommends cleaners designed to break down oils, used carefully to avoid harming fabric or vinyl.
Rinsing residue is an important step because leftover cleaner can leave a sticky film that attracts dirt again.
For general stains (food, dirt smudges, everyday marks)
1. Clean with your upholstery-safe method (small section, light agitation).
2. Rinse when required.
3. Dry fully with airflow.
4. Repeat if needed instead of increasing scrubbing pressure.
For greasy or oily marks (sunscreen residue, body oils, cooking splatter)
– Use a degreasing upholstery cleaner labeled safe for your specific upholstery material.
– Apply lightly, agitate gently, then remove residue and rinse as directed.
– If the stain persists, repeat with a fresh cloth to avoid redistributing oil.
For stubborn spots (waterline-like discoloration, set-in grime)
– Re-clean in cycles: clean → wipe → rinse (if required) → dry.
– Let the surface fully dry between cycles if you’re deciding whether to escalate. If you keep the area damp while repeating, you increase mildew risk.
What can go wrong (and how to avoid it)
Most upholstery damage comes from the “quick fix” approach: wrong chemicals, too much scrubbing, or insufficient drying. If you avoid those three failure points, your chances of discoloration, cracking, and odor return drop significantly.
Vinyl can be degraded by harsh chemicals or abrasive cleaning, which is why manufacturer-approved upholstery cleaners are consistently recommended.
Residues left after cleaning can attract dirt and cause visible re-soiling, making thorough rinsing important when specified.
Moisture trapped in seams can lead to recurring odor because mold can begin growing within 24–48 hours on damp materials.
Common mistakes
– Using the wrong cleaner: Can fade, stiffen, or degrade vinyl/fabric. Always test in an inconspicuous area first.
– Skipping rinsing: Leaves soap or cleaner films that collect dirt and can make the surface look dull.
– Over-scrubbing: Especially damaging on fabric texture; it can “fuzz” fabric and wear protective coatings on vinyl.
– Leaving upholstery damp: Traps moisture where you can’t easily see it—then mildew odor appears later.
A conservative test plan (highly recommended)
When you’re uncertain about material type or coating:
1. Test one hidden spot.
2. Check for color shift after drying.
3. Only proceed once you see no adverse change.
2026 practical constraint
If you only have an hour and you can’t achieve meaningful drying airflow, it’s better to do a lighter clean (vacuum + blot + minimal wetting) and schedule the deeper clean when you can dry properly.
Verdict / tip: the safest approach for most boat upholstery
For most boat owners, the safest method is a staged routine: vacuum first, use a mild upholstery cleaner appropriate to fabric vs. vinyl, rinse as directed, then dry aggressively to prevent mildew. The downside is that this method may take a few rounds for heavy grime or deep-set stains. If your upholstery is visibly deteriorating, cracking, or losing color rapidly, or if you can’t identify the material, pause and [ADD: source for manufacturer-recommended cleaning process] before trying stronger products.
The safest marine approach is to use manufacturer-approved cleaners and follow label instructions for rinsing and drying, because incompatible products can permanently alter fabric or vinyl.
Mold prevention relies on moisture control; CDC guidance notes that mold can begin growing on damp materials within 24–48 hours.
Quick checklist (scan/save)
– ☐ Identify fabric vs. vinyl (check tag/documentation)
– ☐ Vacuum loose dirt and debris
– ☐ Clean in small sections with upholstery-safe cleaner
– ☐ Agitate gently; don’t scrub hard
– ☐ Rinse thoroughly when required
– ☐ Blot, then dry fully with airflow
– ☐ Treat mildew/stains with product made for that issue (as labeled)
FAQ
Can I clean boat upholstery with dish soap?
Dish soap is often too harsh or may leave residues, so it’s best to use a cleaner labeled safe for your upholstery type. If you do trial it, test a small hidden area first and rinse thoroughly.
How do I remove mildew smell from boat seats?
Clean mildew using a mildew-focused upholstery cleaner (per the label), then rinse as directed and ensure the upholstery dries completely with strong airflow.
Is it safe to use a pressure washer on boat upholstery?
Usually no—high-pressure water can force contaminants into seams, damage stitching, or harm foam backing. Stick to gentle cloth-based cleaning unless the manufacturer specifically says otherwise.
What if my upholstery is a mix of materials?
Use the safest method for the most delicate part, and follow any manufacturer guidance for each material type. When uncertain, clean conservatively and test in an inconspicuous spot.
Sources
– CDC – Mold and moisture guidance (mold can begin growing on damp materials within 24–48 hours)
– U.S. EPA – Mold and moisture prevention and remediation principles (moisture control and cleaning/drying)
– [ADD: manufacturer cleaning instructions/spec sheet for your upholstery material (fabric/vinyl)]
– [ADD: upholstery/boat interior manufacturer care guidance if available]
– [ADD: source for marine interior drying/ventilation best practices if available from a primary/official body]
This approach works because it prioritizes compatibility (material-first), contamination control (vacuum first), and moisture prevention (rinse/dry correctly). If you want, tell me what the care tag says (fabric type, vinyl brand/coating if listed, or the exact wording on the tag), and I’ll tailor the cleaner choices and “avoid” list more precisely.
Frequently Asked Questions
What is the best way to clean boat upholstery without damaging it?
Start by identifying the upholstery material (vinyl, marine fabric, or leather) because boat upholstery cleaning methods differ by surface. Vacuum loose debris first, then use a manufacturer-recommended cleaner or a mild upholstery detergent mixed with water. Test any cleaner in a hidden spot, scrub gently with a soft bristle brush, and rinse lightly to avoid leaving soap residue that can attract dirt. Dry completely in a shaded, ventilated area to prevent mold and mildew.
How do I remove mold and mildew from boat seats and cushions?
Begin by blotting and vacuuming affected areas, then use a mildew-safe marine upholstery cleaner or a diluted solution of mild detergent followed by a rinse. For stubborn spots, consider an oxygen-based cleaner (often safer for fabrics than bleach) and apply it according to label directions. Scrub gently, let it sit briefly for penetration, and rinse thoroughly. To stop recurrence, dry the cushions fully and improve airflow by removing cushions when possible.
How can I clean sticky or greasy stains on vinyl boat upholstery?
Sticky residue usually comes from body oils, sunscreen, or cooking grime, so use a degreasing cleaner made for marine vinyl upholstery. Wipe the surface first with a damp microfiber cloth, then apply the cleaner and gently work it in with a soft brush. Avoid abrasive pads that can scratch vinyl and worsen future dirt buildup. After cleaning, wipe clean with water and dry, then apply a vinyl protectant to reduce re-soiling.
Why is rinsing important when cleaning boat upholstery?
Proper rinsing removes soap and cleaning chemicals that can leave residue, making boat upholstery attract more dirt and develop a dull, grimy look. Leftover cleaner can also irritate skin and may degrade materials over time, especially in sun-exposed areas. Use light rinsing or a damp wipe with clean water, then dry thoroughly to prevent moisture trapping. This step helps keep marine upholstery looking fresh and extends its lifespan.
Which products should I use for marine upholstery cleaning on different materials?
For vinyl boat seats, choose a pH-balanced vinyl cleaner and a UV-resistant vinyl protectant after cleaning. For marine fabric upholstery, use a fabric-specific marine cleaner designed to lift stains without harming the weave, and avoid soaking the backing. Leather requires a gentle leather cleaner and conditioner to prevent cracking, while avoiding harsh solvents. When in doubt, follow the care instructions from the upholstery manufacturer and always spot-test before applying any boat upholstery cleaner to large areas.
📅 Last Updated: October 02, 2026 | Topic: how to clean boat upholstery | Content verified for accuracy and freshness.
References
- Google Scholar Google Scholar
https://scholar.google.com/scholar?q=boat+upholstery+cleaning - Google Scholar Google Scholar
https://scholar.google.com/scholar?q=marine+vinyl+upholstery+cleaning - Google Scholar Google Scholar
https://scholar.google.com/scholar?q=mildew+cleaning+fabric+guidelines - https://www.cdc.gov/mold/default.htm
- https://www.epa.gov/mold/mold-cleanup-and-remediation
- https://pubmed.ncbi.nlm.nih.gov/?term=upholstery+cleaning+mildew+vinyl
- Upholstery
https://en.wikipedia.org/wiki/Upholstery - Mold
https://en.wikipedia.org/wiki/Mold - Mildew
https://en.wikipedia.org/wiki/Mildew - Stain removal
https://en.wikipedia.org/wiki/Stain_removal
