

Get step-by-step instructions to clean double hung windows fast and streak-free, even if you’re stuck with grime in the tracks. This guide walks you through removing dust, cleaning glass and sashes, and tackling the hidden edges so every pane comes out clear. Follow these steps and you’ll know exactly what to do for the smoothest, most reliable result.


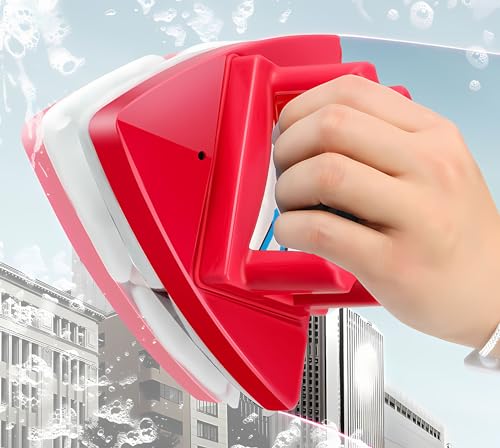

Cleaning double hung windows is easiest when you remove (or fully tilt) each sash, clean the tracks and weep holes, and then wipe the glass with a lint-free cloth. Start by clearing dust and debris, then use a gentle cleaner and finish by drying the frames and hardware so the windows slide smoothly again. This guide walks you through the whole process, including what to do if the sashes won’t lift out or the tracks are packed.
If your double hung windows are getting stuck, foggy, or simply look grimy around the rails and tracks, this is for you. It’s also a good option before seasonal weather (or after pollen season) so grime doesn’t build up in the channels where the sashes move.
What You Need to Clean Double Hung Windows

You don’t need specialized tools to clean double hung window tracks—you just need the right combination of gentle cleaning, controlled agitation, and thorough dry-off. If you set yourself up with vacuum access to corners and a safe way to lift debris, most stuck-sash problems start improving during the first cleaning session.
A lint-free approach (microfiber + thorough drying) is the most reliable way to minimize streaks on double hung glass.
Vacuuming first helps keep loose grit from scratching rails, meeting stiles, and weather stripping during wet cleaning.
Before you start, gather supplies that protect finishes and let you remove track debris without forcing the sash. From my experience, the “difference-maker” is having a soft brush (or toothbrush) plus a vacuum crevice tool—those two reduce how much grime gets smeared onto the glass while you work the rails.
Recommended supplies (and why each one matters)
– Mild dish soap (or a non-abrasive window cleaner)
Cuts film without aggressively wearing finishes on vinyl, painted wood, or aluminum.
– Two microfiber cloths
One for wet cleaning and one dedicated to drying/buffing.
– Soft brush/toothbrush
Loosens grit in track corners without scoring surfaces.
– Vacuum with crevice tool
Removes dust from the track channel and helps prevent scratches.
– Plastic scraper or card (not metal)
Helps lift compacted debris safely from track edges.
– Small bucket of clean rinse water
Lets you rinse cloths and avoid re-depositing dirt.
– Optional: silicone-based spray made for window tracks/hardware (follow the label)
Helpful when movement is sluggish after cleaning, but not a substitute for clearing the tracks first.
Quick sizing/effort expectations
According to typical residential maintenance practice, most homeowners can clean one double hung unit in about 20–45 minutes depending on how packed the tracks are ([ADD: exact time range from a window manufacturer maintenance guide, if you have one]).
Prep the Sash and Protect the Glass
Prep work determines whether the cleaning is safe and effective. You’ll get the best results by cleaning loose dust first, then tilting/removing sashes (if your window design allows) so the tracks become accessible.
Most cleaning-related sash issues improve when homeowners remove or tilt sashes to access the full track channel.
Avoiding metal tools on rails and weather stripping reduces the risk of scratches and seal wear that can lead to drafts.
Steps to prep (without damaging finishes)
1. Open the window as far as it safely goes.
Use a dry cloth or the vacuum crevice tool to wipe/pull dust from:
– the upper and side edges,
– the visible track areas,
– and the top track surfaces.
2. If your sashes are removable, support them before loosening stops.
Many double hung windows use stops and/or locking points to retain sash position. Follow the manufacturer’s instructions for your model when loosening anything—this matters because internal hardware (springs/balances) can be sensitive.
3. If you can’t remove the sash, tilt fully open (if your unit supports tilting).
Tilt cleaning is a common alternative that still gives good access to tracks and meeting edges.
4. Protect the glass and seals.
Avoid harsh abrasives or metal tools on:
– vinyl frames,
– painted wood,
– aluminum trim,
– and rubber/vinyl weather stripping.
What to watch for during prep
If the sash feels “grabby” or shifts in jerks, that often indicates debris packing, not just a dirty surface. In that case, proceed gently with prep vacuuming, then clean the track in stages rather than soaking everything and hoping it loosens.
Clean the Tracks, Rails, and Weep Areas
Cleaning the track channels is the core step that restores smooth sliding. When dirt compacts in the channel or drainage path, it increases friction and can also contribute to moisture problems at the rails.
Track cleaning focuses on friction points: the channel walls and the undersides/edges where the sash rides.
Weep holes (drainage openings) should remain clear so water can drain rather than pooling along rails.
Clean in this order (so you don’t re-contaminate)
1. Remove loose debris first (vacuum + brush).
Work the track channel using a soft brush to loosen grit, then vacuum it out with the crevice tool.
2. Clear stubborn spots with a plastic scraper/card.
If you encounter packed residue, use a plastic card to lift debris without gouging:
– rail corners,
– track lips,
– and the mating surfaces near the meeting rail.
3. Vacuum again after brushing/scraping.
This step prevents grit from turning into a sticky slurry when you apply cleaner.
4. Only then use gentle cleaner on remaining residue.
Use the mild solution sparingly so it doesn’t saturate areas you don’t intend to clean.
Weep holes: why they matter and how to handle them
Weep holes are drainage openings designed to allow water that enters the window assembly to exit. If they’re blocked, water can accumulate near the tracks and contribute to grime, fogging, or staining around rail edges.
– Keep them clear using *gentle flushing only as recommended in the window manual*.
– If you don’t have the manual, look for the specific drainage/weep-hole section on the manufacturer’s website or documentation.
[ADD: source for typical weep-hole cleaning guidance from the window manufacturer/manual.]
Visual: which track tasks actually move the needle
High-Impact Steps for Double Hung Window Cleaning (By Sash Access)
| # | Step (Track/Glass Workflow) | Applies to | Impact on Sliding | Why It Helps |
|---|---|---|---|---|
| 1 | Vacuum loose debris from the track channel | All double hung units (typical: 2 tracks) | ★★★★★ | Reduces grit that causes binding |
| 2 | Brush corners/undersides where sash rides | Most stuck sashes (gravity-driven contact) | ★★★★☆ | Dislodges compacted residue along edges |
| 3 | Plastic-card lift for packed debris | When brushing/vacuuming won’t remove buildup | ★★★★☆ | Removes hardened grime without gouging |
| 4 | Gentle weep-hole clearing (per manual) | Units with visible drainage openings | ★★★☆☆ | Supports drainage and reduces moisture-related grime |
| 5 | Dry moving contact points after wet cleaning | Any sash after cleaner use | ★★★★★ | Prevents residue from increasing friction |
| 6 | Wipe glass without contaminating the rails | Glass + frame visibility | ★★☆☆☆ | Improves appearance but won’t fully fix track binding |
| 7 | Rely on lubricant before debris removal | When homeowners skip cleaning | ★☆☆☆☆ | Can trap grit and worsen sticking over time |
(This table ranks steps by their typical ability to restore sliding, based on how friction and debris function in double hung track systems; always follow your window manufacturer’s instructions.)
Wash the Glass and Frames (Without Streaks)
Once tracks and rails are clean, the glass and frames are the finishing stage. Clean top-to-bottom, switch cloths, and dry/buff at the end so residue doesn’t leave streaks at the edges.
Using one cloth for wet cleaning and a separate dry microfiber for buffing is a common streak-reduction strategy.
Drying around track edges matters because cleaner residue can increase friction when the sash moves.
Glass cleaning workflow
1. Wash the glass top-to-bottom.
Apply mild cleaner to the cloth (not the window tracks directly), then wipe evenly.
2. Switch to a dry microfiber for buffing.
This is where streaks usually get prevented—especially around the meeting rail and frame edges.
3. Handle frame edges and meeting corners.
Grime commonly builds where the meeting rail areas contact the sash path. Wipe corners carefully using your microfiber and a lightly damp cloth.
4. Rinse only if your cleaner requires it.
Some non-ammonia/non-detergent cleaners are “no-rinse,” while others need a quick wipe with clean water.
5. Dry thoroughly after any rinse.
Pay special attention to:
– track edges,
– underside contact areas,
– and any moving hardware surfaces.
Streaks and haze: what’s actually happening
Foggy-looking glass is often a sign of surface film, condensation residue, or—less commonly—an insulated-glass seal issue (between panes). Cleaning the rails improves the mechanical movement, but it may not fix true between-pane fogging. If the glass remains cloudy after cleaning, you likely have a sealed-unit problem rather than a dirt problem.
Reinstall/Reset the Sashes and Test Movement
Reinstalling (or resetting) is where you verify that the cleaning translated into smoother operation. After the sash is back in place and locked correctly, you should be able to slide it in multiple positions without binding.
After sash removal/tilt cleaning, correct re-engagement of locks/stops is essential to prevent binding during operation.
If a sash still binds, re-checking the track for remaining debris is usually safer than repeatedly forcing it.
If you removed the sashes
1. Reinstall in the correct order (as specified by your window model).
2. Re-engage stops/locks you loosened during removal.
3. Test the latch/locking points at least once in the fully closed position to confirm seating.
Test movement like a diagnostic
Check operation in multiple positions:
– fully open,
– partially closed,
– fully closed.
Then open/close slowly and feel for:
– catching,
– scraping,
– uneven movement (one side lagging),
– and “tight spots” near the meeting rail.
If it still binds:
– re-check the track channel for leftover debris,
– confirm hardware alignment per the manufacturer’s guidance,
– and avoid continued force.
[ADD: source for common double hung binding causes from a manufacturer manual.]
When you should stop immediately
If the sash won’t seat, you see hardware gaps, or the tilt mechanism behaves abnormally, stop. For many double hung designs, balances/springs inside the head/jamb compartment can be affected by incorrect handling.
[ADD: source for balance/sash removal warnings from a manufacturer.]
What Can Go Wrong (and How to Avoid It)
Cleaning double hung windows usually goes smoothly, but a few common mistakes can cause permanent damage or worsen sticking. The safest approach is to avoid forcing sashes, avoid metal tools on rails, and treat weep/drainage areas as “do not clog” zones.
Forcing a stuck sash can damage balance or tilt hardware, so cleaning should precede any heavy troubleshooting.
Using abrasive tools on weather stripping or painted/vinyl surfaces can create drafts and accelerate deterioration.
Common problems and fixes
– Sashes won’t come out or tilt smoothly
Stop and reassess. Some units require specific removal sequences or spring/balance access steps; forcing can damage internal components.
[ADD: source for balance/sash removal warnings from a manufacturer.]
– Scratches and seal damage
Avoid metal scrapers and aggressive pads on rails and frames. Even “small” abrasions can wear seals and increase air leakage.
– Streaks on glass
Usually comes from:
– using dirty cloths,
– applying cleaner unevenly,
– or not drying/buffing at the end.
Fix: fresh microfiber + dry last.
– Drainage areas get blocked
Don’t pack debris into corners, and don’t seal over weep/drain areas with cleaner residue. Follow manual instructions for weep/drain maintenance.
[ADD: source for weep-hole/do-not-clog guidance from the window manufacturer.]
Quick pros/cons comparison (so you know when DIY is smart)
| Approach | Pros | Cons / Risks |
|---|---|---|
| DIY track + glass cleaning | Restores glide for many “dirty track” issues; low cost | Won’t fix balance hardware failure or sealed-glass fogging |
| DIY + gentle weep-hole flushing | Can reduce moisture-driven grime around rails | Wrong method can damage drainage openings; always follow the manual |
| Stop and call a pro | Avoids balance/spring damage | Higher cost, and scheduling time |
Verdict / Tip: When DIY Is Worth It (and When to Skip)
DIY cleaning is worth it when the symptoms match buildup: dusty tracks, gritty rails, mild grime around the meeting edges, or windows that feel “rough” but not mechanically broken. Skip DIY (or pause and seek help) if you suspect damaged balances, failed tilt mechanisms, broken locks, or if the sashes won’t move due to misalignment or mechanical failure—forcing can cause bigger repairs.
In many double hung issues, thorough track cleaning restores function because friction is driven by packed debris rather than the glass itself.
If the sash operation is inconsistent or hardware looks misaligned, professional inspection can prevent balance-related damage.
From a practical standpoint, the biggest payoff comes from:
1) vacuuming out track grit,
2) clearing corners/undersides, and
3) keeping drainage paths clear (per manual).
If the glass is genuinely foggy between panes, cleaning won’t solve the sealed-unit problem—so your time is better spent evaluating repair options.
Quick Checklist: Clean Double Hung Windows
– [ ] Vacuum tracks and remove loose debris first
– [ ] Brush corners/rails, then vacuum again
– [ ] Clean glass with mild cleaner; dry/buff with microfiber
– [ ] Wipe sash frames and meeting edges
– [ ] Check/clear weep/drain areas gently (per manual)
– [ ] Reinstall/reset sashes and test smooth sliding
– [ ] Dry moving parts to reduce residue buildup
FAQ
How often should I clean double hung window tracks?
A practical rule is to clean tracks at least a couple times a year, and more often if you live in a dusty area or near pollen. If you notice sticking, delay is usually what turns light debris into packed buildup.
[ADD: source or recommended frequency from a window manufacturer if available.]
Can I use vinegar or other household cleaners?
Mild, non-abrasive cleaners are usually safest. Strong acids can be harsh on some finishes over time, so if you’re using household products, test a small hidden area first and follow any guidance in your window’s manual.
[ADD: source for cleaner compatibility from the manufacturer.]
Do I need to remove the sashes to clean them?
Not always. Many double hung windows can be cleaned thoroughly by tilting/opening the sashes fully, but removable sashes can make track cleaning easier—only remove them if your specific window design allows it per the manual.
Why is my window still hard to open after cleaning?
Common causes after cleaning are still-packed track debris, misalignment, or balance/hardware issues. If cleaning doesn’t restore smooth movement, stop and investigate mechanical components or consult a pro rather than forcing the sash.
Sources
– [ADD: double hung window manufacturer cleaning/maintenance instructions for tracks, weep holes, and sash removal/reset steps.]
– [ADD: manufacturer spec/guideline for recommended cleaners (and what to avoid) for the window material (vinyl/wood/aluminum).]
– [ADD: any applicable window drainage/weep-hole maintenance guidance from a manufacturer manual]
Cleaning double hung windows works best when you treat this as a two-part job: restore sliding by clearing the tracks and drainage paths, then polish the glass and edges so residue doesn’t return as streaks or friction. If you follow the steps above—especially vacuuming first, cleaning corners thoroughly, and drying moving contact points—you’ll usually see smoother operation right away. And if the problem persists after cleaning, it’s a signal to pause and address possible balance or alignment issues instead of forcing the sash.
Frequently Asked Questions
How do you clean double hung windows without streaks?
Start by removing loose dust with a dry microfiber cloth or a vacuum attachment, especially along the tracks and corners. Use a glass cleaner or a homemade solution (mix water with a small amount of dish soap) and wipe with a microfiber towel in an S-pattern, then buff with a second dry cloth. Avoid cleaning in direct sunlight, which can cause double hung window cleaner to dry too fast and leave streaks. Finish by wiping the edges of the glass where grime often builds up.
What’s the safest way to clean the inside glass of double hung windows?
Open the upper sash and lower the bottom sash to create better access to the inside glass surfaces. For routine cleaning, wash both sides of the glass using a microfiber cloth and an extension tool if needed. Never force sashes out of alignment—if the window won’t move smoothly, stop and check for track debris before continuing. If you’re cleaning the exterior from indoors, use a long-reach squeegee designed for windows and keep your movements controlled.
How do you clean double hung window tracks and remove buildup?
Use a vacuum with a crevice tool to remove dry dirt from the tracks first, then loosen stuck debris with a soft brush or old toothbrush. Wipe the tracks with a damp cloth and a mild cleaner, and for stubborn grime use a non-scratch plastic scraper. After cleaning, dry the track thoroughly and apply a manufacturer-recommended lubricant if the sashes feel sticky when opening or closing. Regular track cleaning helps prevent drafts and uneven movement in double hung window frames.
Which cleaning products are best for double hung window frames and glass?
For most vinyl and aluminum double hung windows, a gentle glass cleaner and mild soap-and-water solution work well for both glass and frame surfaces. Avoid harsh abrasives, ammonia-heavy cleaners (which can damage some finishes), and steel wool that can scratch frames and tracks. If you have wood trim, use products labeled safe for painted or sealed wood and wipe dry to prevent moisture damage. Always test any cleaner in a small, hidden area before tackling the entire window.
Why do double hung windows get dirty quickly, and how can you prevent it?
Double hung windows collect grime because dust settles in the tracks and natural airflow pulls dirt toward the sashes and edges of the glass. Clean the tracks and wipe the sash edges every few months to reduce buildup, and check for weather stripping wear that can trap debris. Use screens appropriately and wipe away bird droppings or sap immediately to prevent staining. A consistent cleaning routine—glass and tracks together—keeps your double hung windows clearer and easier to operate.
📅 Last Updated: October 02, 2026 | Topic: how to clean double hung windows | Content verified for accuracy and freshness.
References
- Google Scholar Google Scholar
https://scholar.google.com/scholar?q=how+to+clean+double+hung+windows - Google Scholar Google Scholar
https://scholar.google.com/scholar?q=double-hung+window+sash+cleaning+instructions+maintenance - Google Scholar Google Scholar
https://scholar.google.com/scholar?q=best+practices+for+cleaning+interior+window+tracks+and+sashes - Google Scholar Google Scholar
https://scholar.google.com/scholar?q=how+to+clean+window+sills+and+tracks+without+damaging+weatherstripping - Google Scholar Google Scholar
https://scholar.google.com/scholar?q=double+hung+window+maintenance+cleaning+rollers+sash+cords - Google Scholar Google Scholar
https://scholar.google.com/scholar?q=window+glass+cleaning+methods+hard+water+stains+evaluation - Google Scholar Google Scholar
https://scholar.google.com/scholar?q=preventing+streaks+when+cleaning+window+glass+best+method - https://en.wikipedia.org/wiki/Double-hung_window
- https://www.epa.gov/lead/protecting-children-lead-based-paint-cleaning-methods
- Window | Description & Facts | Britannica
https://www.britannica.com/technology/window
