

Learn how to clean brushed aluminum without ruining the finish—use the right method and you’ll avoid the haze, streaks, and scratch marks that cheap cleaners create. For most brushed aluminum surfaces, gentle dish soap or a pH-neutral cleaner plus microfiber wiping in the grain direction is the fastest, safest winner. Follow with a light rinse and thorough dry, and you’ll restore shine without flattening the brush texture.
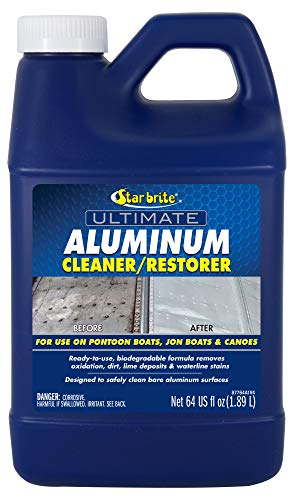


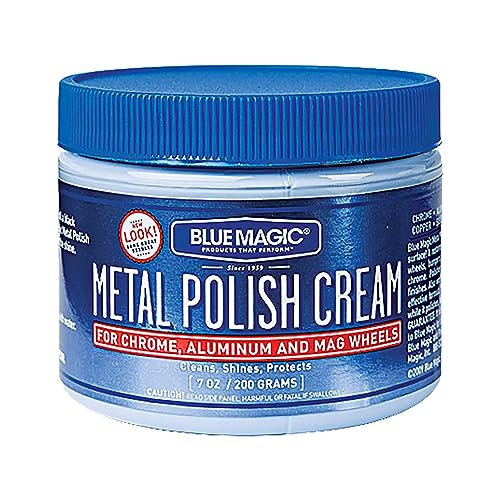
Clean brushed aluminum by removing dust first, then washing with mild dish soap and warm water, and always wiping strictly along the brushed grain. If fingerprints, oxidation, or water spots remain, step up only to a non-abrasive cleaner or metal polish—never scrubbing with abrasives that erase the directional texture.
For brushed aluminum, clean in the direction of the grain and avoid harsh, abrasive cleaners that can erase the brushed texture. Start with mild dish soap and warm water, then spot-clean tougher grime with a non-abrasive cleaner or dedicated metal polish. This article walks you through safe methods, the right tools, and how to prevent streaks and permanent scuffs.
This is for homeowners and DIYers cleaning brushed aluminum items like appliance panels, rails, fixtures, or décor. It’s especially useful if you want to remove fingerprints, oxidation, or water spots without damaging the directional pattern.
Gather the right supplies

To preserve the brushed pattern, gather tools that clean effectively without mechanically erasing the grain. The right supplies matter because brushed aluminum fails in two ways: streaking from residue and texture loss from abrasion.
Use soft microfiber cloths and non-abrasive sponges to clean brushed aluminum while minimizing scratch marks that disrupt the directional finish.
Mild dish soap plus warm water is the safest “first line” because it dissolves skin oils and everyday grime without aggressive polishing action.
Here’s what to have on hand before you start, plus why each item matters.
– Soft microfiber cloths (multiple) and a soft-bristle brush or sponge
Microfiber is designed to lift soils rather than grind them; multiple cloths let you separate “wash” from “dry/finish.”
– Mild dish soap, warm water, and a non-abrasive cleaner/polish (as needed)
Choose a cleaner labeled for metal or aluminum, and avoid products that include scouring agents.
Material reality: hardness is why abrasives are risky
Brushed aluminum is visually sensitive because the texture is created by controlled abrasion (the grain). Once you add new abrasion, you widen or flatten those micro-scratches.
To understand why abrasives are so harmful, consider relative hardness. According to ASM Handbook (materials hardness references), aluminum metal has a Mohs hardness around ~2.75, while aluminum oxide (the protective surface film) is much harder at ~9 on the Mohs scale. That mismatch is one reason soot, sand, and gritty cleaners can leave visible damage even if aluminum itself is relatively soft.
Abrasion Risk When Cleaning Brushed Aluminum (vs. Aluminum ~Mohs 2.75)
| # | Material in the “gunk” | Typical Mohs hardness | What it usually is | Finish-damage risk (1–10) |
|---|---|---|---|---|
| 1 | Aluminum oxide (Al₂O₃) | ~9 | Protective film / oxide particles | 10 |
| 2 | Quartz / silica (SiO₂) | ~6.5 | Sand/dust grit | 9 |
| 3 | Iron oxide (rust, mixed phases) | ~5.5–6.5 | Oxidation residue | 8 |
| 4 | Glass fragments (typical silicates) | ~5.5–6.5 | Hard particles from debris | 7 |
| 5 | Chalk / calcite (CaCO₃) | ~3 | Mild abrasive dust | 5 |
| 6 | Talc (soft powder) | ~1 | Soft dust residue | 2 |
| 7 | Clean water + soap (no grit) | ~0 | No abrasive particles | 1 |
Risk scale is based on the relative ability of common particles (by Mohs hardness) to abrade the aluminum surface and disrupt brushed grain.
Pre-clean: remove dust and grit first
The fastest way to prevent permanent scuffs is to remove loose dust before you introduce water or cleaner. Wetting grit and then wiping can “grind” particles into the direction of the grain, making streaks and scratchy texture permanent.
Dry-wiping brushed metal before wet cleaning reduces the chance you’ll smear abrasive dust across the directional finish.
Keeping grit off the surface before applying water helps prevent new micro-scratches that show up as dull patches under light.
Dry-wipe with a clean microfiber cloth to lift loose dust before wet cleaning
Start with a clean, dry microfiber cloth and wipe gently along the grain direction. If you’re cleaning an appliance panel, work top-to-bottom or side-to-side following the brush lines—don’t “reset” your direction mid-pass.
Key details:
– Use light pressure. Brushed aluminum is a texture finish; strong pressure adds abrasion.
– Flip the cloth often so you’re always using a clean area.
Rinse with water (or wipe damp) to prevent grinding grit into the finish
If the surface is dusty, avoid soaking it immediately. Instead, dampen a microfiber and wipe once along the grain, then proceed with soap.
This “damp wipe” step is especially helpful for:
– Door rails and stair rails (they collect household dust)
– Fixture plates near powder rooms (they pick up fine aerosol residue)
– Decorative panels (they often trap skin oils plus airborne grit)
Clean safely: use the grain, not circles
The best cleaning technique for brushed aluminum is straight, grain-following strokes with minimal pressure. Circular scrubbing creates cross-hatching that permanently changes the appearance of the directional finish.
Cleaning along the brushed lines reduces visible streaks because it avoids leaving cross-directional abrasion marks.
A pH-neutral, non-abrasive approach is the safest escalation path: soap first, then a dedicated metal polish only if needed.
Work along the brushed lines with light pressure to reduce visible streaks
Wipe in the direction of the grain, using one-direction passes. If the finish has a clear “swirl” direction, treat it like a road—stay in the same lane.
Practical method:
1. Apply the soap solution to a microfiber (not directly onto seams).
2. Wipe along the grain for small sections (example size: a hand-width area).
3. Immediately move to a fresh cloth or rinse step (depending on how sudsy the surface gets).
Use the gentlest cleaner that works: soap solution first, then step up only if needed
Begin with mild dish soap and warm water. Warm water helps emulsify oils so you remove fingerprints without needing aggressive polishing.
If soap removes most stains but leaves faint “ghosting,” that’s often residue from dried water minerals—tackle it with a non-abrasive metal cleaner or polish rather than increasing scrubbing force.
Quick spot-clean for fingerprints and light smudges
Fingerprints are largely skin oils. They smear easily and “catch” light, so you want controlled, directional removal.
– Dampen a microfiber cloth with the soap solution and wipe in one direction
– Dry immediately with a separate clean microfiber to prevent water marks
For best results, keep spot-cleaning localized. Over-wiping larger areas increases the chance of uneven sheen.
Drying immediately after wiping helps prevent mineral deposition that can appear as water spots on brushed aluminum.
For tougher grime and oxidation (non-abrasive only)
If you see oxidation haze or stubborn residue, switch to a non-abrasive metal cleaner or polish that is explicitly safe for aluminum.
– Try a non-abrasive metal cleaner or polish, following the product directions
– Lightly buff along the grain; stop and reassess rather than repeatedly scrubbing
Important escalation rule: fewer passes is better than “many small scrubs.” If you repeat an abrasive-friendly motion, you gradually flatten or blur the brushed texture.
Drying and finishing: prevent streaks and new marks
The finish looks clean when it’s fully dried without introducing new friction. Air-drying often leaves mineral residue trails, especially in humid climates or on fixtures exposed to hard water.
Drying brushed aluminum with a clean microfiber immediately after cleaning reduces spotting compared with air-drying.
If the finish looks patchy, continuing along the grain is safer than switching to circular scrubbing.
– Dry with a clean microfiber (no air-drying) to reduce spotting
Use a dry cloth and wipe along the grain. If the cloth drags, you may need a light rinse first, not more force.
– If the finish looks “patchy,” continue only along the grain—don’t switch to circular scrubbing
Patchiness often indicates residue concentration differences or slightly different abrasion patterns across sections.
A note on protective coatings
Some brushed aluminum is coated (painted, powder-coated, anodized, or covered with a protective clear finish). Coatings can be more sensitive to certain polishes than bare aluminum, so always follow the product label instructions and spot-test in a hidden area first.
What can go wrong (and how to avoid it)
Most failures happen because people either scratch the texture with abrasives or leave residue that dries unevenly. If you understand the failure modes—abrasion vs. residue—you can avoid both.
Abrasive tools like steel wool can erase brushed texture because they remove the directional micro-scratches that define the finish.
Streaks typically come from leftover soap, cleaner, or mineral deposits; rinsing and immediate microfiber drying prevents them.
– Scratches from abrasive pads (steel wool, scouring sponges, harsh powders): use only soft, non-abrasive materials
Even “fine” scrubbing pads can create cross-grain damage that reads as dull patches.
– Permanent loss of the brushed texture: aggressive cleaning can flatten the grain pattern
Once the texture is flattened, you usually can’t restore it without refinishing.
– Streaking from drying residue: rinse/spot-clean thoroughly and dry right away
Water spots and soap films both appear as light-reflecting lines and blotches.
Comparison: what to use vs. what to avoid
Below is a quick comparison to guide your next step when you’re deciding between “safe” and “stronger.”
| Method | Best for | Main risk |
|---|---|---|
| Warm water + mild dish soap | Fingerprints, light smudges, daily film | Streaks if not dried immediately |
| Non-abrasive metal cleaner/polish | Oxidation haze, persistent water marks | Texture dulling if over-buffed or used too aggressively |
| Steel wool / scouring powders | Typically not recommended | Cross-scratches that permanently alter the brushed grain |
Safety note: acids and aggressive solvents
Some cleaners can react with aluminum or harm coatings depending on formulation. According to U.S. EPA guidance on chemical hazards (general handling), acids and strong solvents can be hazardous to materials and people alike; always check the product label compatibility and wear basic eye/skin protection.
Verdict / tip: safest approach, and who should skip DIY
If you want the lowest risk, start with soap and water, always wipe along the grain, and only use non-abrasive cleaners when needed. The downside is that this “gentle-first” method may take a little longer for heavy oxidation, but it preserves the directional texture.
Skip DIY or test carefully first if the aluminum is coated (anodized, powder-coated, or part of a specialty finish) and you’re unsure how a cleaner/polish will behave—some products can dull or discolor coatings even when they’re labeled for metal.
Wiping strictly along the brushed grain helps preserve the directional texture, while circular scrubbing tends to introduce cross-directional marks.
For unknown finishes, a hidden-area spot test prevents permanent sheen changes or coating discoloration.
[ADD: source for “wipe along the grain” best-practice from a manufacturer or finish guide.]
Scan-and-save checklist
If you follow this order, you’ll remove grime without erasing the brushed finish. This checklist is designed for quick reference during real home cleanups in 2025 and beyond.
– [ ] Dry-wipe dust first (no rubbing grit)
– [ ] Use warm water + mild dish soap
– [ ] Wipe strictly along the brushed grain
– [ ] Non-abrasive tools only
– [ ] Rinse/spot-clean as needed, then dry immediately with microfiber
– [ ] Avoid steel wool, scouring powders, and harsh chemicals
FAQ
Can I use vinegar or glass cleaner on brushed aluminum?
It depends on the finish and any coatings; some cleaners can leave residue or dull certain surfaces. If you try it, spot-test first and keep it mild—[ADD: specific guidance/source for vinegar/glass cleaner compatibility].
How do I remove water spots from brushed aluminum?
Try mild soap and water first, wipe along the grain, then dry immediately. If spots persist, use a non-abrasive metal cleaner/polish per the label—[ADD: source for appropriate spot-treatment method].
What should I never use to clean brushed aluminum?
Avoid abrasive pads, scouring powders, steel wool, and strong solvents/bleaches unless the product explicitly says they’re safe for brushed aluminum finishes.
Will polishing make brushed aluminum look “smooth” or uniform?
Yes—over-buffing can reduce the visible brushed texture. If you want to preserve the pattern, use light pressure and stop early; work along the grain.
Sources
– [ADD: manufacturer or official care guidance for brushed/anodized aluminum cleaning—e.g., from an aluminum fixture/appliance manufacturer]
– [ADD: product-label instructions for any non-abrasive metal cleaner/polish used in your workflow]
Cleaning brushed aluminum is mostly about technique: remove dust first, use mild cleaner, wipe strictly along the grain, and dry immediately to prevent streaks. If grime is stubborn, step up gradually with non-abrasive cleaners rather than scrubbing harder. Try the soap-and-water method first on a small, discreet area, then follow the grain-focused steps above for a finish that stays true to the brushed pattern.
Frequently Asked Questions
What is the safest way to clean brushed aluminum without scratching it?
Start by dusting or rinsing the brushed aluminum to remove grit, since abrasive particles can cause visible scratches. Use a microfiber cloth with warm water and a mild dish soap, wiping gently in the same direction as the grain. Avoid steel wool and harsh scouring pads, and dry immediately with a clean microfiber towel to prevent water spots.
How do you remove oxidation or water spots from brushed aluminum?
For light oxidation, apply a solution of equal parts white vinegar and water, then wipe along the brushing direction with a soft cloth. Let it sit for 1–3 minutes, gently buff, and rinse with clean water before drying thoroughly. If stains persist, a non-abrasive aluminum cleaner or a paste made from baking soda and water used lightly (no scrubbing across the grain) can help.
How can you clean brushed aluminum that has greasy residue or fingerprints?
Use warm soapy water first, then follow up with isopropyl alcohol on a microfiber cloth for fingerprint and oily smudges. Wipe in the grain, and don’t soak the surface unless the product area is sealed, as liquids can seep into seams. Rinse after alcohol if needed, then dry immediately to maintain a clean, streak-free brushed look.
Which cleaning products work best for brushed aluminum finishes?
The best options are mild dish soap, pH-neutral cleaners, and aluminum-specific cleaners that are labeled safe for brushed metal finishes. For maintenance, microfiber cloths and soft non-scratch sponges (like foam) provide effective cleaning without marring the texture. Steer clear of abrasive powders, “metal polish” that’s overly gritty, and chlorine-based cleaners, since they can dull the finish or cause pitting.
Why should you always clean brushed aluminum in the same direction as the grain?
Brushed aluminum has a visible texture pattern, so wiping across the grain can create cross-scratches that stand out under light. Cleaning along the grain helps maintain the uniform brushed appearance and reduces the chance of noticeable streaking. Pair that technique with gentle pressure and proper drying to keep your aluminum looking consistent and polished.
📅 Last Updated: October 02, 2026 | Topic: how to clean brushed aluminum | Content verified for accuracy and freshness.
References
- https://scholar.google.com/scholar?q=how+to+clean+brushed+aluminum Google Scholar
- Google Scholar Google Scholar
https://scholar.google.com/scholar?q=brushed+aluminum+surface+cleaning+mild+detergent+non+abrasive - Google Scholar Google Scholar
https://scholar.google.com/scholar?q=aluminum+surface+cleaning+corrosion+oxide+layer+removal - https://en.wikipedia.org/wiki/Aluminum
- Aluminium oxide
https://en.wikipedia.org/wiki/Aluminium_oxide - https://pubmed.ncbi.nlm.nih.gov/?term=aluminum+surface+cleaning+corrosion
- https://pubmed.ncbi.nlm.nih.gov/?term=aluminum+oxide+removal+cleaning+chemistry
- https://www.sciencedirect.com/search?qs=aluminum+surface+cleaning+process+oxide+removal
- https://www.sciencedirect.com/search?qs=mechanical+surface+preparation+aluminum+brushed+finish+cleaning
- https://www.britannica.com/science/aluminum-chemical-element
