

Start by gathering your cleaning supplies specific to your baseboards and flooring types. First, remove dust and debris using a vacuum or microfiber cloth. For baseboards, use mild detergent and a soft brush for deep cleaning, rinsing and drying carefully to avoid damage. Hardwood floors need gentle mopping with a wood-safe cleaner, while tile grout benefits from regular scrubbing and sealing. Following this method protects surfaces and maintains their look. More detailed steps can help you perfect your routine.



Preparing Your Cleaning Supplies

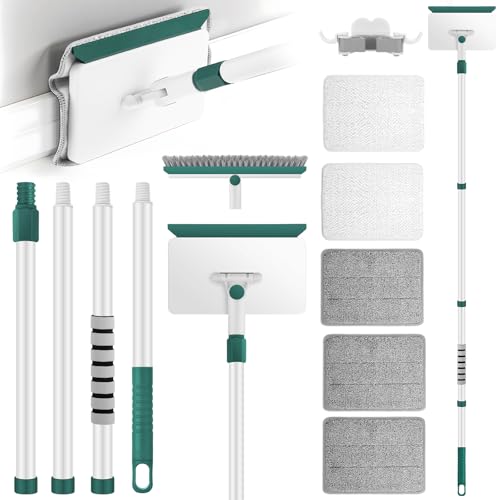
Before you begin deep cleaning your baseboards, it’s essential to gather all necessary supplies to guarantee an efficient process. Start by choosing cleaners suited to your baseboard material—mild detergents work well for painted wood, while stronger solutions might be necessary for stubborn grime on vinyl or plastic. Avoid harsh chemicals that could damage surfaces. Next, focus on organizing tools systematically: microfiber cloths, soft brushes, and a bucket of warm water should be within easy reach. Having a dedicated caddy or tray keeps everything orderly, reducing interruptions during cleaning. Preparing your supplies thoughtfully not only streamlines your task but also gives you the freedom to focus on precision without scrambling for items mid-clean. This methodical setup guarantees a smooth, effective deep cleaning experience. Remember to wear gloves for hand protection during cleaning to keep your skin safe from irritants.
Removing Dust and Loose Debris
Once your supplies are ready, you’ll want to tackle the dust and loose debris on your baseboards to prevent smearing during deeper cleaning. Start with vacuum attachments designed for crevices to remove stubborn dust. Follow with precise dusting techniques using a microfiber cloth to capture fine particles without scattering them. Remember that microfiber cloths trap dust effectively and reduce the spread of particles during cleaning.
| Feeling Free To… | After Removing Dust |
|---|---|
| Breathe Easy | Cleaner Air Quality |
| Move Freely | No Obstructions |
| Feel Accomplished | Visible Freshness |
| Enjoy Comfort | Reduced Allergens |
| Relax More | Peace of Mind |
Deep Cleaning Baseboards Effectively

Although removing dust is essential, deep cleaning your baseboards requires a targeted approach to eliminate grime and buildup effectively. Start by identifying your baseboard materials—wood, PVC, or MDF—as this influences your cleaning techniques. For painted wood, use a mild detergent mixed with warm water and a soft cloth to avoid damage. For PVC or vinyl, a stronger solution with vinegar or a gentle all-purpose cleaner works well. Dip a toothbrush or small brush in the solution to scrub tight corners and grooves. Rinse with a clean damp cloth to prevent residue. Dry thoroughly to avoid warping or mold. By tailoring your cleaning techniques to the specific baseboard materials, you maintain their appearance and durability, giving you the freedom to enjoy a truly fresh, polished finish. Regular cleaning maintains the appearance of baseboards and helps prevent costly repairs down the line.
Cleaning Hardwood Flooring
When cleaning hardwood flooring, start by removing dirt and grime with a soft broom or vacuum to prevent scratches. Use a damp mop with a hardwood-safe cleaner to avoid damaging the finish. Always protect the wood by drying it thoroughly and avoiding excess water. Using a microfiber mop can help hold moisture without over-wetting the surface.
Removing Dirt and Grime
Before tackling the baseboards, you’ll want to thoroughly clean the hardwood flooring to prevent dirt and grime from transferring back onto the freshly cleaned surfaces. Start with a dry dust mop or vacuum to remove loose debris. For dirt removal techniques, use a microfiber mop dampened with a mixture of warm water and a few drops of mild dish soap. Avoid soaking the floor, as excess water can damage hardwood. For stubborn grime fighting solutions, try a blend of vinegar and water—just one part vinegar to ten parts water—to break down buildup effectively without harsh chemicals. Work in small sections, rinsing the mop frequently. This methodical approach guarantees your hardwood stays clean and free from dirt and grime, creating a fresh canvas before you focus on the baseboards.
Protecting Hardwood Finish
To maintain the beauty of your hardwood flooring, you’ll need to protect its finish during cleaning. This means focusing on scratches prevention and moisture control to extend the floor’s life and appearance. Avoid harsh chemicals or excessive water that can damage the finish or warp the wood. Instead, use gentle, hardwood-specific cleaners and soft cloths or mops.
Here are five essential tips to protect your hardwood finish:
- Use a microfiber mop to minimize scratches
- Clean spills immediately to prevent moisture damage
- Avoid abrasive scrubbers or harsh detergents
- Place felt pads under furniture legs for scratches prevention
- Maintain consistent room humidity to control moisture
Maintaining Tile and Grout

Although tile and grout are durable materials, they require regular maintenance to prevent dirt buildup and discoloration. To keep grout clean, focus on grout maintenance by scrubbing with a soft brush and a mild cleaner weekly. Avoid harsh chemicals that can erode grout. Periodically, inspect grout lines for cracks or wear, addressing any damage promptly to maintain integrity. Tile sealing is essential; it creates a protective barrier that repels stains and moisture, extending tile life. Apply a high-quality sealer every one to two years, depending on foot traffic. By following these steps, you’ll preserve your tile’s appearance and avoid costly repairs, giving you freedom from constant deep cleaning while enjoying lasting, fresh-looking floors. Knowing the difference between grout types helps in choosing the right cleaning and sealing methods for your tiles.
Refreshing Carpeted Areas
Keeping your tile and grout in top shape helps maintain overall floor cleanliness, but carpeted areas demand a different approach to stay fresh. Carpet cleaning and carpet maintenance require specific steps to effectively remove dirt and allergens while preserving fibers. To refresh your carpeted areas, focus on these key actions:
Effective carpet care involves targeted cleaning steps to remove dirt and allergens while protecting fibers.
- Vacuum regularly to prevent dirt buildup.
- Treat stains promptly using appropriate cleaners.
- Schedule professional deep cleaning annually.
- Use carpet protectors to reduce wear near baseboards.
- Allow carpets to dry completely after cleaning to avoid mold.
- Additionally, vacuum regularly and thoroughly to capture hidden debris and maintain carpet longevity.
Frequently Asked Questions
How Often Should I Deep Clean My Baseboards and Flooring?
You should prioritize baseboard maintenance by deep cleaning them every three to six months, depending on your home’s traffic and dust levels. For flooring, aim for a thorough cleaning monthly to keep surfaces in top shape. Adjust your cleaning frequency if you have pets or allergies. Sticking to this methodical schedule guarantees your space stays fresh and allows you the freedom to enjoy a clean, comfortable environment without constant upkeep.
Can I Use Vinegar to Clean Baseboards Without Damaging Paint?
You can use vinegar to clean baseboards since its natural vinegar benefits include cutting grease and grime effectively. However, to guarantee paint safety, dilute white vinegar with water—usually one part vinegar to four parts water—to avoid damaging the paint finish. Test a small, hidden area first to check for any adverse reaction. This method gives you a powerful, eco-friendly cleaner while preserving your freedom from harsh chemicals and paint damage.
What Are the Best Tools for Cleaning Baseboards in Tight Corners?
They say, “A stitch in time saves nine,” and when it comes to corner cleaning, that’s true. For tight corners, you’ll want specialized baseboard brushes with angled bristles to reach every nook. Microfiber cloths wrapped around a flat tool also work wonders, letting you clean without damage. Small detailing brushes or old toothbrushes help access tricky spots, giving you freedom to tackle grime precisely and efficiently.
How Do I Prevent Mold Growth on Baseboards in Humid Areas?
To prevent mold growth on baseboards in humid areas, you should apply mold resistant paints to create a protective barrier. Regularly use a dehumidifier to maintain low indoor humidity, ideally below 50%, which inhibits mold development. Guarantee proper ventilation by opening windows or using exhaust fans. Keep baseboards dry and promptly address any leaks or water damage. These steps give you control over moisture, helping maintain a clean, mold-free environment.
Are There Eco-Friendly Cleaning Products Safe for All Floor Types?
Yes, you can use natural cleaning alternatives that are safe for all floor types. Look for biodegradable products made from plant-based ingredients; these are gentle yet effective, reducing environmental impact. Avoid harsh chemicals that could damage delicate surfaces. Always test a small area first to guarantee compatibility. By choosing eco-friendly options, you maintain your floors’ integrity while embracing freedom from harmful substances, supporting a healthier home and planet.

[…] the safest method that actually works without ruining softness or color. Follow the checklist for removing dust, tackling stains, and drying correctly—so the fur stays fluffy instead of stiff or flat. If you […]
[…] brushed aluminum by removing dust first, then washing with mild dish soap and warm water, and always wiping strictly along the […]
[…] the right steps. This guide answers how to clean a silk lampshade by showing the safest method for removing dust, spots, and grime while protecting the sheen and structure. Get fresh, bright light with techniques […]
[…] your LPs by removing dust first, then using a record-safe cleaner and a microfiber brush to lift grime gently—never […]
[…] a mini split unit comes down to removing dust from the indoor filter(s) and keeping the condensate drain path clear, then wiping the casing and […]
[…] it? This step-by-step guide shows the exact cleaning process—from choosing the right supplies to removing dust and residue from the print head—for the cleanest, sharpest receipts with the fewest repeats. […]
[…] by removing dust and chips with compressed air or a stiff nylon brush, then wipe the bit clean with a rag. For […]
[…] velour upholstery without ruining its soft nap? Follow this simple step-by-step care routine for removing dust, stains, and odors while keeping the fabric looking even and plush. You’ll get the safest method […]
[…] how to clean satin shoes without ruining the fabric: start by removing dust gently, then spot-clean stains with a mild, water-free cleaner and a soft cloth. For the best […]
[…] or motor—by following a simple step-by-step routine. This guide gives the clear best method for removing dust, clearing debris, and reassembling your fan correctly, whether you’re handling light buildup or a […]
[…] If your MacBook is running hot or throttling, you’ll get the exact do’s and don’ts for removing dust without harming fans, sensors, or the delicate internal components. Follow this method to improve […]
[…] an NES cartridge without damaging the pins? Follow this step-by-step method for deep cleaning—removing dust and grime, safely treating the contacts, and reassembling for reliable gameplay. It’s the clear […]
[…] by removing dust with a soft, dry brush or compressed air so you don’t grind debris into the connector. Clean the […]
[…] I’ve found that this approach cuts total cleaning time significantly—because you’re removing dust film before it turns into a harder residue […]
[…] your vinyl records gently by removing dust first, then using a vinyl-safe solution with a microfiber cloth to avoid scratches. In my own […]
[…] cleaning starts with the right tools, because you’re protecting ductwork components while removing dust efficiently. The best setup lets you vacuum safely, wash the removable cover thoroughly, and avoid […]
[…] Buy Patent Leather Cleaner Now on Amazon Removing dust with a dry cloth first helps prevent micro-scratches when you wipe. Use minimal pressure with a […]