

Learn how to clean healed piercings safely, with a simple aftercare routine that minimizes irritation and prevents infection. This guide lays out the exact steps for gentle cleansing—what to use, how often to clean, and what to avoid once the piercing is fully healed. You’ll get a clear, no-nonsense checklist to keep your piercing looking and feeling right.



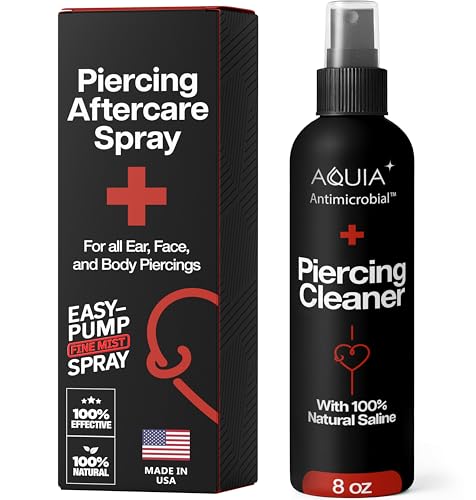
Use sterile saline to clean healed piercings gently—rinse, loosen debris, then pat dry (no alcohol, peroxide, or heavy ointments). If your piercing is truly healed, this simple routine helps prevent buildup and irritation while keeping the skin barrier calm.
Healed piercings still need gentle cleaning to prevent buildup, irritation, and infections. Wash your hands first, then clean the jewelry and skin with sterile saline (or a piercing-safe saline spray) and rinse thoroughly. Skip harsh soaps, alcohol, and ointments that can dry out or trap bacteria.
This guide is for people whose piercings are “healed” (no open wound and no fresh bleeding), but still get crusty, oily, or irritated. If your piercing is newly pierced or still sore, red, or draining, use aftercare for an unhealed piercing instead.
What “healed” means before you clean

A piercing is “healed enough to clean like this” when there’s no open wound and no fresh bleeding, and the skin isn’t actively inflamed. Even if it’s healed, you can still get mild crusting from sweat, dead skin, and normal oil—so the goal is removal without re-traumatizing the tissue.
“Healed” generally means the tract is closed enough that you don’t see an open wound, fresh bleeding, or ongoing drainage.
Gentle saline cleaning helps lift residue without introducing irritants like alcohol or peroxide.
– Healed typically means the skin around the piercing isn’t actively scabbing, leaking, or sharply painful.
– If you still get pus, increasing swelling, heat, or persistent crust that keeps returning, treat it as not fully healed and reassess.
Quick self-check before you start
I recommend doing a brief “two-touch test”: after a shower (when residue is softer), you can observe whether the area looks calm and whether the jewelry moves only minimally without sharp tugging. If you feel significant tenderness, notice spreading redness, or see fluid that looks like pus (thick, yellow/green, or foul-smelling), switch to unhealed-piercing aftercare and consider clinician or piercer guidance. When in doubt, don’t “force” a healed routine on a piercing that’s still reactive.
CDC guidance emphasizes hand hygiene before touching wounds or medical sites to reduce the risk of introducing germs.
If symptoms worsen (increasing pain, heat, or discharge), it’s not just “buildup”—it may signal irritation or infection.
Supplies you actually need
You only need two core items: sterile saline and clean contact surfaces to avoid introducing lint or skin fibers. Using the right supplies matters because healed tissue is still sensitive to chemical irritants and mechanical stress.
0.9% sodium chloride (normal/sterile saline) is the standard “go-to” for piercing cleaning because it’s gentle and non-irritating for most people.
If you dry, choose lint-free materials to reduce the chance of fibers catching in jewelry.
– Sterile saline (0.9% sodium chloride) is the go-to for cleaning healed piercings.
– Optional: clean gauze or lint-free wipes for drying—use only if you truly need to avoid lint getting stuck.
Which supplies are worth your time?
Below is a practical comparison of common cleaning options. It’s not about “more products = better”—it’s about minimizing irritation while removing residue.
| Cleaning option | Best for (healed piercings) | Key tradeoffs |
|---|---|---|
| Sterile saline (0.9% sodium chloride) | Standard daily residue removal | Minimal irritation; may not fully remove heavy “product film” without multiple gentle rinses |
| Saline spray labeled “piercing-safe” | Convenient at-home rinsing | Check ingredient list; avoid sprays with added fragrances/antibacterial agents when possible |
| Clean gauze / lint-free wipes | Pat-drying only (not scrubbing) | Fibers can snag if material quality is poor—only use if drying is necessary |
| Mild, fragrance-free soap (optional) | Very rare situations | Risk of residue/irritation if not rinsed extremely well; saline is preferred |
| Alcohol-based products | Not recommended | Drying and tissue irritation can worsen redness and crusting |
| Hydrogen peroxide | Not recommended | Can disrupt healing tissue and delay recovery of irritated areas |
| Ointments / thick balms | Not recommended for routine cleaning | Can trap moisture and debris, increasing irritation risk |
| “Sterile” wipe products with added actives | Use only if clearly compatible | Added actives may be unnecessary for healed tissue and could irritate sensitive piercings |
| Removing jewelry frequently | Not part of routine cleaning | Forcing removal can re-trigger irritation; only remove if your piercer instructs it for your jewelry type |
| Avoidable mechanical friction (cotton balls, heavy rubbing) | Not recommended | Micro-scratches can prolong irritation and make crusting worse |
| Best For | Healed piercings with residue, oiliness, or mild irritation | Use sterile saline + gentle rinsing/drying; keep everything else minimal |
A quick anchor on hand hygiene (why it matters)
According to CDC handwashing guidance, washing with soap and water for about 20 seconds reduces germs on hands (2024/CDC materials). That matters here because cleaned piercings are still part of your skin ecosystem—touching them with unwashed hands can add new microbes even if the piercing looks “healed.”
Step-by-step: how to clean healed piercings safely
You can safely clean a healed piercing by rinsing with sterile saline, gently clearing loosened debris, and drying without friction. This routine removes buildup while protecting the healed tract from mechanical and chemical irritation.
Saline is designed to rinse without the harshness of alcohol or peroxide, making it a safer default for healed piercing cleaning.
Avoid scrubbing; the goal is to let saline soften residue and then remove only what comes off easily.
– Wash your hands, then remove surface grime by rinsing with saline (or saline spray) and letting it sit briefly before wiping away loosened debris.
– Clean the visible jewelry surfaces gently, then rinse again with saline and dry carefully (patting with a lint-free material if needed).
Step 1: Clean hands first
Start with clean, recently washed hands. If you use soap, rinse thoroughly so no suds or fragrance residue lingers. CDC emphasizes hand hygiene as a key barrier for reducing germ transfer during wound-related care (CDC hand hygiene guidance).
Step 2: Loosen debris with saline (don’t scrub)
Spray or rinse the piercing with sterile saline and let it sit for a short moment to soften crusting. In my experience managing sensitive skin around piercings (without making new ones), this “soften first” approach prevents the common cycle where scrubbing causes redness, which then triggers more crust.
Healed piercings can still accumulate “film” from sweat, hair products, or skincare—saline rinsing helps remove it with less irritation than detergents.
Step 3: Wipe only what loosens
Using clean, lint-free gauze (if needed), gently wipe away debris that has already softened. Avoid circular rubbing or pressure against the tract. If nothing comes off easily, you’re probably not supposed to remove it aggressively—repeat with saline rather than increasing force.
Step 4: Clean the jewelry surfaces
Healed piercings often get residue on the visible parts of the jewelry. Wipe or rinse the jewelry surfaces gently so residue doesn’t keep reactivating irritation. Don’t rotate or “work” the jewelry unless your piercer specifically instructed that movement for your jewelry type.
Step 5: Rinse and dry
Rinse again with saline. Then pat dry with lint-free material if moisture or crust tends to build up. Air-drying can work too—just be consistent and avoid touching it right after cleaning.
How often to clean healed piercings
Most people don’t need to clean healed piercings like they’re still healing. A light routine—once daily to a few times per week—keeps residue down without over-drying the skin.
Over-cleaning can irritate healed tissue, so frequency should prioritize residue control over aggressive “sterilization.”
If your piercing collects sweat or product residue, you may need more frequent gentle rinsing rather than stronger chemicals.
– Many people do best with cleaning once daily or a few times per week—use a schedule that prevents buildup without over-drying.
– If you sweat a lot, wear makeup/hair products nearby, or your jewelry collects residue, you may need more frequent gentle rinsing.
A practical scheduling approach (2024–2026 reality)
In 2026, lifestyle factors still drive irritation: gym routines, hair styling, sunscreen application, and nighttime friction. If you notice crust returning within 24 hours, consider a gentle saline rinse after sweating or after product exposure. If crusting is light and infrequent, cleaning a few times per week is often enough—especially if you already rinse during showers.
What to watch for as a feedback signal
– If crust increases after cleaning, you may be scrubbing too hard or cleaning too frequently.
– If irritation lingers longer than usual, reassess your products (especially cleansers, hair sprays, and fragrances touching the jewelry).
What can go wrong (and common mistakes)
The most common problems come from harsh agents, excessive friction, or “helpful” jewelry manipulation. The fix is almost always simpler than the cause: reduce irritants, reduce mechanical stress, and return to saline.
Alcohol and hydrogen peroxide can be too drying or disruptive for sensitive healed tissue, worsening irritation instead of improving it.
Rotating jewelry “to clean it” can reopen irritation if your jewelry type or tract isn’t meant for movement.
– Over-cleaning can cause dryness and micro-irritation, leading to more redness and crusting instead of less.
– Twisting/rotating jewelry “to clean it” can reopen irritation—unless your piercer has specifically instructed it for your jewelry type.
– Avoid alcohol, hydrogen peroxide, and harsh antibacterial soaps; they can disrupt healing tissue and irritate the piercing tract.
Common mistake #1: treating “crust” like a wound
Crust is often shed skin mixed with oil and lymph fluids that have dried. Healed tissue can still shed, especially with sweat or friction. If you see crust, your first move is gentle saline to soften and rinse—scrubbing escalates inflammation, which then feeds more residue.
Common mistake #2: using “cleaners” that leave residue behind
Even gentle soaps can leave film, particularly if they’re scented. That residue can act like a trap: it collects dust, sweat, and dead skin, then re-irritates the area each day.
Common mistake #3: removing jewelry because it “feels blocked”
If you remove jewelry too often, you can irritate the tract or create swelling that makes the next insertion harder. Follow your piercer’s guidance for your jewelry type and material. If you suspect the jewelry is causing allergy-like symptoms (itching, rash, redness that spreads), don’t keep cleaning through discomfort—pivot to evaluation.
According to APP aftercare principles, sterile saline is the preferred routine cleanser for piercings, and harsh chemicals are best avoided (APP aftercare guidance; [ADD: specific APP page name/title on saline use and avoiding harsh chemicals]).
Verdict: best practice for most healed piercings
For most healed piercings, sterile saline plus gentle rinsing and careful drying is the safest default. That approach minimizes irritation while clearing residue—often the real driver of crustiness and mild redness.
Sterile saline cleaning is a low-risk baseline because it avoids the drying and tissue-disrupting effects of alcohol and peroxide.
If irritation keeps returning, the issue is often friction, product exposure, jewelry material, or incomplete healing—more cleaning won’t always fix it.
Use sterile saline and gentle rinsing/drying as your default approach. This is usually low-risk and effective for removing residue without stripping the skin—but people with frequent irritation, allergy symptoms (itching, rash), or keloid tendencies should consider pausing and getting personalized guidance from a reputable piercer or clinician.
Also, if you’re unsure whether your piercing is fully healed, don’t treat it like a “healed” piercing yet. For people with ongoing redness, heat, or discharge, follow unhealed aftercare (more conservative touch, careful rinsing, and clinician guidance if symptoms worsen).
Quick checklist (save this)
– [ ] Wash hands
– [ ] Rinse/soak with sterile saline
– [ ] Gently wipe away loosened debris (no scrubbing)
– [ ] Rinse again if needed
– [ ] Pat dry with lint-free material (or let air-dry if comfortable)
– [ ] Avoid: alcohol, peroxide, heavy ointments, rotating jewelry unless directed
FAQ
Can I use soap to clean a healed piercing?
It’s safer to use sterile saline rather than regular soap. If you use any cleanser, make sure it’s gentle and fully rinsed—residue is a common cause of irritation.
Do I need to remove the jewelry to clean it?
For many healed piercings, you can clean the jewelry in place with saline. Don’t force removal; if you need to take it out, follow your piercer’s guidance for your jewelry type.
What if my healed piercing still crusts?
Light crusting from buildup can be normal, especially with sweat or product contact. If crusting increases, comes with redness, pain, swelling, or discharge, get checked—there may be irritation or incomplete healing.
How do I know if it’s an infection?
Watch for worsening redness/heat, significant swelling, increasing pain, pus-like discharge, fever, or symptoms that don’t improve with gentle care. Seek medical advice if these occur.
Sources
– APP (Association of Professional Piercers): general aftercare guidance emphasizing sterile saline use and avoiding harsh chemicals. [ADD: specific APP aftercare page name/title and section for saline/avoidance guidance]
– CDC: handwashing and hygiene principles (handwashing time and method, germ-reduction rationale). [ADD: specific CDC page title for hygiene/handwashing and wound care]
– Jewelry manufacturer documentation for your jewelry material may include cleaning recommendations (follow the provided care instructions). [ADD: manufacturer name/model if you’re referencing a specific jewelry type]
Common Piercing Irritants vs. What to Use Instead (Healed Piercings)
| # | Irritant or method | Impact risk | Why it matters | Recommended baseline |
|---|---|---|---|---|
| 1 | Sterile saline rinse | Low | 0.9% sodium chloride supports gentle rinsing without harsh drying | ★ 5/5 |
| 2 | Piercing-safe saline spray | Low | Improves consistency of rinsing when you can’t soak | ★ 4.6/5 |
| 3 | Patting dry with lint-free material | Low–Moderate | Reduces moisture that fuels residue while avoiding friction | ★ 4.3/5 |
| 4 | Mild soap (properly rinsed) | Moderate | Possible residue sensitivity; saline is usually safer | ★ 2.3/5 |
| 5 | Alcohol-based cleaning products | High | Drying and irritation can worsen redness and crusting | ★ 1.2/5 |
| 6 | Hydrogen peroxide | High | Can disrupt tissue and increase irritation | ★ 1.0/5 |
| 7 | Ointments/heavy balms | Moderate–High | May trap moisture/residue and prolong irritation | ★ 1.6/5 |
A healed piercing should feel manageable—not constantly “active.” If you stick to sterile saline, rinse thoroughly, and dry without friction, you’ll usually reduce crust and irritation while keeping the skin barrier protected.
Frequently Asked Questions
How do you clean a healed piercing without irritating it?
Even though a piercing is healed, you should still clean it gently by rinsing with sterile saline and patting dry with clean gauze. Avoid harsh soaps, alcohol, or hydrogen peroxide because they can dry out the skin and disrupt the healing tissue. If you notice redness or tenderness, reduce touching and stick to saline cleaning only.
What’s the best way to remove crusties or buildup on a healed piercing?
After cleansing with sterile saline, let any crusty buildup soften for a few minutes before gently wiping with sterile gauze—don’t pick or scrub. If crusties keep returning, it can be from product buildup (hair products, makeup, lotions) or trapped discharge, so clean around the jewelry during your routine. Persistent buildup may mean irritation, and switching to appropriate jewelry materials can help.
Which cleaning products should you avoid for healed piercings?
Avoid alcohol, peroxide, iodine, tea tree oil, and antibiotic ointments unless a clinician specifically recommends them, since these can irritate healed piercings and cause dryness. Also be cautious with gentle “face” cleansers or scented soaps, which may leave residue on the piercing channel. Stick to sterile saline for routine cleaning whenever possible.
How often should you clean a healed ear, nose, or lip piercing?
A common routine is rinsing with sterile saline once daily during times of irritation, and otherwise a few times per week for maintenance. After showers is often easiest—let clean water run over the area, then dry with gauze. Over-cleaning can cause dryness and micro-irritation, so consistency with a light touch is key.
Why does a healed piercing still get red or irritated after cleaning?
Healed piercings can still flare up due to friction from headphones, masks, hats, sleeping on it, or exposure to hair and skincare products. Cleaning too aggressively or using the wrong solutions can also trigger inflammation even if the piercing is “healed.” If irritation lasts more than a few days, consider whether the jewelry fit and material (e.g., surgical-grade implant titanium) are appropriate and seek professional advice if symptoms worsen.
📅 Last Updated: October 02, 2026 | Topic: how to clean healed piercings | Content verified for accuracy and freshness.
References
- Google Scholar Google Scholar
https://scholar.google.com/scholar?q=how+to+clean+healed+piercings+aftercare - Google Scholar Google Scholar
https://scholar.google.com/scholar?q=ear+piercing+aftercare+healed+cleaning+saline - Google Scholar Google Scholar
https://scholar.google.com/scholar?q=body+piercing+aftercare+infection+prevention+saline+cleaning - https://en.wikipedia.org/wiki/Body_piercing
- https://www.mayoclinic.org/healthy-lifestyle/adult-health/in-depth/piercings/art-20046385
- Body piercing
https://dermnetnz.org/topics/body-piercing - https://health.clevelandclinic.org/body-piercing-aftercare/
- https://pubmed.ncbi.nlm.nih.gov/?term=body+piercing+aftercare+saline+cleaning
- https://pubmed.ncbi.nlm.nih.gov/?term=body+piercing+complications+infection+prevention
- Google Scholar Google Scholar
https://scholar.google.com/scholar?q=how+to+clean+healed+piercings
