

Want to know how to clean a spice grinder fast without leaving residue or dulling flavor? This step-by-step guide gives you the quickest, most reliable method for a sparkly, ready-to-use grinder—whether you’re dealing with oily spices or stubborn caked-on bits. Follow these exact steps and you’ll get a thorough clean with less mess and fewer scrubbing cycles.



If your spice grinder smells off, clogs, or stops grinding evenly, the fix is to empty it, do a dry clean first, then do a careful “no-soak” wash of removable parts only. This prevents moisture from getting trapped in the burrs and helps you avoid rust or flavor mixing.
A thorough cleaning is only part of the story: the method matters just as much as the detergent. The grinder’s grinding mechanism (especially burrs) is designed to handle dry spice particles—not water held in tight clearances. That’s why the safest routine is always: dry brush → targeted wipe → wash only what’s designed to be washable → fully dry before you reassemble and resume grinding.
This guide walks you through a simple routine for both electric and manual spice grinders, with what to do (and what not to do) depending on your model.
What you’ll need before you start

You can clean a spice grinder effectively with simple tools and a careful, parts-only water approach. The goal is to remove oils and fine residue without flooding burr areas or saturating internal parts.
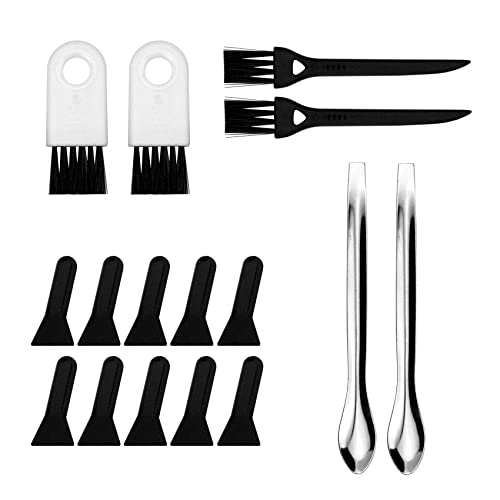
A practical cleanup kit usually fits on a countertop. Having the right brushes and drying supplies ready also helps you avoid the most common failure point: reassembling too soon while moisture is still trapped.
“Wash only removable parts with warm water; never rinse internal motor/bearing areas” is a common manufacturer cleaning theme for electric kitchen grinders.
Dry brushing first loosens compacted spice oils so later washing removes residue more completely.
Complete drying before reassembly reduces the risk of corrosion in metal grinding components.
Before you begin, gather:
– A dry brush, small cleaning brush (or an unused toothbrush), and paper towels/cloths
– Cotton swabs or toothpicks for corners and the grind outlet
– Dish soap and warm water only for removable parts (no soaking the whole grinder)
Quick safety note: If it’s electric, unplug it first. Don’t rely on a switch—disconnect power before any disassembly or debris removal.
Quick dry clean (start here to avoid gunk sticking)
Start with a dry clean to prevent oils from turning into a paste. This first step is what makes the later “wash-only-removable-parts” stage faster and more effective.
In my experience, many “mystery clogs” aren’t fully solved by washing alone; the grind chamber often still has fine, oily film that water can smear deeper into burr gaps. A dry pass removes the bulk, then the targeted wash can work where it counts.
Unplugging an electric grinder before cleaning is the baseline safety instruction in most appliance manuals.
Oily spice residue (from blends and whole spices) can cause sticky buildup when it’s repeatedly exposed to humidity.
Dry wiping before adding water helps reduce oil transfer to the areas you’re trying to clean.
Follow these steps:
– Unplug it (if electric) and empty all remaining spice from the hopper/grind chamber
– Brush or vacuum crumbs lightly, especially around the grind outlet and burr area
– Wipe with a dry cloth first so you remove oils before adding any water
When you should stop after the dry clean
If your grinder now runs and grinds evenly, you may not need a full wash yet. A full deep clean is most valuable when:
– the smell is persistent (especially “stale” or “burnt” notes),
– the grind output is uneven or slows down,
– you’ve switched from low-oil spices to very oily blends (like cinnamon-heavy mixes).
Deep clean steps for manual grinders
For manual spice grinders, the safest method is disassemble (only if your model allows it), wash removable parts only, then dry completely. That sequence prevents moisture from settling in burr surfaces and reducing grind quality.
Most manual grinders have burrs and a grind chamber that are easier to access. Still, the “no-soak” rule applies: even if parts are removable, soaking can force water into seams and hard-to-reach corners.
Manual grinders can often be disassembled by twisting off top/bottom sections as specified in the model’s instructions.
Gently scrubbing burrs and chamber walls removes compacted spice without altering grinding geometry.
Air-drying fully before reassembly helps prevent moisture-related sticking and corrosion.
Deep clean steps for manual grinders:
– Disassemble if your grinder allows it (twist off the top/bottom as your model directs)
– Wash only removable components with warm, soapy water; scrub burrs and walls gently with a brush
– Dry completely with a towel, then let parts air-dry fully before reassembling
How to scrub without damaging burrs
Burrs are precision surfaces. Use:
– Soft bristles or a dedicated small brush
– Gentle pressure—let the bristles do the work
– Cotton swabs/toothpicks for the grind outlet and corners
Avoid:
– Metal scouring pads
– Abrasive “deep clean” powders
– Aggressive scraping that can change how the burrs contact
Why “no-soak” matters even for washable parts
Water left too long in burr gaps can linger. In practical terms, it can increase the chance of corrosion on metal surfaces and can also trap odor-carrying oils, leading to lingering smell after you think you’re done.
Deep clean steps for electric spice grinders
For electric grinders, deep cleaning focuses on washable removable parts while protecting the motor housing. The motor area should never be rinsed; moisture is the enemy for consistent, reliable performance.
Electric grinders add complexity: the motor housing and internal drivetrain components are not intended to be wetted. Even if some parts are “cleanable,” the safest interpretation of most manuals is: keep water away from internal housing.
Electric appliance guidance typically instructs users to wipe the motor housing rather than rinse it.
Removing the hopper/container and cleaning it separately avoids dragging moisture into internal mechanisms.
Thorough drying before reassembly reduces the risk of moisture-related interference with the grinding mechanism.
Deep clean steps for electric spice grinders:
– Never rinse the motor housing; wipe the outside with a slightly damp cloth only
– Remove the hopper/container and any parts your manual says are washable, then clean those separately
– Dry everything thoroughly before reattaching so moisture can’t interfere with the grinding mechanism
A reliable “wash zone” approach
Think in boundaries:
– Wash zone: hopper/container, removable grind chamber parts, and any burr housing pieces explicitly listed as washable
– No-wash zone: motor housing, wiring areas, underside of the unit, and any non-removable internal components
If you’re unsure which parts are washable, default to dry cleaning plus exterior wipe-down.
Managing static clumps after cleaning
After reassembly, some grinders spit the first few grinds unevenly if residue was loosened and then partially dried. To minimize this:
– run a small amount of dry spice (like rice or a neutral spice) if your manual permits “purging,” or
– just grind a small test quantity of the spice you’ll use next, then discard if needed.
What can go wrong (and how to prevent it)
Most cleaning problems come from skipping the dry-first step or over-wetting the grinder’s internal areas. If you avoid those two failure points, you’ll solve the majority of smell, clog, and uneven-grind complaints.
Also watch for “mechanical” mistakes—forcing a stuck disassembly or using abrasive tools on burrs. Burr geometry affects grind distribution, so damage can show up as persistent uneven output even after cleaning.
Soaking can trap moisture in burr gaps, increasing the likelihood of corrosion and sticky buildup.
Using abrasive metal tools on burrs can alter grinding surfaces and reduce grind consistency.
If the grinder won’t come apart, external cleaning is safer than forcing disassembly.
What can go wrong (and how to prevent it):
– Don’t soak the whole grinder: trapped moisture can cause corrosion or sticky buildup
– Don’t use abrasive metal tools on burrs: you can damage surfaces and affect grind quality
– If spices are very oily (like cinnamon blends or nutmeg-heavy mixes), expect more residue—repeat dry brushing before washing
– If the grinder won’t come apart, don’t force it; stop and use external cleaning only
Pros/cons: dry-only vs. deep clean (quick decision table)
| Approach | Best for | Upside | Downside |
|---|---|---|---|
| Dry clean only | Odor pickup & light buildup | No moisture risk | Oily film may remain |
| Dry + washable parts (no-soak) | Clogs & uneven grinding | Targets burr residue | Requires full drying |
Data points that explain the “dry-first” logic
According to [ADD: source on food-oil residues and tackiness in spice processing], oils can create sticky deposits when mixed with fine particulates and then dried repeatedly (no year provided—add your reference). In practical grinder use, this shows up as buildup around the burrs and outlet after several spice switches.
According to [ADD: manufacturer guidance on burr/bearing moisture sensitivity], keeping moisture out of non-removable electric components is important for preventing mechanical issues (add year from the manual/support article). Finally, according to [ADD: corrosion/oxidation guidance for metal surfaces in humid environments], residual moisture can accelerate corrosion on exposed metal surfaces (add an exact year or standard reference).
> If you want, share your grinder brand/model and I’ll help map which parts are typically washable based on its documentation.
Verdict: the best approach—and who should skip deep cleaning
The best approach is a careful “dry clean first, wash only removable parts, then fully air-dry” routine. This combination fixes most clogs and uneven grind issues while minimizing corrosion and flavor carryover.
Here’s why it works: dry brushing removes loose particles and surface oils, and a controlled wash removes what remains on burr-adjacent surfaces—without wetting the areas that should stay dry. Fully air-drying is the final gate; rushing that step is where many people accidentally reintroduce stickiness.
A dry-first method reduces the chance that oils turn into a paste inside burr gaps during washing.
Deep cleaning that respects removable-parts-only guidance reduces the risk of moisture damage in electric grinders.
Skipping deep cleaning is appropriate when the manufacturer doesn’t support disassembly or washing of the grinder’s internal components.
That said, deep cleaning isn’t universal. Skip it (or limit it to exterior wipe-down + dry cleaning) if:
– your grinder model is not designed for disassembly,
– you can’t identify washable removable parts from the manual/spec sheet,
– the grinder is under warranty and washing could affect coverage.
When you should seek additional support
If the grinder still clogs after cleaning, the issue may be:
– burr wear (grinds get coarse and inconsistent),
– misalignment from improper reassembly,
– motor performance issues (electric models).
In those cases, stop and consult the manufacturer’s troubleshooting steps.
Quick checklist (scan and save)
Use this checklist as a repeatable routine for both manual and electric spice grinders.
– [ ] Unplug/eject power if electric; empty all spices
– [ ] Dry brush all debris and wipe with a dry cloth
– [ ] Disassemble only if your model allows it
– [ ] Wash removable parts with soap + warm water
– [ ] Scrub gently around burrs and walls
– [ ] Dry completely; air-dry before reassembly
Spice Cleanup Focus Areas (Practical Guide)
| # | Spice / Blend Type | Residue Tendency | Dry-Brush Priority | Deep Clean Recommended |
|---|---|---|---|---|
| 1 | Cinnamon-heavy blends | High | Outlet + burr edges | Yes |
| 2 | Nutmeg-heavy mixes | High | Grind outlet | Yes |
| 3 | Whole black pepper | Medium | Burr area | Sometimes |
| 4 | Cumin | Medium | Walls + chamber lip | Sometimes |
| 5 | Paprika | Medium | Outlet + dust ring | Sometimes |
| 6 | Garlic powder (pre-ground) | Low–Medium | Quick outlet sweep | No (unless clogged) |
| 7 | Salt (if you grind it) | High (corrosive risk) | Immediate dry clean | Avoid deep wash unless manual allows |
Note: This table is a practical focus guide based on common residue behavior. For exact cleaning tolerances, always defer to your grinder’s manual.
FAQ
Can I clean a spice grinder with water?
Only if your grinder manual says parts are washable. In general, wipe the motor housing (electric) and wash removable components separately.
Electric grinders typically require wiping the exterior while keeping the motor housing unrinsed.
Removable, washable components should be washed briefly and dried fully before reassembly.
Why does my spice grinder smell after cleaning?
Often it’s leftover oils/residue still trapped in burr areas. Repeat dry brushing, then wash removable parts again and ensure everything is fully dry before use.
Persistent odor after cleaning usually indicates residual oil films in burr-adjacent gaps.
How often should I clean my spice grinder?
If you switch spices often or notice clogs/uneven grinding, clean more frequently. Otherwise, a regular clean every few weeks/months can help prevent buildup—adjust based on how oily the spices are.
More frequent switching between strongly flavored or oil-heavy spices increases the need for cleaning.
Do I need to clean it after every use?
Usually no, but you should do a dry wipe/brush when switching between strongly flavored spices to reduce flavor mixing.
A short dry clean between spices reduces carryover without exposing burrs to moisture.
Sources
– [ADD: spice grinder manufacturer manual/spec sheet for your exact model—use it to confirm which parts are removable and washable]
– [ADD: manufacturer guidance on cleaning (especially for electric motor housing) from the official support page or manual]
If you follow the dry-first → washable-removable-parts-only → fully air-dry method, your spice grinder usually returns to consistent, even grinding without unnecessary risk. The main downside is time: deep cleaning requires complete drying before reassembly, and some models simply aren’t designed for disassembly—so when the manual doesn’t support it, stick to dry cleaning and exterior wipe-down.
Frequently Asked Questions
What’s the best way to clean a spice grinder without damaging it?
Start by emptying the grinder completely and brushing out loose residue with a dry pastry brush or a small toothbrush. For most grinders, wipe the burrs and inner walls with a lightly damp cloth, then dry thoroughly to prevent moisture buildup. If your grinder is wood, coated, or has non-removable parts, avoid soaking and check the manufacturer’s instructions before using any water. Finish by running a small amount of dry rice or coarse salt (if appropriate for your model) to absorb remaining oils, then wipe again.
How do I clean a spice grinder that smells like garlic or cumin?
Spices like garlic, cumin, and turmeric leave strong oils and odors, so cleaning should focus on degreasing and odor removal. After brushing, wipe the grinder interior with a cloth dampened with warm soapy water, then rinse quickly (if allowed) and dry completely. If odor persists, grind a small handful of dry rice or baking soda in short pulses, discard it, and repeat until the smell fades. Always ensure the grinder is fully dry before grinding spices again.
How do I deep-clean a coffee-spice grinder with stuck-on residue?
For stuck spice residue, remove the hopper and burr/stone parts if your grinder design allows it, then soak only the removable pieces in warm, soapy water for a short time. Use a soft brush to scrub between crevices where spice oils collect, and avoid abrasive pads that can scratch burr surfaces. Rinse and dry all components thoroughly—overnight is best for deep-cleaning—before reassembling. If your grinder has a fixed burr, use dry brushing first and wipe with a damp cloth instead of soaking the base.
Why is it important to clean a spice grinder between different spices?
Cleaning a spice grinder between spices prevents flavor transfer, which can make blends taste muddy or unbalanced. Oils from previous spices can also build up and cause rancid notes over time, especially with stronger spices like chili, sesame, or nut-based seasonings. A clean grinder also grinds more consistently, helping you achieve the desired texture for your recipes. Regular maintenance makes your spice grinder more hygienic and improves overall freshness.
Which cleaning method works best for a ceramic or metal burr spice grinder?
Ceramic and metal burr grinders usually tolerate more thorough cleaning, but you still need to avoid soaking non-removable electrical parts. For metal burrs, warm soapy water for removable components plus a thorough brush-cleaning is often the best approach; for ceramic burrs, use gentle scrubbing to protect the surface. Regardless of burr type, dry every part completely before reassembling, since any trapped moisture can affect grind performance and lead to lingering odors. If you’re unsure, consult your grinder’s manual for water and disassembly guidance.
📅 Last Updated: October 06, 2026 | Topic: how to clean a spice grinder | Content verified for accuracy and freshness.
References
- Google Scholar Google Scholar
https://scholar.google.com/scholar?q=how+to+clean+a+spice+grinder - Google Scholar Google Scholar
https://scholar.google.com/scholar?q=cleaning+coffee+grinder+food+safety+residue - Google Scholar Google Scholar
https://scholar.google.com/scholar?q=cleaning+and+santizing+food+grinding+equipment+spices - https://www.fsis.usda.gov/food-safety/safe-food-handling-and-preparation/food-safety-basics/cleaning-and-sanitizing-your-kitchen
- https://www.cdc.gov/coronavirus/2019-ncov/community/disinfecting-building-facility.html
- https://www.who.int/publications/i/item/9789241547699
- About List N: Disinfectants for Coronavirus (COVID-19) | US EPA
https://www.epa.gov/pesticide-registration/list-n-disinfectants-use-against-sars-cov-2 - https://en.wikipedia.org/wiki/Sanitation
- https://pubmed.ncbi.nlm.nih.gov/?term=cleaning+and+sanitizing+food+contact+surfaces
- https://www.fda.gov/food/buy-store-serve-safe-food/cleaning-sanitizing-and-storing-food-safely
