

If you’re trying to clean a coffee maker with baking soda, this is the fastest, safest method that actually gets scale and lingering coffee oils out. You’ll follow a simple step-by-step process—from making the right baking soda mix to running the clean and rinse cycles—so your next cup tastes fresh. Skip complicated gadgets and harsh chemicals; baking soda delivers the clear result when you do it this way.


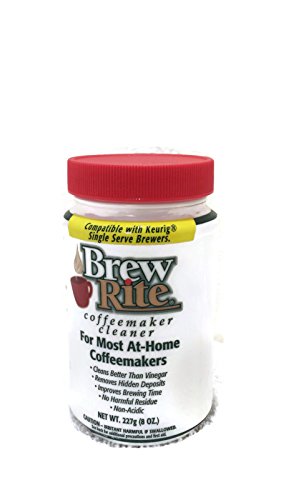

If your coffee maker smells off, has cloudy residue, or is brewing with a dull, mineral-heavy flavor, clean it with baking soda and water. Run a baking-soda cleaning cycle, let it sit briefly if needed, then flush thoroughly with plain water to clear the brew path. This approach lifts oily buildup and helps reduce odor without harsh scrubbing—when used within your machine’s care limits.
This method is most appropriate for drip coffee makers and any brewer that can tolerate a mild alkaline cleaner (baking soda is sodium bicarbonate, a mild base). It’s also practical for reusable carafes, removable filter baskets, and washable parts. In 2026, many households still rely on hard water, and mineral deposits (often calcium carbonate scale) continue to be a common cause of lingering taste and reduced heating efficiency—so a reliable cleaning routine matters.
If you’re unsure whether baking soda is recommended for your specific model, check the manufacturer’s care instructions first. Some specialty brewers have strict descaling requirements, and you’ll want to follow those so you don’t void warranty coverage or damage internal seals.
This works best for drip coffee makers, reusable carafes, and other machines where baking soda cleaning is appropriate. If your model has a manufacturer-recommended descaling method, follow that guidance first—this approach is a practical option for general buildup.
What You’ll Need (and what to avoid)

You only need baking soda and plain water for the internal cleaning cycle, plus basic tools for wiping and rinsing parts. Avoid abrasive materials and only combine cleaning agents if your manual explicitly allows it.
In my experience, the biggest difference between “okay” and “actually clean” is preparation: dissolve baking soda completely and flush long enough that no lingering residue remains in the brew path. For most drip machines, the brew basket, carafe, and removable plumbing are where you’ll see the most oil film and cloudiness.
Baking soda (sodium bicarbonate) is commonly used as a mild, non-acidic cleaning agent that can help neutralize odors and loosen light residue.
Many coffee makers require water-only rinsing after any cleaner to prevent off-flavors, which is why a full plain-water flush is part of this method.
Tooling and compatibility notes
– Baking soda (food-grade) and plain water are all you need for most cleaning.
– Have a soft brush or cloth ready for the filter basket, carafe, and removable parts.
– Avoid abrasive pads on nonstick or delicate surfaces, and don’t mix baking soda with other cleaners unless your manual approves.
Why “dissolve first” matters
A paste that’s too thick can cling to internal components and is harder to flush cleanly. Baking soda should dissolve fully in warm water, so the solution behaves predictably as it moves through the reservoir and brew path.
Key facts to anchor expectations (hard water + buildup)
– According to the U.S. EPA, hard water is typically classified at about 180 mg/L as CaCO₃ (calcium carbonate) or higher—scale becomes more likely at higher hardness levels (U.S. Environmental Protection Agency (EPA), water hardness guidance).
– According to the U.S. Geological Survey (USGS), 1 grain per gallon (gpg) ≈ 17.1 mg/L as CaCO₃ (U.S. Geological Survey (USGS), hardness unit conversion).
– Calcium carbonate scale is a major component of limescale; it forms when minerals precipitate with heat and evaporation inside appliances (general chemistry consistent across cleaning guidance). For model-specific effects, follow your machine manual’s descaling section ([ADD: source for your coffee maker’s official descaling/cleaning guidance from its manual]).
Step-by-Step: Clean the Coffee Maker With Baking Soda
You’ll get the best results by running a controlled baking-soda brew cycle, followed by a thorough water-only flush. Mix the solution until fully dissolved, run it through, let it sit briefly if you notice odor or residue, then flush until everything smells neutral again.
This is a “brew-path first” process. Instead of scrubbing every tube (which can be impractical), you’re using water flow to contact the areas where coffee oils and scale accumulate—especially the internal hot-water pathway and the showerhead (if your machine has one).
A baking-soda cleaning cycle works by circulating a dissolved solution through the same plumbing used to brew coffee, which targets odor and light residue along the brew path.
After using any internal cleaner, manufacturers typically recommend rinsing with plain water to avoid leaving taste-active residues in the brewer.
If odors persist, a short dwell time (a brief sit) can improve contact time without needing harsh scrubbing.
Step 1: Mix correctly (no paste)
– Mix baking soda with warm water until fully dissolved (start with a moderate concentration rather than a very thick paste).
Practical approach: Start moderate, dissolve completely, and avoid “strong paste” concentrations that can be harder to remove during flushing. If you have a large reservoir, you may need to scale the amount of baking soda proportionally—still dissolved, not thick.
Step 2: Run the cleaning cycle
– Pour the solution into the water reservoir and run the machine through a full brew cycle (or the closest equivalent to your model).
If your machine has options like “clean” or “brew,” use the closest standard equivalent that sends water through the brew path. For single-serve pod machines, only proceed if your manual indicates baking-soda-compatible cleaning for internal parts.
Step 3: Optional brief sit time
– Let it sit briefly if you have noticeable odor or residue, then run 1–2 full cycles of plain water to flush.
How long? Use a short dwell time—just enough to increase contact—then don’t skip the rinse. The “sit” step is most useful when you smell sour, stale coffee, or when you see cloudy residue that doesn’t immediately wash away.
Clean the Removable Parts Thoroughly
You’ll eliminate the majority of visible residue by washing removable components separately from the internal cycle. That includes the carafe, filter basket, lids, and any detachable parts you can rinse without forcing cleaner into areas the manual says not to.
This part matters because oils and fine grounds often cling to basket surfaces and lids. Even if the internal brew path is clear, leftover film on the carafe bottom can keep your next cup tasting “muddy.”
Removable coffee maker parts—carafes and filter baskets—should be cleaned separately to remove oil film and stuck residue that internal flushing may not fully contact.
Using a soft brush or cloth reduces the risk of scratching protective coatings that can trap residue over time.
Wash and address stuck buildup
– Remove and wash the carafe, filter basket, lids, and any detachable parts using warm water and gentle soap.
– For areas with stuck residue, use a baking-soda water solution with a soft brush, then rinse well.
– Dry components completely before reassembling to reduce lingering smells.
Drying is not optional: Moisture encourages odor retention. Drying also helps you visually confirm whether cloudiness is gone before you put the machine back together.
Mini “surface safety” checklist
– Avoid abrasive pads on nonstick coatings.
– Don’t use metal tools on plastic parts.
– Don’t force water into electrical housings or areas sealed per your manual.
Rinse and Check: How to Confirm It’s Clean
You confirm cleanliness by smell, by a test brew, and by checking for cloudiness in the carafe or basket. If you still detect off-notes or see film, repeat water-only flushing until normal.
This step is the difference between “cleaned” and “safe to drink.” Baking soda is mild, but taste-active residue can still linger if flushing is incomplete—especially in machines with longer internal plumbing or reservoirs that don’t fully drain.
A final water-only flush is essential to prevent any remaining cleaner from affecting coffee flavor and aroma in the next brew.
A discard test brew (water-only) is a practical way to verify that the brew path has no residual odor before brewing coffee.
– Smell for “baking soda” or off-notes—after flushing, it should smell neutral again.
– Run a test brew with plain water and discard it; taste and smell should be normal.
– Check for cloudy residue in the carafe or filter basket; if you see it, repeat the plain-water flush.
What “neutral again” typically means
If the machine smells like clean water (not stale coffee and not soapy or mineral-tinged), you’re likely done. If the carafe still looks hazy, focus on the basket and the brew outlet area where mineral and oil films can settle.
What Can Go Go Wrong (Common Mistakes and Limits)
Most issues come from skipping rinses, using overly concentrated solution, or cleaning a machine that requires a specific descaling chemistry. Baking soda is helpful for odor and light buildup, but it may not replace dedicated descaling for heavy scale.
Here are the common failure modes to avoid, based on how coffee oils and scale behave inside heated plumbing. In 2026, with more homes using hard water, it’s worth being realistic: you’re managing buildup, not magically dissolving years of scale in one pass.
Skipping the final rinse can leave taste-active residue that makes the next cup smell or taste off.
Overly concentrated solutions may increase foaming or leave films that are harder to flush, so moderate concentration is safer.
For severe mineral scale, many manufacturers recommend approved descalers, and baking soda may not provide equivalent results.
– Skipping the final rinse can leave residue that affects taste and smell.
– Using too much baking soda or overly concentrated solution can create foamy buildup inside the machine—stick to a moderate mix and dissolve fully first.
– Some coffee makers (especially specialty models with strict care instructions) may not be designed for baking-soda-based cleaning—use the manufacturer’s descaling instructions if they discourage it.
– If your problem is scale/mineral buildup from hard water, baking soda may not fully replace a dedicated descaler—consider an approved descaling product when needed.
Baking soda vs. vinegar vs. manufacturer descaler (quick compatibility view)
Use this table to decide which internal cleaner to use and where to be cautious.
| Feature | Baking soda + water | White vinegar (acid) | Manufacturer-approved descaler |
|---|---|---|---|
| Typical target | Odor, oily film, light buildup | Mineral scale (often calcium carbonate) | Scale and buildup per chemistry |
| Flavor risk if rinsing is skipped | Moderate (mild base residue) | Higher (vinegar aroma/taste) | Depends on product; usually rinse-specified |
| Foaming potential | Can foam if too concentrated | Usually less foaming than carbonate cleaners | Usually controlled formula |
| Effect on heavy limescale | Limited for severe scale | Often stronger for scale | Designed for scale removal |
| Compatibility with seals/materials | Varies by model | Acid sensitivity possible | Usually vetted by manufacturer |
| Need for water-only flushing | Yes (always) | Yes (especially important) | Yes, per label/manual |
| Maintenance routine friendliness | High (low cost, non-bleach) | Medium (smell/taste concerns) | Medium (product cost) |
| Best use frequency | Routine odor/cloudiness checks | Intermittent descaling | As recommended by manual |
| Risk of scratching parts | Low if no abrasives used | Low if not scrubbing | Low if used correctly |
| How it interacts with coffee oils | Helps loosen and neutralize odor | Indirect; can also loosen deposits | Direct where formulated to remove scale/oils |
| **Best For** | Routine upkeep for drip machines and washable parts | Households with visible limescale | Models with strict descaling requirements |
Verdict: When Baking Soda Is Worth It (and who should skip)
Baking soda is worth using when you’re dealing with routine odor, light cloudy residue, or coffee oil buildup in a drip-style brewer where the manual doesn’t restrict mild cleaners. It’s not always the best “one-and-done” fix for heavy mineral scale, and you should skip it when your manufacturer discourages baking-soda-based cleaning or when scale is severe.
From what’s consistent across cleaning best practices (and what manuals typically emphasize), the safest way to think about baking soda is as a maintenance cleaner rather than a complete descaling substitute for deeply scaled boilers and heaters.
Baking soda cleaning is most reliable for routine buildup because it’s mild and helps lift residue without using harsh chemicals.
If your brewer’s manual specifies a particular descaling method, follow it; compliance is the best protection for longevity and warranty coverage.
For hard-water households, dedicated descalers can be more effective when visible scale persists after several maintenance cleanings.
If you want a decision rule: if the problem is mostly smell + light cloudiness, baking soda is usually a good first move. If the problem is mostly scale (rough deposits, persistent haze after water-only rinses, slow flow), move toward the manufacturer’s descaler guidance.
Quick decision summary
– Use baking soda when: odor is present, carafe/basket looks hazy, and internal buildup seems “general.”
– Skip baking soda when: your manual discourages it, your machine is specialty/hypersensitive, or scale is visibly heavy and recurring.
Visual reference: what to expect by cleaning approach
Cleaning Fit for Coffee Makers (Routine vs. Scale) — Typical Outcomes
| # | Method | Best for | Cycle type | Odor/Film Lift | Scale Removal Potential | Residue Risk (★) |
|---|---|---|---|---|---|---|
| 1 | Baking soda + water | Odor & light cloudiness | Brew-path cycle | High | Medium-Low | ★★★☆☆ |
| 2 | Water-only flush | Interim maintenance | Full rinse cycles | Medium | Low | ★☆☆☆☆ |
| 3 | Vinegar + water | Limescale on many drip units | Descale cycle | Medium | Medium-High | ★★★★☆ |
| 4 | Manufacturer descaler | Severe buildup & warranty-safe | Label-guided cycle | Medium-High | High | ★★★☆☆ |
| 5 | Remove & wash basket/carafe only | Visible oil film on parts | Manual wash | High (surface) | Low | ★☆☆☆☆ |
| 6 | Half-measure cleaning (short rinse) | “Quick” maintenance | Partial flush | Low | Low | ★★★★☆ |
| 7 | Unapproved mixes (avoid) | Not recommended | Chemical combinations | Unpredictable | Unpredictable | ★★★★★ |
Quick Checklist: Baking Soda Coffee Maker Clean
– [ ] Dissolve baking soda in warm water (no paste)
– [ ] Run 1 cleaning brew cycle through the machine
– [ ] Optional: short sit time for strong odors/residue
– [ ] Flush with 1–2 full plain-water cycles
– [ ] Wash/removes parts separately, then rinse and dry
– [ ] Run a final water-only test brew and discard
FAQ
Can I use baking soda to descale a coffee maker?
Baking soda can help loosen buildup and reduce odor, but severe mineral scale may require the manufacturer’s recommended descaling method or an approved descaler. If your manual provides specific descaling guidance, follow that first.
How often should I clean with baking soda?
For routine upkeep, clean when you notice odor, cloudy residue, or slow/less consistent brewing. If you use hard water, you may need more frequent maintenance—again, align with your machine’s care instructions.
Do I need to rinse with plain water after baking soda?
Yes. A thorough plain-water flush is essential to prevent any lingering taste or residue.
Can I clean the filter basket and carafe with baking soda too?
Usually, yes—use a baking-soda water solution and a soft brush/cloth for removable parts, then rinse well and dry completely.
Is it safe for all coffee makers?
Not necessarily. Some manufacturers specify particular cleaning agents or descaling steps; if your manual discourages baking soda, don’t use it.
Sources
– [ADD: Coffee maker manufacturer cleaning/descaling instructions from your specific model manual or official care guide]
– U.S. Environmental Protection Agency (EPA), water hardness guidance (hardness classification thresholds)
– U.S. Geological Survey (USGS), water hardness unit conversion (e.g., grains per gallon to mg/L as CaCO₃)
– [ADD: Source for baking-soda cleaning use as a mild deodorizer/cleaning aid from a recognized authority such as the baking-soda manufacturer’s cleaning guidance or a consumer safety authority]
Baking soda cleaning is a practical, low-cost way to refresh a drip coffee maker’s flavor and aroma when the issue is oily film, stale odor, or mild cloudiness. Use dissolved baking soda for a brew-path cycle, wash removable parts separately, and always finish with multiple water-only flushes plus a discarded test brew. If your machine shows signs of heavy mineral scaling—or if the manual discourages baking soda—pivot to the manufacturer’s descaling method to protect performance and taste.
Frequently Asked Questions
How do I clean a coffee maker with baking soda safely?
First, mix baking soda with warm water to make a light solution (about 1–2 tablespoons per 16–24 oz water). Pour it into the water reservoir, then run a brew cycle as if making coffee (no grounds). Let it sit for 15–30 minutes if you have heavy buildup, then run 1–2 more cycles with clean water to rinse away any baking soda residue.
What is the best baking soda ratio for descaling a coffee maker?
A common rule is 1 tablespoon of baking soda per 8–12 oz of warm water, then adjust based on your machine’s reservoir size. For most drip coffee makers, using 2 tablespoons in a full reservoir (about 16–24 oz total capacity) works well for regular maintenance. If the scale is heavy or the coffee tastes dull, you can repeat the process once, but always follow with thorough water-only rinses.
Why does my coffee maker smell or taste like baking soda after cleaning?
The smell or taste usually means residue is still sitting in the internal tubing or warming plate. To fix this, run multiple water-only brew cycles until the water runs clear and you no longer notice any odor. Also make sure the baking soda was dissolved in warm water before pouring, since undissolved particles can linger and cause residue.
How do I clean the coffee maker’s carafe and filter basket using baking soda?
Remove the carafe and any parts like the filter basket, then wash them with hot soapy water first. Next, soak them in a basin of warm water mixed with baking soda (about 1 tablespoon per cup of water) for 15–30 minutes, then scrub gently with a non-abrasive brush or sponge. Rinse well and air-dry completely before reassembling to prevent lingering odors.
Which coffee makers can be cleaned with baking soda, and which should not?
Baking soda is generally safe for many drip coffee makers and thermal carafe models when used as a descaling aid and followed by rinsing. However, avoid using it on manufacturers that specify vinegar-only or restrict cleaners, especially some espresso machines and machines with sensitive internal components. If you’re unsure, check your coffee maker’s manual for cleaning instructions to confirm whether baking soda is recommended.
📅 Last Updated: October 06, 2026 | Topic: how to clean coffee maker baking soda | Content verified for accuracy and freshness.
References
- Google Scholar Google Scholar
https://scholar.google.com/scholar?q=how+to+clean+coffee+maker+with+baking+soda - Google Scholar Google Scholar
https://scholar.google.com/scholar?q=coffee+maker+descaling+baking+soda - Google Scholar Google Scholar
https://scholar.google.com/scholar?q=coffee+machine+cleaning+descaling+limestone+scale+baking+soda - https://en.wikipedia.org/wiki/Baking_soda
- https://en.wikipedia.org/wiki/Descaling
- https://www.cdc.gov/household/sanitizing-disinfecting.html
- https://www.epa.gov/infectious-diseases/cleaning-and-disinfecting-your-facility
- https://pubmed.ncbi.nlm.nih.gov/?term=coffee+machine+cleaning
- https://pubmed.ncbi.nlm.nih.gov/?term=coffee+machine+microorganisms+biofilm
- https://pubmed.ncbi.nlm.nih.gov/?term=coffee+maker+scale+descaling+mineral+deposits
