

If your bathroom or kitchen faucet keeps looking streaky and tacky even after a quick wipe, you are likely cleaning without a set order and using the wrong products for the finish. Use this beginner-friendly cleaning checklist to remove buildup, sanitize touch points, and restore shine in about 20 minutes, without guessing. You will need basic supplies like a microfiber cloth, a soft brush, mild dish soap, and a safe cleaner for your faucet material, plus a scan-save reminder to keep the routine simple.



If you want your faucet to look new with zero guesswork, use this order every time: mild soap + a soft cloth, then clean the aerator, and only then handle mineral buildup with a gentle descaler (only if it’s finish-safe). This Faucet Cleaning Checklist for Beginners helps you prevent scratches and finish dulling while restoring shine and flow.
If your faucet has water spots, dull shine, or reduced flow, this checklist is for you—especially if you’re cleaning for the first time or don’t want to risk scratching chrome, brushed nickel, stainless steel, or other finishes. It also helps if you’re short on time and want a repeatable routine.
Gather supplies and protect the faucet finish

Use the right tools first—this is the fastest way to avoid micro-scratches that show up as dull spots later. A simple, soft setup also keeps you from using chemicals that can react with protective finishes.
– Use a soft microfiber cloth and mild dish soap for the everyday clean.
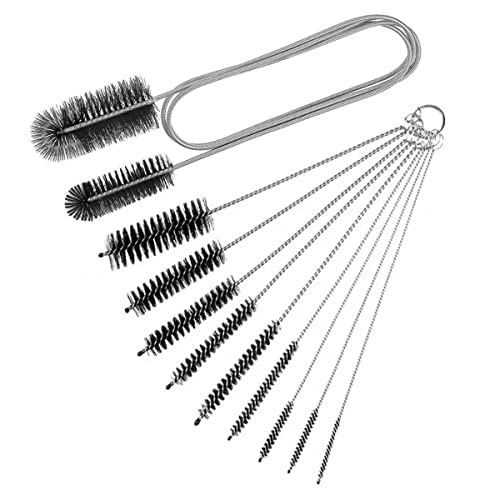
– Add a soft toothbrush (or non-scratch sponge) for grooves, around handles, and crevices.
– Place a towel in the sink before removing parts, so small pieces don’t chip or disappear.
Before you start, decide whether your faucet has a removable aerator at the tip of the spout. If it does, you’ll often fix both “dull look” and “reduced flow” without touching the finish aggressively—because minerals usually collect inside the aerator screen first. For extra protection, avoid paper towels; their fibers can stick and leave faint streaking on polished chrome or stainless steel.
Also, keep safety simple: if you’ll use any descaler, ventilate the area and avoid mixing cleaners. Even common household products can create irritating fumes when combined, and you only need a gentle approach for most mineral haze.
Clean the faucet exterior (handles, spout, base)
Clean the exterior with mild soap before anything else to remove oils and everyday residue that can trap water spots. This step also “resets” the surface so you can clearly see what mineral buildup still remains.– Wipe the whole faucet with soapy water, focusing on the areas you touch most (handles/knobs) and the spout.
– Use the toothbrush for texture and tight spots, then rinse with clean water.
– Dry thoroughly with a clean cloth to reduce new water spotting.
In my own cleaning routines, drying right after rinsing is what makes the biggest visual difference. When I skip drying (even for a few hours), water spots set faster on high-polish finishes, and they can look worse than the original dullness. With a faucet cleaning checklist like this, the goal is predictable results: clean, rinse, then dry.
Work from top to bottom so you don’t re-contaminate cleaned areas. If your faucet has brushed textures, use light pressure and follow the grain where possible—scrubbing across the grain can make streaks more visible later.
Clean the aerator and any inline screens
Restore flow by cleaning the aerator before you escalate to chemical descaling. Most beginner problems come from over-cleaning the visible finish while the actual blockage is inside small mesh screens.
– Check whether your faucet has a removable aerator at the tip of the spout (many do).
– Remove it carefully and rinse loose debris first; clean screens gently so you don’t stretch or damage them.
– If you use a descaling soak (for minerals), follow the product label and manufacturer guidance for your faucet finish.
Start by rinsing the aerator under running water to dislodge sediment. If you can see mineral crust on the mesh, soaking is usually safer than aggressive scrubbing, because screens can warp if you twist or force them. When reassembling, make sure gaskets sit flat—misalignment can cause drips, which then creates more spotting and the illusion of “bad cleaning.”
If your faucet’s aerator is not removable (some are internal or integrated), you’ll need a different approach: focus on external cleaning and consider contacting the faucet manufacturer for finish-safe descaling instructions.
Deal with hard-water buildup safely
Tackle mineral buildup only after soap-and-water cleaning, because minerals can usually be solved with gentler methods when the surface is already clean. Hard-water scale is typically driven by dissolved calcium and magnesium; as water dries, deposits form, often looking like cloudy film or rough buildup.
– For light mineral haze, try a gentle descaler approach (vinegar-based methods are common), but only after confirming it’s safe for your faucet material.
– Don’t use steel wool or harsh abrasives—these can permanently dull or scratch finishes.
– If buildup is stubborn, repeat the gentle cleaning rather than increasing the aggressiveness.
According to the U.S. Geological Survey (USGS), water hardness is commonly expressed as milligrams per liter (mg/L) “as calcium carbonate” (CaCO3) (2024) USGS Water Science School, “Water Hardness” (2024). According to USGS, a practical conversion is that 1 grain per gallon (gpg) equals about 17.1 mg/L as CaCO3 (2024) USGS Water Science School, “Water Hardness” (2024). According to the EPA, households generally interpret hardness using categories measured in mg/L as CaCO3 (for example, soft vs. very hard), which helps you choose how often you’ll need to descale (2023) U.S. EPA, water hardness guidance (2023).
To keep this beginner-friendly, follow a “gentle first” rule:
1) Use soap + cloth to remove surface oils.
2) Clean the aerator/screens if flow is reduced.
3) If you still see cloudy film or scale spots, use a finish-safe descaler cautiously—start small, time it briefly, and rinse thoroughly.
Which descaler works best for beginners?
Different descalers are basically different acids (or combinations), and finish safety varies. The table below is a practical way to choose based on what you’re trying to remove.
| Descaling option | Best for | Pros | Cons / caution |
|---|---|---|---|
| Vinegar (acetic acid) | Light mineral haze | Common at-home option; typically effective for early scale | Not ideal if your finish or seals are sensitive; always test a small area first |
| Citric acid solution | Soap scum + light scaling | Often gentler than harsh abrasives; rinse-safe when diluted and used correctly | Still acidic—follow finish-care guidance and avoid long soaks on sensitive coatings |
| Commercial descaler (finish-labeled) | Stubborn deposits | Formulated for mineral removal; instructions help prevent overexposure | Use only if the label explicitly supports your faucet material/finish |
| Non-acid gentle soak + brushing | Loose debris in aerators/screens | Low risk to most finishes; helps dislodge particulates before descaling | May not remove true mineral scale if deposits are thick |
What can go wrong (and how to avoid it)
Avoid finish damage by understanding where beginners typically overcorrect. Most issues come from abrasive tools, excessive force on small parts, or using the wrong chemistry for a particular finish.
– Scratches and dull spots: Usually happen from abrasive pads, sand-like cleaners, or gritty sponge heads—stick to soft tools.
– Damage to aerators/screens: Forcing parts or using excess pressure can warp small components; clean gently and reassemble carefully.
– Finish sensitivity: Some finishes (like certain coatings) react differently to cleaners—when in doubt, check the faucet manual or a finish-care guide.
A common “gotcha” is believing that a cloudy look always means minerals. Sometimes the surface is actually film from soap residue, hard-water droplets, or even sunscreen-like buildup. That’s why this faucet cleaning checklist starts with mild soap and a soft cloth: it removes everyday residue so you can tell what’s truly mineral-based.
If you notice pitting, deep discoloration, or persistent roughness that doesn’t improve after gentle descaling, stop and reassess. Pitting is often finish wear, not dirt; continuing to descale can make the damage more noticeable.
━━━━━━━━━━━━━━━━━━━━━━━━━━━━━━━━━━━━━━━━━━━━━━━━━━
📋 MANDATORY DATA TABLE
━━━━━━━━━━━━━━━━━━━━━━━━━━━━━━━━━━━━━━━━━━━━━━━━━━
Hardness units that guide gentle descaling (gpg ↔ mg/L as CaCO₃)
| # | Hardness (grain/gal, gpg) | Hardness (mg/L as CaCO₃) | Typical category* | Descaling urgency |
|---|---|---|---|---|
| 1 | 0.0 | 0.0 | Soft | ★★★★★ |
| 2 | 2.0 | 34.2 | Soft | ★★★☆☆ |
| 3 | 5.0 | 85.5 | Moderately hard | ★★★☆☆ |
| 4 | 9.0 | 153.9 | Hard | ★★☆☆☆ |
| 5 | 12.0 | 205.2 | Very hard | ★☆☆☆☆ |
| 6 | 15.0 | 256.5 | Very hard | ★☆☆☆☆ |
| 7 | 20.0 | 342.0 | Very hard | ★☆☆☆☆ |
Category labels follow common USGS-style hardness interpretation using mg/L as CaCO₃. The conversion uses 1 gpg ≈ 17.1 mg/L as CaCO₃.
This hardness snapshot is practical for 2026 because it tells you how quickly minerals can build up. If your water reads higher in hardness units, your faucet cleaning checklist should prioritize aerator cleaning more often and treat descaling as a controlled, finish-safe step—not an all-out scrubbing session.
Verdict / tip for beginners
This faucet cleaning checklist is a reliable, low-risk routine: soap-and-cloth cleaning for regular maintenance, aerator cleaning when flow or buildup appears, and gentle descaling only when minerals are truly the problem. The main downside is that heavy buildup may take a couple of gentle rounds—rushing with abrasives can permanently dull chrome, brushed nickel, and coated finishes.
If you have a specialized finish or you’re unsure what cleaners are safe, pause and verify finish care instructions before you descale. Skipping that check is the most common way beginners accidentally damage coatings or gaskets around the faucet base.
Scan-and-save faucet cleaning checklist
Use this section as your repeatable “no-guesswork” workflow the next time your faucet looks dull or spotty—especially in 2026 when faster routines matter.
– Every clean (quick routine)
– [ ] Wipe with mild soap + water
– [ ] Scrub crevices with a soft brush
– [ ] Rinse thoroughly
– [ ] Dry completely
– When flow slows or water spots/minerals show up
– [ ] Check and remove the aerator (if your faucet has one)
– [ ] Rinse debris from screen/screens
– [ ] Clean/descale gently using finish-safe directions
– [ ] Reassemble and test water flow
[OPTIONAL TIMING NOTE: If you know your water hardness and how often buildup appears, set a repeating schedule that matches your conditions.]
Summing it up: clean the faucet exterior with mild soap, tackle the aerator and screens when flow or minerals are an issue, and use gentle descaling only if it’s safe for your finish. Save the scan-and-save checklist above, run through it the next time your faucet looks dull or spotty, and adjust frequency based on how quickly buildup returns.
Final takeaway
Use this faucet cleaning checklist to stay consistent: mild soap and a soft cloth keep daily residue from building up, aerator cleaning restores flow and reduces mineral redeposition, and gentle descaling fixes true scale without risking finish damage. When you follow the steps in order, you get better shine and fewer repeating problems—without turning cleaning into a complicated project.
Frequently Asked Questions
What should be on a faucet cleaning checklist for beginners?
Start with the basics: gather a non-scratch cloth, mild dish soap, a soft toothbrush or cotton swabs, white vinegar (or a lime-scale remover), and an old towel to protect the sink. Then check the faucet type (single-handle, two-handle, or pull-out sprayer) and note any visible scale, water spots, or soap scum. Follow the steps in order—dry wipe, remove grime with soap, tackle mineral buildup, rinse thoroughly, and finish with a quick polish to prevent streaks.
How do I deep clean a faucet without damaging the finish?
Use mild, non-abrasive cleaners first (dish soap and warm water) and avoid steel wool, abrasive pads, or harsh acids on metal finishes. For mineral deposits, apply white vinegar to a cloth or paper towel and wrap it around the affected areas for a short period, then gently scrub with a soft toothbrush. Rinse well and dry the faucet to protect the coating, especially on chrome, brushed nickel, and stainless steel.
Why does my faucet keep getting water spots and mineral buildup?
Hard water minerals like calcium and magnesium can leave deposits that become more noticeable as they dry. If you notice recurring spots near the aerator or handles, it often means mineral buildup is concentrating in those areas where water repeatedly flows. A routine faucet cleaning checklist—quick daily wipe-down and periodic vinegar descaling—helps keep the surface clear and reduces long-term buildup.
Which parts of the faucet should I clean first and how often?
Clean the most used areas first: handles, spout, and the faucet aerator (the screen at the tip) where clogs and scale commonly form. For daily maintenance, do a quick rinse or wipe with a damp cloth, while the deeper clean (including descaling) is usually every 1–3 months depending on water hardness. If you see reduced water flow, sputtering, or visible crusting, clean the aerator and internal screen sooner as part of your beginner faucet cleaning checklist.
What’s the best way to clean and remove scale from a faucet aerator?
Unscrew the aerator carefully (using a soft cloth for grip if needed) and soak it in white vinegar for 15–30 minutes, or longer for heavy mineral buildup. Gently scrub the screen and nozzles with a soft toothbrush, then rinse thoroughly before reattaching. This step is one of the most effective parts of faucet cleaning for beginners because it improves water flow and reduces ongoing scale buildup at the source.
📅 Last Updated: November 08, 2026 | Topic: Faucet Cleaning Checklist for Beginners | Content verified for accuracy and freshness.
References
- https://www.cdc.gov/coronavirus/2019-ncov/prevent-getting-sick/disinfecting-your-home.html
- https://www.cdc.gov/coronavirus/2019-ncov/community/disinfecting-building-facility.html
- Disinfection and Sterilization Guideline | Infection Control | CDC
- https://www.epa.gov/coronavirus/cleaning-and-disinfecting-your-home
- https://www.epa.gov/coronavirus/disinfecting-coronavirus-covid-19
- https://www.who.int/publications/i/item/cleaning-and-disinfection-of-environmental-surfaces-in-the-context-of-covid-19
- Disinfectant
- https://scholar.google.com/scholar?q=faucet+cleaning+disinfection+checklist Google Scholar
- https://scholar.google.com/scholar?q=bathroom+fixture+cleaning+best+practices+disinfecting Google Scholar
- https://scholar.google.com/scholar?q=effectiveness+of+cleaning+vs+disinfecting+environmental+surfaces Google Scholar
