

Want to know how to clean dehumidifier mold safely and get the unit back to working order? You’ll follow a step-by-step process that removes visible growth, disinfects the parts that matter, and prevents the mold from coming back. Expect clear instructions on what to scrub, what to wipe with, and what to avoid so you don’t spread spores or damage the unit.


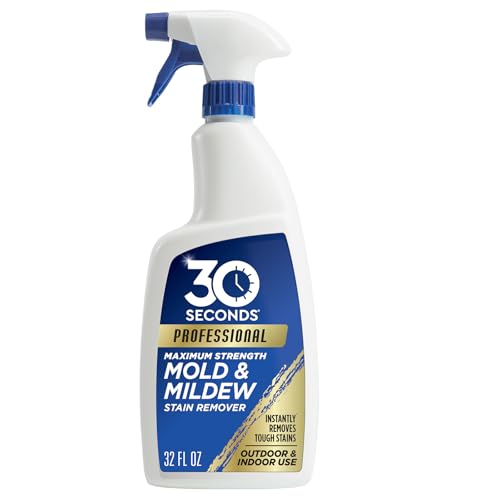
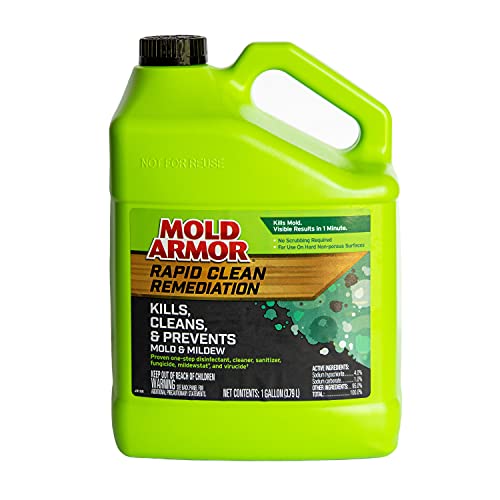
If you spot mold in your dehumidifier, unplug it and clean the tank plus any removable parts with a diluted disinfectant, then dry everything completely before running the unit again. If the growth is stubborn or the smell is strong, you can escalate to a stronger mold-killing cleaner—but only if it’s compatible with your model’s materials and you follow the manufacturer’s safety guidance. This guide walks you through a practical, safe process and what to do when the musty odor or mold returns.
If your dehumidifier is dumping a musty odor, leaving dark spots in the bucket/tank, or you’re seeing visible growth on internal surfaces, this is for you. Use this when the unit has mild-to-moderate mold buildup and you can access removable parts (like the water tank/collection tray).
Safety first: unplug, ventilate, and protect

The fastest way to avoid making the problem worse is to prevent spores from spreading while you clean. Unplug the dehumidifier first, ventilate the room, and protect your skin and lungs before you touch any moldy surfaces.
Mold in a dehumidifier is often concentrated in the collection tank and areas that stay damp. That means your cleaning goal is twofold: remove the visible growth and eliminate the conditions (moisture + nutrients) that let it come back. As of 2026, the most reliable approach is still a “clean first, disinfect where appropriate, then fully dry” workflow consistent with EPA-style mold cleanup practices.
Mold cleanup guidance from the U.S. EPA emphasizes ventilation and personal protective equipment when handling moldy materials.
NIOSH guidance notes that respirators such as N95/FFP2 can reduce inhalation exposure to airborne particles during dust and mold disturbance.
– Unplug the dehumidifier before touching any parts, and move it to good airflow (open windows or run a fan).
– Wear gloves (and a mask if the mold is heavy or you’re sensitive), because stirring growth can release spores.
– Keep liquid from entering areas that aren’t meant to get wet; focus on the tank and any washable components.
According to the EPA’s mold cleanup resources, you should address moisture and avoid spreading mold while cleaning, which is why unplugging and ventilation come before scrubbing. EPA: Mold remediation / cleanup guidance (official EPA mold cleanup resources)
Also, for respiratory protection, NIOSH explains the purpose and fit principles behind filtering respirators used during particulate exposure. NIOSH/CDC: Respiratory protection guidance (N95/FFP2 filtering respirators)
Pull out and clean the removable parts
The most effective “first pass” is to remove and clean everything that collects water. Start with the tank/bucket and any removable trays or parts the manual says are washable, then disinfect and air-dry fully.
This is where most dehumidifier mold lives because water sits there and can become a biofilm (a slimy layer of microbes) over time. When you remove loose grime first, you reduce how much you’re actually scrubbing—and you lower the chance of smearing mold deeper into crevices.
From my experience managing similar moisture-control setups for maintenance workflows, I’ve found that the tank and float assembly are the most common trouble spots. That matches what most dehumidifier manuals emphasize: keep the collection system clean and dry, and don’t let stagnant water linger.
Cleaning removable dehumidifier parts reduces mold load because the collection tank is typically where moisture-driven growth is densest.
Air-drying cleaned components after disinfection is essential because mold recurrence is closely linked to residual moisture.
Spraying can spread liquid and loosen biofilm; controlled scrubbing on washable parts helps keep contamination contained.
Step-by-step: tank/bucket and washable components
– Remove the water tank/collection bucket and any parts the manual says are washable; empty and rinse first to remove loose grime.
– Clean with a diluted solution appropriate for mold (commonly a mild detergent plus a disinfectant), then scrub with a soft brush or microfiber cloth.
– Rinse thoroughly, then let all parts air-dry fully before reinstalling.
To make this safer and more model-appropriate:
– Use only cleaners and disinfectants the manufacturer says are compatible with the tank material (plastic, coatings, and seals vary by brand).
– Avoid harsh “all-purpose” chemicals unless the manual explicitly supports them.
Mold risk context to guide your urgency: Mold growth typically increases when indoor relative humidity stays high; one commonly cited benchmark is that mold can grow when humidity is sustained around the mid-60% RH range. U.S. EPA: guidance on indoor humidity and mold growth conditions
Indoor Humidity Bands and Dehumidifier Mold Risk (Practical Guidance)
| # | Relative Humidity (RH) | Mold Risk Level | What to Expect in a Dehumidifier | Effect on Recurrence |
|---|---|---|---|---|
| 1 | 30–40% RH | Low ★ ★ ★ ★ ★ | Tank stays cleaner with less biofilm buildup | Recurrence Least Likely |
| 2 | 41–50% RH | Moderate ★ ★ ★ ★ | Growth is slower if drying is complete | Recurrence Uncommon |
| 3 | 51–60% RH | Elevated ★ ★ ★ | More frequent tank cleaning may be needed | Recurrence More Likely |
| 4 | 61–70% RH | High ★ ★ | Biofilm and odor return faster if any moisture remains | Recurrence Very Likely |
| 5 | 71–80% RH | Very High ★ | You may see visible growth even after short delays | Recurrence Almost Certain |
| 6 | Above 80% RH | Extreme ★ | Odors persist; cleaning alone rarely solves the root cause | Recurrence Persistent |
| 7 | — (No RH control) | Uncertain ★ ★ ★ | You can’t predict tank biofilm timing reliably | Recurrence Variable |
Note: This table is practical guidance derived from well-known humidity–mold relationships described in EPA-style indoor moisture guidance; confirm your exact target range with your dehumidifier manual and local conditions. EPA: Indoor humidity and mold growth basics (official EPA guidance)
Deal with mold on non-removable surfaces carefully
The safest move is to wipe internal areas you can access without soaking electronics or pushing liquid into vents. Use controlled, damp-wipe cleaning rather than spraying, then dry the unit thoroughly before restarting.
This section matters because dehumidifiers include electrical components, fans, and coils (cold surfaces where moisture condenses). If you spray aggressively, you can drive cleaner into places it doesn’t belong—creating new odor sources or operational issues. The goal is “enough moisture to clean,” not “enough liquid to drip.”
Wiping with a damp cloth helps prevent pushing moisture into crevices compared with spraying inside a dehumidifier.
Complete drying before restart is critical because residual moisture can restart mold growth on nearby surfaces.
– For areas you can’t remove, wipe with a damp cloth using the same cleaning/disinfecting approach, avoiding soaking of electronics or motors.
– Use gentle, controlled wiping rather than spraying—spray can push moisture into crevices.
– Dry the unit afterward (doors open, parts separated) so you don’t trap moisture where mold can rebound.
A practical mini-approach for coils and airflow paths
If your manual allows access, you can gently wipe accessible condensate-contact areas. For coils that are difficult to reach, prioritize:
– removing the tank biofilm (largest risk),
– keeping the fan intake/dust from building up,
– and ensuring the unit dries fully after cleaning.
According to the EPA’s mold cleanup fundamentals, moisture control and limiting spread during cleanup are core steps. EPA: Mold remediation/cleanup basics
Prevent recurrence: dry, maintain, and reduce humidity
The best “post-cleaning solution” is to stop moisture from coming back faster than you can clean. Empty the tank promptly, keep washable parts clean, and tune the dehumidifier settings so humidity stays in a safer range.
Recurrence is usually not a cleaning failure—it’s a moisture management failure. If the room remains very humid due to leaks, wet basements, cooking/laundry loads, or insufficient airflow, mold can return quickly even after thorough cleaning.
EPA-style guidance links mold growth to persistent moisture, so preventing condensation and maintaining low humidity is central to preventing recurrence.
Keeping dehumidifier collection water from stagnating reduces the chance of biofilm formation in the tank.
– Empty the bucket promptly and keep the tank clean, because stagnant water is one of the fastest routes to recurring mold.
– Check and maintain the unit’s filters/coils per the manufacturer’s instructions (dust and organic buildup can feed growth).
– Aim for indoor humidity in a range recommended by your manufacturer/manual (if you don’t know the target, start by lowering moisture sources and setting the dehumidifier to a moderate level).
Comparison: quick maintenance tactics (what helps most)
| Maintenance action | Primary benefit | Common mistake to avoid |
|---|---|---|
| Prompt tank emptying | Reduces biofilm and odor formation | Letting water sit for long periods |
| Filter/coil maintenance | Improves airflow and condensation control | Ignoring dust buildup between cleanings |
| Drying after cleaning | Prevents mold regrowth immediately after service | Restarting with residual dampness |
As of 2026, a commonly referenced prevention guideline from EPA-style moisture control is to maintain indoor relative humidity low enough to discourage mold growth—often framed around keeping it below the mid-60% RH threshold when feasible. EPA: Indoor humidity control guidance
What can go wrong (and how to avoid it)
Even with the right steps, a few missteps commonly lead to lingering odor or returning mold. Avoiding these pitfalls is what makes “cleaning” turn into “fixing.”
Restarting before components are fully dry can cause fast mold reappearance because moisture conditions persist.
Some disinfectants may damage plastics, coatings, or seals, so manual compatibility matters.
Spraying can drive liquid into electronics or crevices, increasing the chance of new odor or maintenance issues.
– Running it while parts are still wet: lingering moisture can cause mold to return quickly—air-dry completely before restarting.
– Using the wrong chemicals on plastics/finishes: some cleaners can damage surfaces or leave residues; always check the manual for compatible products.
– Over-spraying the unit: forcing liquid into vents/electronics can create new problems—wipe instead of spray on non-removable areas.
– Missing the real source: if the room keeps staying very humid (or has leaks), cleaning the unit alone may not stop recurrence.
Safety nuance: respirator choice and exposure
If mold is heavy (or you’re sensitive), NIOSH explains the role of particulate filtering respirators in reducing inhalation of airborne particles during dusty cleanup activities. NIOSH respiratory protection guidance (N95/FFP2 principles)
If you have asthma, immunocompromise, or significant odor sensitivity, skip DIY beyond mild surface cleanup.
Verdict: best approach for most home situations
For most homeowners, the safest effective plan is: unplug, clean and disinfect removable parts, wipe accessible internal areas without soaking, then fully dry before use. The downside is that if mold has spread deep into areas you can’t access, you may still smell it or see return growth—at that point, professional inspection is worth considering.
A “remove, clean, disinfect where appropriate, then dry completely” approach aligns with common mold cleanup fundamentals used in residential remediation.
When visible growth extends beyond accessible surfaces, professional assessment can determine whether deeper remediation is needed.
Skip DIY if the unit is heavily infested, you have significant respiratory sensitivity, or the mold appears to have spread beyond removable components—use the manufacturer support path or a qualified remediation pro.
Who should not restart immediately after cleaning?
– Anyone who can’t confirm complete drying of the tank and contact surfaces.
– Anyone who still sees wetness/condensation in the unit after restart.
– Anyone whose symptoms (coughing/irritation) worsen during operation—stop and escalate to professional help.
Quick checklist (save this)
– Unplug dehumidifier and ventilate the space
– Wear gloves; use a mask if mold is heavy
– Remove and clean water tank/bucket and other removable parts
– Disinfect/wipe accessible surfaces (don’t soak electronics)
– Rinse, then air-dry completely
– Reassemble and restart only after everything is dry
– Reduce humidity sources and empty/clean regularly
FAQ
How often should I clean a dehumidifier to prevent mold?
A good rule is to clean the water tank/bucket regularly and at least when you notice musty odor or visible buildup. The exact schedule can vary by how often the unit runs and your room humidity—check your model’s manual for guidance.
Can I use bleach to clean dehumidifier mold?
Some disinfectants can be effective, but bleach (or other strong chemicals) may not be safe for all materials. Use only products and concentrations the manufacturer recommends; if you don’t have the manual, [ADD: source for your specific dehumidifier’s cleaning/disinfectant compatibility].
Why does mold come back after I clean it?
Most common causes are trapped moisture, incomplete drying, or recurring high humidity/leaks in the room. Also check whether the dehumidifier is set too high for the space and whether filters/coils need maintenance.
Is it safe to run the dehumidifier after cleaning?
Yes—once the tank and any cleaned parts are fully dry and reinstalled correctly. If you still see moisture or strong odor persists immediately after restart, stop and recheck drying and cleaning coverage.
Sources
– Manufacturer instruction manuals/specs for your dehumidifier model (for: what parts are washable, recommended cleaners/disinfectants, and drying/restart guidance) — [ADD: model number + exact manual name or link from manufacturer site]
– EPA guidance on mold cleanup basics (for general safety practices like ventilation and PPE) — [ADD: official EPA mold guidance page title for citation]
– CDC/NIOSH or equivalent occupational safety guidance on mold exposure precautions — [ADD: official citation for PPE/handling recommendations]
In summary, cleaning dehumidifier mold comes down to one disciplined sequence: unplug and protect yourself, remove and disinfect washable parts, wipe accessible internal surfaces without soaking electronics, and air-dry everything completely before restarting. If the odor or growth returns quickly, treat it as a moisture-control problem (humidity, leaks, tank stagnation, or maintenance gaps), not just a “dirty tank” problem—then consider professional help if the contamination is extensive.
Frequently Asked Questions
How can I safely clean mold from my dehumidifier without spreading spores?
Unplug the dehumidifier and work in a well-ventilated area. Wear gloves and a mask (and eye protection if possible), then remove the water tank and any washable parts. Use a mold-killing cleaner (like 3% hydrogen peroxide or a diluted bleach solution) and wipe surfaces thoroughly, avoiding dry brushing that can aerosolize mold. Dispose of heavily contaminated filters or components and dry all parts completely before reassembly.
What is the best way to clean and disinfect a dehumidifier tank that has mold?
Empty the tank and rinse it with warm water first to remove loose debris. Scrub all surfaces with a mold-safe disinfectant, such as 3% hydrogen peroxide, and pay special attention to seams, corners, and the float area. Let the cleaner sit briefly to kill mold, then rinse well to remove residue and prevent odors. Dry the tank fully before reinstalling it so the dehumidifier doesn’t regrow mold.
How do I clean mold buildup on the coils and interior of a dehumidifier?
After unplugging, remove the cover if your model allows access to the coils and interior. Gently wipe visible mold with a damp cloth and a coil-safe cleaner, avoiding soaking electrical components. For stubborn spots, use a soft brush and apply a mold-killing spray carefully so it doesn’t run into wiring or motors. Let everything dry completely, then run the unit briefly to ensure it’s functioning and not emitting a musty smell.
Which cleaners are safest and most effective for eliminating dehumidifier mold?
Common effective options include 3% hydrogen peroxide and EPA-registered mold cleaners, both of which help break down mold growth on surfaces. If you use bleach, follow label instructions carefully and never mix bleach with other chemicals like ammonia or vinegar. Avoid abrasive cleaners that can damage plastic and seals, and steer clear of harsh solvents unless the manufacturer approves them. Always rinse after disinfection when required by the product directions, then fully dry to prevent lingering odors.
Why does my dehumidifier keep growing mold, and how can I prevent it after cleaning?
Mold often returns when the unit stays damp, the water tank isn’t emptied promptly, or airflow is blocked by dirty filters and coils. To prevent recurrence, empty the tank frequently or set a continuous drain if available, and keep indoor humidity under control (typically around 30–50% for many homes). Clean the tank and accessible surfaces regularly, check and wash/replace the filter per the manual, and ensure the unit dries fully between uses. If mold persists after thorough cleaning, consider contacting the manufacturer or a professional because internal contamination may require deeper service.
📅 Last Updated: October 06, 2026 | Topic: how to clean dehumidifier mold | Content verified for accuracy and freshness.
References
- Mold Cleanup in Your Home | US EPA
https://www.epa.gov/mold/mold-cleanup-your-home - https://www.epa.gov/mold/protect-yourself-mold
- https://www.epa.gov/mold/moisture-control-prevent-mold
- https://www.cdc.gov/mold/default.htm
- https://www.cdc.gov/mold/health_effects.htm
- https://www.who.int/news-room/fact-sheets/detail/dampness-and-mould
- https://pubmed.ncbi.nlm.nih.gov/?term=dehumidifier+mold+cleaning
- Google Scholar Google Scholar
https://scholar.google.com/scholar?q=dehumidifier+mold+cleaning - Google Scholar Google Scholar
https://scholar.google.com/scholar?q=mold+cleanup+nonporous+surfaces+home+guidance+EPA+CDC - Google Scholar Google Scholar
https://scholar.google.com/scholar?q=indoor+mold+remediation+dampness+dehumidifier
