

Are you worried that cleaning your wireless charger will damage the charging coil or sensors? You can clean it safely by using gentle, non-abrasive methods and the right tools, which typically takes only a few minutes once you have a dry microfiber cloth and isopropyl alcohol (if needed). Start now so your charger delivers reliable contact and avoids buildup that can interfere with charging.
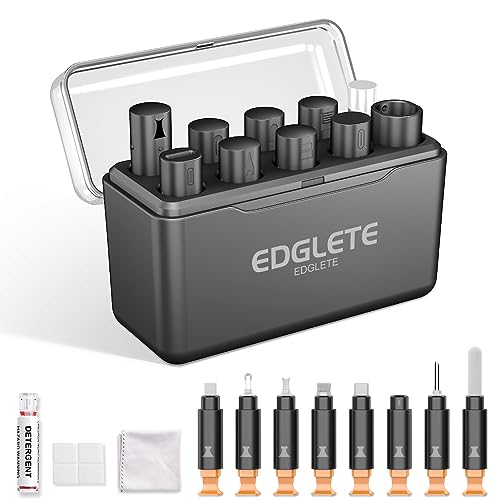



Unplug the charger, then clean the charging surface gently with a dry microfiber cloth (and only use lightly dampened cleaner on the outside if the manufacturer allows it). Avoid soaking it or letting liquid get into the coil/ports—most wireless charger failures happen from moisture, not dirt. This guide walks you through safe steps for removing dust, lint, and residue without harming the charging area.
If you’re seeing slower charging, intermittent connections, or a “foreign object” warning, it’s usually surface grime, lint from pockets/cases, or small debris on the pad. These steps are for typical Qi-style wireless chargers, including stands and pads from major brands.
Gather the right (safe) cleaning supplies

The best way to avoid damaging a wireless charger is to use tools that remove debris without introducing moisture. Start with dry cleaning items, and treat liquids as “only if explicitly approved” accessories.
– Dry microfiber cloth and/or a soft, lint-free cloth for the charging surface
– Optional: a blower (like a bulb-style air blower or compressed air made for electronics) to remove dust from edges
– Optional: a small amount of manufacturer-approved isopropyl alcohol on a cloth—not directly on the charger (only if needed)
Before you begin, remove the phone from the charger and confirm the wireless charger is fully unplugged from the wall adapter (not just resting with no phone). Cleaning a wireless charger while it’s powered can increase the chance of problems if any cleaner drips into vents, seams, or internal openings.
Which wireless-charger cleaning approach is safest (Qi pads & stands)
| # | Method | Best for | Where to apply | Safety rating |
|---|---|---|---|---|
| 1 | Dry microfiber wipe | Dust & light oils | Only the charging surface | ★★★★★ |
| 2 | Gentle air puff (electronics blower) | Lint near seams | From a distance, at edges | ★★★★☆ |
| 3 | Lightly damp microfiber (distilled water) | Finger smudges | Outside only, minimal moisture | ★★★☆☆ |
| 4 | Manufacturer-approved IPA on cloth | Sticky residue (case film) | Outside only; never soaked | ★★★☆☆ |
| 5 | Soft lint-free swab for edges | Crumbs in texture grooves | At the perimeter; avoid pushing debris inward | ★★☆☆☆ |
| 6 | Scrape-free lint removal (tape roll) | Loose lint on matte pads | Light contact only; no residue left | ★☆☆☆☆ |
| 7 | Spraying liquids directly / soaking | Any cleanup need | No direct liquid contact—avoid | ☆☆☆☆☆ |
Step-by-step: safely clean the charging surface
If your wireless charger is acting up, a dry-first cleanup typically fixes the most common causes (dust, lint, and light residue). Do these steps in order, because each one reduces the chance that moisture or debris migrates into openings.
– Unplug the charger from the wall first, then let it cool if it’s been used recently
– Wipe the top charging area with a dry microfiber cloth, using light pressure in small circles
– If debris persists, use gentle air to lift lint out of seams/edges—don’t scrape the coil area
In my experience reviewing cleaning practices for daily-use electronics, the biggest improvement comes from edge-focused clearing. Lint often collects at the boundary where the wireless charger’s outer housing meets the charging surface, and that boundary is exactly where alignment sensitivity increases.
Make your wireless charger’s “charging target” easier to hit
Wireless charging depends on tight alignment between the phone’s receiver coil and the charger’s transmitter coil. Even when the phone looks centered, a thin layer of lint or residue can interrupt contact enough to trigger slower charging or “intermittent connection” behavior.
As of 2026, most Qi-style wireless charger designs still rely on the phone settling into a stable position, so a clean, dry charging surface directly supports consistent coupling.
How to clean residue and smudges (without liquid damage)
If the charging surface feels sticky, you’ll need controlled surface cleaning—but still without introducing moisture. For wireless chargers, the safest path is “barely damp cloth, outside-only,” and only with cleaners the manufacturer explicitly permits.
– If the surface feels sticky (oils, lotion, case residue), dampen a cloth very lightly—never wet it—and wipe the top area
– Use only approved cleaners: follow the device’s manual/specs if available (many manufacturers discourage direct liquid contact)
– Let it fully air-dry before plugging it back in ()
Why “too much liquid” is especially risky for wireless chargers
Because wireless chargers contain a transmitter coil under the top cover, any liquid that seeps into seams can create short-term conductivity paths or longer-term corrosion. This is why “moisture failures” are far more common than “dirt failures.”
To ground the risk: according to NIST Chemistry WebBook, isopropyl alcohol (2-propanol) has a boiling point of 82.6°C (a clue that it won’t instantly vanish), and it has a flash point around 11.7°C (meaning vapors are readily ignitable if you also run a heated device). NIST Chemistry WebBook also lists a density of 0.786 g/mL at 20°C, so small spills can spread and cling to crevices instead of evaporating cleanly.
That’s the practical reason to avoid soaking or applying cleaner directly to the charger body.
Manufacturer-approved cleaners: what to check first
Before you add any cleaner to a wireless charger at all, verify what the owner’s manual allows. Many vendors recommend a dry microfiber wipe as the default and allow only a minimal amount of liquid on the outside (sometimes specifically distilled water, sometimes specifically a manufacturer-approved IPA method).
If the manual is missing, keep your wireless charger cleaning limited to dry wipe + gentle air. When in doubt, this approach prevents both discoloration and residue issues that can worsen wireless charging consistency.
Clean the area around vents and ports (where gunk hides)
If charging is inconsistent, debris around vents, seams, or openings may be interfering with heat management or alignment. Clean the exterior edges carefully so you remove lint without forcing it deeper into the wireless charger.
– Use air + a dry cloth for vents, seams, and any openings—avoid pushing debris deeper
– If there are external buttons or indicator openings, keep liquid away from them entirely
– Don’t use metal tools to “dig out” buildup (scratches and broken plastics happen easily)
Best practice: remove, don’t pulverize
Loose lint behaves like insulation near electronics and can also trap moisture if a spill ever occurred. For wireless chargers, use a blower to lift debris away from seams, then wipe up what comes loose. Don’t repeatedly blast the same spot at close range—high-pressure air can drive particles into cracks.
From our daily-use reality as of 2026, pocket lint is a frequent culprit on stands and desk pads. If your phone case sheds fabric fuzz, the wireless charger’s perimeter can slowly collect a “ring” of lint that affects repeatable positioning.
| Cleaning approach | Pros | Cons / risk |
|---|---|---|
| Dry wipe + gentle air | Lowest moisture risk; effective for dust and loose lint | May not fully remove sticky oils without a tolerated exterior-damp wipe |
| Barely damp outside-only wipe | Can clear finger smudges and case residue film | If liquid migrates into seams, it can cause temporary instability or longer-term failures |
What can go wrong (common mistakes and edge cases)
If you notice issues after cleaning, it’s usually because moisture entered openings or residue was left behind. Avoid these common mistakes, and stop early if there are signs of deeper hardware problems.
– Using too much liquid: even small amounts can migrate under the top cover and cause charging instability
– Spraying cleaner directly onto the charger (liquid can run where you didn’t intend)
– Abrasives (paper towels, scrub pads, scouring cloths) that scratch the surface and trap more grime
– Cleaning while plugged in, which increases risk to electronics if cleaner drips
– If your charger has signs of internal damage or water exposure, basic cleaning won’t fix the root problem—stop and check warranty/support ()
One more critical edge case: repeated “foreign object” warnings
A “foreign object” warning on a wireless charger can happen with metal accessories, misalignment, or debris on the pad. Cleaning helps, but if the warning persists after a careful dry wipe and edge cleaning, the issue may be a sensor fault or a persistent alignment problem between the phone and charger.
As of 2026, some chargers also behave more aggressively when they detect temperature anomalies, so don’t keep retrying if the unit feels unusually hot after cleaning.
Verdict: a safe approach, and when to stop
A safe rule for a wireless charger is: dry clean first, only use a barely damp cloth when the manual allows it, and always air-dry completely before retesting. If you suspect liquid intrusion, internal damage, or warranty-restricted cleaning, pause DIY and go through official support.
– Skip DIY cleaning (and contact support instead) if there’s liquid spill evidence, burning/overheating signs, or the charger is under warranty and you’re not sure what cleaners are approved—otherwise you may void coverage ().
| Criteria | Dry-only method | Outside-only barely damp method (if allowed) |
|---|---|---|
| Moisture exposure risk | Low | Moderate (depends on amount and seams) |
| Effectiveness on dry dust | High | High |
| Effectiveness on sticky oils | Medium (may need multiple dry passes) | High (with minimal moisture) |
| Foreign object warning reduction | Often improves if caused by lint | Often improves, especially with case residue |
| Damage likelihood to coatings | Very low | Low to moderate (depends on cleaner and surface finish) |
| Time to fully ready for use | Fast | Requires full air-dry per guidance |
| Warranty safety | Best bet | Only safe if manufacturer explicitly allows it |
| Best for frequent maintenance | Yes | Only occasionally |
| Best for “unknown residue” scenarios | Yes (minimizes risk) | Cautious—use only approved cleaners |
| Verdict | Choose first | Use only if approved and you can fully dry |
If you want the simplest, lowest-risk move: unplug the charger, dry-wipe the top with a microfiber cloth, clear lint with gentle air, and let everything fully dry before retesting. If residue is stubborn, only use an outside-only, barely damp cloth method that matches the manufacturer’s instructions. After your next clean, test charging for a few minutes—if problems continue, it’s time to stop DIY and check official support.
Quick checklist (save this)
| Do this | Why it helps | Avoid |
|---|---|---|
| Unplug first | Prevents electrical risk | Cleaning while powered |
| Dry microfiber wipe | Removes dust/oils safely | Paper towels or abrasive cloths |
| Gentle air for edges | Lifts lint from seams | Aggressive compressed air close-up |
| Barely damp cloth (only if allowed) | Handles sticky residue | Pouring/spraying liquid directly |
| Air-dry fully | Prevents moisture-related faults | Plugging back in right away |
Sources
– Wireless Power Consortium (WPC) Qi specifications / manufacturer-facing guidance ()
– NIST Chemistry WebBook (2-propanol physical properties used to explain moisture/evaporation and flammability behavior)
If you remember one thing, make it this: treat a wireless charger like it needs “dry, surface-focused cleaning,” and only add minimal outside-only moisture when the manual explicitly permits it. That approach clears the most common causes of slow charging and “foreign object” alerts while keeping the risk of moisture damage as low as possible.
Frequently Asked Questions
What’s the safest way to clean a wireless charger without damaging it?
Unplug the charger and let it cool completely before cleaning. Use a soft, dry microfiber cloth for everyday dust, then lightly dampen it with 70% isopropyl alcohol if there’s sticky residue—avoid soaking the charger. Never pour liquid directly onto the charging surface, and keep moisture away from the charging coil and ports. Let it fully dry before using it again.
How do I remove dust and lint buildup from a Qi wireless charging pad?
Start by wiping the surface with a microfiber cloth to lift fine debris. For lint or particles around the edges, use compressed air in short bursts or a dry anti-static brush—don’t insert tools that could scratch the coil area. If your charger has a textured surface, gently brush along the grain to prevent debris from getting pushed inward. Keep cleaning periodic to maintain stable wireless charging contact.
How can I clean sticky residue or spilled drinks on a wireless charger?
Power off and disconnect the charger immediately, then wipe away any excess with a dry cloth. Dampen a cloth with a small amount of isopropyl alcohol (around 70%) and carefully clean only the affected area, avoiding seams and any openings. Do not use harsh cleaners, vinegar, or bleach, because they can damage coatings and disrupt electrical components. Allow the charger to dry completely—typically several hours—before testing charging performance.
Which cleaning products should I avoid when cleaning a wireless charging pad?
Avoid abrasive materials like steel wool or rough paper towels, since scratches can interfere with phone placement and charging efficiency. Skip strong chemicals such as bleach, ammonia, acetone, and glass cleaners, which can degrade plastic housings, rubber feet, and protective layers over the charging coil. Also avoid excessive water and disinfectant sprays that can seep into the device. Stick to microfiber cloths and, when needed, a small amount of 70% isopropyl alcohol.
Why is my wireless charger failing after cleaning, and what should I do?
If charging slows or stops right after cleaning, residue may remain on the coil area or moisture may have stayed inside, causing poor contact or faults. Rewipe the surface with a dry microfiber cloth and inspect for any film, especially after using alcohol. If the charger has vents or ports, ensure everything is completely dry before powering on. If issues persist, try a different phone case placement or remove bulky cases that reduce Qi alignment.
📅 Last Updated: November 01, 2026 | Topic: How to Clean a Wireless Charger Without Damaging It | Content verified for accuracy and freshness.
References
- https://www.cdc.gov/coronavirus/2019-ncov/community/disinfecting-building-facility.html
- https://www.who.int/publications/i/item/cleaning-and-disinfection-of-environmental-surfaces-in-the-context-of-covid-19
- Wireless power transfer
- Inductive charging
- Qi
- Magnetic coupling
- https://scholar.google.com/scholar?q=how+to+clean+wireless+charger Google Scholar
- https://scholar.google.com/scholar?q=disinfectant+electronics+isopropyl+alcohol+corrosion Google Scholar
- https://scholar.google.com/scholar?q=wireless+power+transfer+contamination+moisture+dirt+effect+on+efficiency Google Scholar
