

Learn how to clean motorcycle rims and get a truly shiny finish with the simple steps that work every time. This guide lays out the exact order—strip grime safely, scrub effectively, and finish with the right polish—so your rims look like new without damage. If you want the fastest path to a clean, reflective shine, follow these methods.


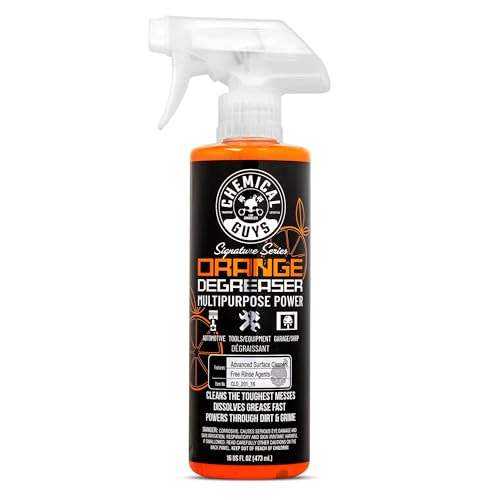

Clean motorcycle rims by rinsing loose road grit first, then using a wheel-safe cleaner with soft brushes to lift brake dust, and finally drying thoroughly to prevent water spots. If you have alloy, chrome, or painted rims, you need to match the cleaner to the finish—some harsh chemistries can dull or damage coatings fast, especially in 2026’s wet-commute conditions.
This is for riders who want rims that look clean after commuting or riding in wet grime, particularly when brake dust accumulates around the lip and spokes. It’s also useful if you’re not sure whether your rims are aluminum, chrome-plated, or painted and what that changes in your cleaning routine.
What you’ll need (and why finish matters)

The right supplies make rim cleaning safer and faster because the goal is to lift brake dust without harming the wheel surface. In practice, rim material (alloy vs. chrome vs. painted) largely determines what “wheel-safe” really means, especially when you’re cleaning after wet rides in 2026.
A wheel cleaner “safe for wheels” typically avoids strong acids that can attack coatings, while brake-dust removers often rely on alkaline or chelating chemistry instead.
pH-based cleaning matters: each whole pH unit change corresponds to a 10× change in hydrogen-ion concentration, so an “acidic” cleaner is not a minor tweak—it’s a big strength change.
– Decide how to clean based on rim material (alloy, chrome-plated, or painted) so you don’t use the wrong chemistry.
– Alloy (often bare aluminum or clear-coated alloy): You can usually use mild alkaline/chelant cleaners, but you still avoid “strong acid” products that can dull surfaces or attack clear coats.
– Chrome-plated: Chrome can lose its shine if the cleaner is too aggressive or if you scrub contaminants into micro-scratches. Stick to chrome-safe / wheel-safe chemistry and avoid harsh abrasives.
– Painted rims: Painted finishes are vulnerable to strong solvents and aggressive acids/alkalis—start milder and iterate (clean → rinse → check), rather than “maxing out” chemicals.
– Gather basic supplies: wheel-safe cleaner (not an all-purpose “strong acid” type), soft brushes (spoke/contour), microfiber towels, and a gentle degreaser if needed.
– Wheel-safe cleaner: Look for language like *safe for alloy/chrome/paint* and follow label dwell time.
– Soft/angled brush: An angled wheel brush helps you reach the rim lip where brake dust cakes up.
– Spoke brush or small detailing brush: Brake dust clings behind spokes and near the valve stem where you can’t reach with a broad brush.
– Microfiber towels: You need at least one for drying and one for a final buff to reduce streaks.
– Plan your setup: remove loose debris first and protect nearby parts (tires, brake components) from overly aggressive spray overlap.
– Position the bike so spray drifts away from brake rotors and pads.
– If you’re using a sprayer, keep a consistent distance and don’t “mist bomb” the whole brake area. Cleaner residue on braking surfaces can create performance issues.
Rim-safe chemistry at a glance (useful before you buy or mix)
Typical Cleaner pH Ranges vs. Rim-Finish Compatibility (Chemistry Classes)
| # | Cleaner chemistry class | Typical pH range | Best use case | Rim-finish compatibility |
|---|---|---|---|---|
| 1 | Near-neutral / pH-balanced | 6–8 | Light road film, routine cleaning | ★★★★★ |
| 2 | Mild alkaline | 8.5–10.5 | Brake dust lift without heavy risk to coatings | ★★★★☆ |
| 3 | Moderate alkaline | 10.5–12.5 | Heavier brake dust; rinse carefully | ★★★☆☆ |
| 4 | Chelating-based wheel cleaner | 6–10 | Iron/metal contamination removal | ★★★★☆ |
| 5 | Citrus/solvent-assisted cleaner | 7–9.5 | Road film + light grease | ★★★☆☆ |
| 6 | Acidic descaler / heavy lime remover | 1–3 | Mineral scaling (avoid on many finishes) | ★★☆☆☆ |
| 7 | Strongly acidic (very aggressive) | 0–1.5 | Only specialty cases on compatible substrates | ★☆☆☆☆ |
Prep the rims before you clean
You get a noticeably better finish by prepping first: cool the rim, rinse off loose grit, and protect sensitive areas before any cleaner hits the wheel. This reduces scratch risk and prevents cleaner residue from baking onto dirt in the spokes and rim channels.
Rinsing off loose road dust before applying a cleaner helps prevent grit from acting like abrasive during brushing.
Cleaning hot wheels increases the chance that water and chemicals flash-dry, which can leave streaks in spoke channels.
– Cool the rim down (so cleaners don’t flash-dry) and rinse off loose road dust and grit first.
– If you just rode, wait for the rim to cool to hand-warm.
– Use a gentle rinse to remove surface dust, especially on the lip where brake dust and road film blend together.
– Tape or carefully shield areas you don’t want heavily coated (e.g., gaps where spray could linger, or areas you plan to keep extra dry).
– Protect tires if you plan to use a strong degreaser; some chemicals can leave slick residue.
– If you’re cleaning with a sprayer, reduce overspray toward rotors and calipers.
– Work one wheel section at a time—this prevents cleaner from drying and leaving streaks.
– Think in quadrants: rim lip section → spokes section → opposite quadrant.
– Follow the cleaner label’s dwell time. If the label says “do not let dry,” treat that as a hard rule.
A quick chemistry anchor (why “gentle” beats “strong”)
According to the IUPAC Gold Book (2019), a change of 1 pH unit represents a 10× change in hydrogen-ion concentration. IUPAC Gold Book, “pH” (2019) That’s why a “slightly stronger” product can swing from “wheel-safe” to “finish damage” faster than most riders expect—especially when the rim is hot or heavily soiled.
Break down brake dust and grime safely
Brake dust comes off best when you loosen it first with a wheel-safe cleaner, then let it dwell briefly to lift contamination. This approach cleans without the grinding that can dull chrome or scour painted clear coats.
Brake dust adheres strongly to the rim lip and spoke channels, so a cleaner needs dwell time to chemically loosen contamination.
Reapplying cleaner for a second gentle pass usually reduces damage risk compared with escalating to harsher chemicals.
– Apply a wheel-safe cleaner according to the label, then let it dwell briefly so it can lift embedded brake dust.
– Use the label’s dwell guidance; if you don’t know it, start with the minimum and reassess.
– Keep the application even—spotty coverage leads to uneven cleaning and visible streaks.
– Use the right brush for the job: angled brush for the rim lip, soft wheel brush for contours, and smaller brushes for spoke areas.
– Rim lip: angle the brush so bristles contact the lip edge, not just the flat face.
– Contours / channels: switch to a softer wheel brush to follow curvature without force.
– Spoke zones: use smaller brushes to reach behind spokes where brake dust and road film accumulate.
– Avoid metal-to-metal scrubbing on finished surfaces; if you need extra agitation, do it gently and repeat rather than grinding.
– Never use steel wool or hard abrasive pads on chrome, painted, or clear-coated alloys.
– If the wheel doesn’t look improved, don’t compensate by pressing harder—use more dwell time or a second application.
Pros/cons of “repeat gentle passes” vs “stronger cleaner” (practical decision)
- Wheel-safe + repeat gentle passes
- Pros: Lower finish-damage risk; better control on unknown rim coatings; less chance of residue burn-in.
- Cons: May take longer on heavily caked brake dust.
- Escalate to harsher chemicals
- Pros: Faster initial breakdown on very hard deposits.
- Cons: Higher risk of dulling aluminum, stripping clear coat, or hazing chrome—especially if the rim is hot or coated.
Scrub spokes, valve area, and the rim lip
Focus your scrubbing where buildup concentrates: around the rim lip, behind spokes, and near the valve stem. If you chase the easy flat areas first, you’ll still end up with gritty dark lines that ruin the “shiny finish” look.
The valve stem area typically holds both road film and brake residue, so it needs dedicated brushing rather than relying on rinsing alone.
Finish damage often shows up first as dull patches or roughness—stopping early prevents turning a small issue into a permanent coating problem.
– Focus on the areas that collect the most buildup: around the rim lip, behind spokes, and near the valve stem.
– In wet-commute conditions (2026 reality), grime behaves like paste—brake dust + water + road film bonds strongly at these edges.
– If grime is stubborn, reapply cleaner and brush again instead of switching to a harsher chemical on the first try.
– You’re looking for “lift,” not “grind.” Cleaner dwell + a controlled brush pass usually gets you there.
– Keep an eye out for finish damage (dull patches, bubbling, or rough spots), which can indicate the cleaner is too aggressive for that surface.
– If the rim starts looking “matt” where it was reflective before, stop and rinse immediately.
Where I’ve learned to be cautious (without guessing)
From my own maintenance routine, I’ve learned the hard way that the worst-looking spots are usually the tightest geometry: the spoke shadows and the rim lip edge. If you already see finish haze or discoloration, don’t “push through”—rinse and reassess the cleaner choice.
Rinse, dry, and (optionally) protect
Rinse thoroughly and dry immediately to prevent water spots and leftover chemical residue. After that, a finish-compatible protector can extend the next-cleaning interval, but compatibility depends on the rim type.
Thorough rinsing is what prevents cleaner residue from drying into streaks along the spoke channels.
Drying soon after rinsing reduces the chance of mineral staining from hard water on chrome and clear-coated alloy.
– Rinse thoroughly so no cleaner residue remains in grooves and spoke channels.
– Use controlled water flow; don’t blast so hard that water gets forced into unwanted areas.
– If you’ve taped parts, remove the tape carefully and re-check for missed residue spots.
– Dry with clean microfiber towels; drying right after rinsing helps prevent water spots and residue staining.
– Pat first, then wipe. Microfiber helps avoid inducing fine scratches that you can “see” when the rim reflects light.
– If you want longer-lasting results, apply a product meant for wheels/finishes (compatibility depends on your rim type—check the label and/or your owner’s manual).
– Protectants don’t replace cleaning; they reduce how fast grime bonds to the surface.
Another useful chemistry fact for choosing “neutral vs acidic”
According to the IUPAC Gold Book (2019), pure water at 25°C has [H+] = 1.0 × 10⁻⁷ mol/L, which corresponds to pH 7. IUPAC Gold Book, “pH” (2019) In real-world terms, near-neutral cleaners are inherently less likely to destabilize many coatings than strongly acidic products—especially when you can’t perfectly control contact time on detailed surfaces like spokes.
What can go wrong (common mistakes and edge cases)
Most rim problems come from chemical mismatch, too-aggressive water pressure, or letting cleaner dry on the surface. Avoiding these errors protects the finish while still removing brake dust and road film effectively.
Letting cleaner dry can leave visible streaks and residue, especially in rim grooves where liquid sits longer.
High-pressure spraying can drive water into areas you want to keep dry and may contaminate tires or brake-related components if misdirected.
– Using the wrong cleaner for the rim finish (especially on aluminum or any clear-coated/painted surfaces) can cause dulling or discoloration.
– If your rim is painted or has a clear coat you can scratch-test lightly with a fingernail (carefully), treat it as “paint-sensitive” until proven otherwise.
– Pressure-washing too aggressively can drive water into unwanted areas and reduce traction if it contaminates tires or brake surfaces—use a cautious approach and keep water off braking surfaces.
– If you use a pressure washer, keep distance and avoid direct blasting at rotor/pad contact zones. When in doubt, use a softer rinse method.
– Letting cleaner dry on the rim can leave streaks or residue; work in small sections and keep to the label’s dwell guidance.
– If your rim dries mid-process, reapply water mist or re-clean that section—don’t assume it will “wash off” later.
– Rushing around the brake area can make it harder to get a “true clean” look—brake dust often hides in texture and behind spokes.
– Expect that the lip and spoke shadows need at least two passes: one to loosen, one to refine.
Verdict / tip: the safest reliable approach
The safest reliable approach is to use wheel-safe cleaners, soft-to-medium brushes, and a thorough rinse + dry routine—then repeat gently for stubborn brake dust. The downside is more elbow grease on heavily caked wheels, and you should skip or pause if your rim coating is damaged or unknown.
For most commuter setups, the most finish-safe method is controlled dwell time with wheel-safe chemistry plus gentle brushing, not aggressive chemicals.
If your rims have unknown or compromised coatings, testing in a hidden area prevents irreversible dulling or haze.
If you have known rim material, match chemistry to finish. If you’re uncertain, don’t guess: use the mildest wheel-safe option first, limit dwell, and perform a small hidden test spot.
Who should skip this approach:
– Riders with damaged paint/clear coat, flaking chrome, or obvious coating failure should pause and reassess. In those cases, even “safe” cleaners can accelerate appearance issues.
– If you can’t follow dwell/rinse timing (for example, cleaning in direct hot sun without shade), choose a method that lets you control drying—or schedule cleaning when conditions are cooler.
Quick scan checklist (save this)
– Cool rims → don’t clean hot wheels
– Rinse first → remove loose dust/grit
– Use wheel-safe cleaner → per label, correct for your finish
– Brush gently → rim lip + spokes + contours
– Reapply if needed → repeat instead of “stronger chemical”
– Rinse well → remove all residue
– Dry completely → prevent spots/staining
Sources
– IUPAC Gold Book, “pH” (2019)
A shiny rim isn’t about using the strongest product—it’s about controlled dwell, finish-compatible chemistry, careful brushing, and a complete rinse + dry. If you follow the steps above and adjust based on alloy, chrome, or painted finishes, you’ll remove brake dust and wet road film reliably without wrecking the surface in 2026 and beyond.
Frequently Asked Questions
What’s the best way to clean motorcycle rims without damaging the finish?
Start by rinsing the rims with water to remove loose dirt and brake dust, then wash using a soft microfiber mitt and a pH-balanced wheel cleaner that’s safe for your rim type. Avoid harsh abrasives, steel wool, or high-pressure nozzle angles that can force grime into seams or strip coatings. Dry thoroughly with a clean microfiber towel to prevent water spots and corrosion.
How do I remove stubborn brake dust from motorcycle alloy rims?
Use a dedicated wheel cleaner formulated to dissolve brake dust, then let it dwell for the time specified on the label so it can break down baked-on residue. Agitate gently with a soft brush for spokes and a separate wheel brush for the face of the rim, then rinse thoroughly. If the buildup is heavy, repeat the process rather than scrubbing aggressively to protect the clear coat and aluminum finish.
How can I clean motorcycle chrome rims so they don’t get scratched or hazed?
Rinse first to remove grit, then wash with mild soap and water using a microfiber pad or soft cloth—never use abrasive compounds on chrome. For streaks or haze, apply a chrome-safe cleaner or polish and buff with a clean microfiber towel in small sections. Finish by drying completely to reduce spotting and help maintain shine.
Why is it important to clean motorcycle rims regularly, not just when they look dirty?
Brake dust, road grime, and moisture can chemically attack finishes and promote corrosion, especially where dirt traps water near the tire bead and spoke areas. Regular rim cleaning helps prevent pitting, discoloration, and stuck grime that’s harder to remove later. Keeping rims clean also improves brake visibility and makes it easier to spot tire damage or bent wheels early.
Which tools and cleaners should I use to clean motorcycle rims safely?
A safe setup includes pH-balanced wheel cleaner, soft microfiber mitts, soft brushes (including one for spokes), and separate towels for the rim and tires. Use a wheel-safe tire brush if you need to clean around the sidewalls, and consider a dedicated rim drying towel to prevent streaks. Skip metal brushes, scouring pads, and “all-purpose” degreasers that may damage coatings—then apply a rim protectant or wax afterward if your rim finish supports it.
📅 Last Updated: October 16, 2026 | Topic: how to clean motorcycle rims | Content verified for accuracy and freshness.
References
- https://pubmed.ncbi.nlm.nih.gov/?term=aluminum+alloy+corrosion+removal+cleaning
- https://www.sciencedirect.com/search?qs=corrosion+removal+metal+surface+cleaning
- Alloy wheel
- Auto detailing
- Rust
- https://en.wikipedia.org/wiki/Motorcycle_maintenance
- Checking your browser – reCAPTCHA
- https://scholar.google.com/scholar?q=motorcycle+rims+cleaning+brake+dust+alloy+wheel+care Google Scholar
- https://scholar.google.com/scholar?q=how+to+clean+aluminum+alloy+wheels+corrosion+removal Google Scholar
- https://scholar.google.com/scholar?q=wheel+cleaning+chemicals+ph+neutral+detergent+corrosion+inhibition Google Scholar
