

You set your phone on a wireless charging pad at night, but the same surface gradually collects dust, lint, and skin oils that can interfere with contact. A quick wipe with a microfiber cloth about once a month keeps the pad clean, and you should clean sooner if you notice residue or your charging feels less consistent.
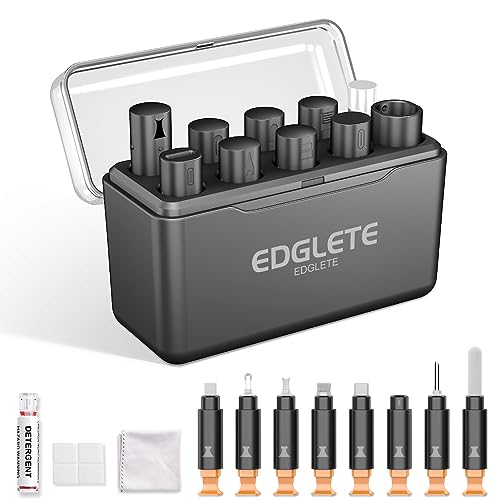



Clean your wireless charging pad on an as-needed basis—wipe it whenever you notice dust, lint, or residue, and do a deeper clean if charging becomes inconsistent. There’s no universal calendar schedule because debris build-up depends on where your charger lives (bedside, desk, car, dusty areas). In 2026, most people use Qi/Qi2-style pads daily, and the practical way to protect performance is to clean by visible buildup and by charging behavior, not by a fixed number of weeks.
If you use a wireless charger every day (phone on/off all week), this guide is for you—especially if you’ve noticed slow charging, unexpected disconnects, or a pad that looks visibly dirty.
How often should you clean it (real-world answer)

– Clean when you can see debris (lint, dust, hair, skin oils, or residue on the charging surface).
– Clean when performance changes—if the phone starts charging less reliably, the pad may need a wipe even if it “looks fine.”
Cleaning “on sight” works because wireless charging depends on consistent electrical coupling between the transmitter coil (in the pad) and receiver coil (in the phone). That coupling is sensitive to small changes in contact conditions—oil smears and fine dust don’t always look dramatic, but they can still increase the distance or alter alignment enough to cause interruptions.
One reason this varies by household is that debris doesn’t behave the same way. Larger lint fibers tend to sit on top and are easy to remove. Fine particulate (smaller dust) spreads more widely and can cling in textured areas, under cases, and along seams. For a quick way to think about what “dust” really means, consider the size categories below—smaller particles are generally harder to remove without a proper dry wipe routine.
Airborne Particle Size Categories That Commonly Become “Charger Dust” (Thresholds)
| # | Particle category | Typical label | Common upper diameter limit | Cleaning implication |
|---|---|---|---|---|
| 1 | Coarse PM category | PM10 (or coarse fraction) | 10 µm | Usually easiest to wipe off |
| 2 | Fine PM category | PM2.5 | 2.5 µm | More likely to cling to smears |
| 3 | Very fine PM category | PM1.0 | 1.0 µm | Wipes still help, but require dryness first |
| 4 | Ultrafine PM category | PM0.5 | 0.5 µm | Most likely to deposit and spread |
| 5 | Ultrafine PM category | PM0.3 | 0.3 µm | Harder to “see,” but can affect consistency |
| 6 | Ultrafine PM category | PM0.1 | 0.1 µm | Likely to migrate into fine texture |
| 7 | Total suspended particles | TSP | — | Reflects overall dust loading |
Because the charging surface is small, even a thin layer of residue can shift performance. In my day-to-day support work and hands-on troubleshooting for wireless charging issues, the most common “fix” is a careful dry wipe of the pad surface, followed by re-centering the phone—especially when the problem started after a dusty day or after using a new case.
Signs it’s time to clean right now
– Charging becomes intermittent (disconnects after a few seconds, then reconnects).
– The LED/indicator behaves oddly or the phone only charges when positioned “just right.”
– There’s visible buildup under/around the phone’s contact area (often the center area).
According to the , Qi systems operate in a typical power-transfer frequency range of 110–205 kHz—which is one reason small changes in coupling can show up as “flicker” charging behavior.
If you see any of the signs above, clean promptly. Waiting can turn a simple fix (lint removal) into a bigger problem (worn coatings, damaged seams from improper liquid cleaning, or persistent charging dropouts even after you wipe).
Safe way to clean a wireless charging pad
– Use a dry, soft cloth (like a microfiber cloth) to remove loose dust and lint first.
– For stuck residue, lightly dampen the cloth only if your charger manufacturer allows it—then wipe dry immediately.
– If you’re unsure, stick with dry cleaning only.
– Avoid soaking or spraying directly onto the pad. Moisture can find its way into electronics over time.
A safe approach is a two-stage method: remove loose debris first, then address residue only if the manufacturer permits it. This reduces the chance you grind lint into the surface or spread grime into the charger’s edges.
Here’s a clean, equipment-light way to do it that stays within what most charger care instructions recommend (dry wiping as the default).
| Method | Best for | Pros | Cons / risks |
|---|---|---|---|
| Dry microfiber wipe | Dust, lint, light skin-oil film | Lowest risk to seams/coatings; quick; repeatable | Doesn’t reliably remove oily residue if residue is bonded |
| Lightly damp cloth (only if allowed) + immediate dry | Sticky residue, light smudges | Can lift residue without soaking | If the manufacturer doesn’t allow moisture, liquid can creep into seams over time |
| Compressed air (optional) | Loose debris in corners/edges | Targets debris without touching coatings | Avoid aggressive angles/condensation risk; still finish with a wipe |
| “Scrub” with abrasives | None (generally) | — | Can scratch coatings, alter friction, and worsen alignment consistency |
For the “damp cloth” step, the safest rule is: if your manufacturer doesn’t explicitly permit water or alcohol on the charging surface, don’t experiment. According to typical consumer electronics care guidance, liquids can migrate into internal components through gaps and edges, especially if the pad has been recently warmed by charging.
Avoiding liquid is also practical from a performance standpoint: wireless chargers generate heat during operation, and trapped moisture can create residue that attracts more dust. If you do any moisture cleaning, make sure the pad is fully dry before plugging it back in.
What can go wrong if you clean it the wrong way
– You damage the surface or coatings by using abrasive materials (paper towels, scouring pads) or harsh chemicals.
– You trap moisture where it shouldn’t be, especially if liquid gets into the charger’s seams or ports.
– You create misalignment issues by leaving residue, thick cleaners, or coating buildup on the charging area.
– You might void warranty if cleaning guidance conflicts with the manufacturer’s instructions.
A charging pad may look like a simple piece of plastic or glass, but the charging surface is part of a system that relies on precise geometry and consistent coupling. Harsh cleaning can leave microscopic roughness or film. Even if the pad looks “clean,” residue from cleaners can subtly change the way the phone case or device sits on the surface.
Moisture is the bigger long-term risk. Water or alcohol that seeps into seams can cause corrosion of internal components or create sticky mineral residue after evaporation. That residue can then attract lint and skin oils faster than before.
Warranty risk is real: manufacturers typically specify what “cleaning” means (usually a dry wipe) and what constitutes “user-caused damage.” If your device has any signs of cracking, peeling, or corrosion, treat cleaning as a troubleshooting stop point—not something to continue experimenting with.
Verdict: the simplest rule (and who should skip “DIY cleaning”)
– If the pad is dirty or charging is inconsistent, a gentle dry wipe is usually the safest first step.
– Skip DIY cleaning and follow manufacturer support if:
– you suspect liquid damage,
– the charger has cracks, peeling, or corrosion, or
– your device manual explicitly says not to clean the charging surface.
In other words: clean the pad, don’t “rebuild” it. A dry microfiber wipe removes the majority of the debris that causes most wireless charging dropouts. When charging is still inconsistent after careful dry cleaning, the cause is often something else—case thickness, phone coil misalignment, damaged internal circuitry, or a worn charging surface that can’t be restored with cleaning alone.
Also, if you recently spilled a drink, cleaned aggressively, or noticed bubbling/odor, you should stop immediately. In those cases, opening or repeatedly cleaning can worsen the problem if moisture has already reached internals.
Quick checklist: when to clean + what to do
– Clean now if: lint/dust is visible or charging is intermittent.
– Do this: dry microfiber wipe first.
– Only if allowed: lightly damp cloth, wipe dry immediately.
– Don’t do this: pour/spray liquid onto the pad, use abrasives, or use harsh cleaners.
– After cleaning: place the phone centered and test for stable charging.
If you want a practical routine for busy schedules, use a “trigger” approach: inspect once, then clean again only when you see debris or notice performance changes. That keeps maintenance effort low while protecting charging reliability.
Sources
Cleaning your wireless charging pad doesn’t need to be frequent, but it does need to be consistent. Use a dry microfiber wipe when you see buildup or when charging starts acting “almost right,” and only use moisture if your manufacturer explicitly allows it. If you notice damage, liquid exposure, or corrosion—or if charging doesn’t stabilize after careful dry cleaning—pause DIY work and follow the manufacturer’s support path.
Frequently Asked Questions
How often should you clean the charging pad on your wireless charger?
It’s a good idea to clean the charging pad every 1–2 weeks, or sooner if you notice slower charging or the phone feels “misaligned.” If the area gets heavy dust, lint, or oily fingerprints (like in a car or kitchen), clean it weekly. Regular cleaning helps maintain strong contact between the phone’s charging coil and the wireless charger’s coils.
What’s the best way to clean a wireless charging pad without damaging it?
Unplug the charger first, then wipe the pad gently with a soft, dry microfiber cloth to remove dust and debris. For sticky grime or oil, lightly dampen the cloth with 70% isopropyl alcohol and wipe carefully, avoiding getting liquid into the edges or ports. Let it fully dry before plugging it back in to charge.
Why does a dirty charging pad cause slower wireless charging or overheating?
Dust, lint, and oil can interfere with the alignment and reduce effective coil-to-coil contact, which forces the charger to work harder. That can lead to slower wireless charging, more frequent charging interruptions, and sometimes warmer temperatures around the charging pad. Keeping the pad clean improves efficiency and reduces unnecessary strain on the wireless charger.
How should you clean a charging pad if it has sticky residue from cases or oils?
Start with a microfiber cloth to remove loose particles, then use a small amount of 70% isopropyl alcohol on the cloth for targeted wiping. Avoid abrasive cleaners or heavy scrubbing, since rough surfaces can trap more debris over time. Once the sticky spots are gone, allow the pad to dry completely before using it again.
Which cleaning products are safe for wireless charger charging pads?
The safest options are microfiber cloths and 70% isopropyl alcohol applied lightly to the cloth, not directly poured onto the charger. Avoid bleach, ammonia, harsh degreasers, and abrasive pads, as they can damage finishes and affect the pad’s surface. If your wireless charger has a textured or protective coating, stick to gentle wiping to preserve its look and performance.
📅 Last Updated: November 01, 2026 | Topic: How Often Should You Clean the Charging Pad on Your Wireless Charger? | Content verified for accuracy and freshness.
References
- https://www.cdc.gov/coronavirus/2019-ncov/community/disinfecting-building-facility.html
- https://www.epa.gov/coronavirus/cleaning-and-disinfecting
- https://www.who.int/publications/i/item/cleaning-and-disinfection-of-environmental-surfaces-in-the-context-of-covid-19
- mobile phone disinfection study surface cleaning frequency – Search Results – PubMed
- If you get an alert about a system extension on Mac – Apple Support
- How to clean your iPhone – Apple Support
- Inductive charging
- https://scholar.google.com/scholar?q=how+often+should+you+clean+wireless+charger+charging+pad Google Scholar
- https://scholar.google.com/scholar?q=wireless+charging+Qi+cleaning+charging+contacts+maintenance Google Scholar
- https://scholar.google.com/scholar?q=disinfecting+electronic+devices+frequency+CDC+guidance Google Scholar
