

Learn how to clean a suede bag at home safely, without ruining the nap or leaving water marks. Follow the exact step-by-step method for removing dirt, stains, and scuffs using the right tools and light pressure. If you want the fastest, safest results, this guide shows what to do first—and what to avoid—so your bag looks fresh again.



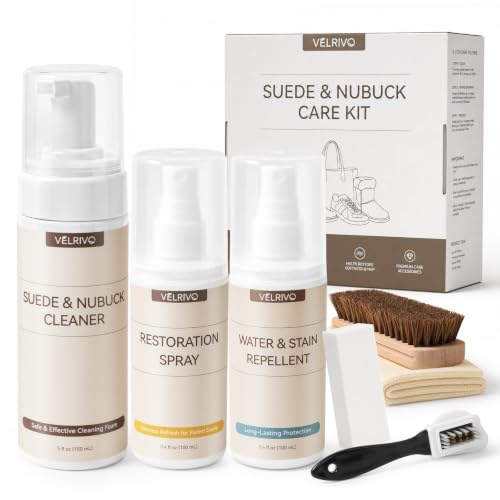
Clean a suede bag at home by dry cleaning first—brush gently, lift marks with a suede eraser, and use moisture only in tiny, controlled blotting amounts. Then let it dry naturally and re-brush to restore the nap so you remove dirt without flattening or soaking the suede. If your suede bag has light dust, scuffs, or small stains, this guide gives a safe home routine; if it’s heavily stained or water-damaged, it also covers what to stop doing and when to switch to a professional (as of 2026).
If your suede bag is made from suede or nubuck leather, the safest approach is to treat it like “pile fabric,” not like regular fabric: you work with the nap (the brushed fibers), not against it.
When to Clean & What You’ll Need

Clean it when the damage is still on the surface (dust, scuffs, light spots), and only start if your care label allows home cleaning. Right now, manufacturers increasingly warn against soaking, so checking the tag is the fastest way to avoid irreversible texture changes on your suede bag.
Most suede care guidance emphasizes “brush first” and avoiding soaking so the nap doesn’t mat or shrink.
A care label that restricts water/solvents is your practical boundary for home cleaning—follow it before you apply any liquids.
Here’s the framework I use: if you can fix it with dry tools, you should. Moisture management matters because water interacts strongly with porous leather fibers, and heat accelerates the set of changes.
Quick decision rule (suede bag): If you can see dust or a scuff line, start dry. If a liquid hit caused a dark ring, stop and work from blotting outward after checking the label.
Why moisture is a risk (with data): Water’s surface tension at 20°C is about 72.8 mN/m—high enough to spread beyond the exact impact point on porous surfaces, which is a big reason “just a little water” can create rings on suede. CRC Handbook of Chemistry and Physics (water surface tension at 20°C)
What to check and gather (before you touch the suede)
– Check the care label first, and only proceed if it doesn’t warn against home cleaning or “water/solvents.”
– Gather essentials: a suede/nubuck brush, a suede eraser (or pencil eraser-style tool), and clean white microfiber/cloths.
– For spot work, keep an optional “support” item ready like white vinegar (very diluted) or a dedicated suede stain solution—but only if your bag’s care guidance allows it.
Mandatory “hidden test” mindset
Even safe-looking suede tools can change color saturation if your dye is sensitive. Plan a test before you treat visible areas (especially on light-beige suede bags).
A standard textile/leather best practice is to test cleaning on an inconspicuous area first to confirm no color transfer or nap damage.
(You’ll see where to test in the mistakes section below.)
Step-by-Step Dry Cleaning for Suede
Dry cleaning is the default because it lifts dust and scuffs without disturbing the nap structure. For your suede bag, this step is usually enough for everyday grime and most scuff marks.
Brushing in one direction lifts surface dust and fuzz while minimizing nap disturbance on suede and nubuck.
Using a suede eraser on dry scuffs targets superficial discoloration without adding moisture to the leather nap.
In my workflow, the “dry first” sequence is also a control method: if brushing/erasing doesn’t remove the mark, you’ve learned something important about whether the stain is surface-level or absorbed—then you decide on blotting or professional cleaning.
Dry-clean routine (suede bag)
– Brush the bag lightly in one direction to lift surface dust and fuzz (avoid aggressive scrubbing).
– Treat scuffs with a suede eraser using gentle back-and-forth motions, then re-brush to blend the area.
– If the stain is still there, repeat in small rounds—don’t switch to liquids immediately. “More passes, less moisture” usually causes fewer texture changes.
When dry cleaning isn’t enough
If the discoloration looks “soaked in” (dark patches that don’t lighten after repeated dry passes), switching straight to water is how you get a persistent ring. In 2026, many brand care pages still recommend escalating carefully: dry tools first, then only limited blotting if permitted.
Suede bag decision table (scan before you start)
Home-Safe First Actions for Suede/Nubuck Bags (2026)
| # | First action | Best for | Home-safety | Typical risk |
|---|---|---|---|---|
| 1 | Suede/nubuck brushing (dry, single direction) | Dust & light fuzz | ★★★★★ | Low |
| 2 | Suede eraser (dry scuffs) | Rub marks & surface smudges | ★★★★☆ | Low–medium |
| 3 | Dry blotting with white cloth | Fresh moisture (immediate) | ★★★★☆ | Medium |
| 4 | Cornstarch/talc absorbent powder (post-blot) | Fresh oily spots | ★★★☆☆ | Medium |
| 5 | Very diluted vinegar (only if allowed) | Some water-ring conditions | ★★☆☆☆ | High |
| 6 | Unknown “all-purpose” cleaners | Unverified stain lifting | ★☆☆☆☆ | Very high |
| 7 | Heat tools (hair dryer/steam) | Drying fast (tempting) | ☆☆☆☆☆ | Extreme |
Note: “Home-safety” here reflects typical care-label restrictions and the inherent risk to suede nap—always defer to your bag’s tag.
Removing Spots & Stains Safely
Spot cleaning is easiest when you treat the type of stain correctly—water marks, oil spots, and ink behave very differently on a suede bag. Your goal is to remove the visible discoloration without spreading it deeper into the fibers.
Water rings happen when moisture spreads unevenly and then dries, leaving a darker boundary on suede.
Oil marks are often best addressed by absorption first, because water-based cleaning can drive oils deeper.
Removing spots and stains (do it in rounds)
– Water/salt marks: blot excess moisture right away with a dry cloth, let it air-dry completely, then brush. Don’t use a hair dryer or heater.
– Oily spots: blot what you can (if fresh), then let the bag dry and try a light dusting of absorbent powder (e.g., cornstarch/talc) before brushing it out after it sits.
– Ink/unknown stains: stop and test carefully—ink can spread with moisture. Use only spot-tested methods recommended for suede, or consider professional cleaning if the stain is absorbed.
Why “controlled moisture” matters (and why heat is risky)
Collagen—the protein framework in leather—begins to denature in the approximate ~58–62°C range, which is one reason heat drying can permanently alter the leather structure and nap. Lehninger Principles of Biochemistry (collagen thermal behavior; temperature-dependent denaturation)
So, for your suede bag, the safe play is:
– air-dry fully,
– brush to lift,
– only then assess whether the stain has truly changed.
A practical escalation plan for a suede bag
If the mark persists after dry erasing, don’t “chase it” with liquids. Instead:
1) repeat dry passes,
2) if permitted by the care label, do a small blot from the edge toward the center,
3) let it fully dry,
4) re-brush.
Drying, Brushing, and Restoring Texture
Drying is where you protect your outcome: for a suede bag, you only judge results after it has dried fully at room temperature. Once dry, brushing brings back the “grain” (the nap direction) and removes loosened residue from erasing or absorbents.
Damp suede often looks darker and flatter temporarily; waiting for full air-dry is essential before deciding the stain is permanent.
Re-brushing in the original nap direction helps restore texture uniformity after spot treatment.
The restore step-by-step
– Let the bag dry fully at room temperature before judging results; damp suede can look worse temporarily.
– Once dry, brush again in the original nap direction to bring back the “grain” and remove any remaining loosened residue.
– If nap looks flattened in one patch, gently re-lift with light brushing/eraser touches, then stop once the texture blends.
Drying do’s and don’ts (suede bag-focused)
To keep it clean and predictable, treat heat and pressure like contaminants:
– Do use good airflow, not heat.
– Do keep the bag away from direct sunlight.
– Don’t compress the nap with stacked items while drying.
What Can Go Go Wrong (Mistakes to Avoid)
Most suede bag problems come from “fixing faster,” meaning soaking, heat drying, or scrubbing too hard. If you avoid these mistakes, your home-cleaning results are much more consistent.
Soaking suede can cause uneven dye transfer and matting because the nap structure is sensitive to water penetration.
Heat sources (like hair dryers) can set texture changes and worsen staining by accelerating thermal effects on leather.
Common mistakes (and why they backfire)
– Soaking suede: soaking can cause rings, stiffness, and permanent texture changes.
– Heat drying: direct heat often damages suede fibers and can set stains.
– Rub too hard: scrubbing can create shiny patches (matted glaze) and uneven color.
– Skipping a hidden test: always test eraser/liquid methods on an inside seam or hidden area first.
Dry vs. wet methods (what changes for suede bags)
| Method | Best for | Pros | Cons |
|---|---|---|---|
| Dry (brush + suede eraser) | Dust, scuffs, surface marks | Lowest risk of water rings; preserves nap | Won’t remove deeply absorbed stains |
| Controlled wet (label-approved blotting) | Recent water/salt marks | Can reduce visible rings when done minimally | Higher risk of spreading/dark boundaries |
Verdict: When Home Cleaning Works (and When to Skip)
Home cleaning is a good fit for light dust, scuffs, and small, superficial stains—especially when your bag’s care label allows basic, non-soaking methods. Skip DIY (or move to a professional cleaner) when stains are deep, texture is already stiff, or the tag explicitly restricts water/solvents (as of 2026).
If the suede tag restricts water or solvents, DIY spot cleaning can create lasting rings or color shifts.
Deep-set stains (oil, ink, or heavy water damage) often require specialized suede/nubuck chemistry and extraction.
– Skip home cleaning (or move to a pro cleaner) if: the suede is already stiff/dyed unevenly, stains are large/deep, there’s heavy water damage, or the tag explicitly restricts DIY cleaning.
When to consider a professional (suede bag reality check)
A pro cleaner matters most when:
– the stain outline keeps reappearing after dry brushing,
– you see widespread color loss (not just a spot),
– ink has likely soaked in,
– the bag was left wet long enough to “set.”
Aftercare tip (after cleaning and full dry)
A suede protector can help reduce future marking, but only after the bag is clean and dry and only if your product instructions and care label allow it.
Quick Checklist (Scan + Save)
| Situation | Do this | Avoid |
|---|---|---|
| Everyday dust | Brush gently (one direction) | Scrubbing hard |
| Scuffs | Suede eraser → re-brush | Pressing/soaking |
| Water/salt marks | Blot → air-dry fully → brush | Hair dryer/heater |
| Oil spot (fresh) | Blot (if possible) → air-dry → absorbent then brush | Rubbing while wet |
| Ink/unknown stain | Spot test only / consider pro | Adding water “to lift” immediately |
Frequently Asked Questions
How can I clean a suede bag at home without damaging it?
Start by gently brushing the suede with a soft-bristle suede brush to lift surface dirt, then blot stains with a clean, dry microfiber cloth—don’t rub hard. For overall cleaning, use a suede eraser for dry marks and a suede-safe cleaner applied lightly with a cloth, always testing in a hidden area first. Let the bag dry naturally away from heat and then brush again to restore the nap.
What’s the best way to remove water stains on a suede bag?
For fresh water spots, blot immediately with a dry cloth and let it dry fully at room temperature. Once dry, lightly brush the area in one direction and, if needed, use a suede eraser or a specialized suede water-stain remover. Avoid soaking the whole bag unless the entire panel needs even treatment, since suede can develop blotchy “rings.”
Which household items can safely clean suede bag stains?
The safest at-home tools are a suede brush and a suede eraser, which are designed for suede nap without soaking the material. If you don’t have suede products, use a white microfiber cloth for blotting and only small amounts of water-based cleaner if the suede manufacturer recommends it—avoid oils, alcohol, and harsh detergents. For tougher stains, it’s usually better to use a dedicated suede cleaner rather than guessing with household solutions.
How do I clean oily or greasy marks on a suede bag?
Blot any fresh grease gently with a clean cloth, then let the area sit until it’s dry—don’t use heat. Sprinkle a small amount of cornstarch or talcum powder on the stain, leave it for several hours (or overnight), and brush off the residue with a suede brush. If the stain remains, repeat the process or use a suede cleaner that’s formulated for oil spots, testing first in an inconspicuous area.
Why does my suede bag look rough or flat after cleaning, and how do I fix it?
Suede can look matted if it’s been rubbed too aggressively or if it dried while compressed. After cleaning, brush the suede bag in one direction with a suede brush, then lightly steam the surface from a short distance to lift the nap—only if your suede care instructions allow it. Finish by brushing again once the suede is fully dry to restore the soft, even texture.
📅 Last Updated: October 17, 2026 | Topic: how to clean suede bag at home | Content verified for accuracy and freshness.
References
- Suede
- Leather
- https://www.britannica.com/topic/suede
- https://www.britannica.com/topic/leather
- https://pubmed.ncbi.nlm.nih.gov/?term=suede+leather+cleaning
- https://pubmed.ncbi.nlm.nih.gov/?term=leather+cleaning+methods
- https://www.sciencedirect.com/search?qs=suede%20leather%20cleaning
- https://scholar.google.com/scholar?q=how+to+clean+suede+at+home Google Scholar
- https://scholar.google.com/scholar?q=suede+leather+cleaning+methods+stain+removal Google Scholar
- https://scholar.google.com/scholar?q=suede+bag+cleaning+eraser+brush+water+stains Google Scholar
